This document introduces the basic operations for managing users, including creating a user, viewing user information, modifying basic user information, deleting a user, and enabling or disabling user login.
1. In the left sidebar, select User Management > User.
2. On the User list page, click Create User.
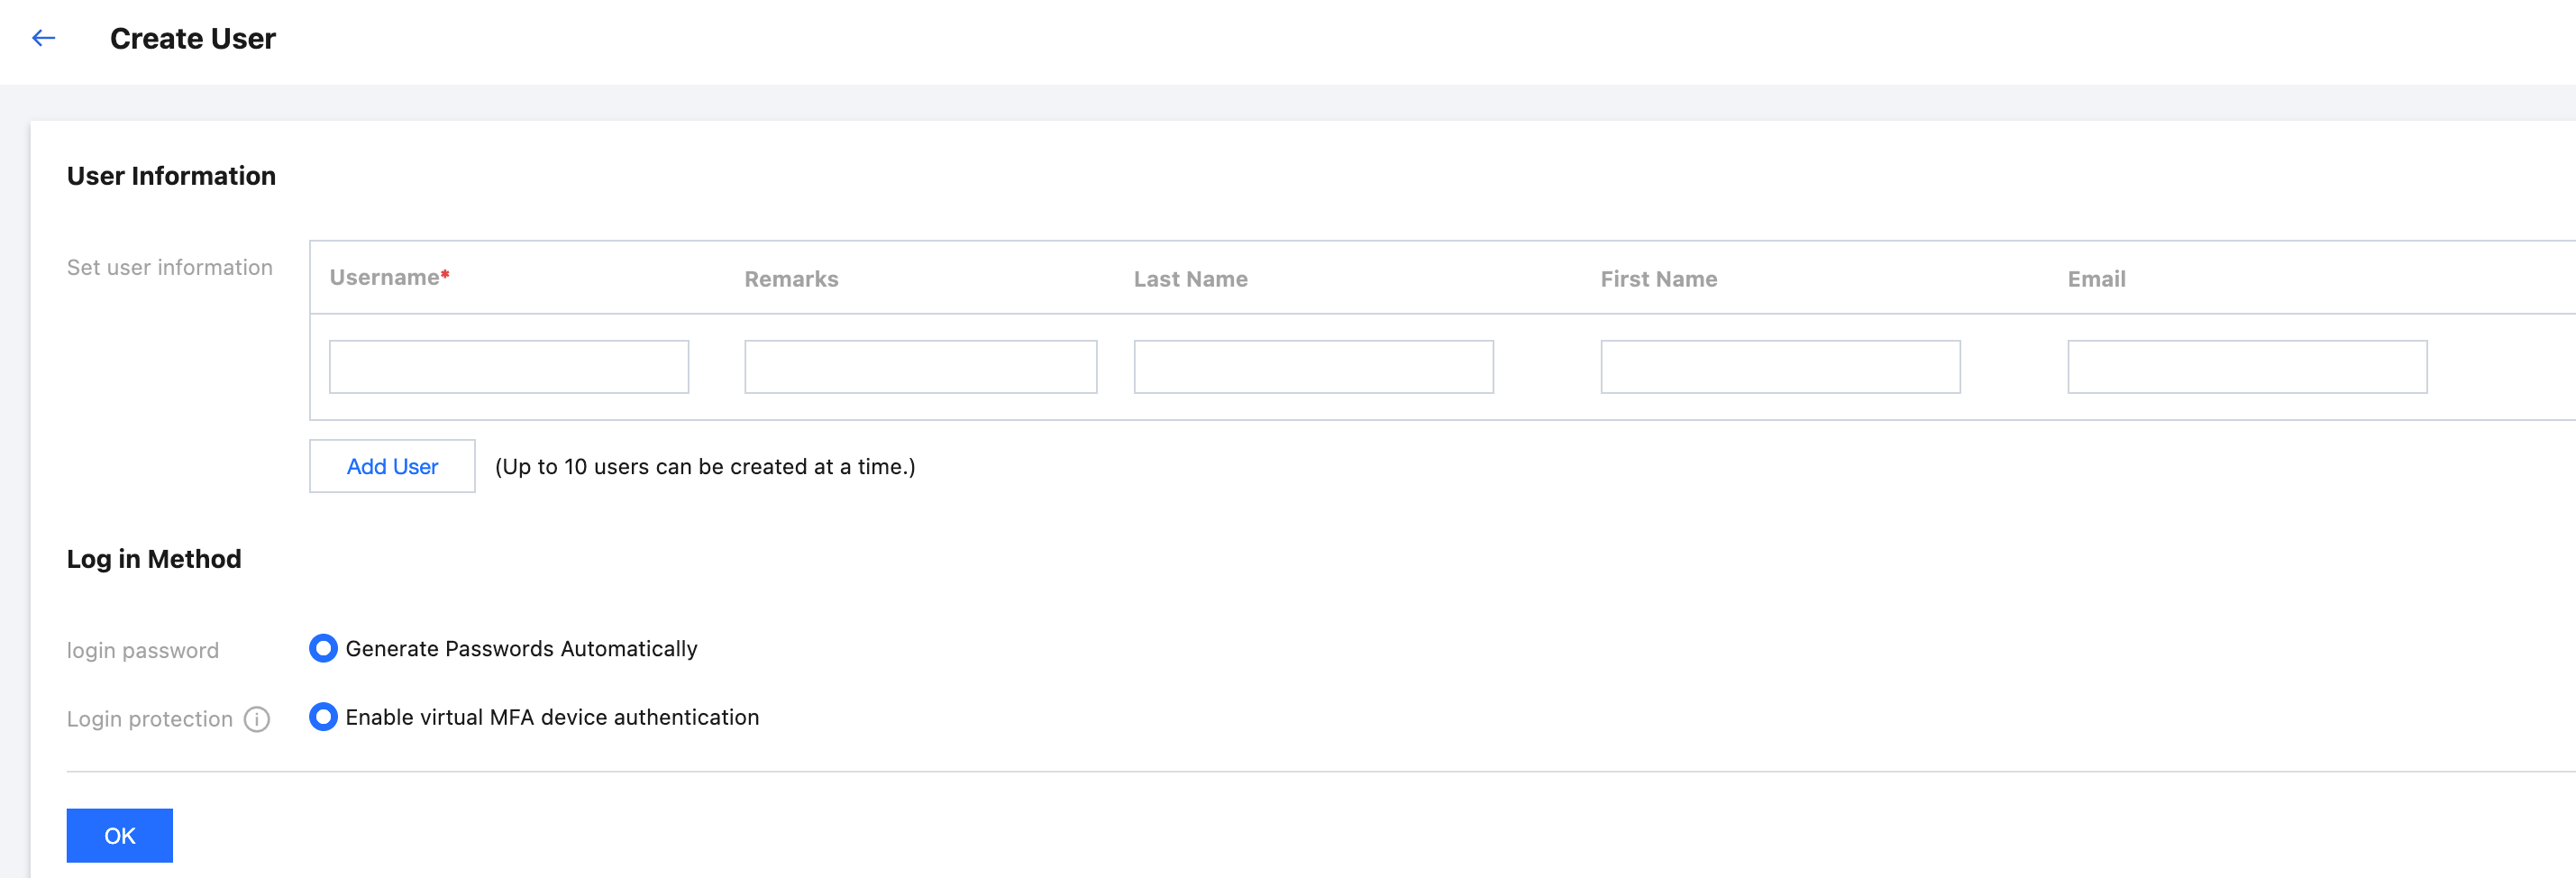
3. On the Create User panel, set basic user information.
User Information:
Username: required. It must be unique within the space, and can include letters, numbers, and +=,.@-_ characters, with a maximum length of 64 characters.
Remarks, Last name, First Name, Email: optional. You can enter these as needed.
Log in Method:
Login password: Only supports automatically generated password by the system.
Login protection: Virtual MFA device authentication is enabled by default.
4. Click OK.
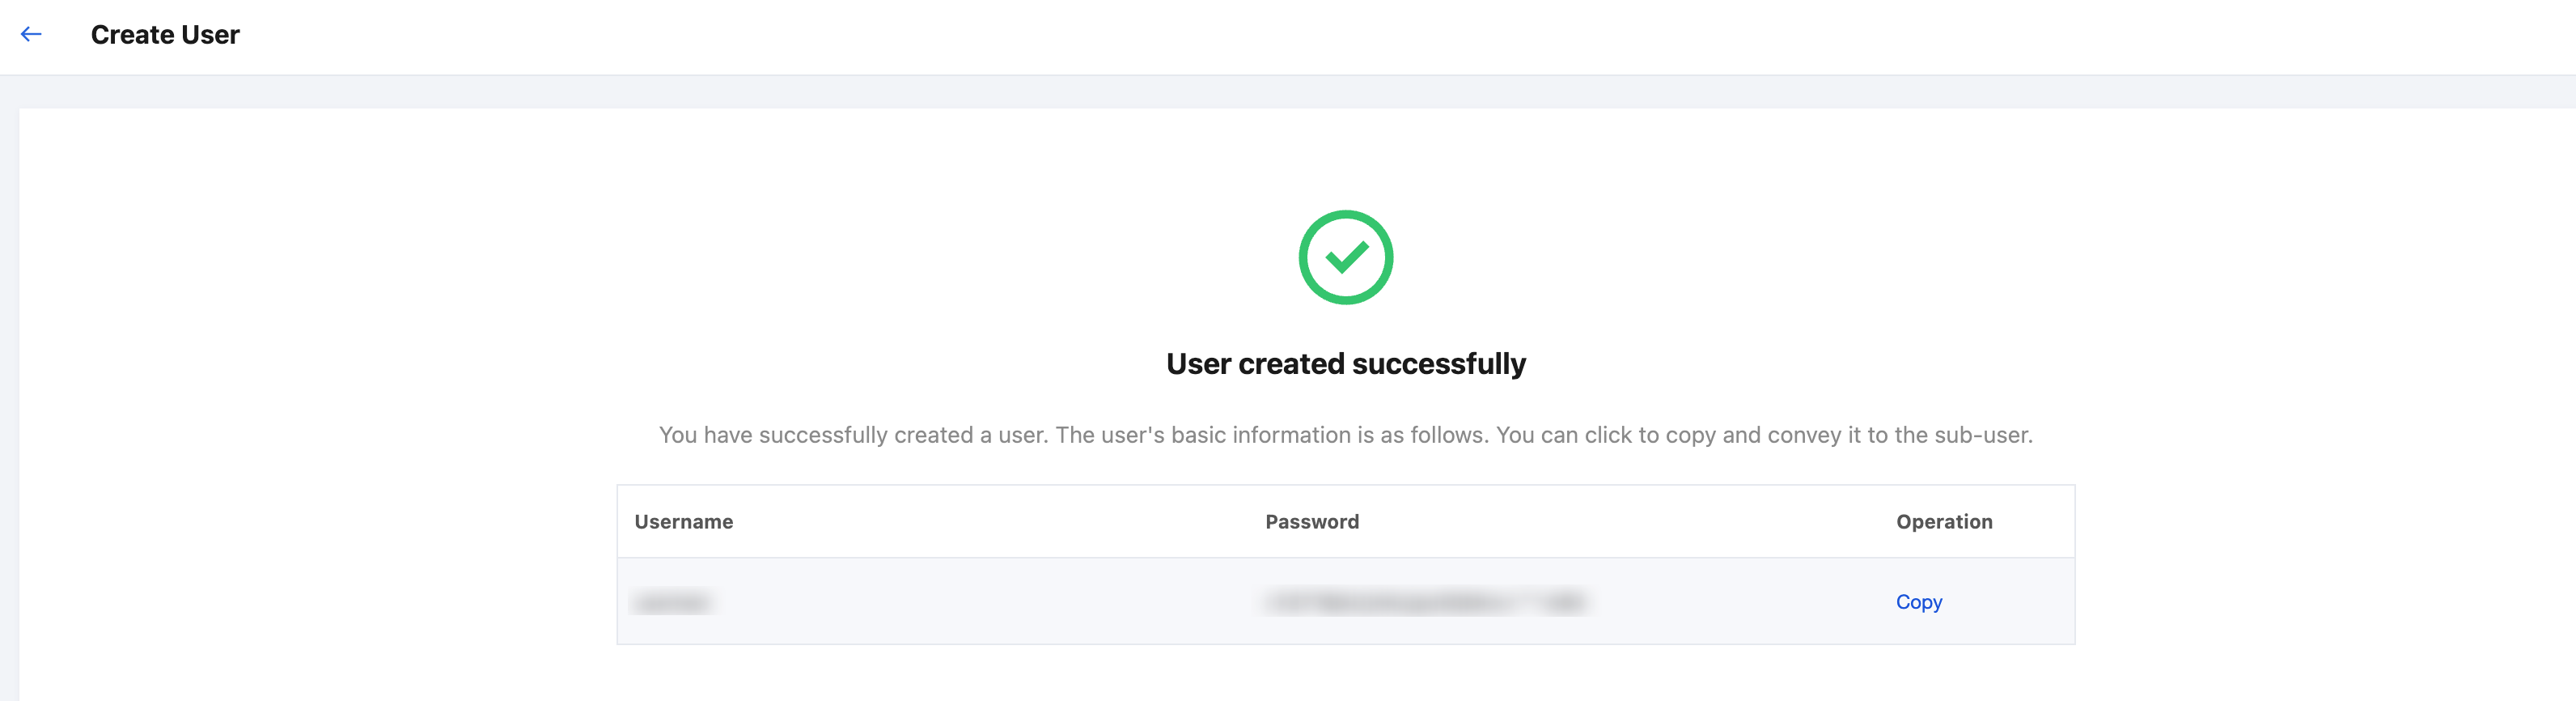
5. After successful creation, in the Operation column, click Copy to save the username and password. To modify the password, please see Resetting User Password.
Viewing User Information
1. In the left sidebar, select User Management > User.
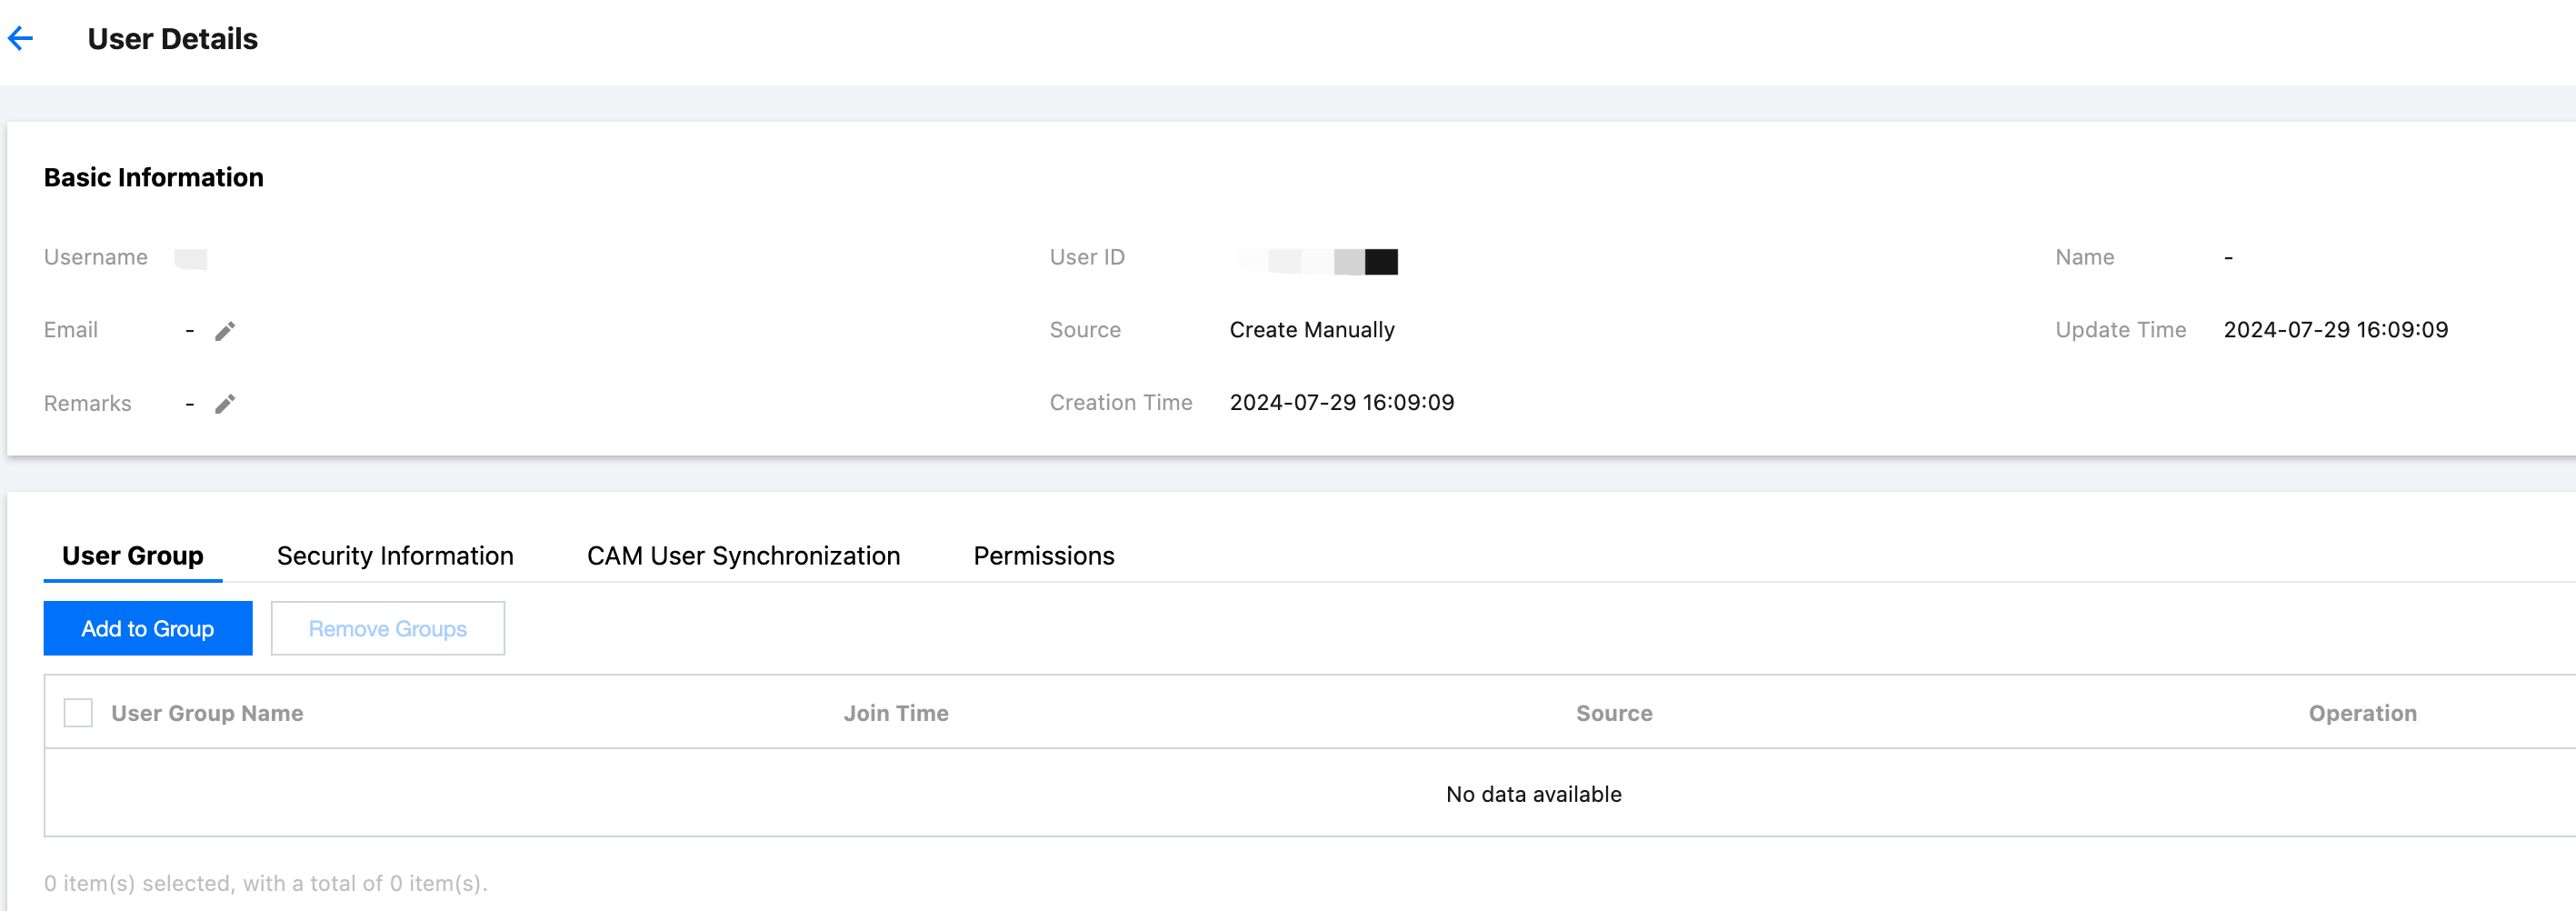
2. On the Userlist page, click the target username to view the following information:
View basic user information.
Click the User Groups tab to view the user groups that the user has joined.
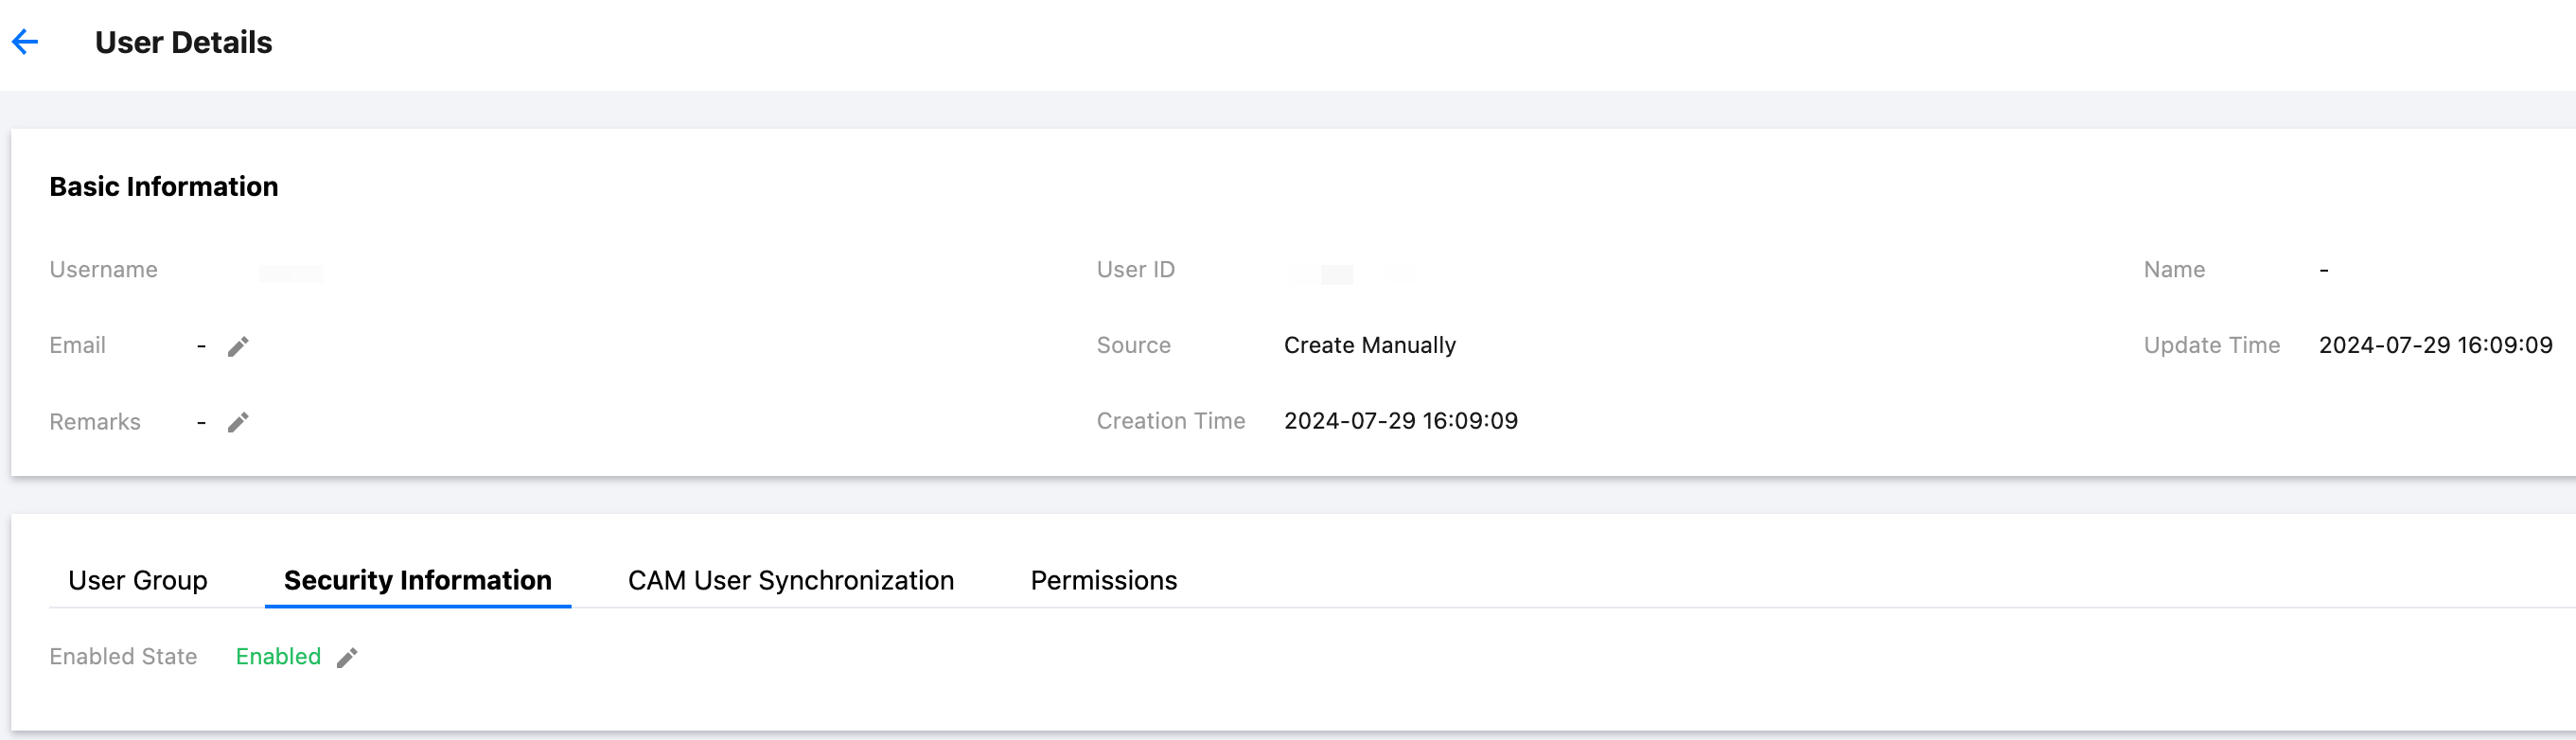
Click the Security Information tab to view the user's enabling status.
Click the CAM User Synchronization tab to view the configured CAM user synchronization information. For more information about CAM user synchronization, refer to Multi-account Authorization Overview.
Click the Permissions tab to view the user's associated accounts and permissions configuration information.
Modifying Basic User Information
Note:
The username cannot be modified.
1. In the left sidebar, select User Management > User.
2. On the Userlist page, click the target username.
3. In the Basic Information area at the UserDetails page, the fields that can be modified are: Remarks, Last name, First Name, Email.
Deleting a User
Note:
Before deleting a user, make sure that the user is not associated with the following resources; otherwise, the deletion will fail. Details are as follows:
Permissions: You need to delete the user's authorization on the account. For specific steps, refer to View/modify/delete authorization.
CAM user synchronization: You need to delete the user's synchronization relationship on the account. For specific steps, refer to View/Modify/Delete User Synchronization.
1. In the left sidebar, select User Management > User.
2. On the User list page, click Delete in the target user's action column.
3. On the Delete User page, click OK.
Enabling or Disabling User Login
Warning:
User in disabled status will not be able to log in to the Identity Center's login portal.
1. In the left sidebar, select User Management > User.
2. On the User list page, click the target username.
3. In the Security Information area of the details page, enable or disable user login.
Enable user login
In the Manage User Status pop-up window, click Enabled, and then click OK.
Disable user login
In the Manage User Status pop-up window, click Disabled, and then click OK.
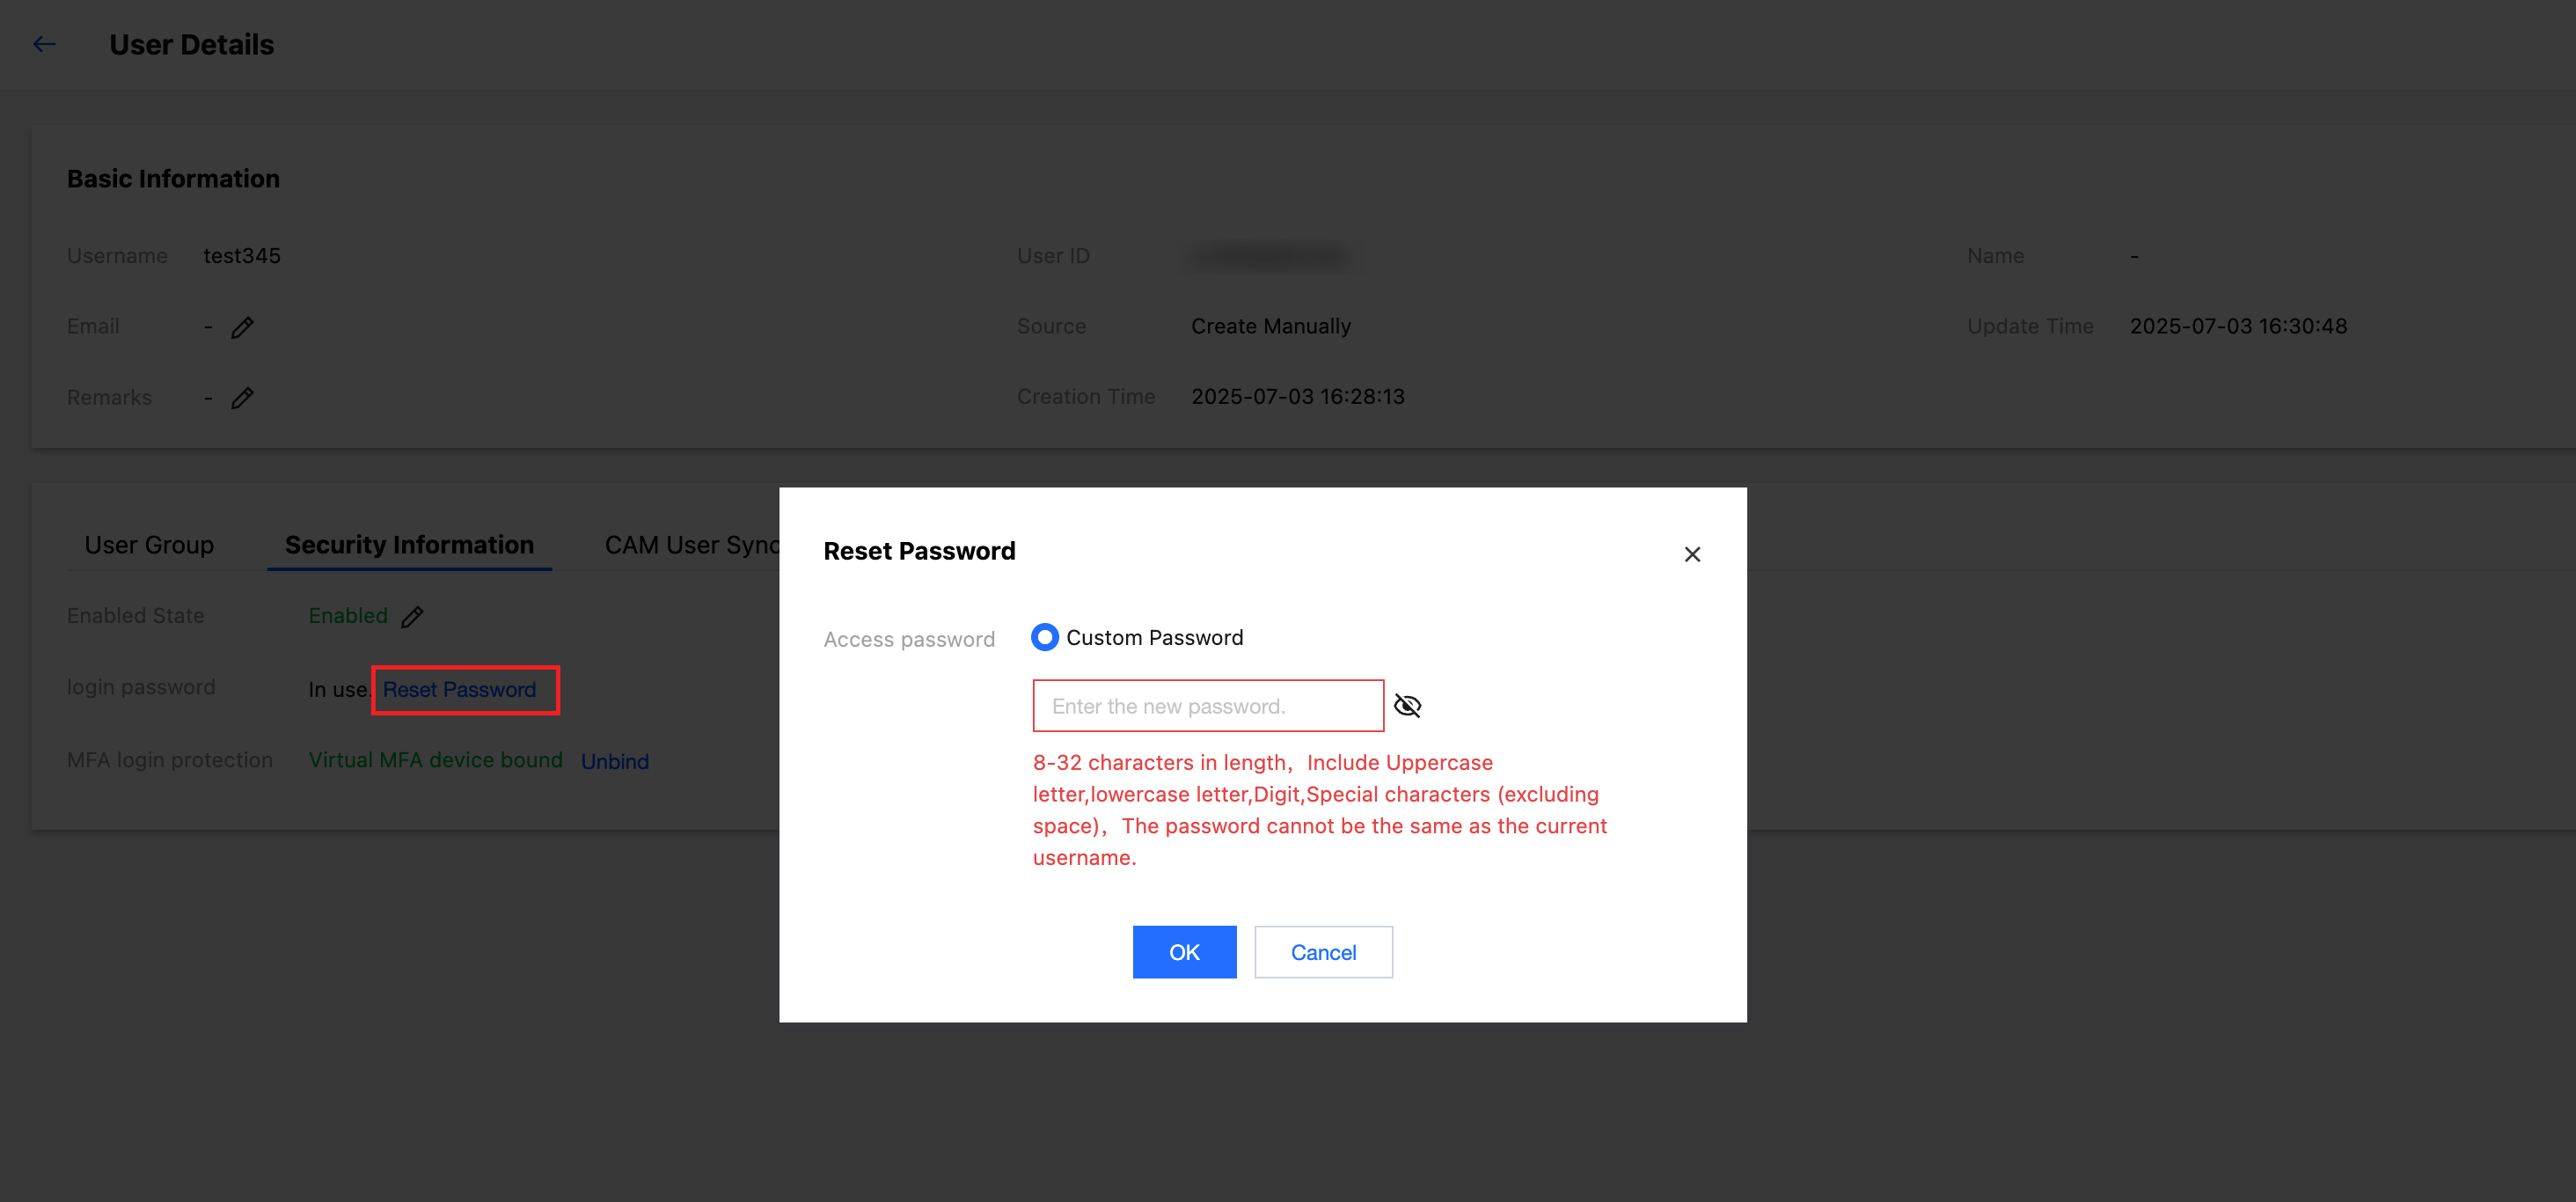
Resetting User Password
1. In the left sidebar, select User Management > User.
2. On the User List page, click the target username.
3. On the User details page, in the Security Information section, click Reset Password. You can customize password during reset.
Password format: 8-32 characters in length, including uppercase letters, lowercase letters, digits, and special characters (excluding spaces).
4. After the reset is successful, you can copy the new password in the pop-up window or download .csv file.