Examples of Synchronization from OneLogin User Groups via SCIM
Download
Mode fokus
Ukuran font
Overview
The operation of synchronizing user groups in Onelogin is special. Instead of synchronizing Onelogin user groups to the identity center, Onelogin reversely pulls user groups from the identity center and then adds users to the group.
Method 1: First pull user groups from the identity center in Onelogin. When configuring user synchronization in Onelogin, select user groups which pull from the identity center.
Method 2: Directly adding synchronized users to the group in the identity center.
Directions
Pulling User Groups from the Identity Center
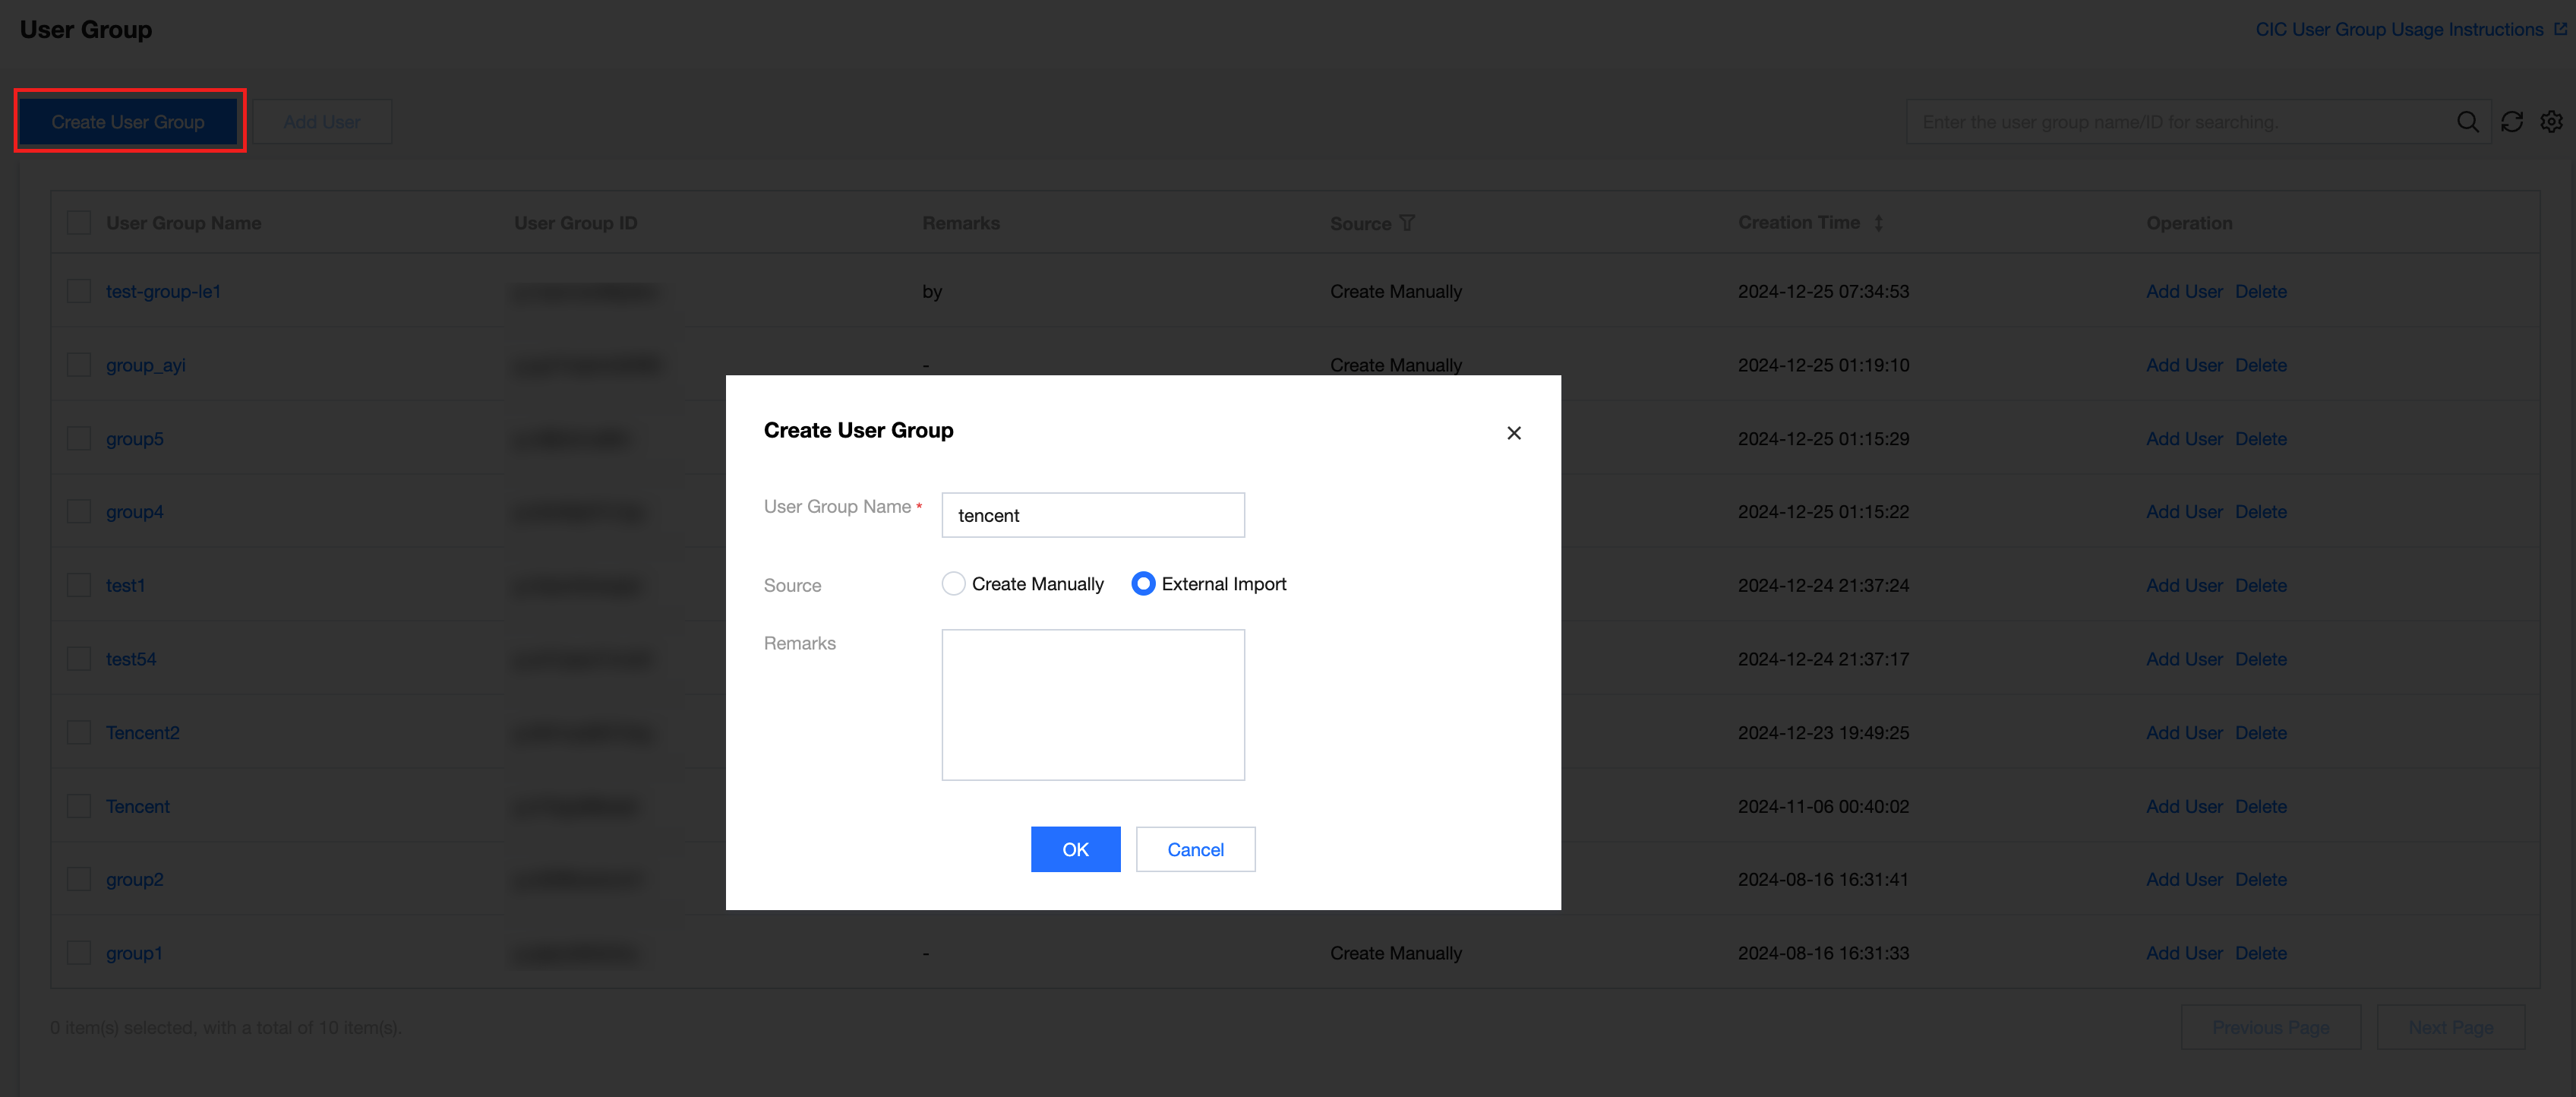
Step 1: Creating a new user group in the identity center
1. In Identity Center > User Management > User Group, create a new user group, click OK, and the user group is created successfully.
You can create an external import type user group through the API, select GroupType as Synchronized.
To create through the console, you need to join the allowlist to change the source.
Step 2: Pulling user groups from the identity center in Onelogin
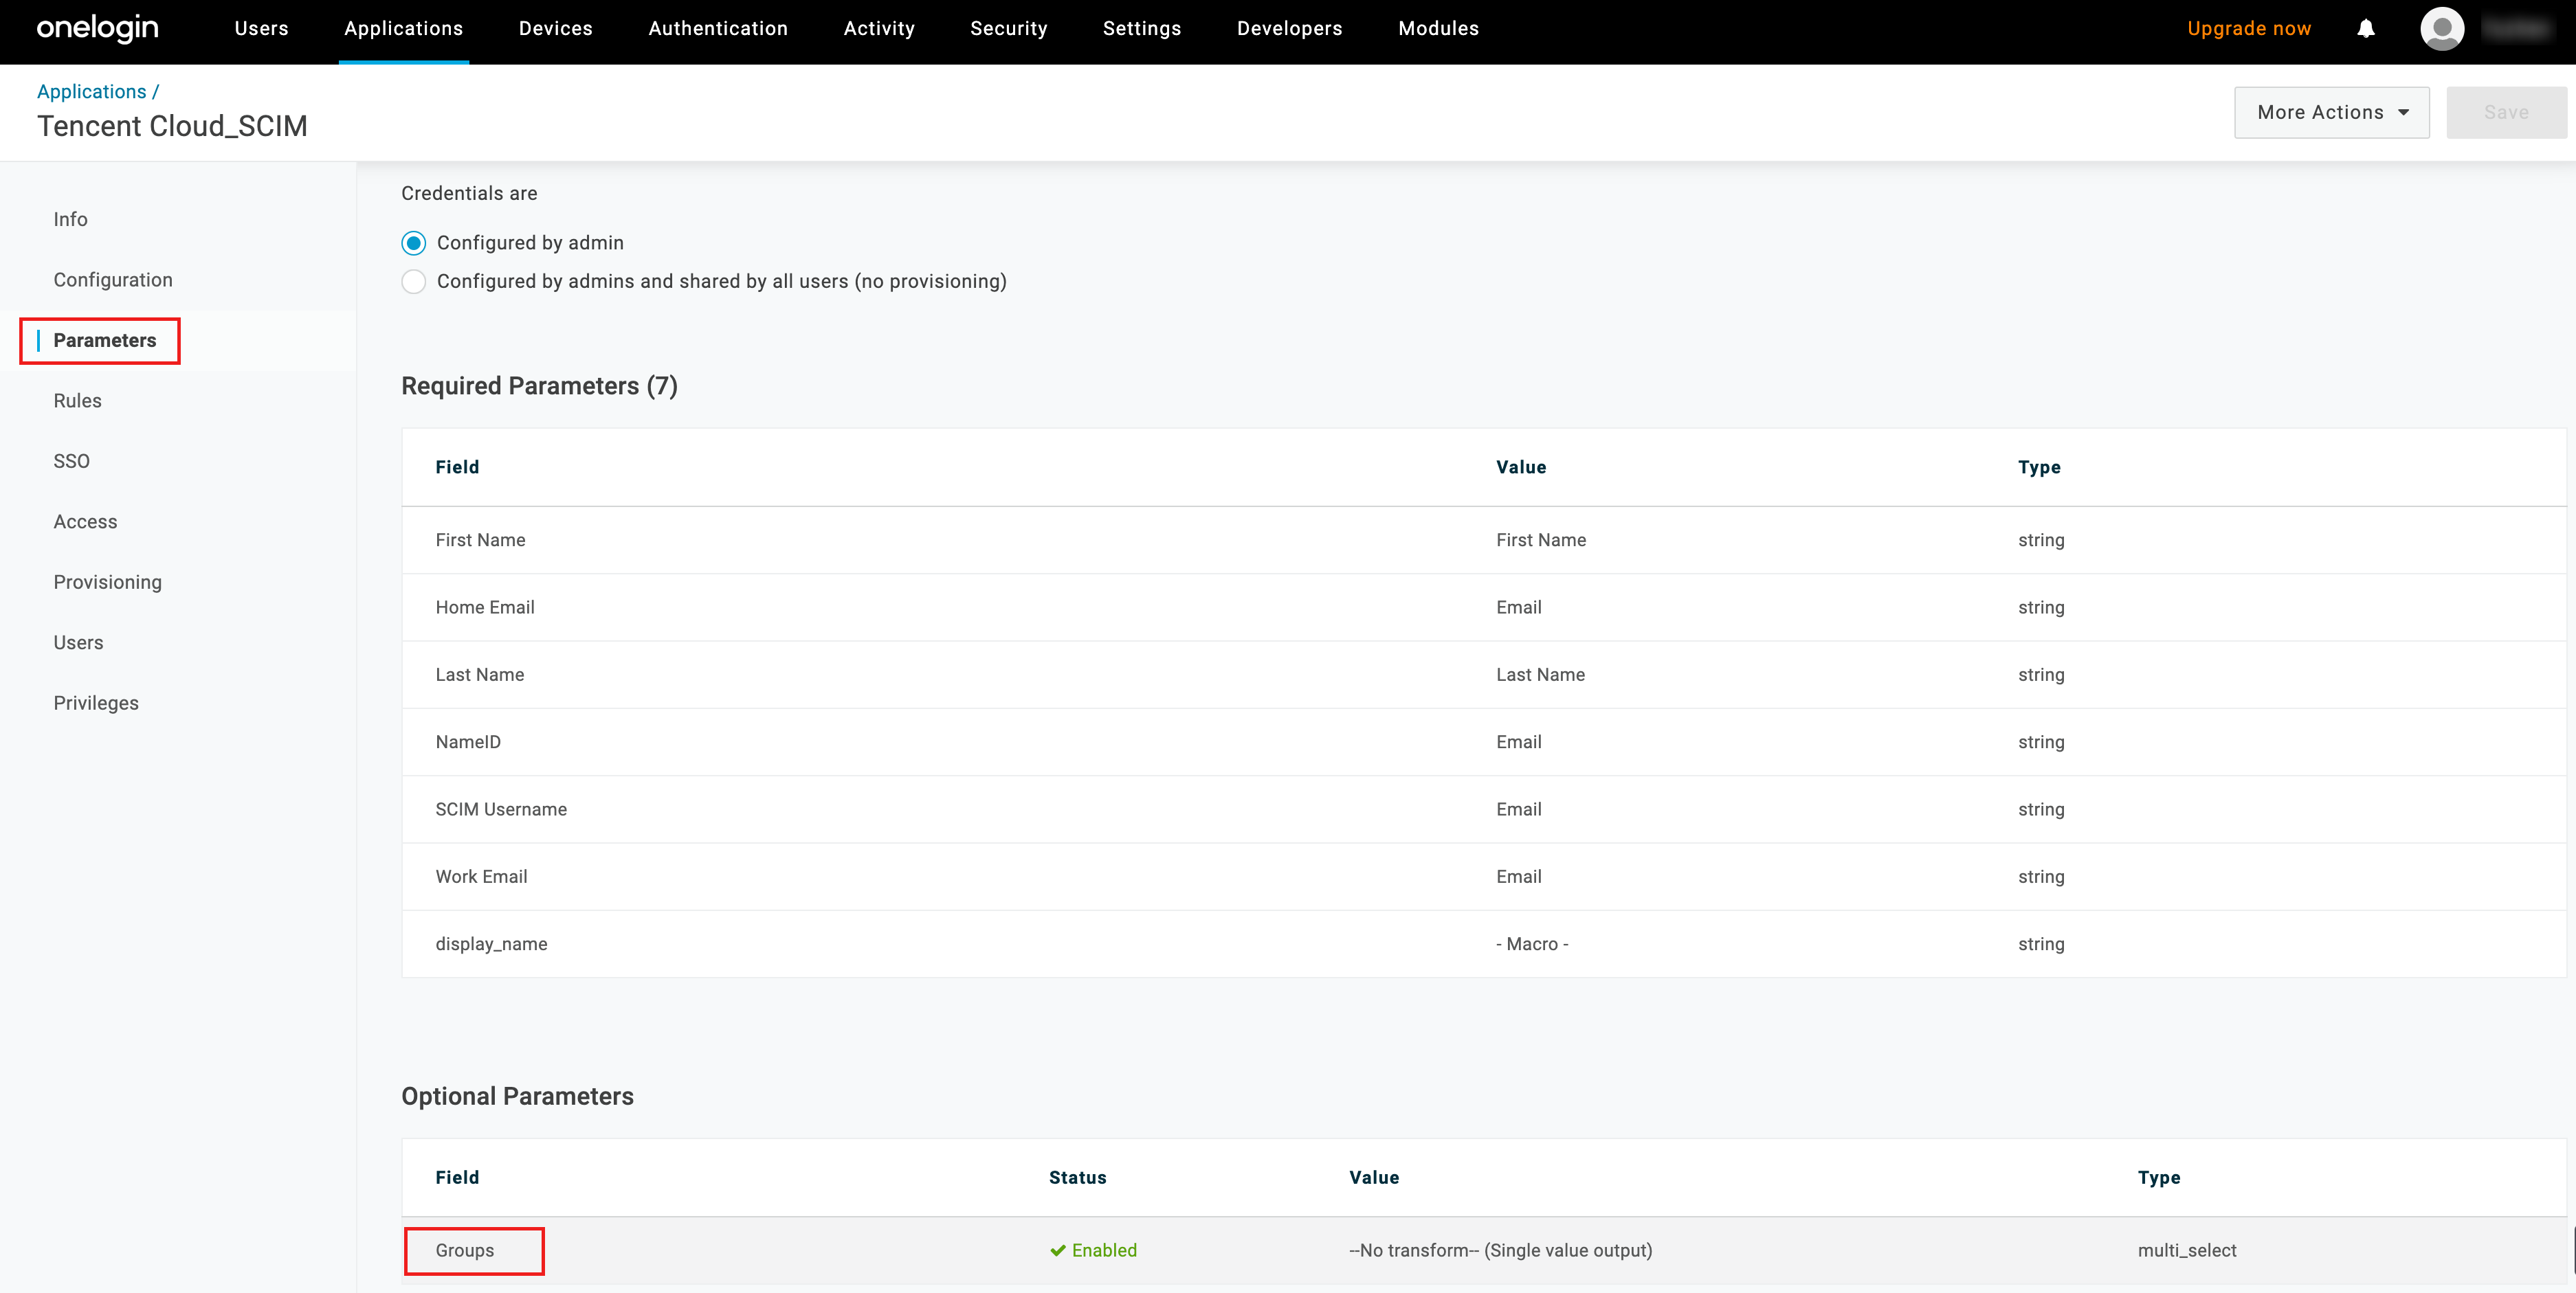
1. Admin logs in to Onelogin, select Applications > Applications from the top menu.
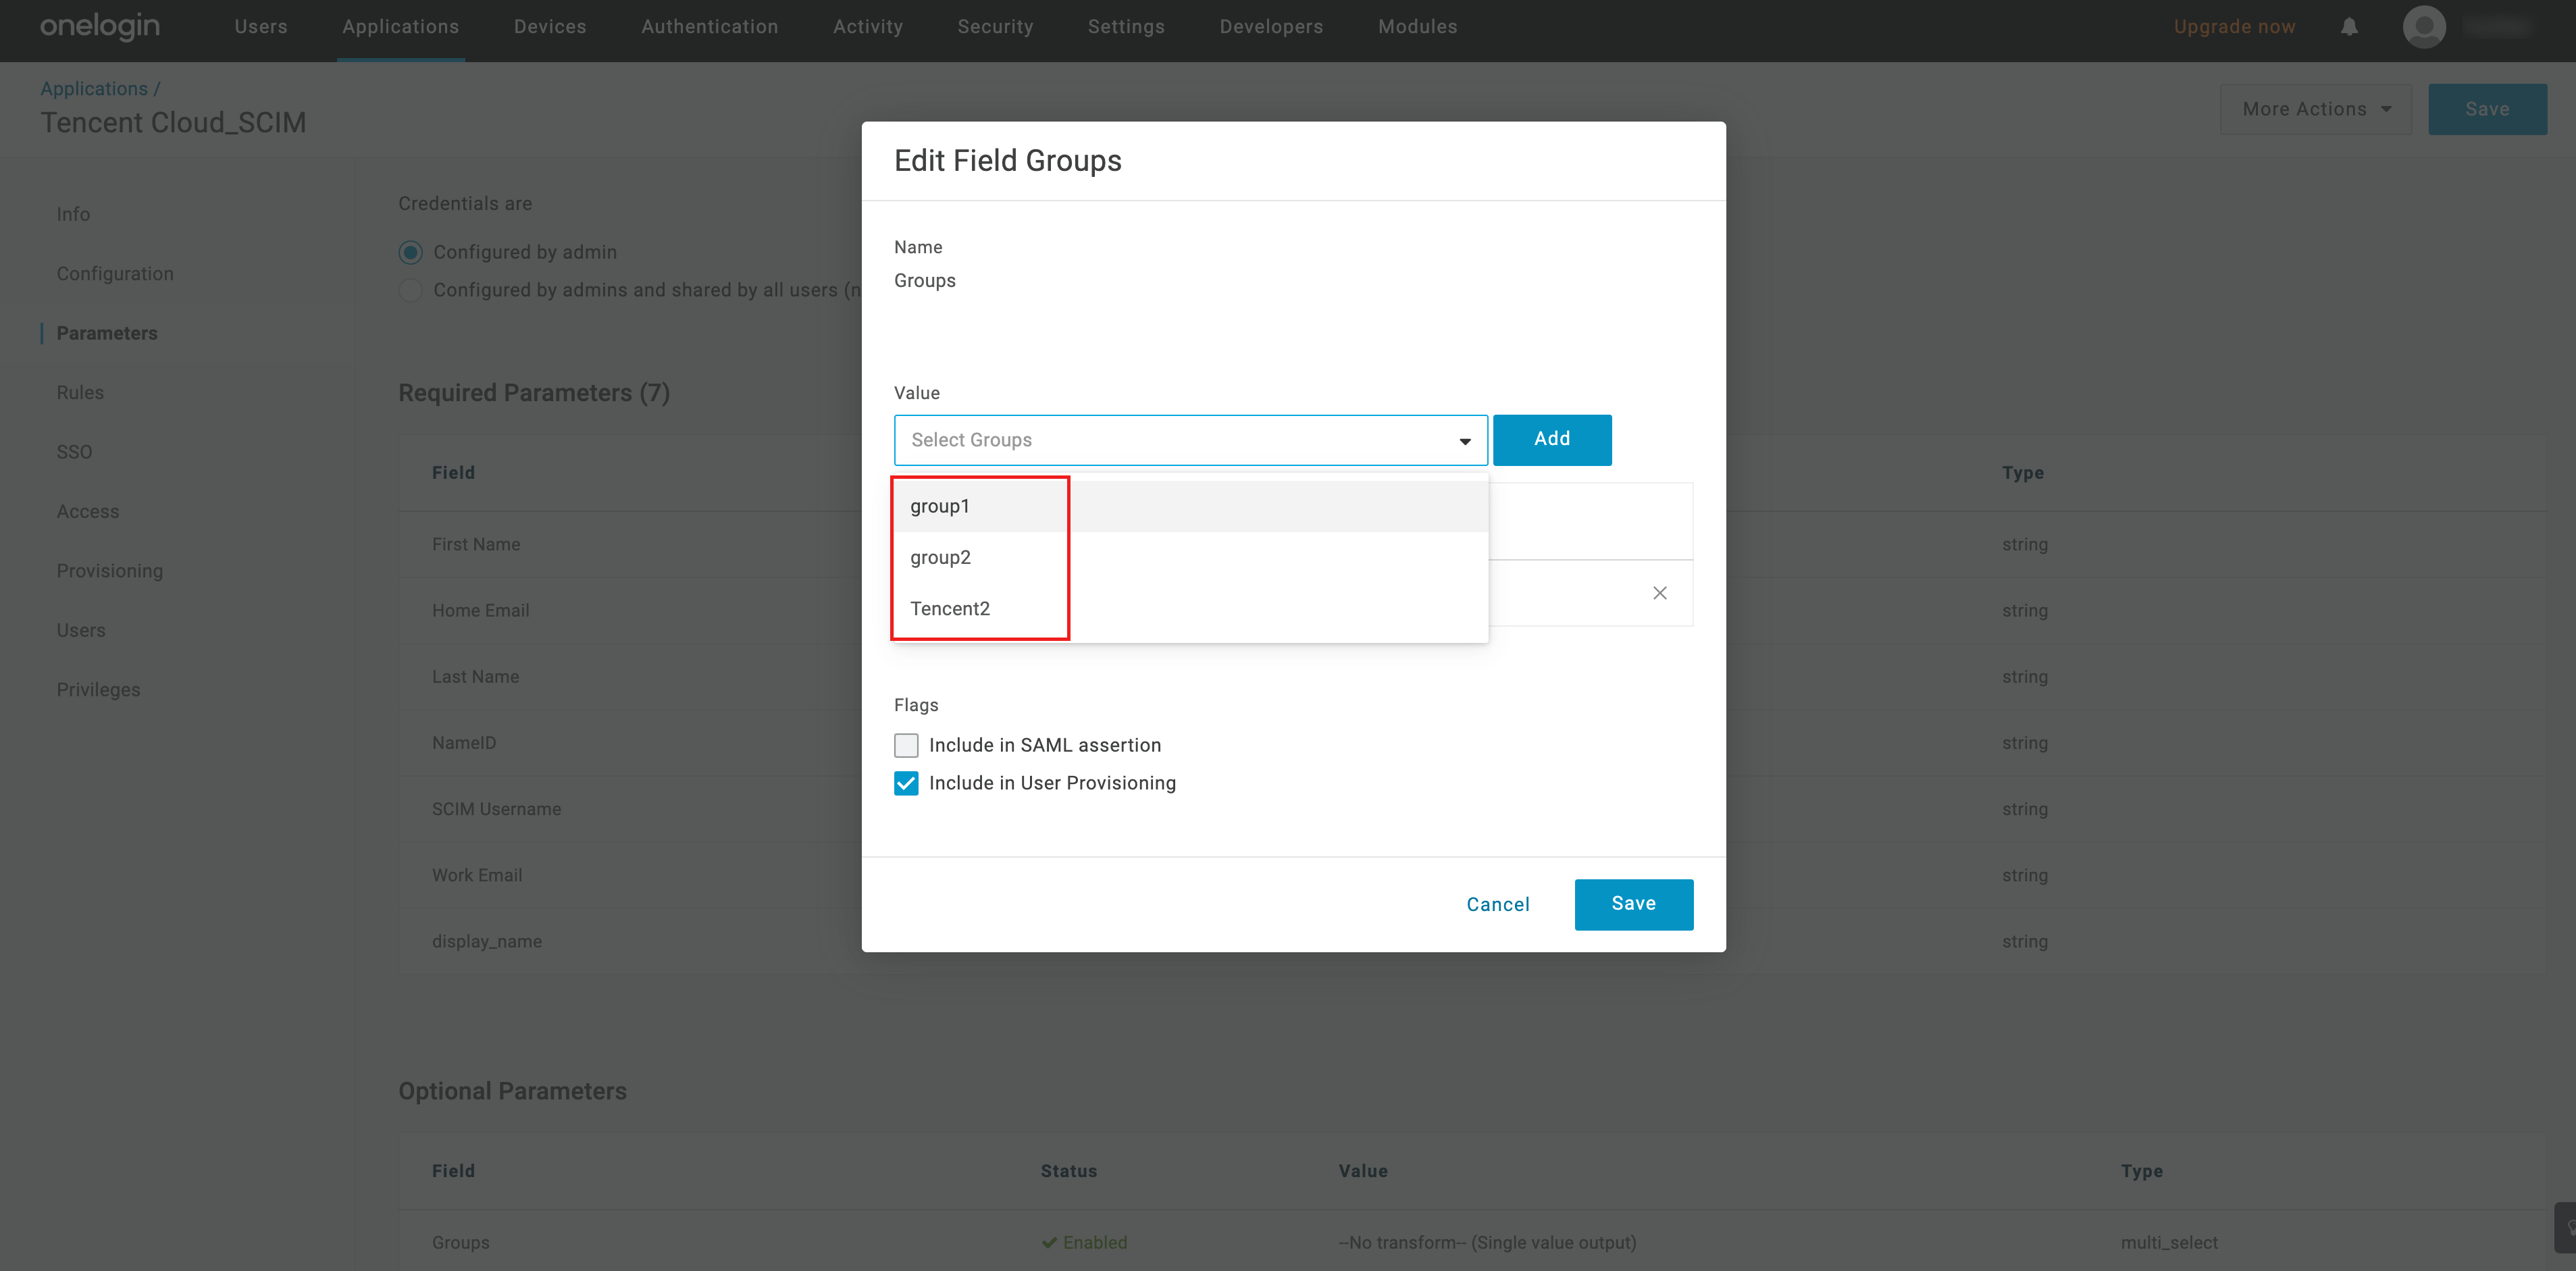
2. In the Tencent Cloud_SCIM application, select Parameters, in Optional Parameters, click Group.
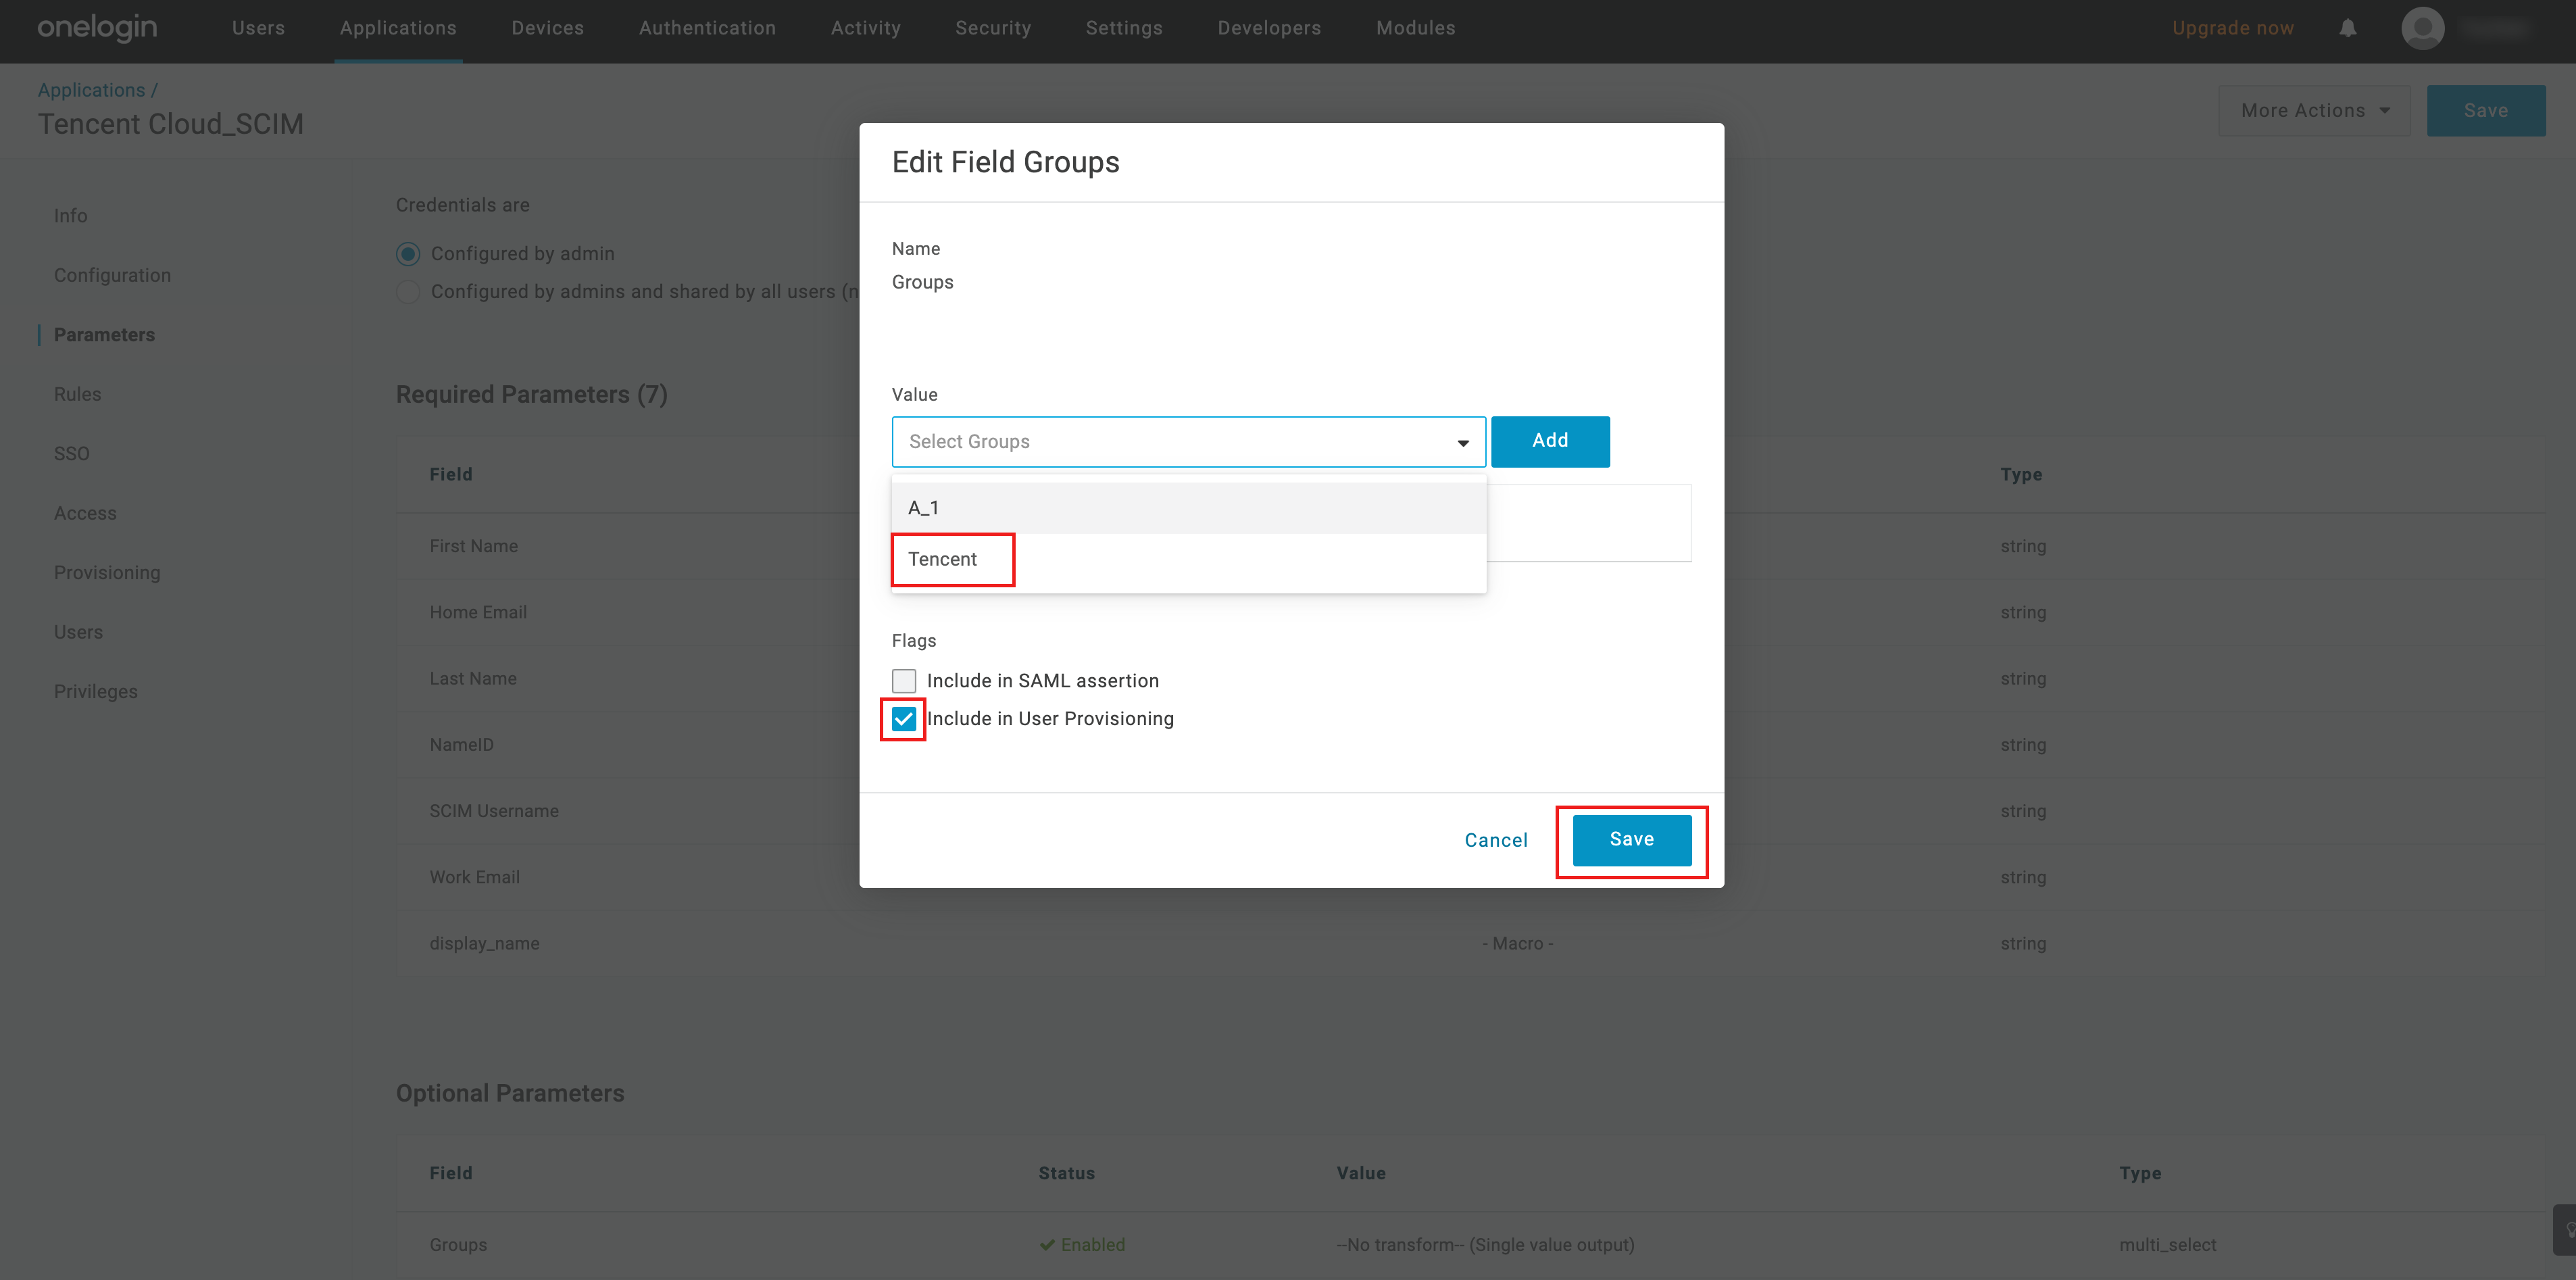
3. In Edit Field Group, in the Value dropdown, you can see the user groups from the identity center. After selecting the target user group, click Add, check Include in User Provisioning, and click Save.
4. When a new user group is created in the identity center, you need to manually refresh in Onelogin for it to appear in the Edit Field Group pop-up box.
4.1 Click Provisioning on the left, then click Refresh on the page to complete the refresh.
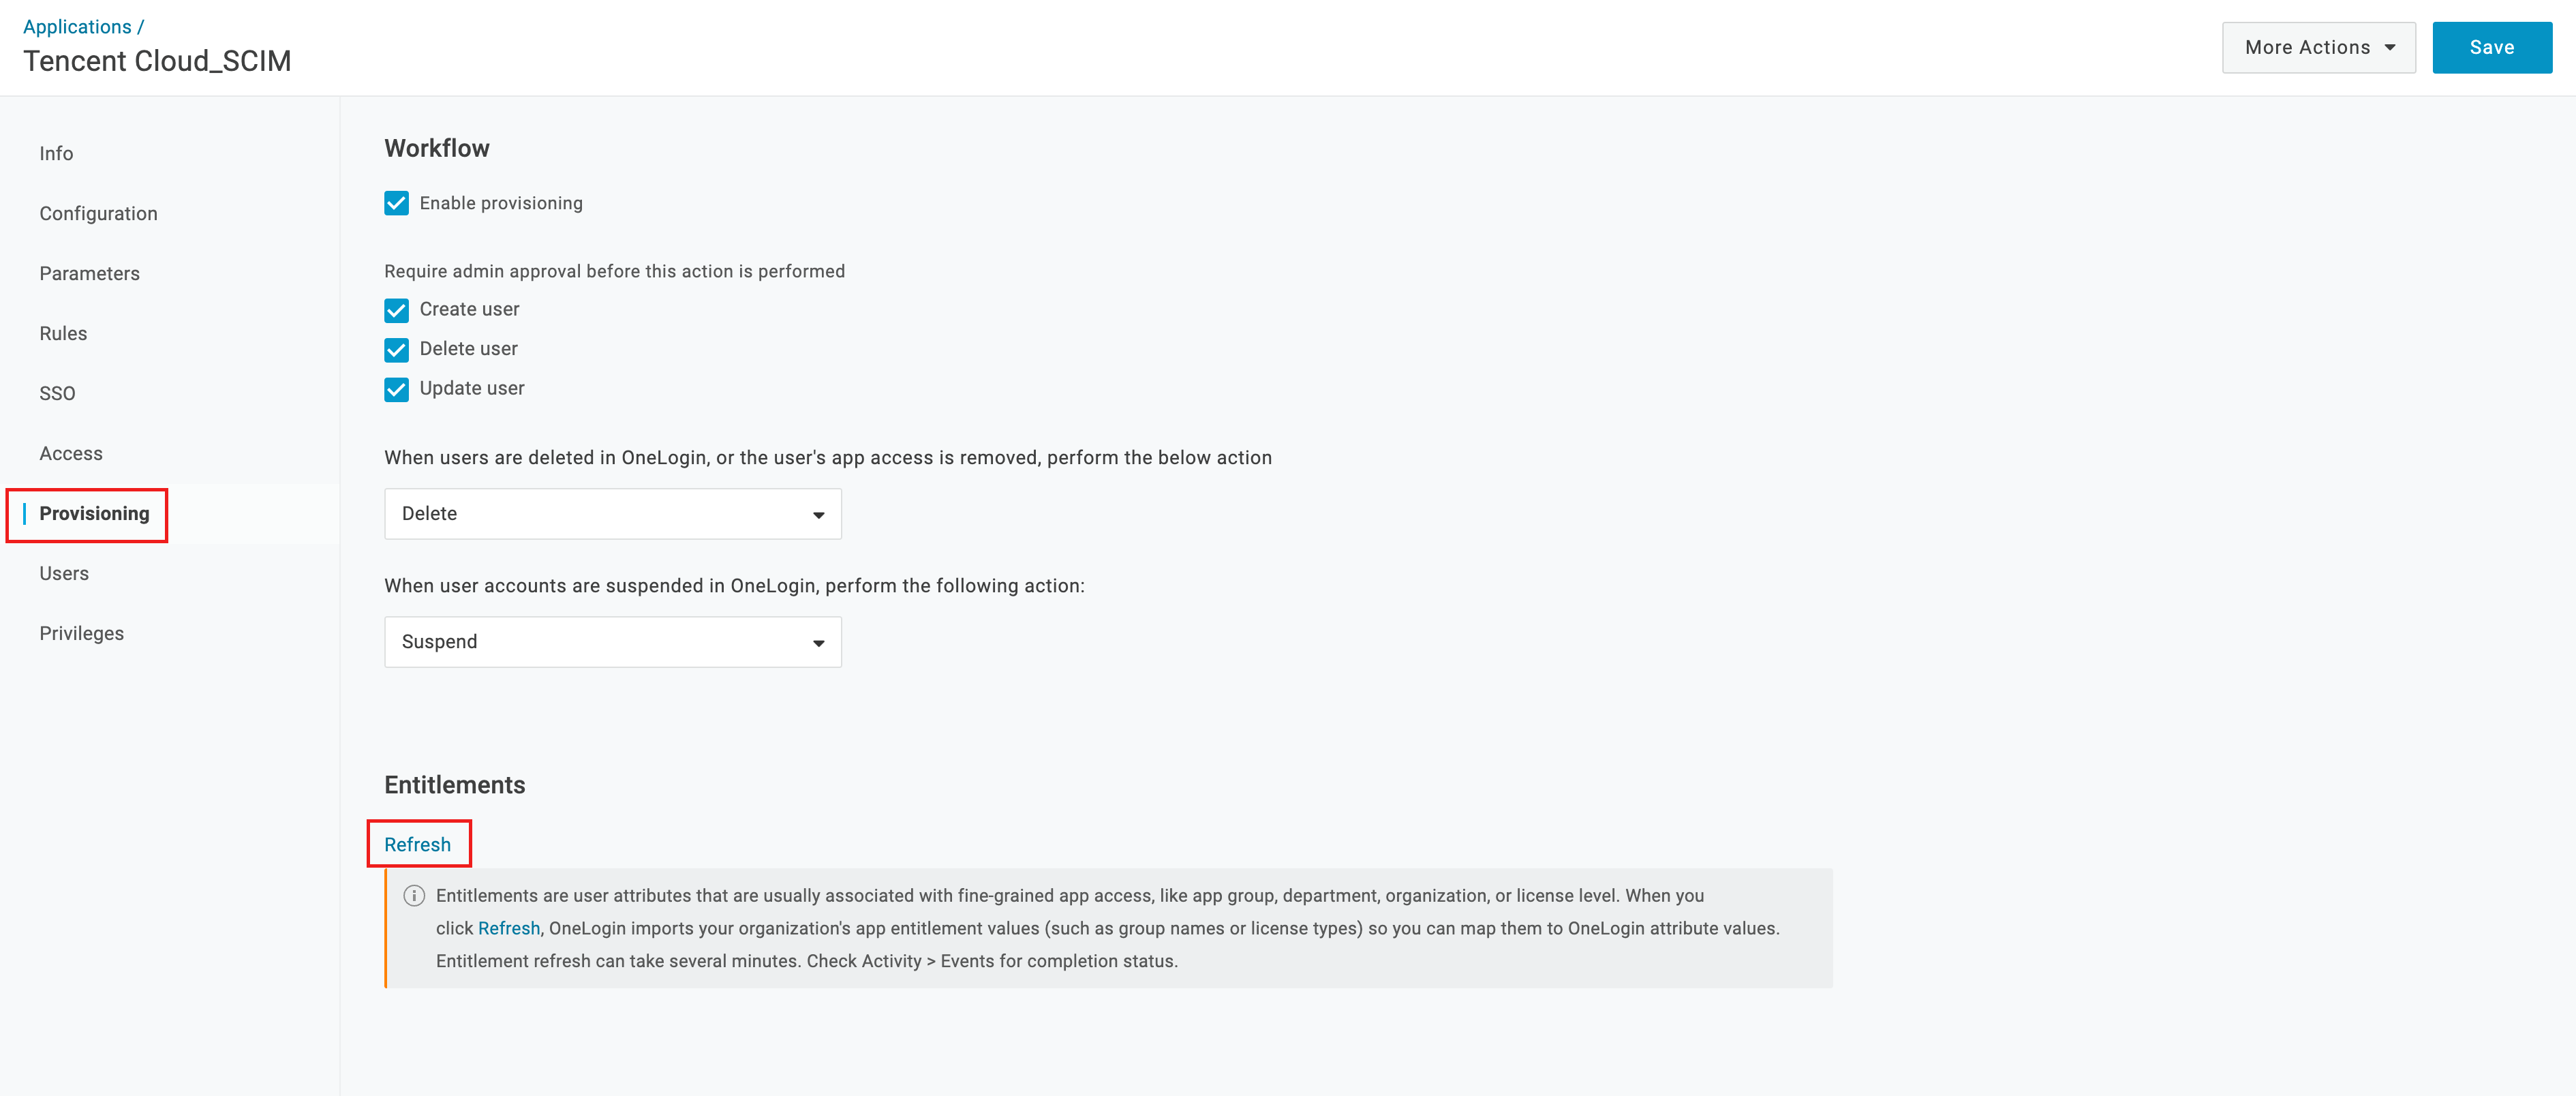
4.2 Go back to Parameters, in Edit Field Group, you can see the new user group in the dropdown.
Step 3: Synchronizing user groups
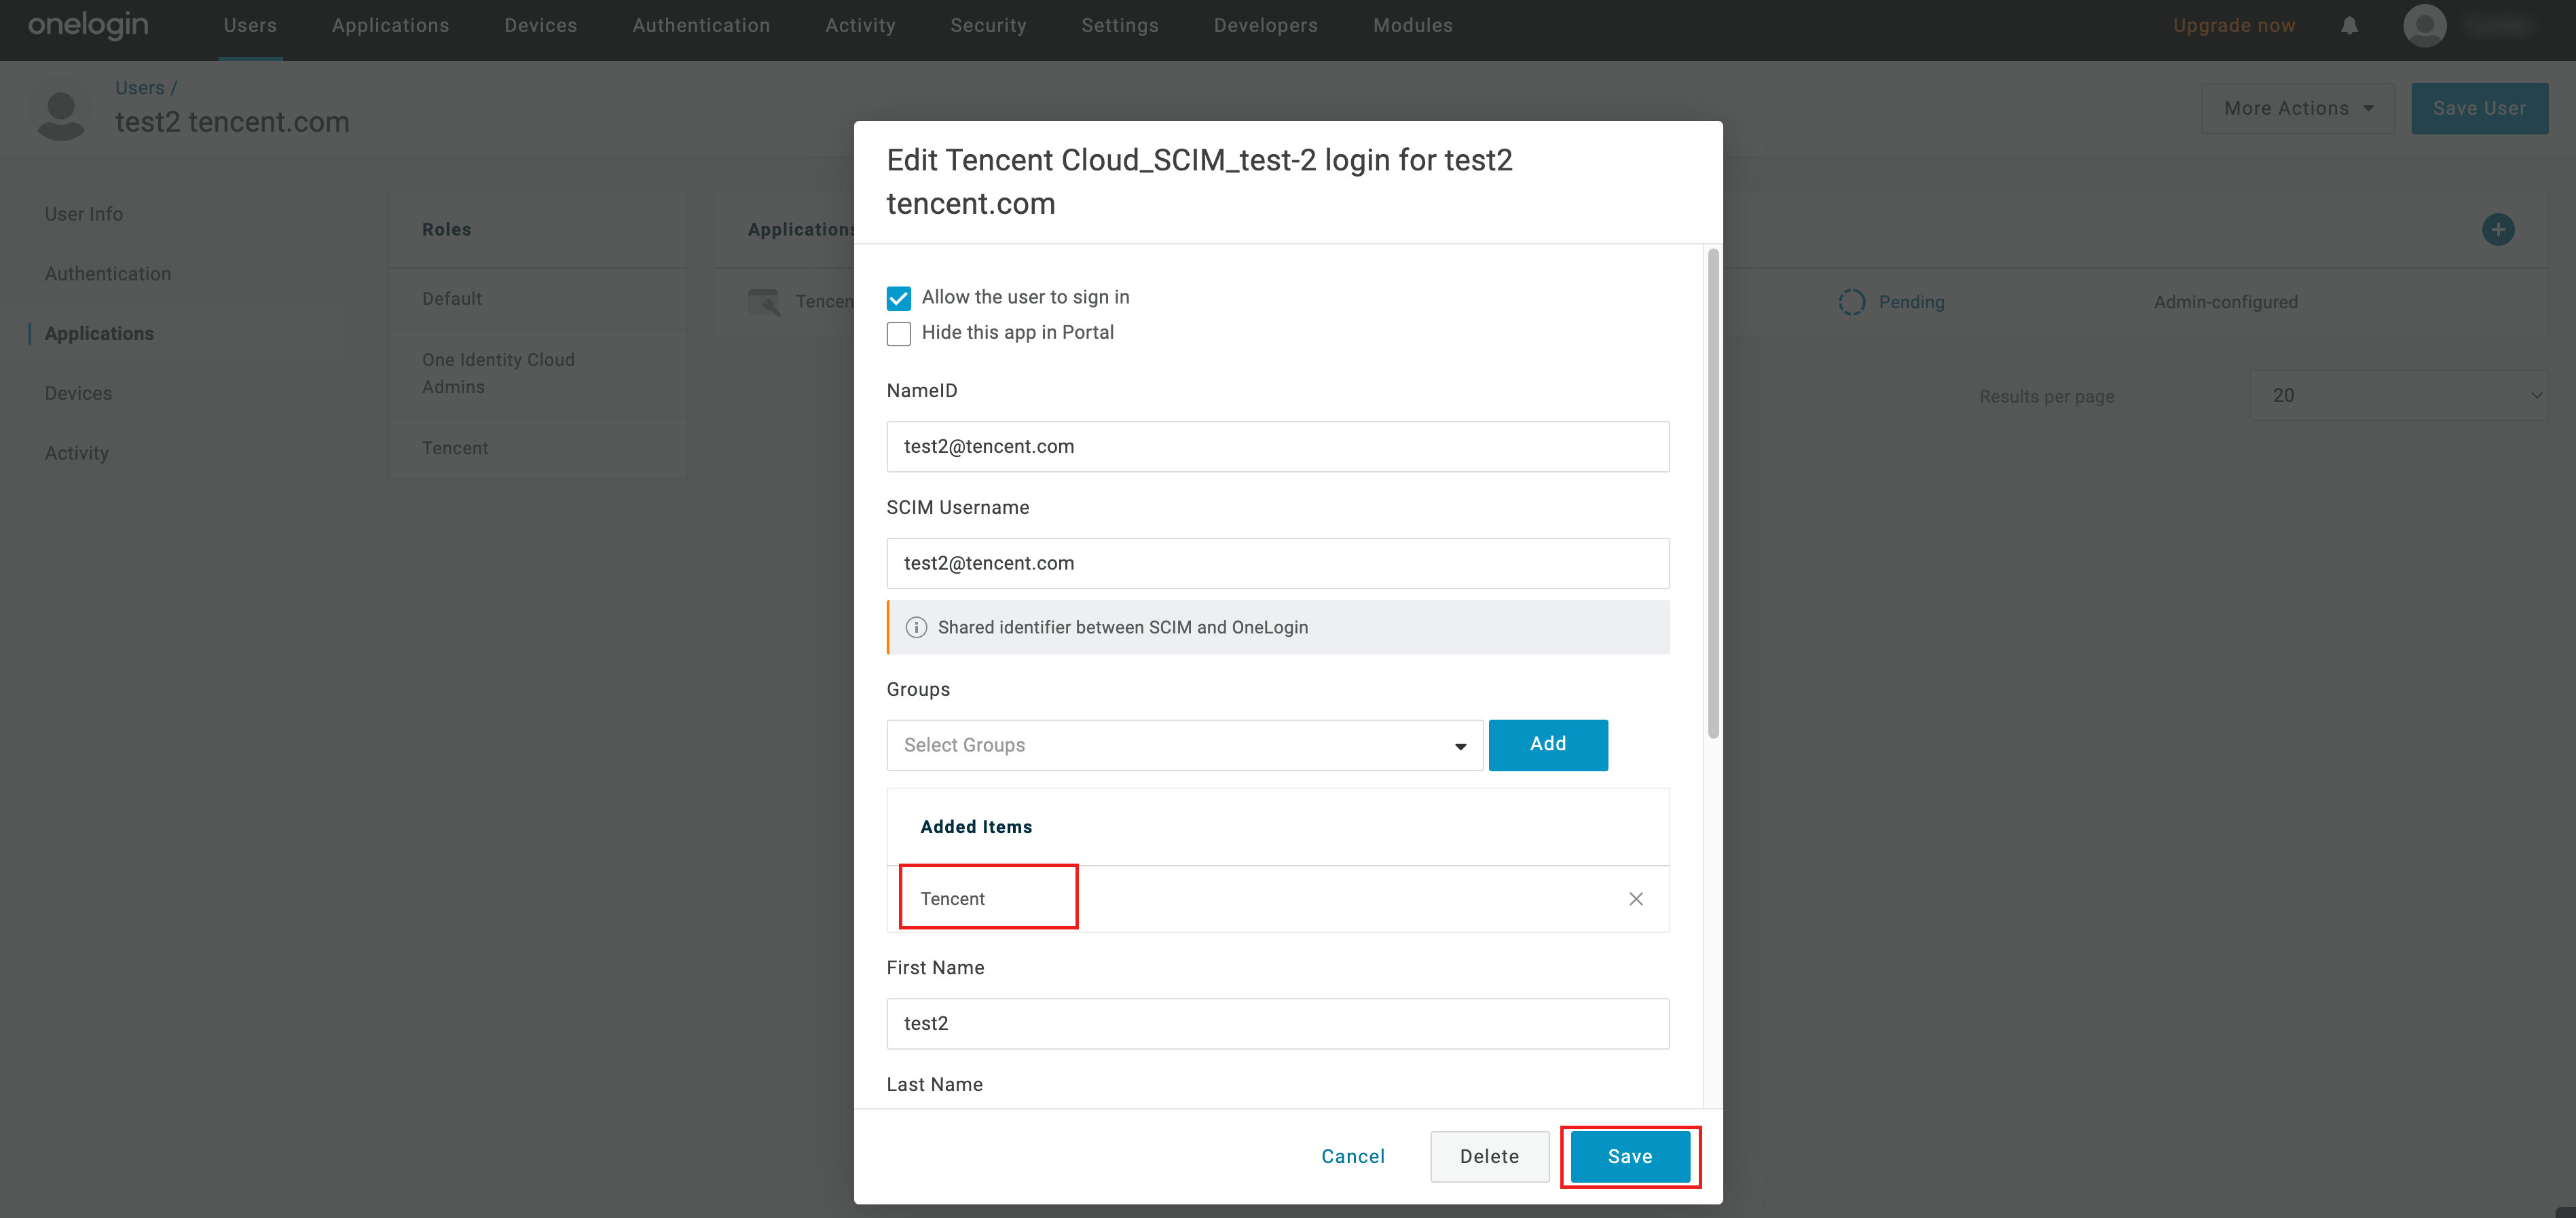
1. After completing the above operations, in the synchronize users configuration, Groups will change to optional. Select the user group associated with test2 and click Save. Here choose Tencent.
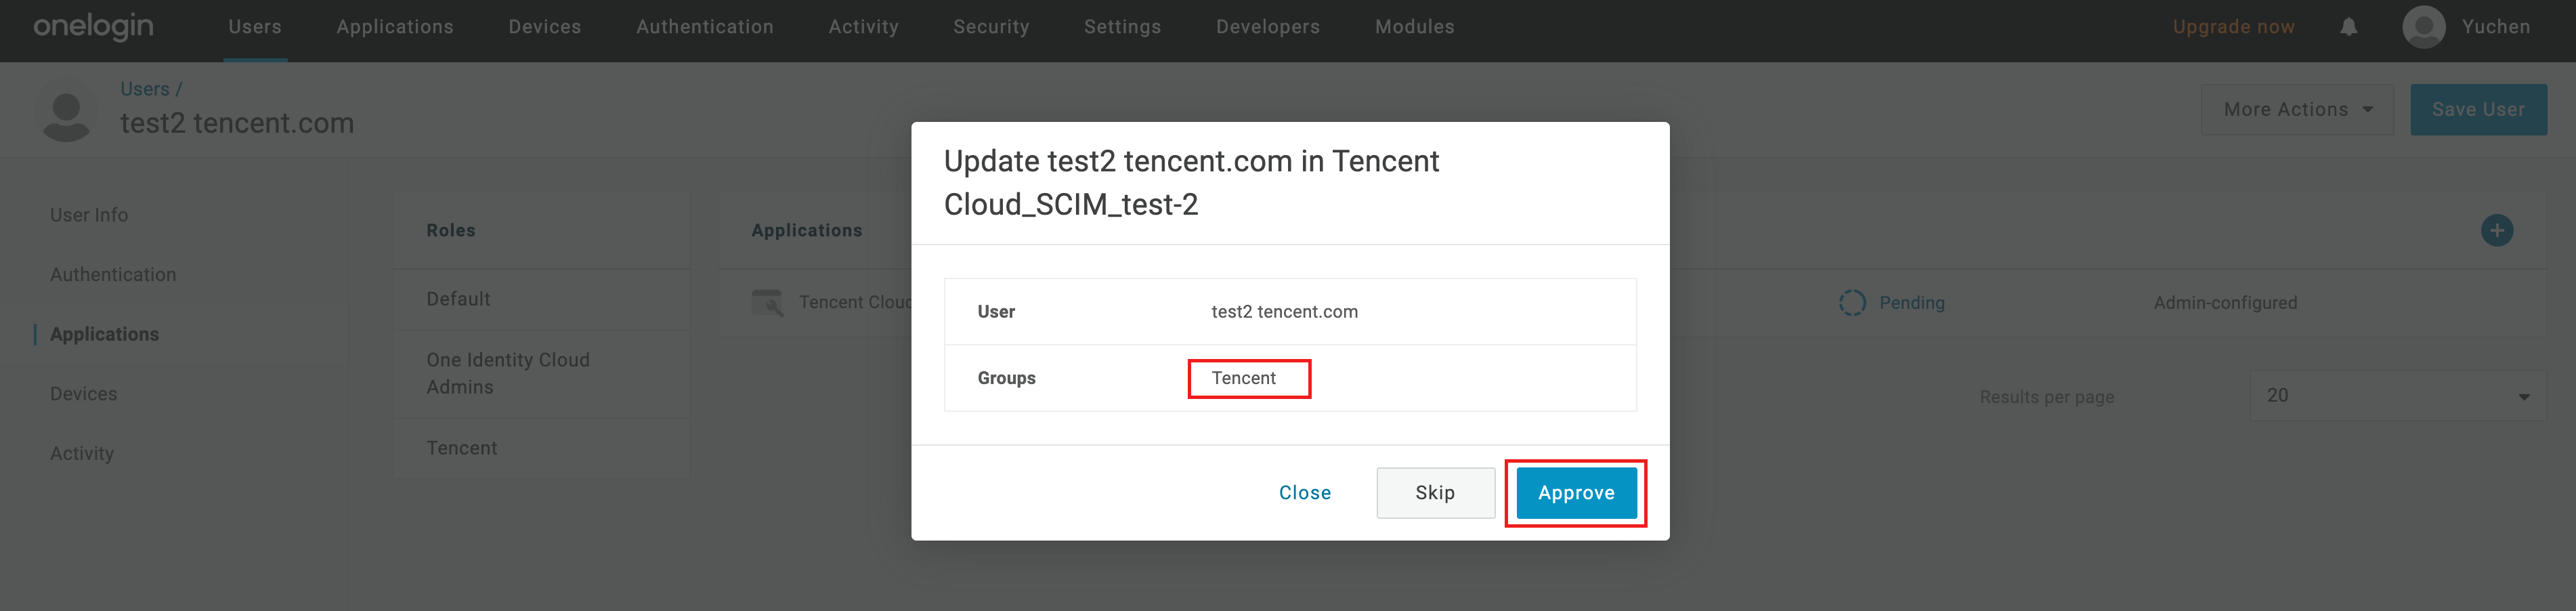
2. Click the Pending area, after pop-up confirmation of the synchronized user and user group information, click Approve.
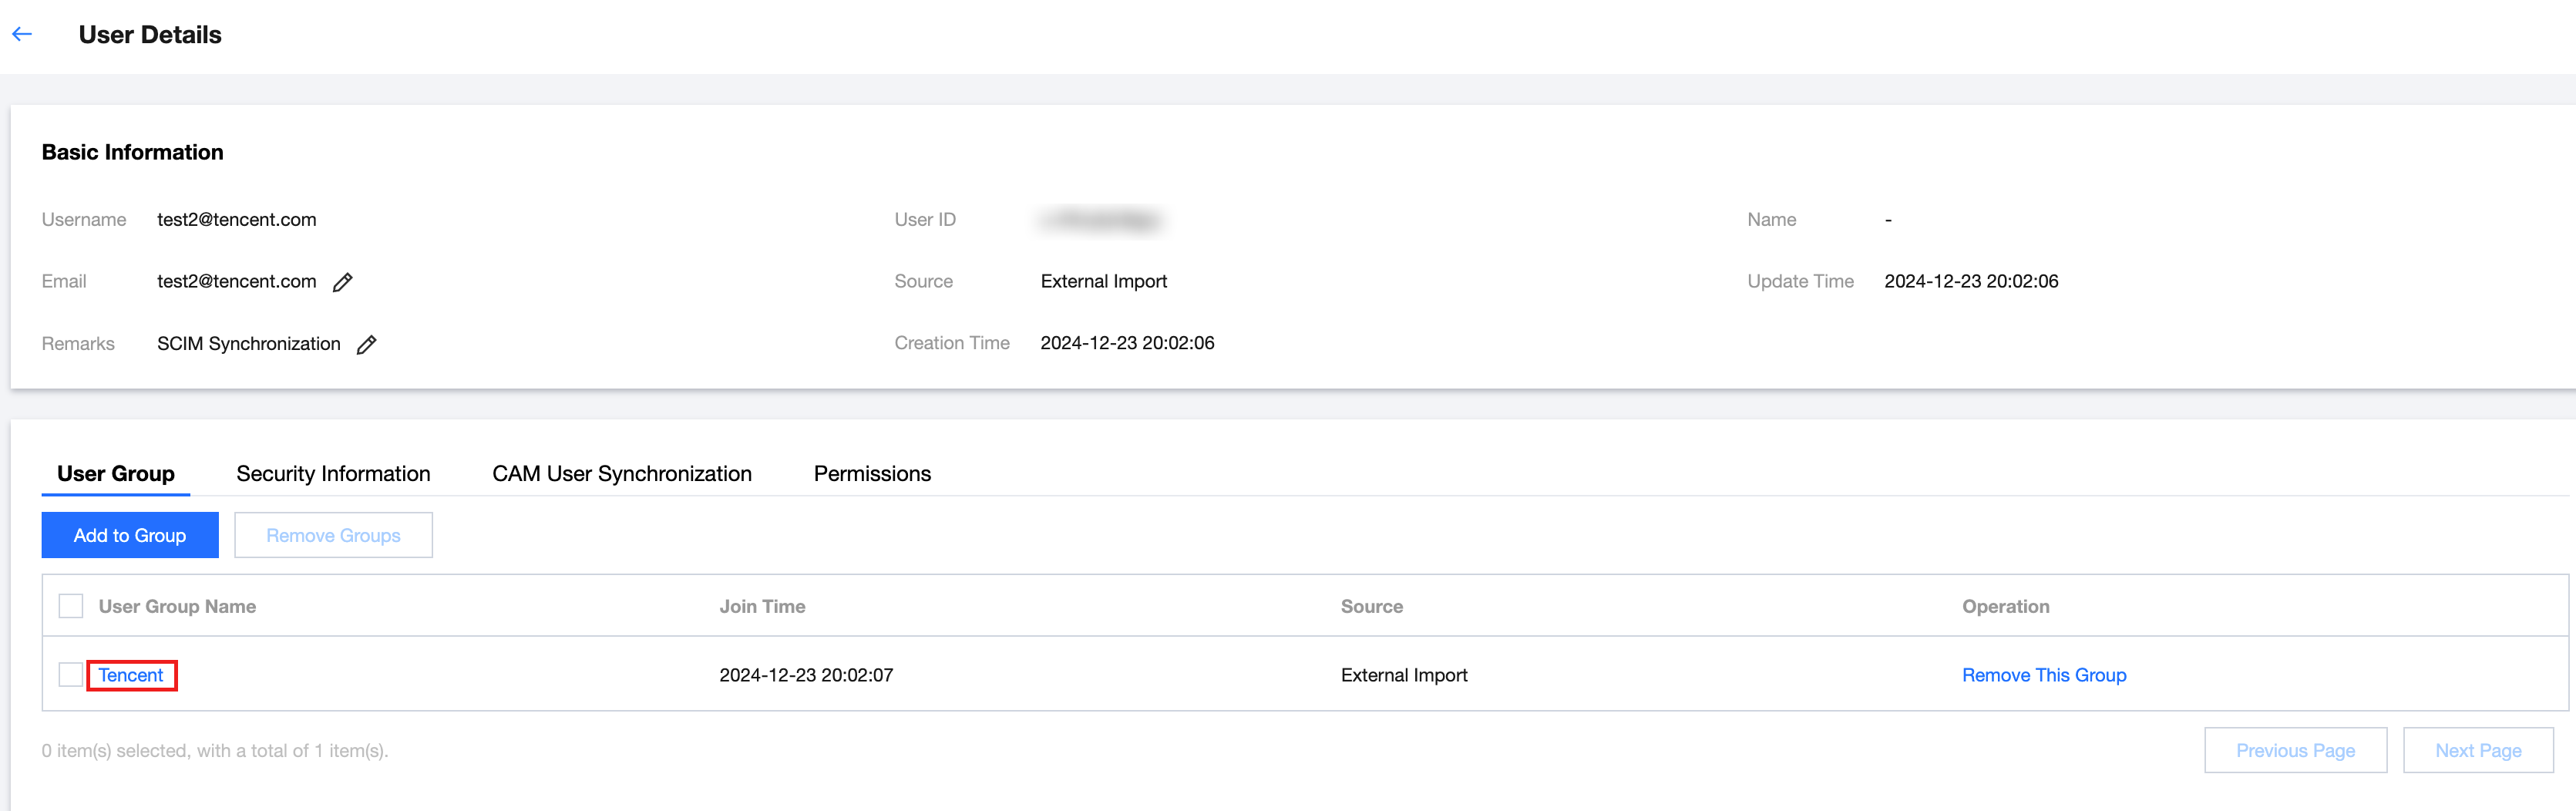
3. The waiting state changes from Provisioning to Provisioned, indicating synchronization successful.

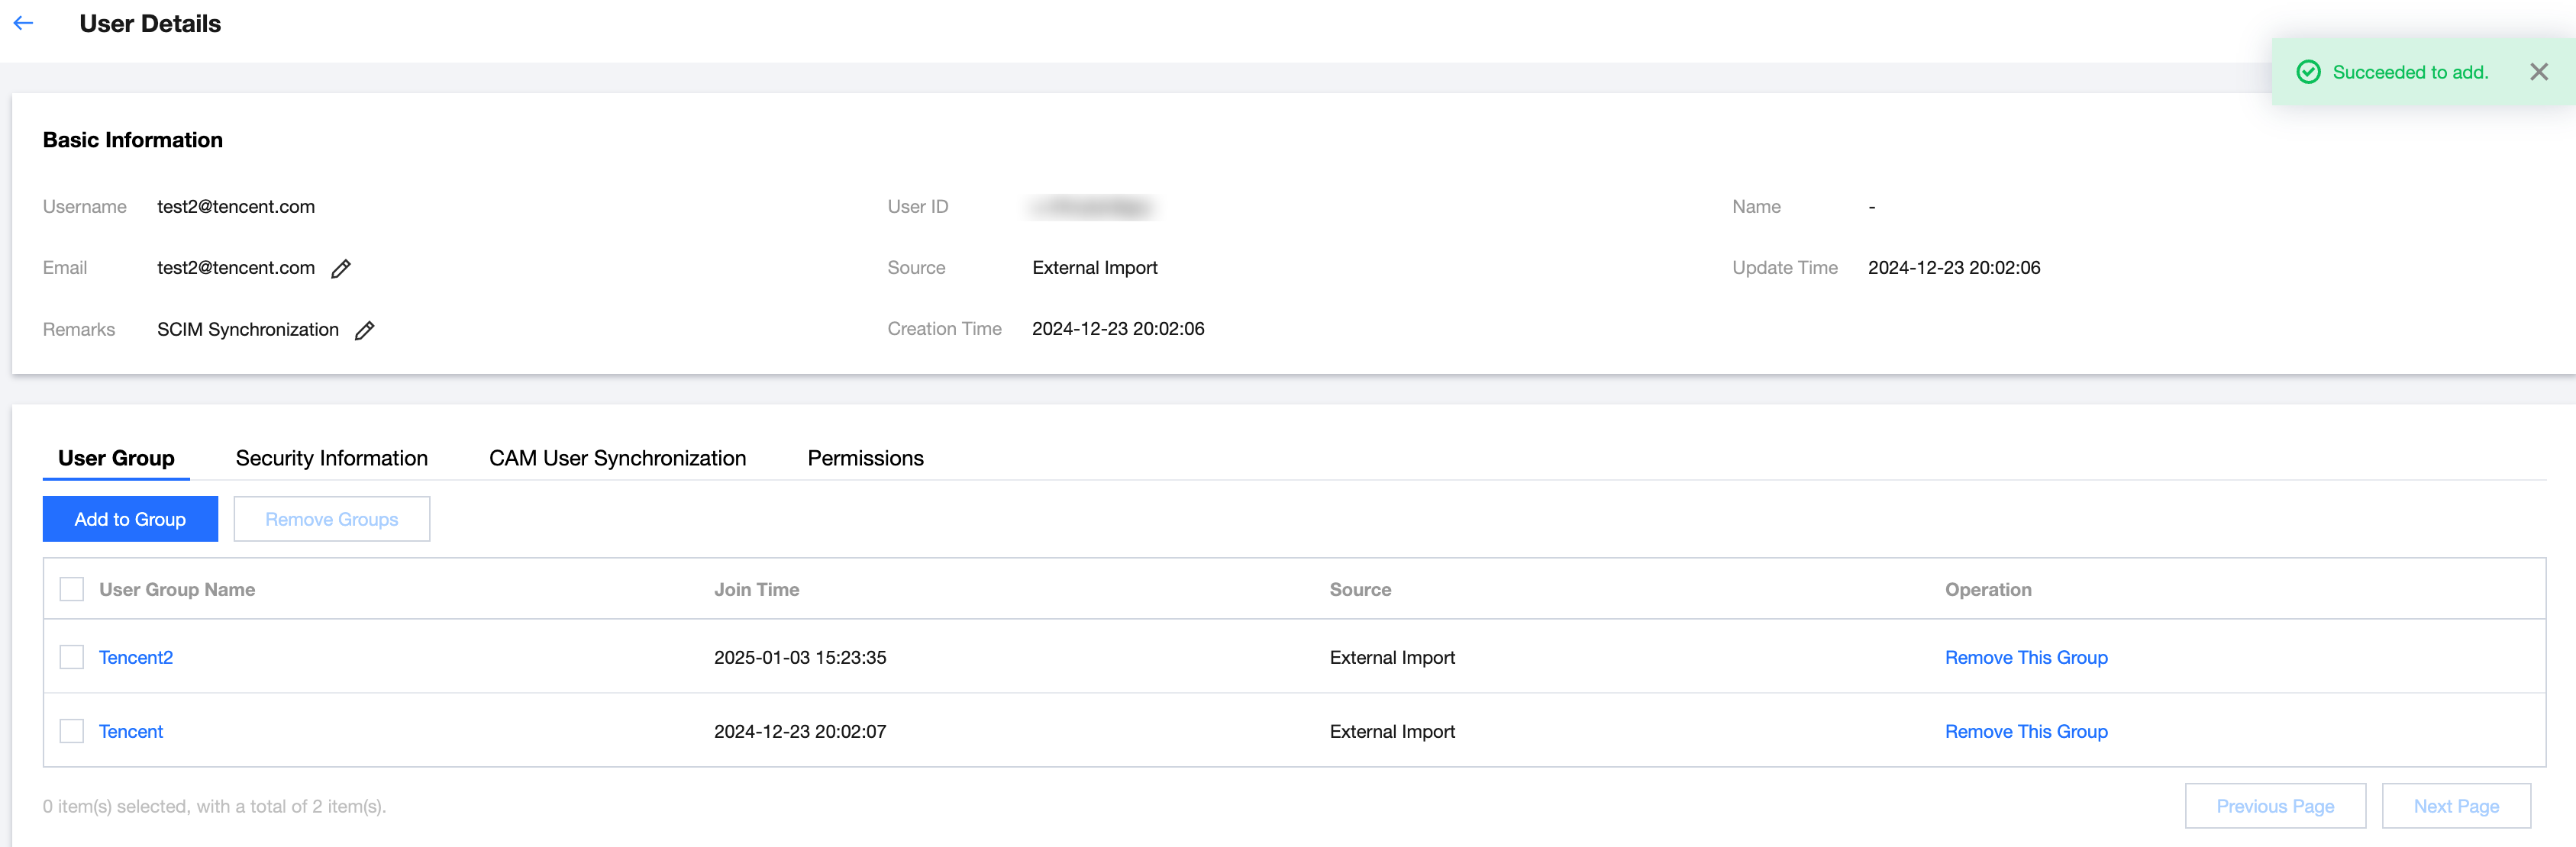
4. Check the result in Identity Center > User Management > User, on the user detail page of test2, you will see the joined user group Tencent.
Method 2 Adding Users to the Group in the Identity Center
1. In Identity Center > User Management > User, on the user detail page of test2, click Add to Group.

2. Select any user group, click OK.
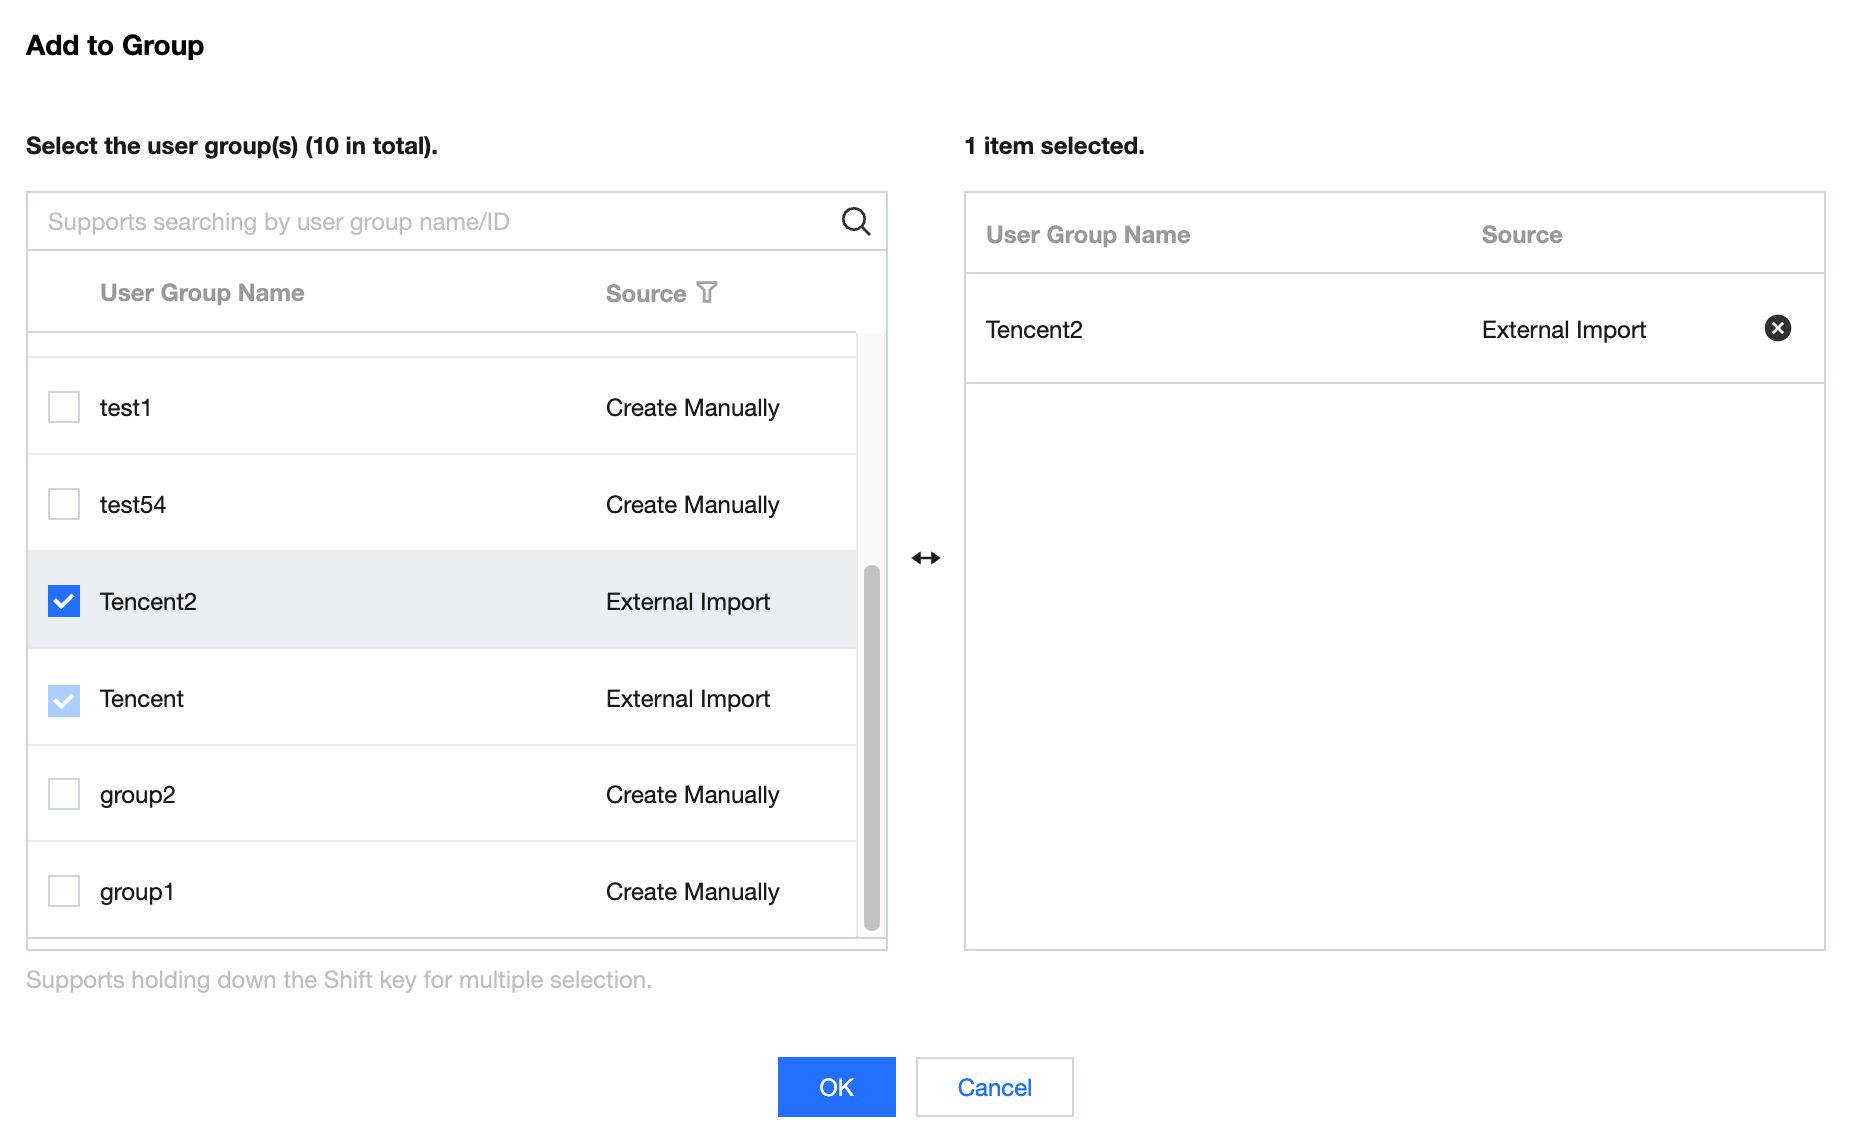
3. Successfully added, view in the user group on the user detail page.
Bantuan dan Dukungan
Apakah halaman ini membantu?
Anda juga dapat Menghubungi Penjualan atau Mengirimkan Tiket untuk meminta bantuan.
masukan