A style separator is a character that separates the filename and the processing style. The separator can be a hyphen (-), underscore (_), slash (/), or exclamation mark (!).
Directions
1. Log in to the CI console and click Bucket Management in the left sidebar.
2. Click the name of the desired bucket (e.g., buckettest) to go to the bucket management page.
3. Select the Image Processing tag. Then, click Basic Processing, find the Style Separator area, and click Edit to select one or more style separators.
4. Click Save.
Instructions
URL format: http:// Bound domain/Filename + Separator + Style name
Assume that you have selected the exclamation (!) as the separator, the style name is yunstyle, and the input image’s fileid is sample.jpg. The URL of the stylized image will be http://space.image.com/sample.jpg!yunstyle. If a signature needs to be carried, the URL will be http://space.image.com/sample.jpg!yunstyle?q-sign-algorithm=<signature>, where /sample.jpg!yunstyle will be used to calculate the signature <signature>.
Note:
You can set up to 100 styles for each bucket.
To avoid ambiguity, do not use separators in style names.
The settings take effect in about 30 minutes on average.
Changing separators requires purging the cache. It takes at least 24 hours for separator changes to take effect for both public and private networks.
Canceling a separator used may cause product feature malfunctions.
Style Management
Style management allows you to preview, edit, delete, or export a style. You can also import a style or use the visualization method to add a style.
Style overview
You can set styles for images in the bucket to manage images as needed. A style is an alias of a set of parameters that process images in real time upon download.
Adding styles
You can import styles in batches using an import rule. Alternatively, you can add styles using the visualization method.
The following describes how to add styles using the visualization method:
1. Log in to the CI console and click Bucket Management in the left sidebar.
2. Click the name of the desired bucket (e.g., buckettest) to go to the bucket management page.
3. Select the Image Processing tab. Then, click Basic Processing and find the Style Management area.
4. Click Add Styles to edit the style as instructed below.
Style Name
Style names are case-sensitive.
To avoid ambiguity, do not use separators in style names.
Once saved, a style name cannot be modified.
Editing Mode
Basic: You can set the style using the visualization method.
Advanced: You can set styles using parameters. For more information, please see the API documentation of Basic Image Processing.
Basic editing mode
You can use the basic editing mode to set the resizing mode, progressive display effect, output format, output effect, text watermark, image watermark, and more.
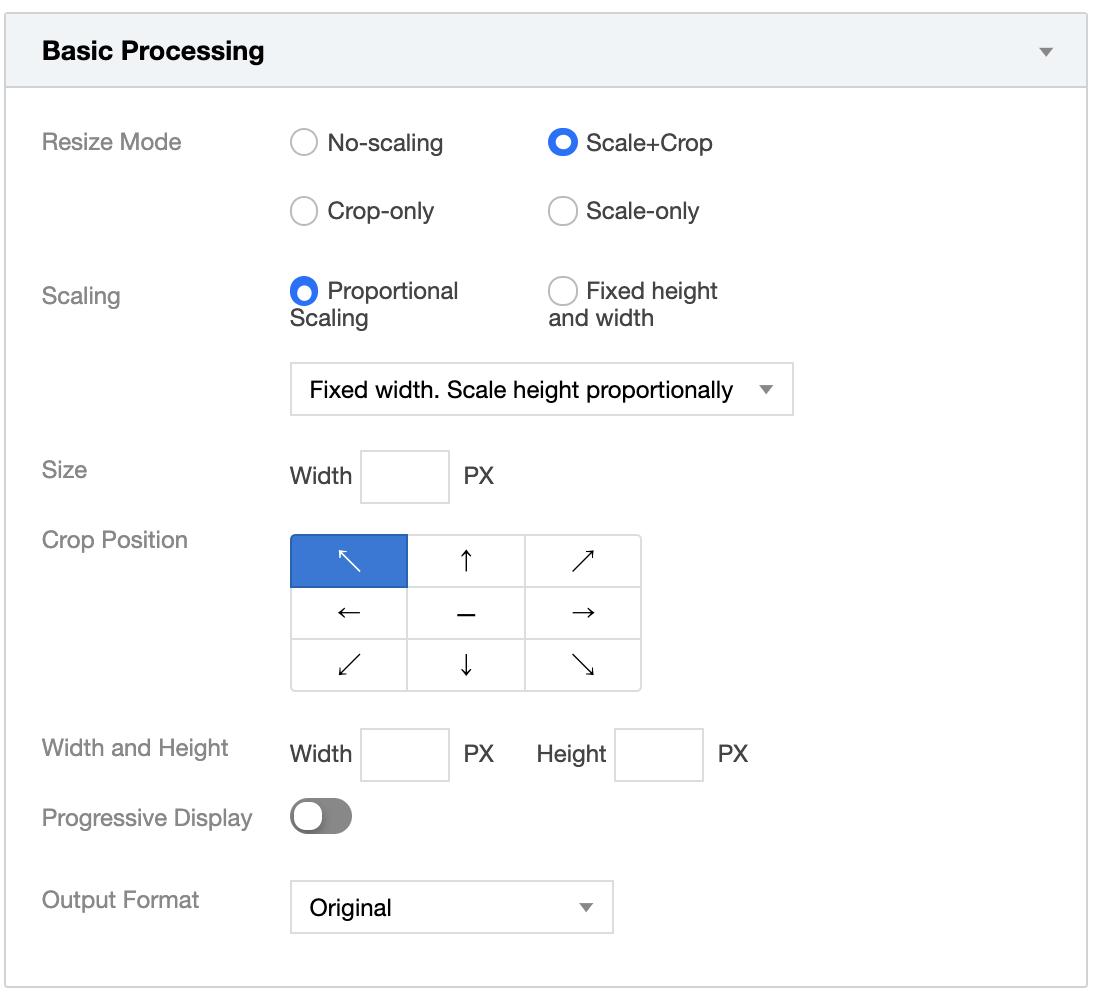
Basic processing
CI supports the scale+crop, crop-only, and scale-only resizing modes. Resizing is optional. Therefore, you can set it to No-scaling as needed.
Note:
CI’s scaling operation enlarges or shrinks images without stretching them.
Scale+crop
When the output image needs to be smaller than the input image and have a different aspect ratio, you can use the scale+crop mode to scale the image to the thumbnail size, and then crop it according to the specified crop position as well as the width and height. A 3x3 grid is used to decide the crop position.
Proportional scaling: scales an image according to the specified width without changing the original aspect ratio.
Fixed height and width: scales an image according to the specified width and height. For example, if the input image resolution is 1200×900 and the thumbnail resolution is 600×600, the input image is first cropped according to the thumbnail aspect ratio (that is, 600:600 or 1:1) to 900×900, and then scaled down to the target resolution of 600×600.
Crop-only
The crop-only mode crops the input image according to the specified crop position and thumbnail size. A 3x3 grid is used to decide the crop position.
Assume that you set the crop position to center and the thumbnail resolution to 600×600. Then, the image is cropped starting from the center of the input image, and 300 pixels at each direction along the horizontal axis and vertical axis will be retained to form a 600×600 thumbnail.
Scale-only
The scale-only mode scales the image according to the specified resolution.
Scale proportionally: scales the image according to specified width without changing the original aspect ratio.
Fixed height and width: scales the image according to the specified width and height, with the original aspect ratio ignored.
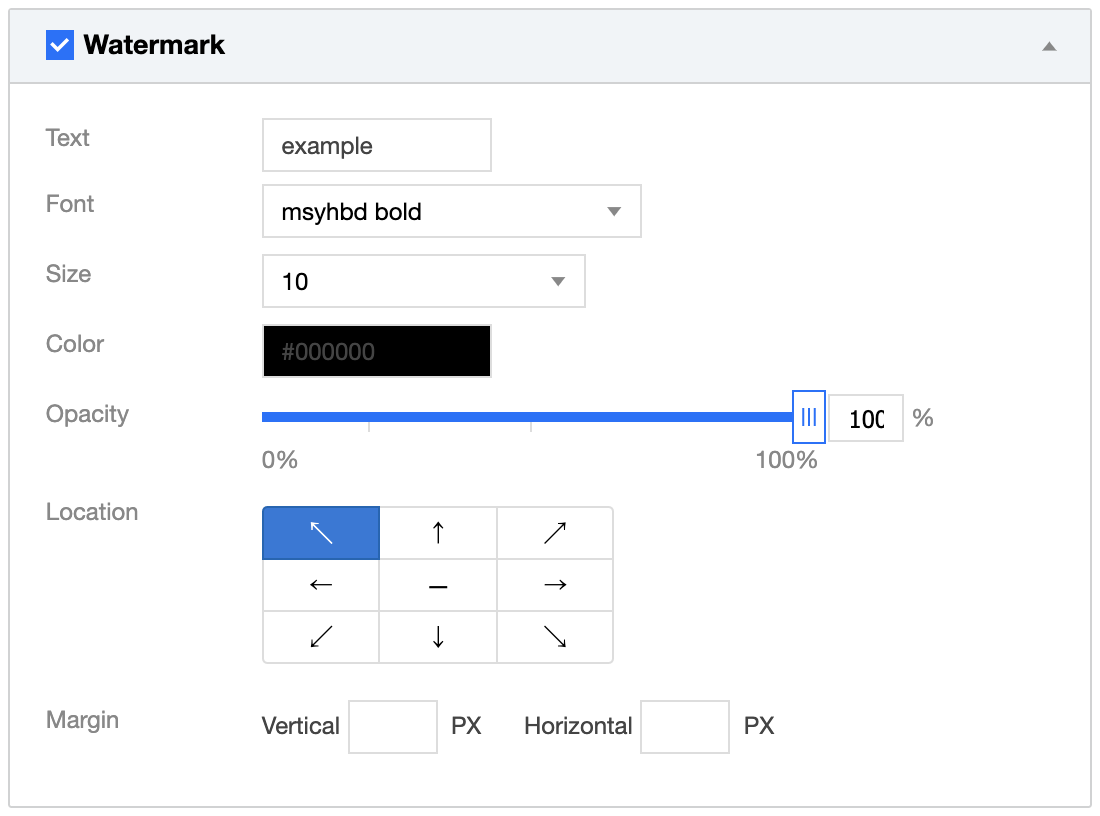
Text watermark
You can add a text watermark with the text, font, font size, color, and opacity specified. A 3x3 grid is used to decide the watermark position.
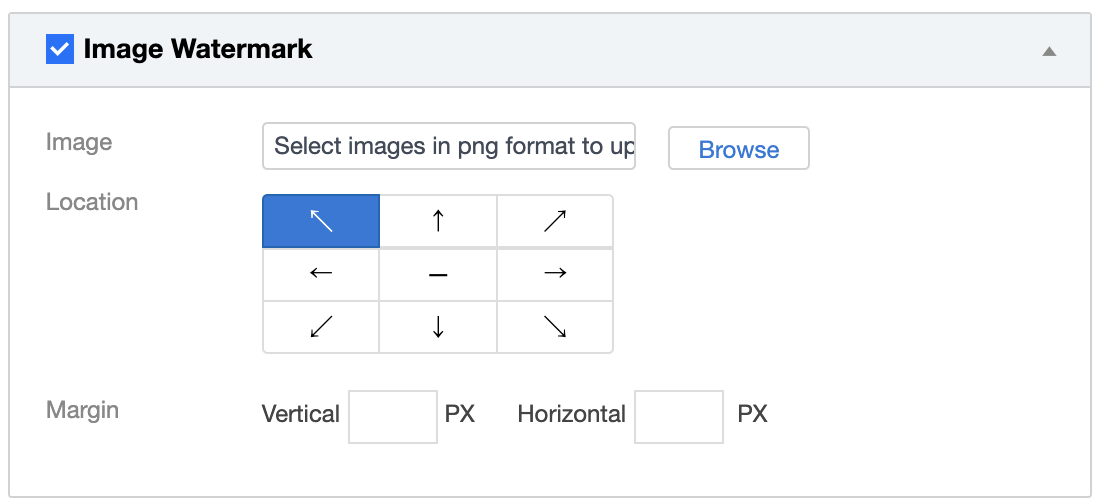
Image watermark
You can overlay an image watermark over the input image. A 3x3 grid is used to decide the watermark position.