Purchase Methods
ダウンロード
フォーカスモード
フォントサイズ
Purchasing in Console
1. Log in to the Lighthouse purchase page and configure the following information as prompted:
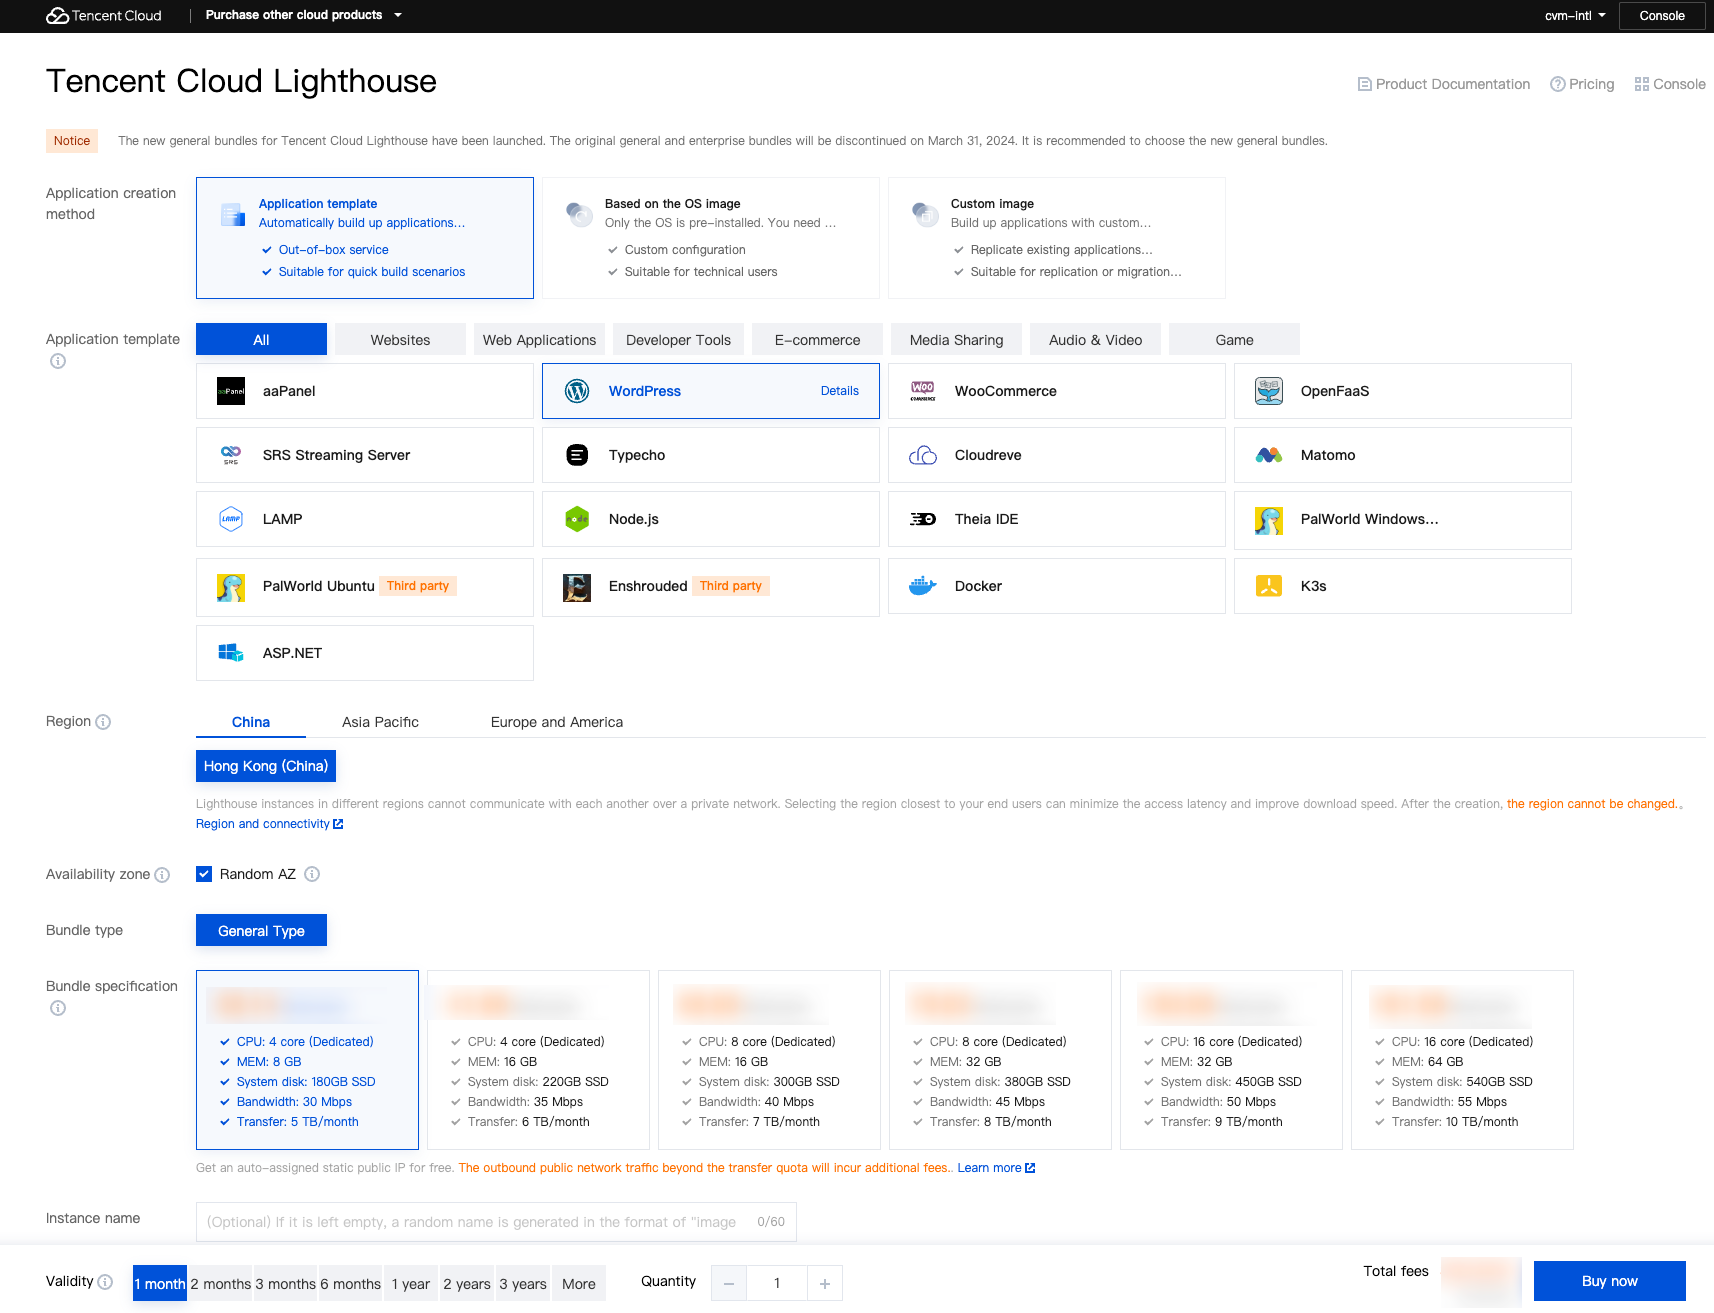
Region: We recommend you select the region closest to your end users to minimize the access latency and improve the access speed.
Availability zone: Randomly assigned is selected by default. You can select one as well.
Note:
Instances in the same region can communicate with each other over the private network. For applications with high disaster recovery requirements, deploy Lighthouse instances to different AZs in the same region to ensure fault isolation. Note that it may cause a higher communication latency.
After creating an instance, you cannot change its AZ.
Image: You can choose application images, system images, Docker images, custom images, and shared images. For more information, see Image.
Instance bundle:Different bundles have different specifications of CPU, memory, SSD storage, bandwidth, and data transfer package. For more information, see Basic Bundle Overview.
Instance name: Enter a custom instance name. If it is left empty, the selected image name will be used as the name by default. When multiple instances are created in a batch, their names will be consecutive with auto-incrementing suffixes. For example, if you enter "LH" as the name and select 3 as the quantity, 3 instances "LH1", "LH2", and "LH3" will be created.
Login method: If you select a Windows image, you can use this option to set the login password of the instance:
Set password: Set the custom password for instance login.
Random password: The system sends an automatically generated password to your Message Center.
Purchase period: It indicates the validity of the Lighthouse instance.
Note:
You can select Auto-renew the device every month when my account has sufficient balance to enable the auto-renewal feature. After successfully creating an instance, you can modify the current auto-renewal settings as instructed in Auto-Renewal.
Quantity: It indicates the number of Lighthouse instances to be purchased.
2. Click Buy now.
3. Make sure the configuration information is correct, click Submit order and make the payment as prompted.
After making the payment, you can enter the Lighthouse console to check your Lighthouse instance. Generally, it takes 1-3 minutes to create an instance.
フィードバック