Building a Voice Notification Agent
Download
フォーカスモード
フォントサイズ
Overview
This document aims to help you quickly start with AI Voice Agent and implement its application in outbound scenarios, providing process guidance from preparation to call data analysis. You can learn about product features through Introducing AI Voice Agent. This article includes the following content: preparation, simple notification scenario Intelligent Agent setup, outbound call task creation, and call data analysis.
Prerequisites
1. Before you start, you need to register a Tencent Cloud account and complete real-name authentication.
2. Login to Tencent Cloud and create a voice call application.
3. Before using the Intelligent Agent feature of Tencent Cloud Contact Center, you can purchase the Intelligent Agent service according to business needs.
4. An Intelligent Agent outbound call requires integration with a self-owned phone.
5. After completing application creation and purchase, enter the management console webpage.
Build a Simple Notification Scenario Agent
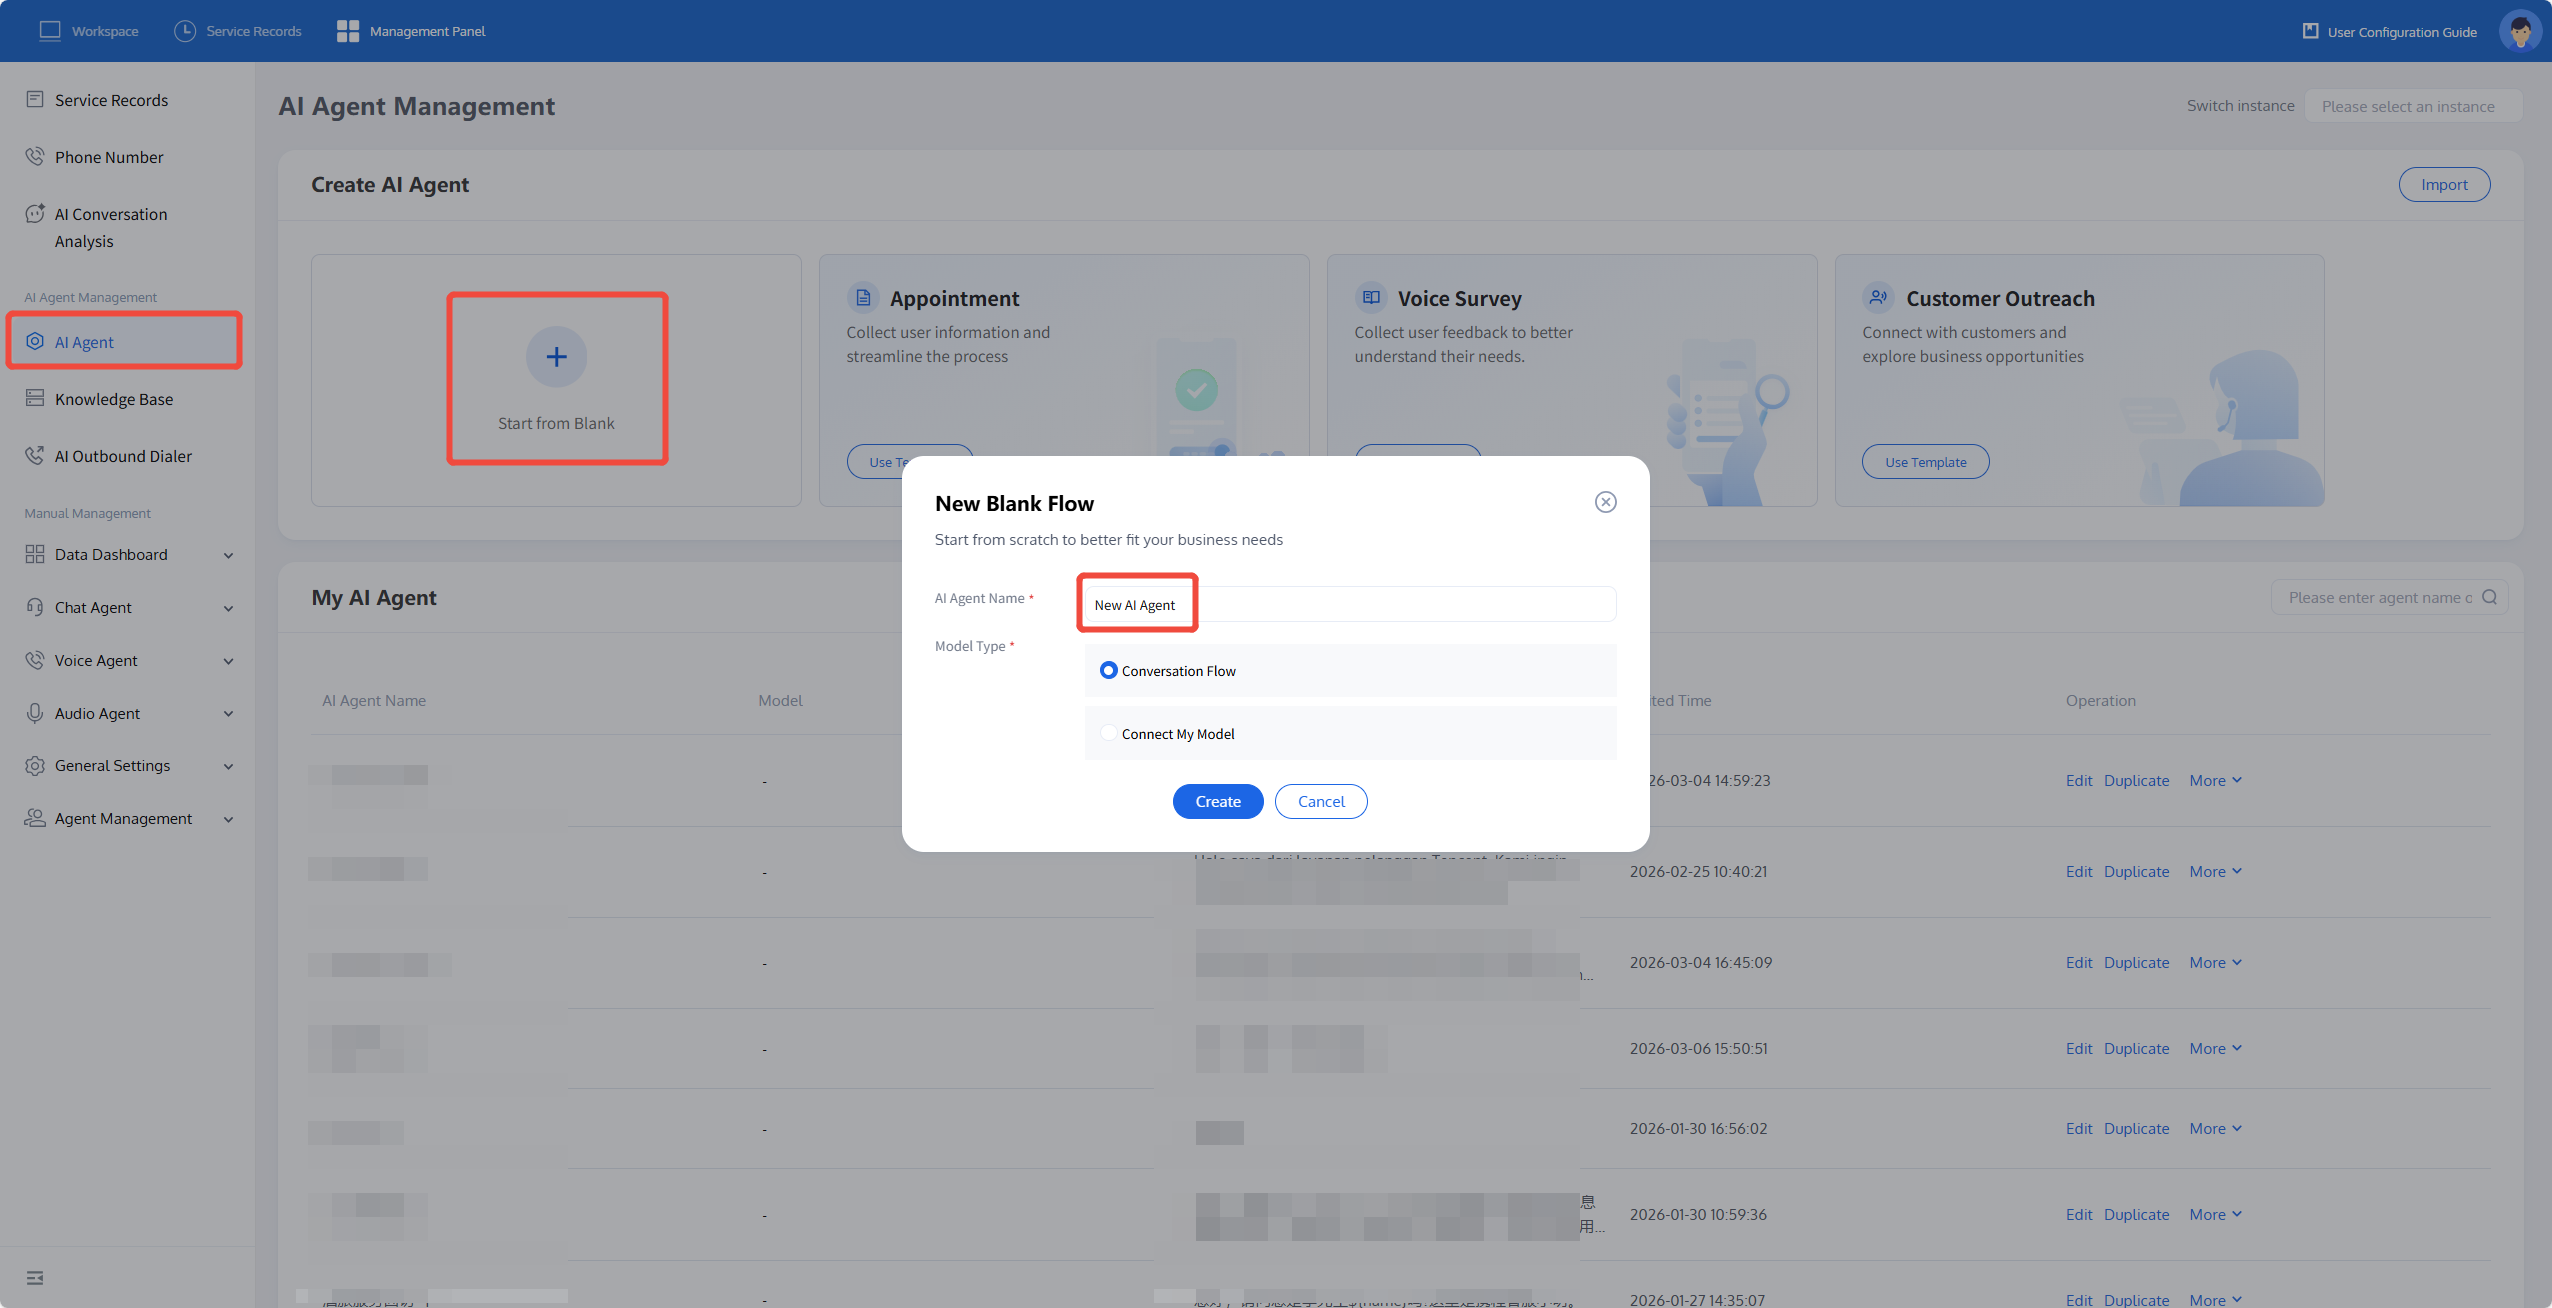
1. Create an AI Agent: Click AI Agent Management on the left side of the management console, then click Create a New AI Agent. Fill in the AI Agent name (for example: Simple Notification) in the pop-up. The system will automatically create a blank process canvas for you.
2. Next, take a logistics company notifying users of package arrival at the station as an example to build an AI Agent. Since this scenario does not require dialogue with users, just select fixed script.

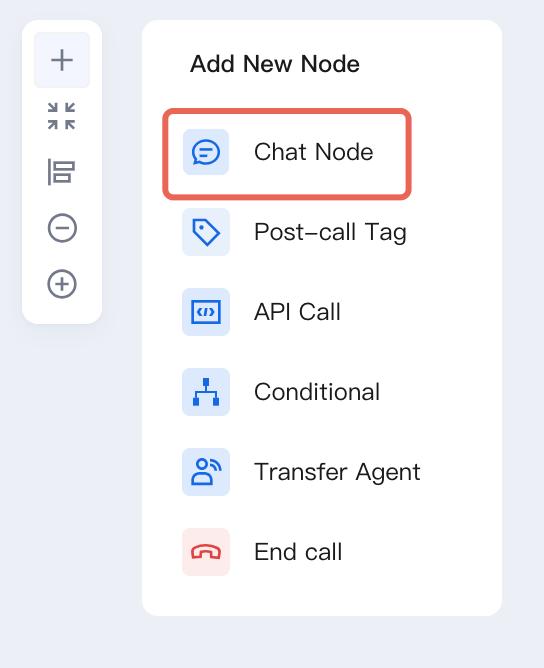
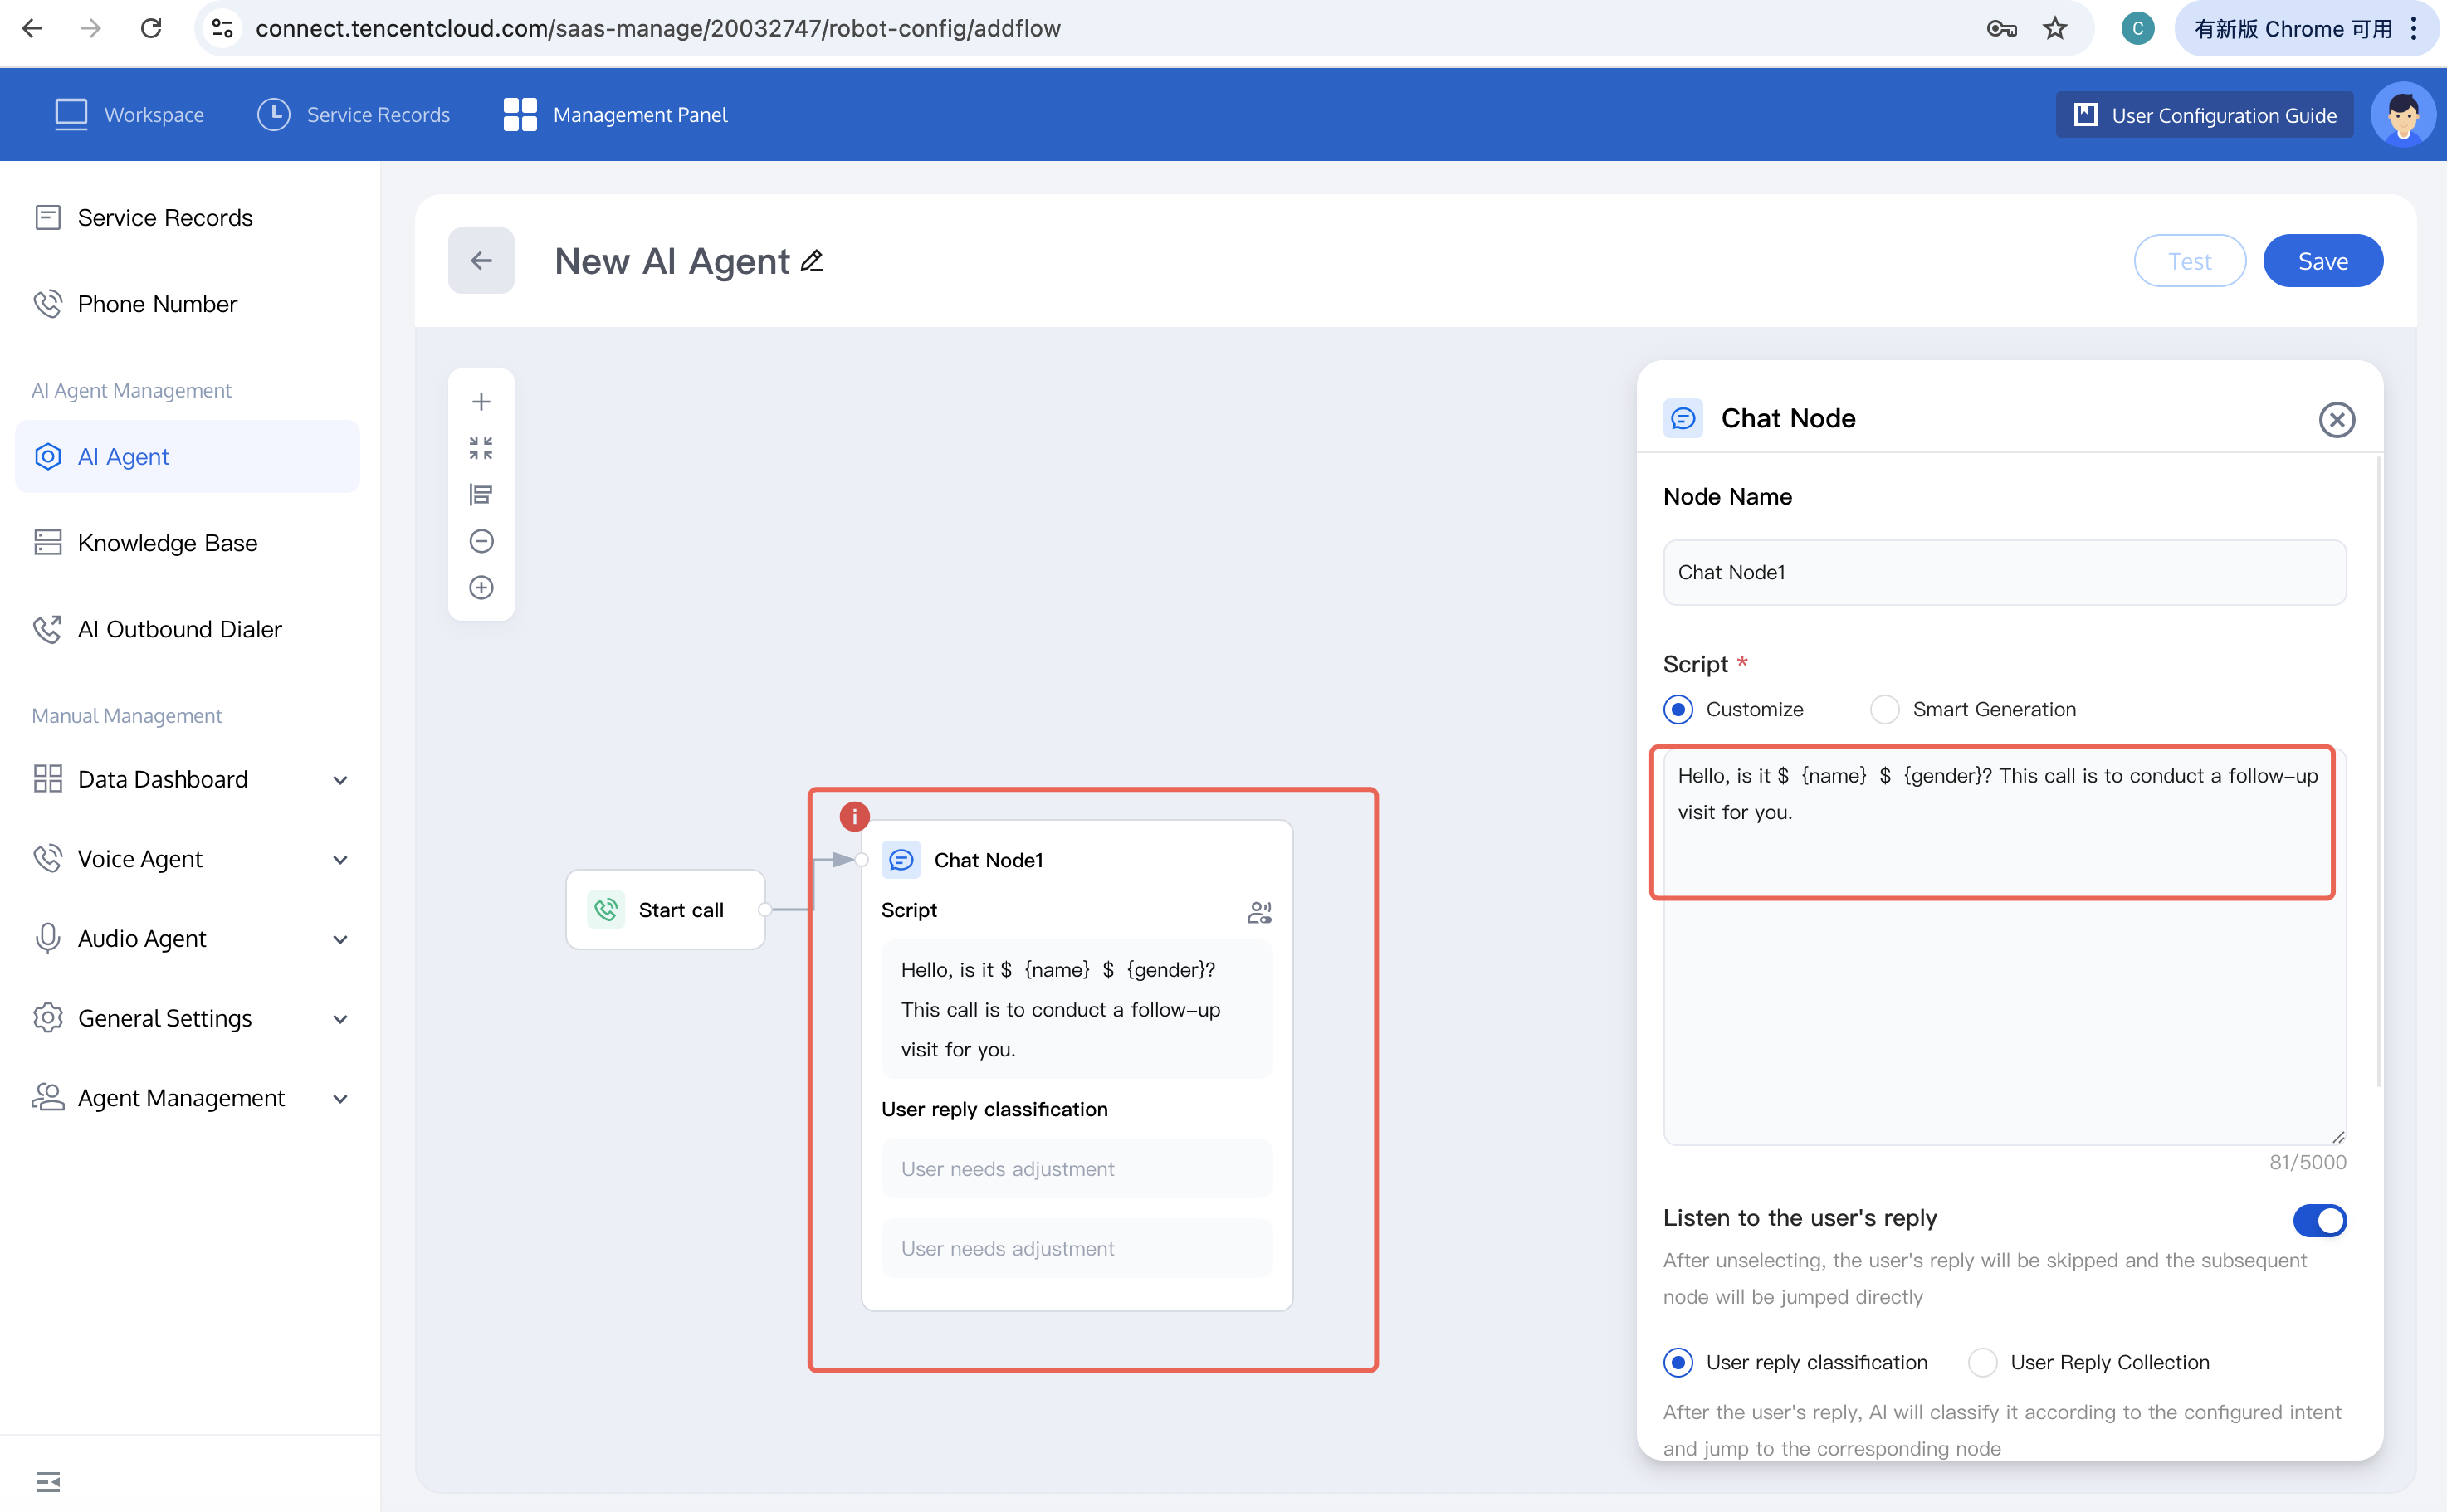
3. Click the plus sign in the top-left corner to add a dialogue node.
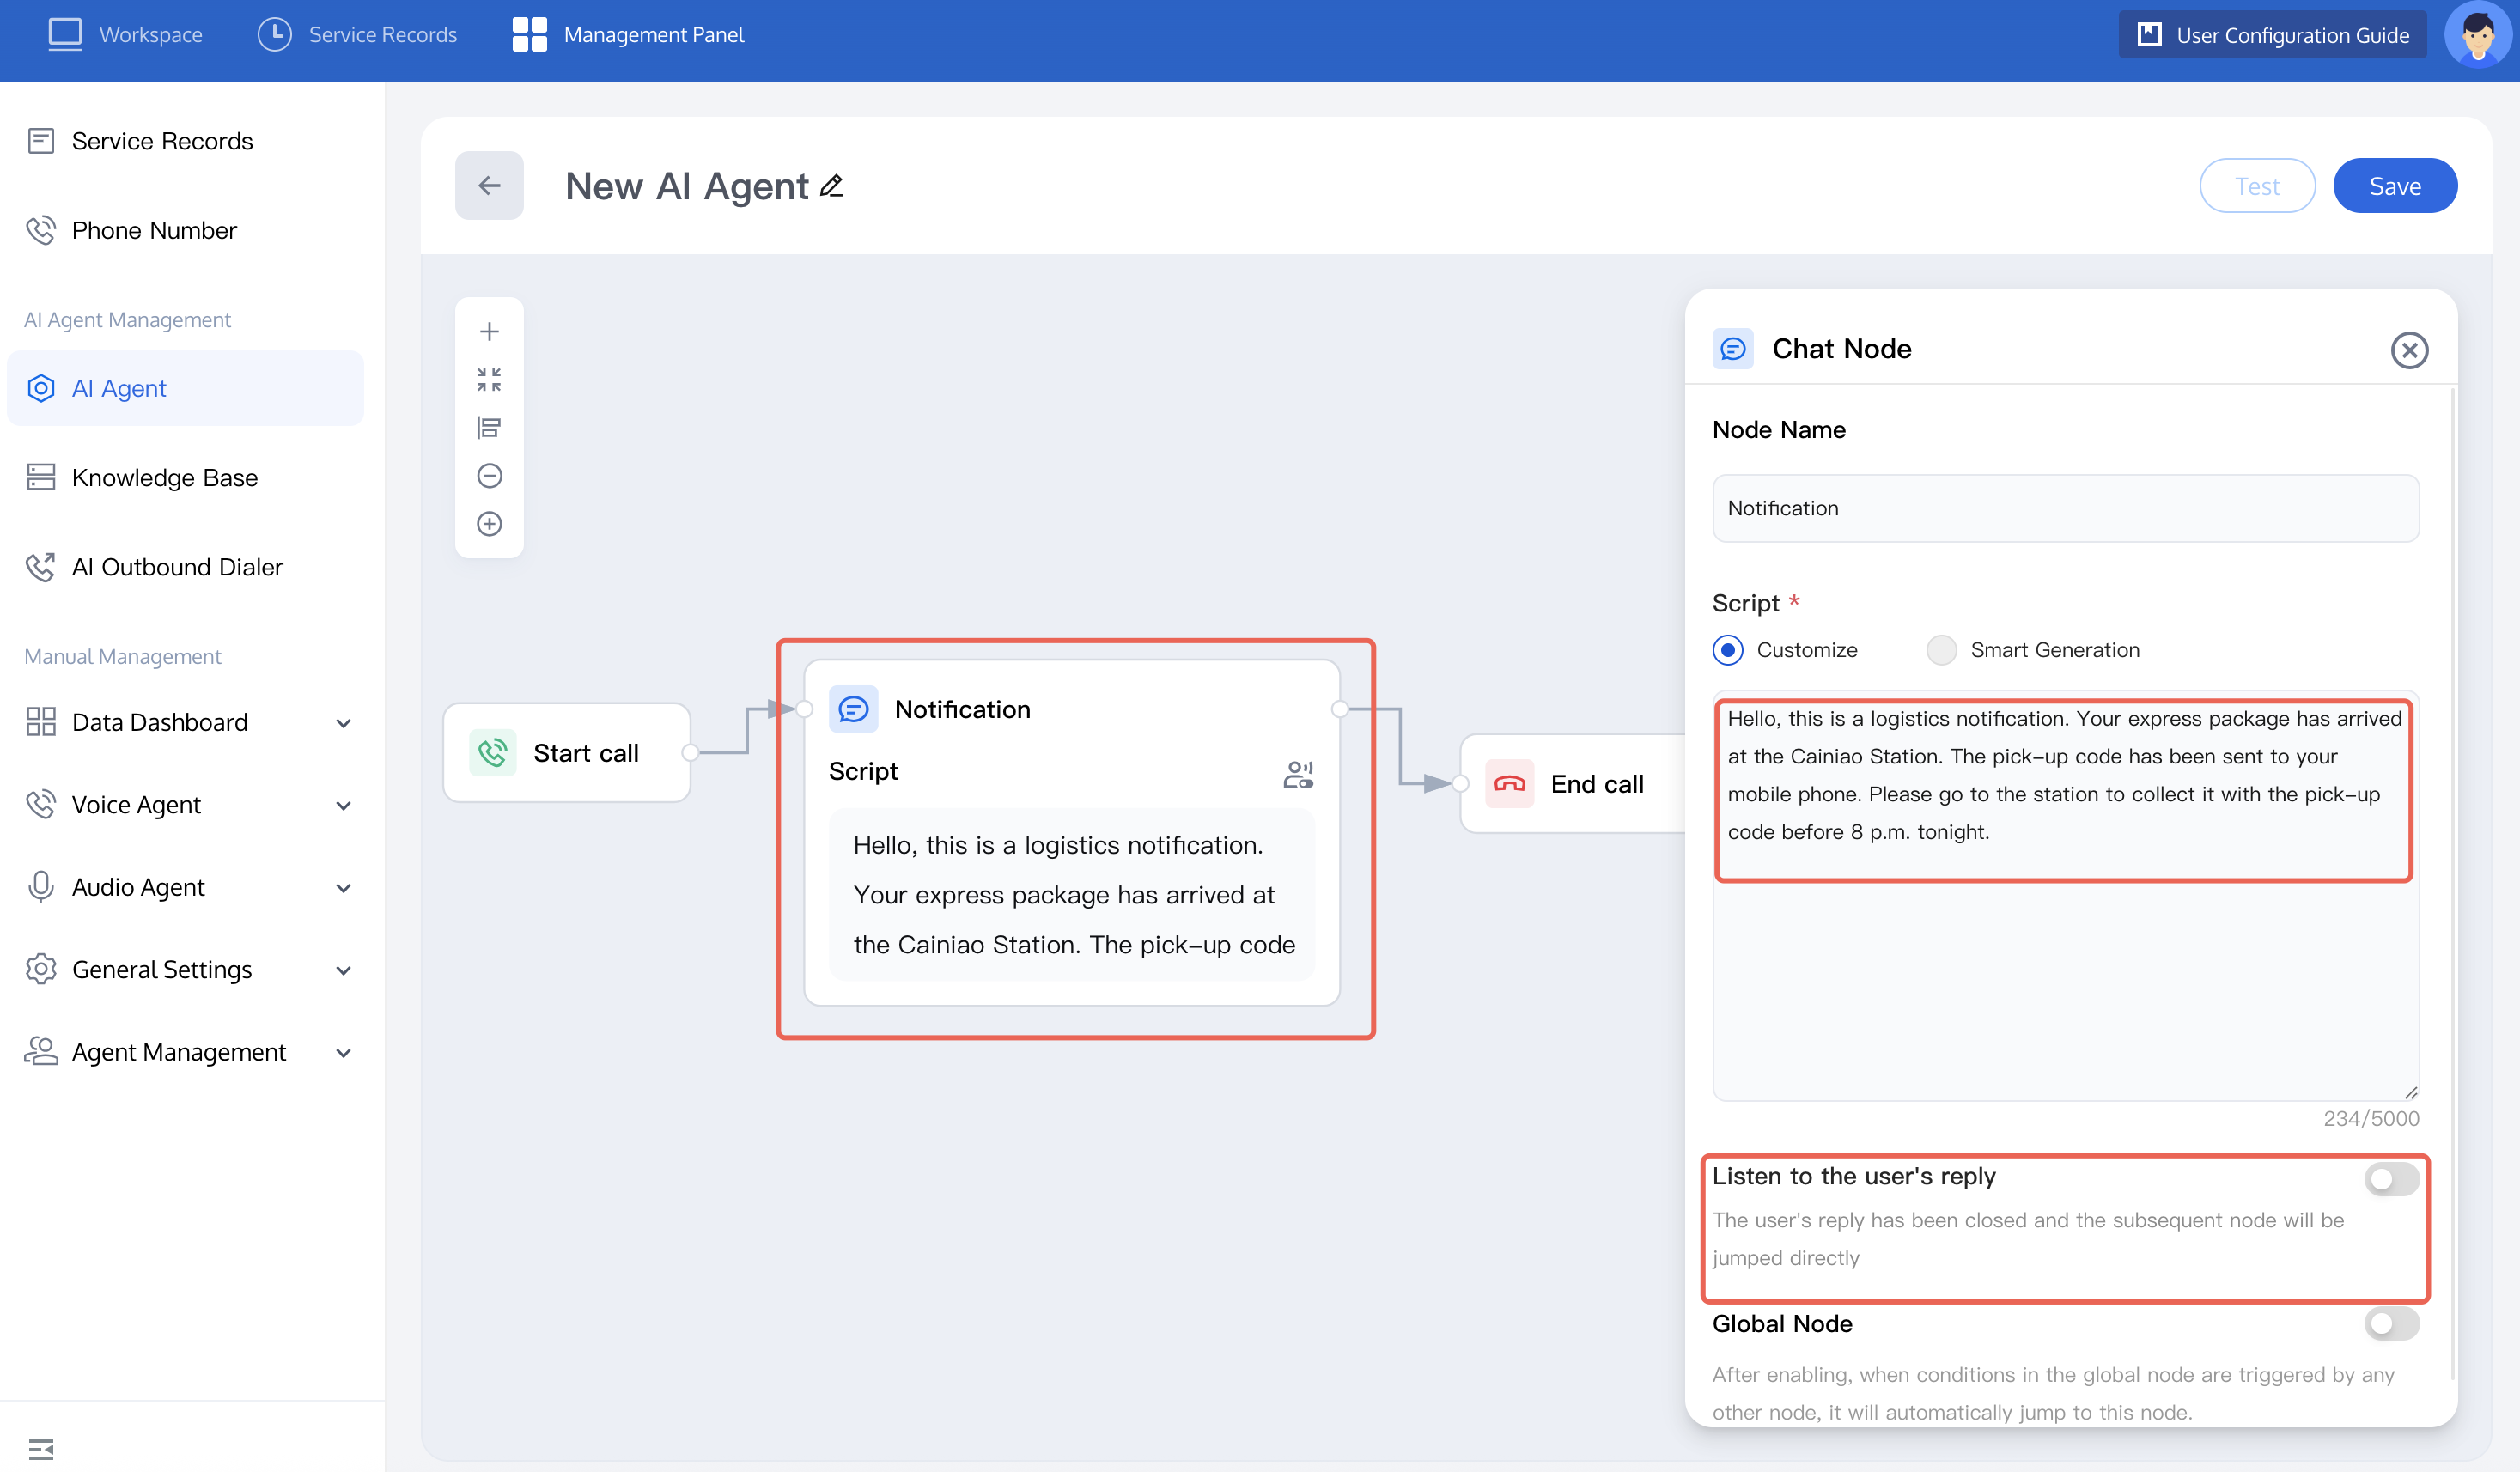
Refer to the image, input custom dialogue and set user reply category, connect the start a call node and the newly-added dialogue node, and turn off the listen to user reply button.
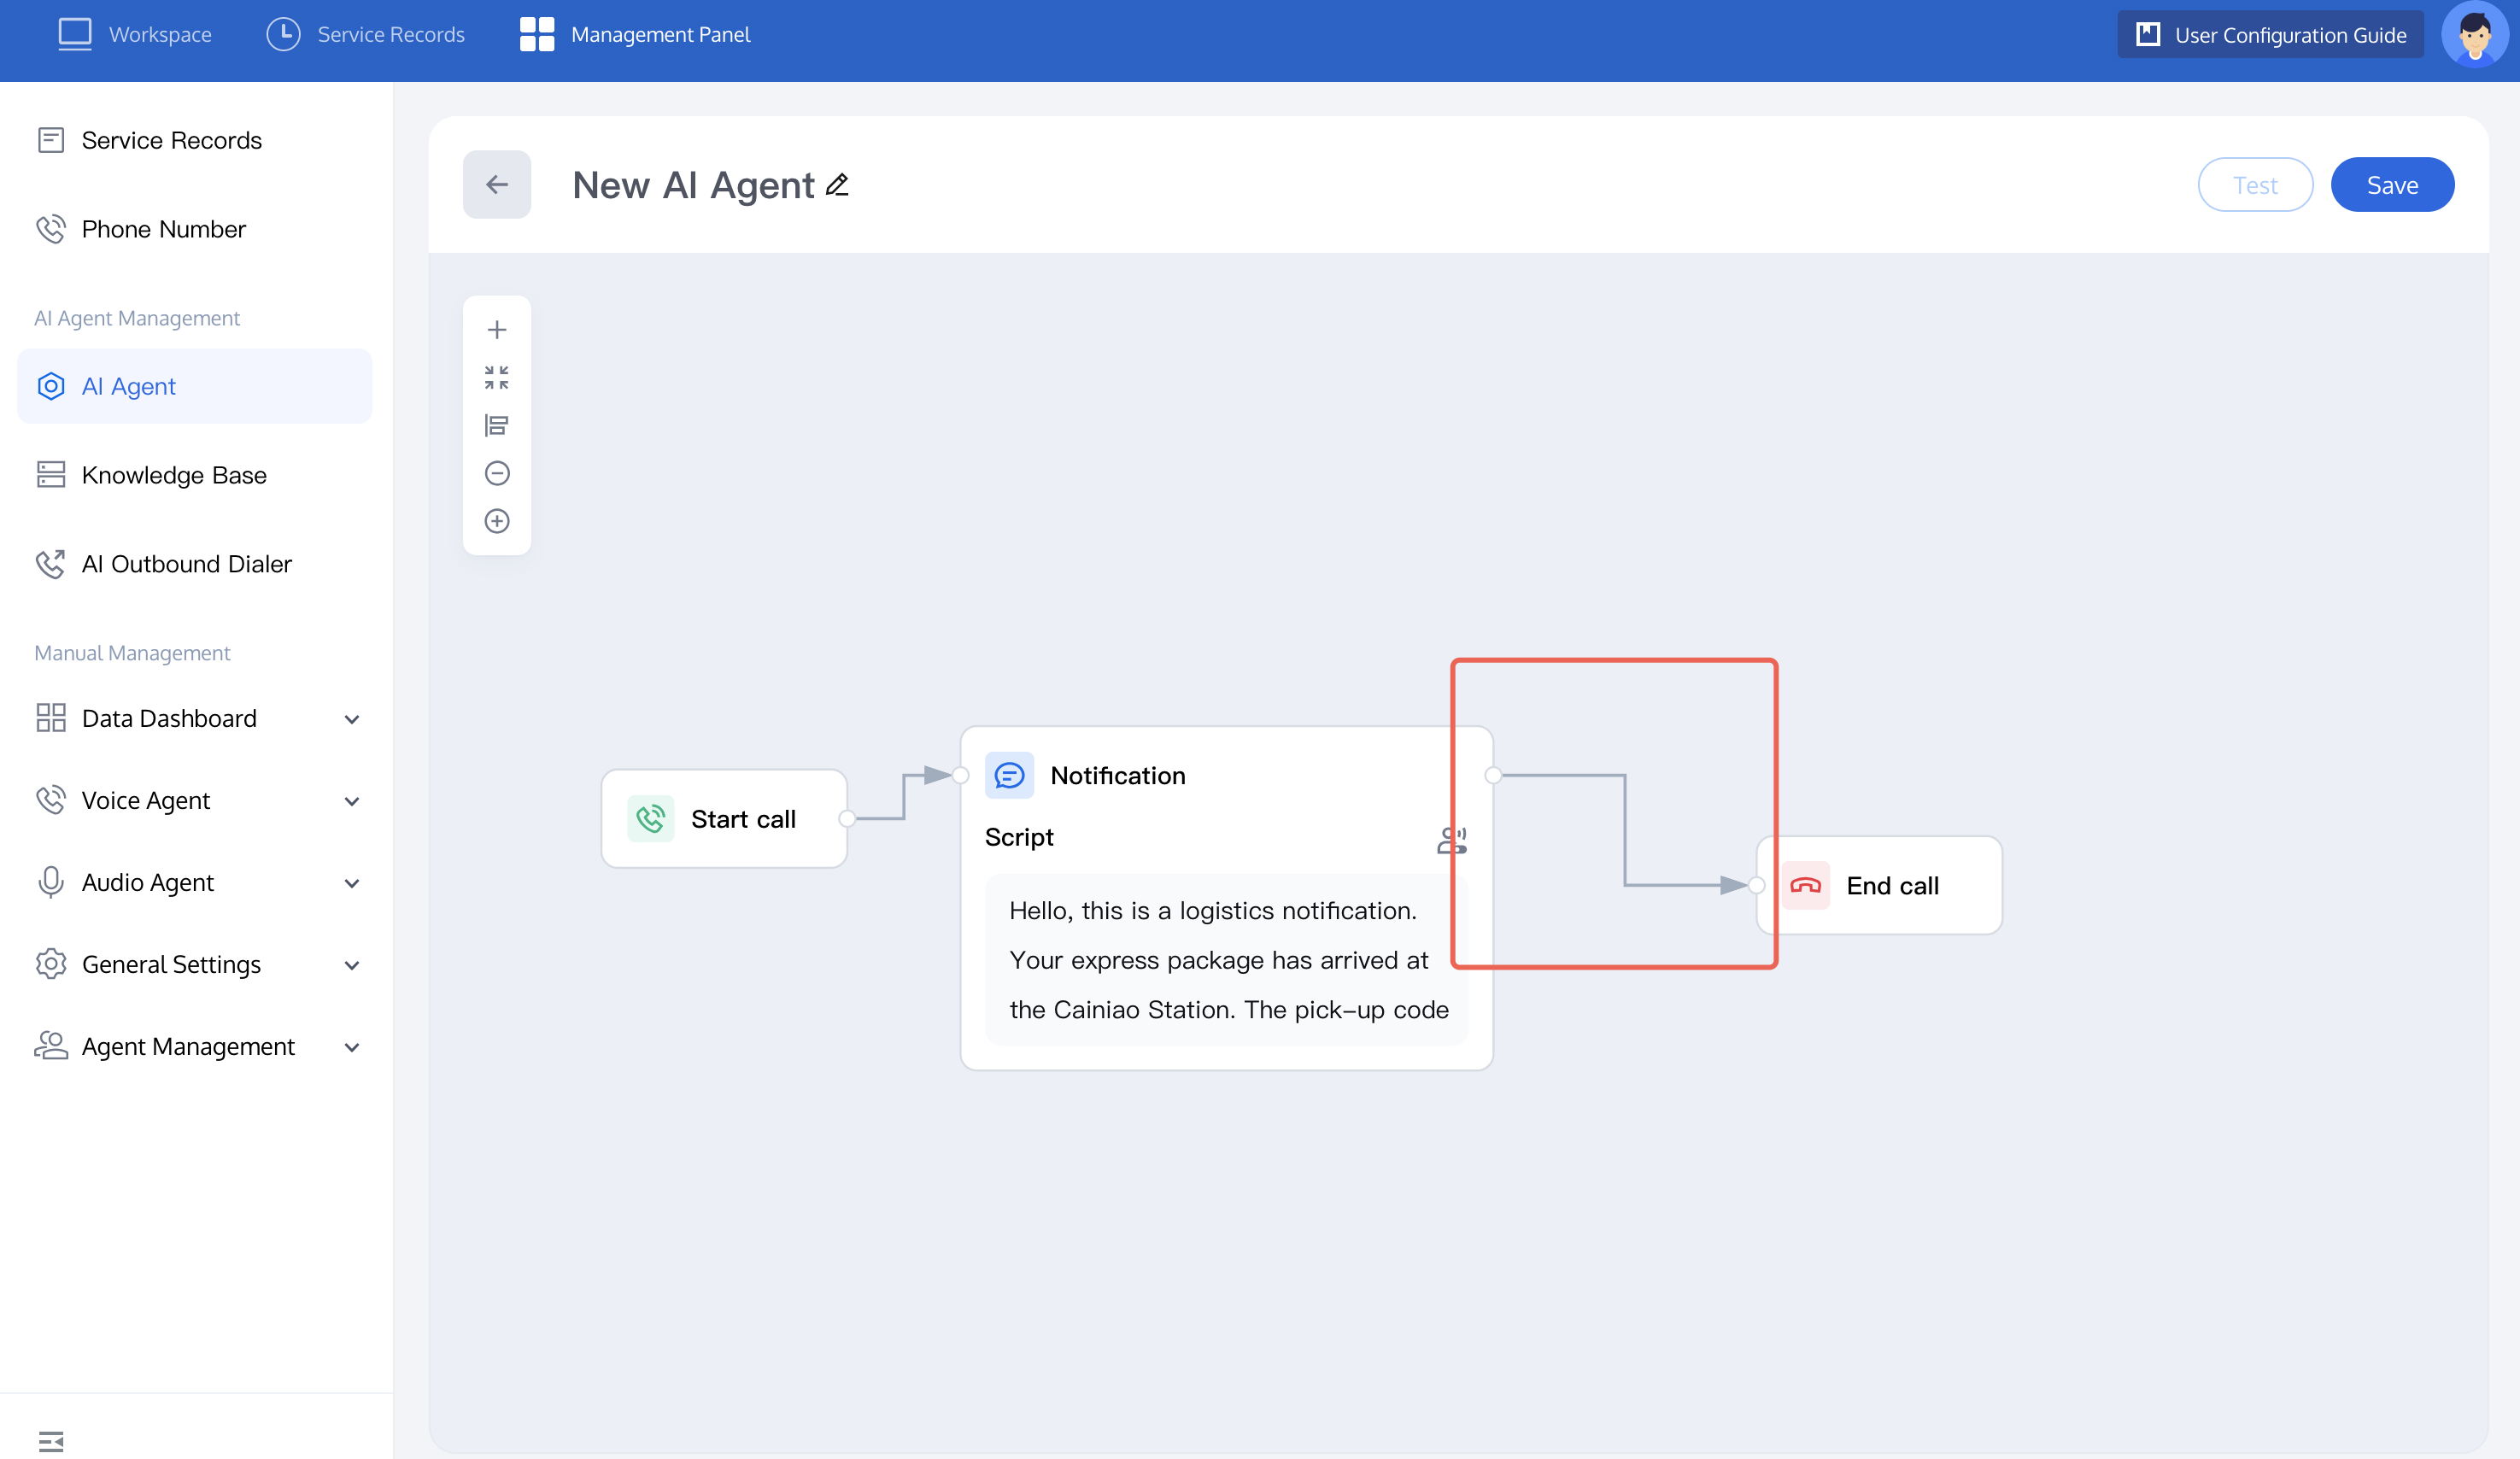
4. Click the plus sign in the top-left corner to add an End call node, then connect the user reply category and the End call node.
5. If you want to learn more about node functions, see node introduction. After completion, you can test the dialogue effect of this Intelligent Agent. For detailed operations, refer to test dialogue effect.
Create an Outbound Call Task
1. After creating a customer operation outbound call Intelligent Agent, you can create outbound call tasks according to business needs (Create a single Intelligent Agent call or Create a bulk automatic outbound call task).
2. Variable replacement: When uploading the called name list, you can provide personalized scripts for different users through setting variable columns, such as addressing users by surname and gender, like Mr. Li, Ms. Wang. When creating the Intelligent Agent, set the variable name you want to replace. The variable format is
${variable name}, such as ${name}, ${gender}. You can create different variables according to business needs.For detailed operations, refer to the figure below:
When editing the called name list, you need to enter variable name and variable value, such as
name: Li; gender: Mr..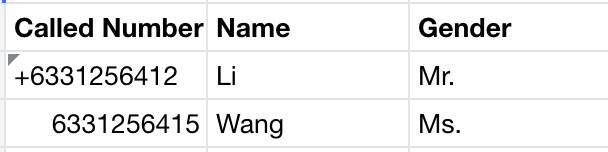
Effect: The broadcast script of the node is: Hello, is this Mr. Li? The inbound call is for a follow-up call.
Call Data Analysis
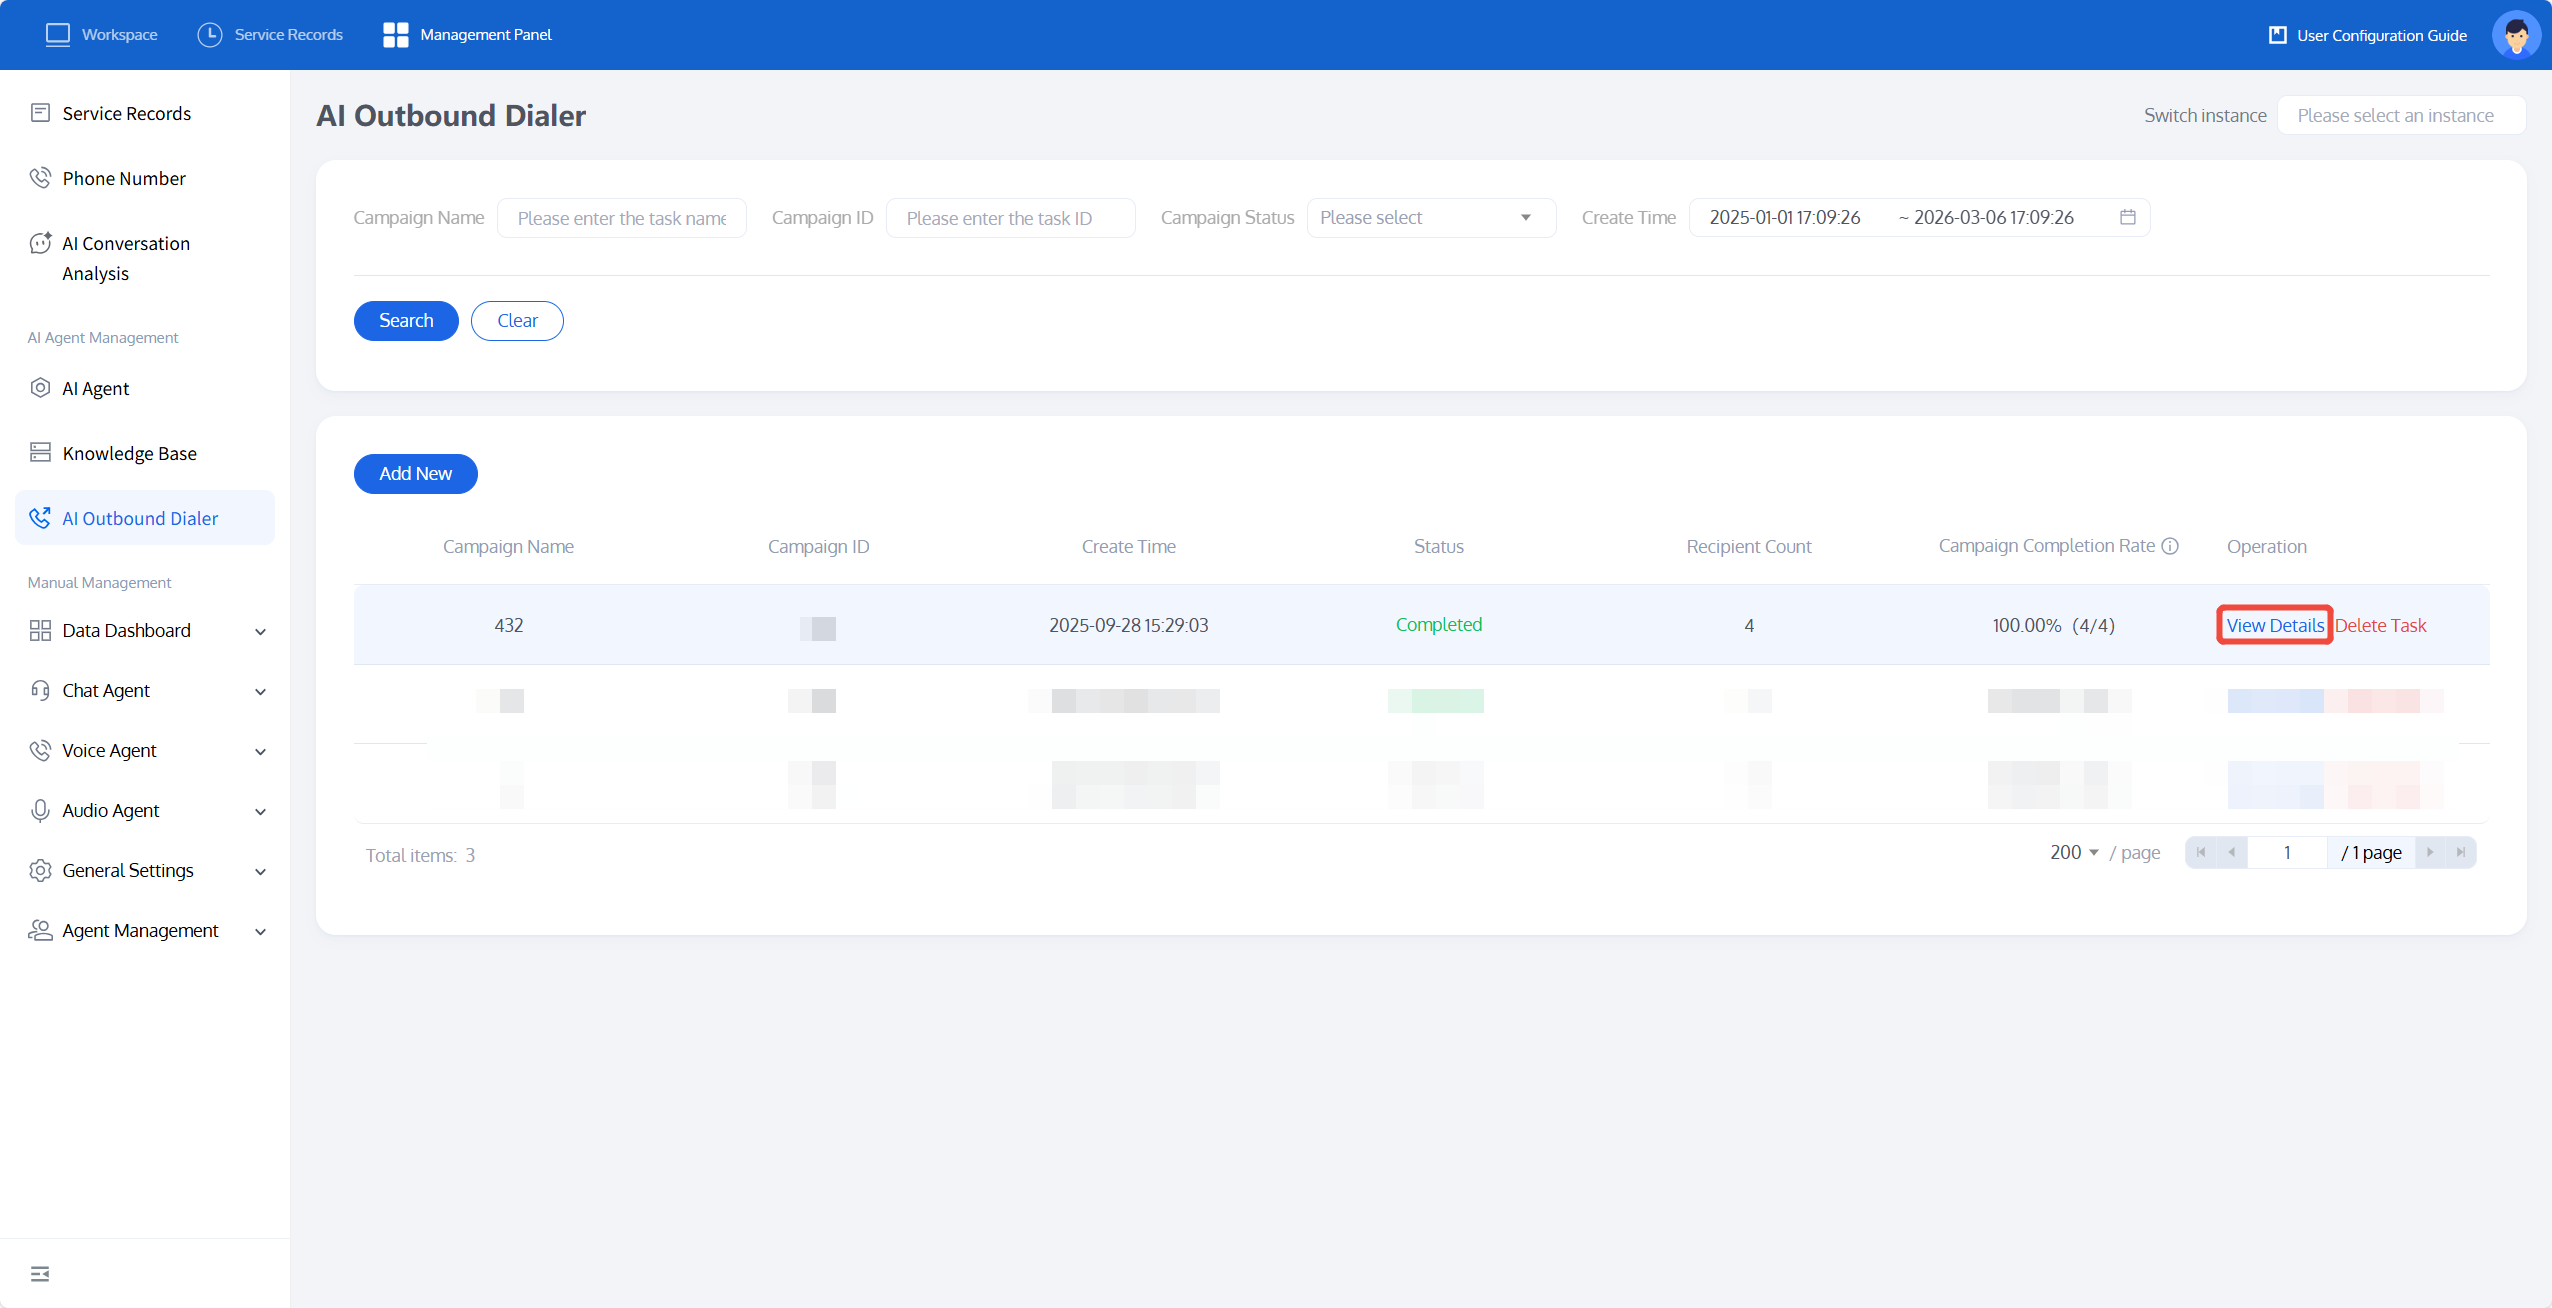
After creating and executing an Intelligent Agent outbound call task, you can view the dialogue data.
Click View Detail to enter and view the specific task detail.
You can see the connection rate of the outbound call task and the call status of each call, and locate the reason for unanswered calls.
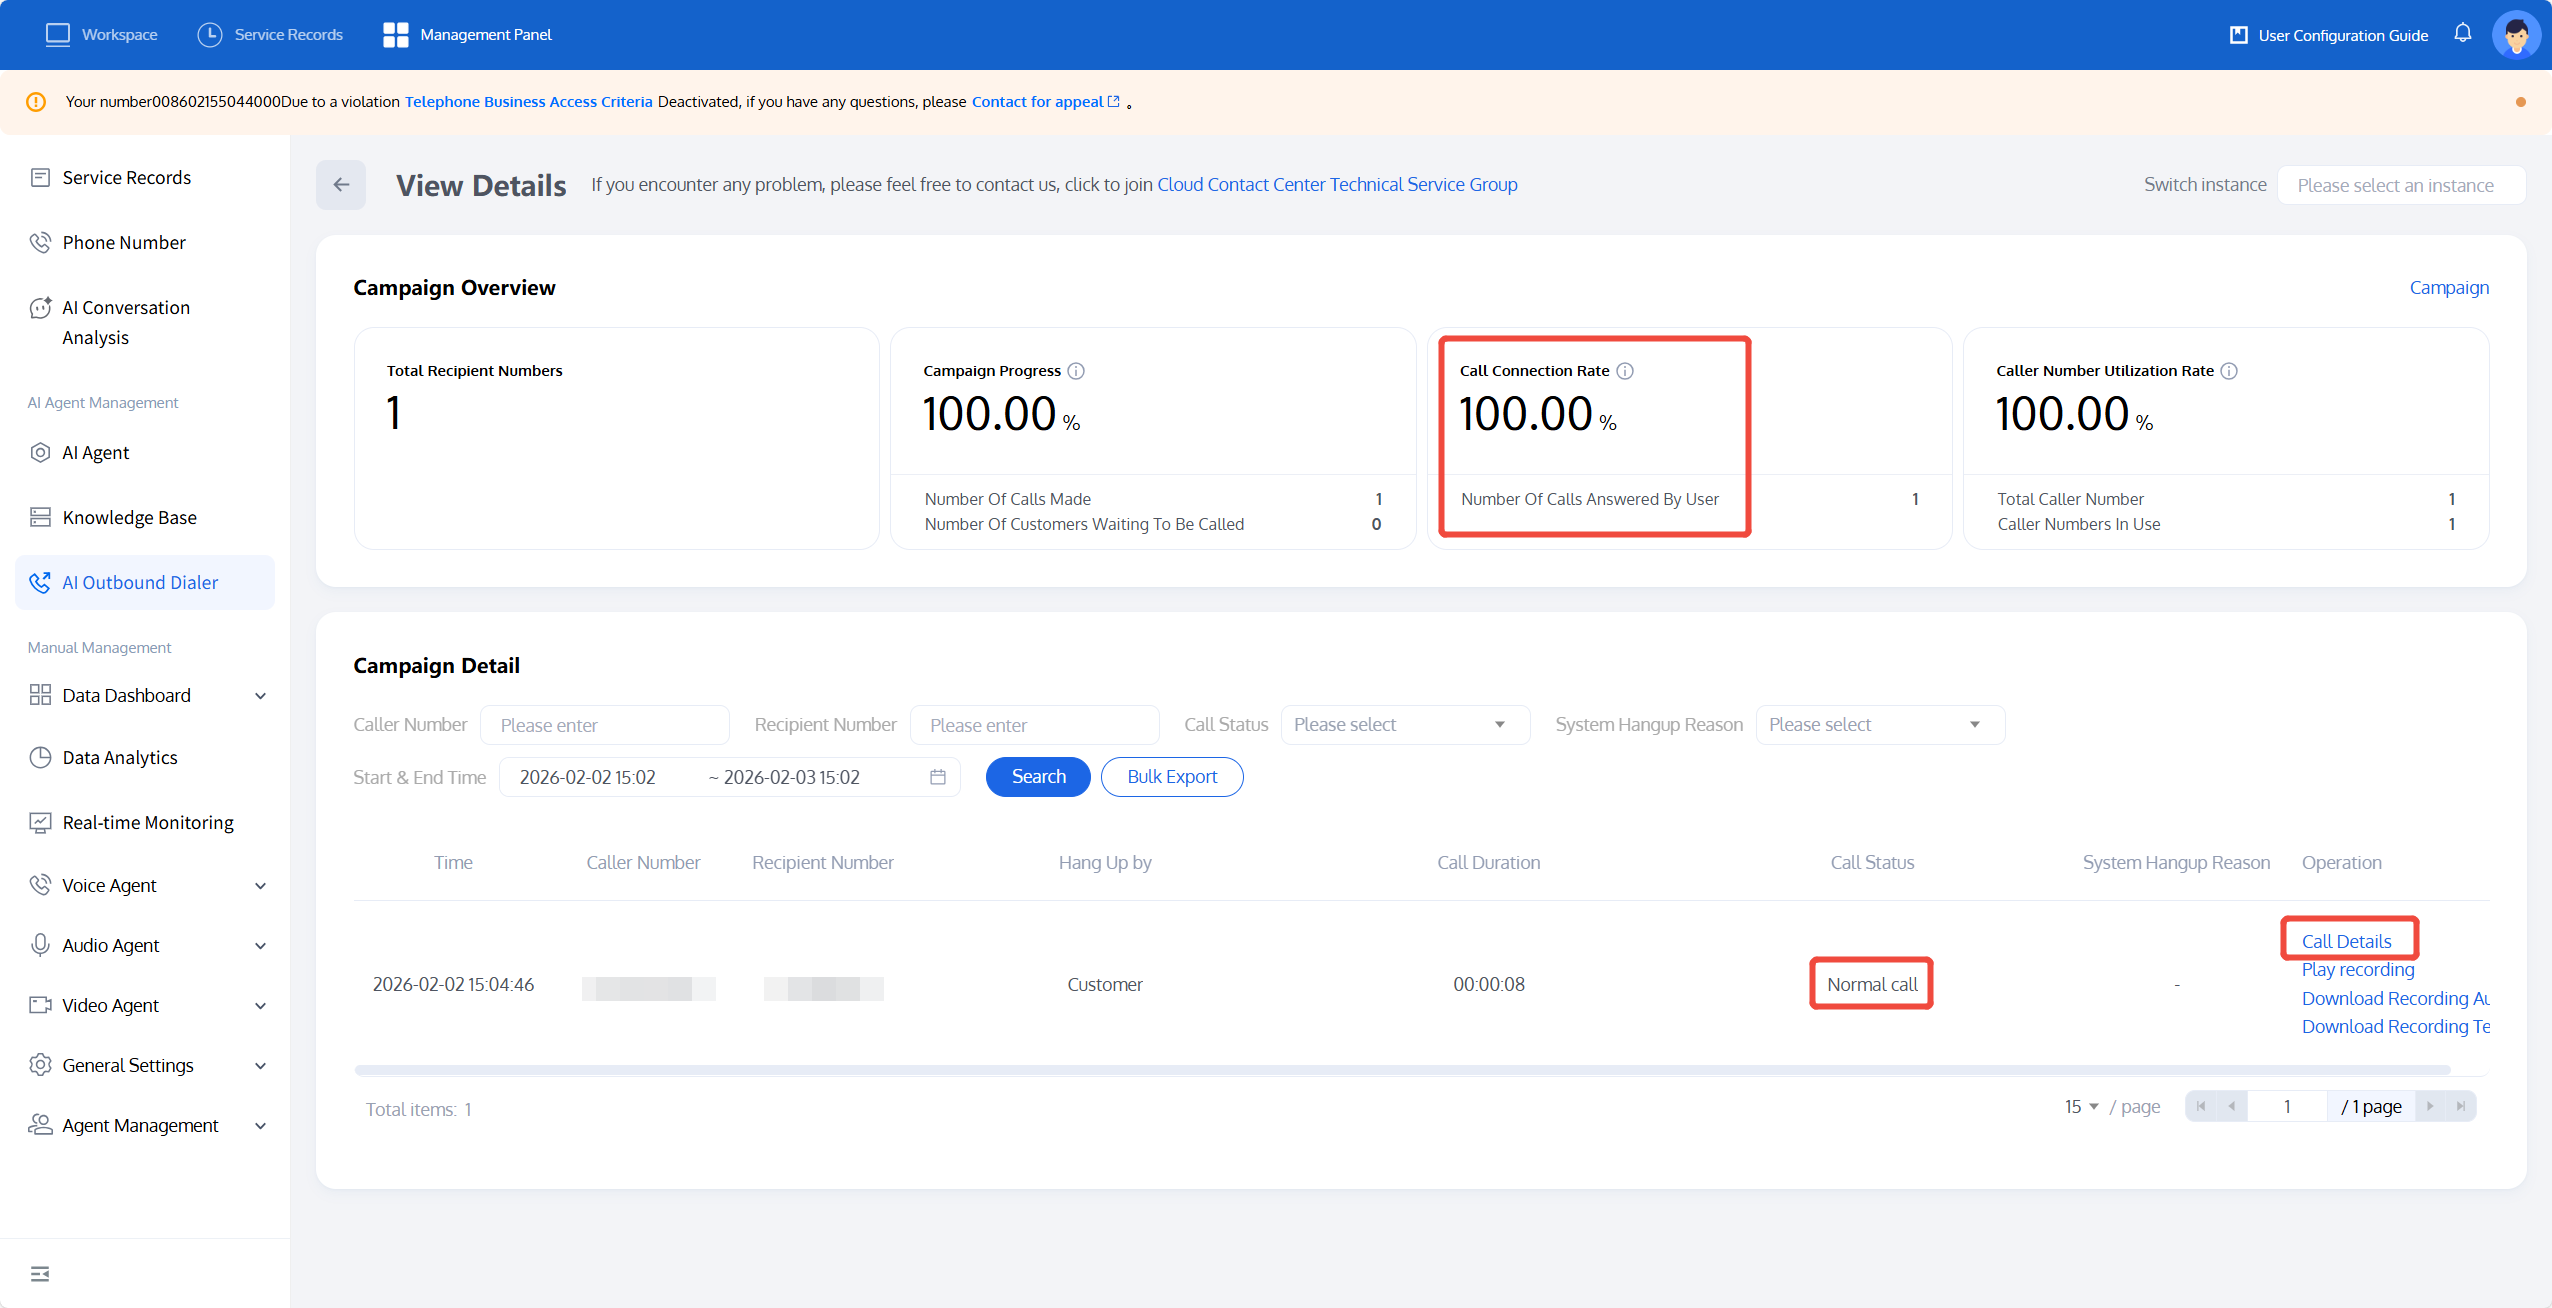
Click Call Detail of a call record to view its detailed information.
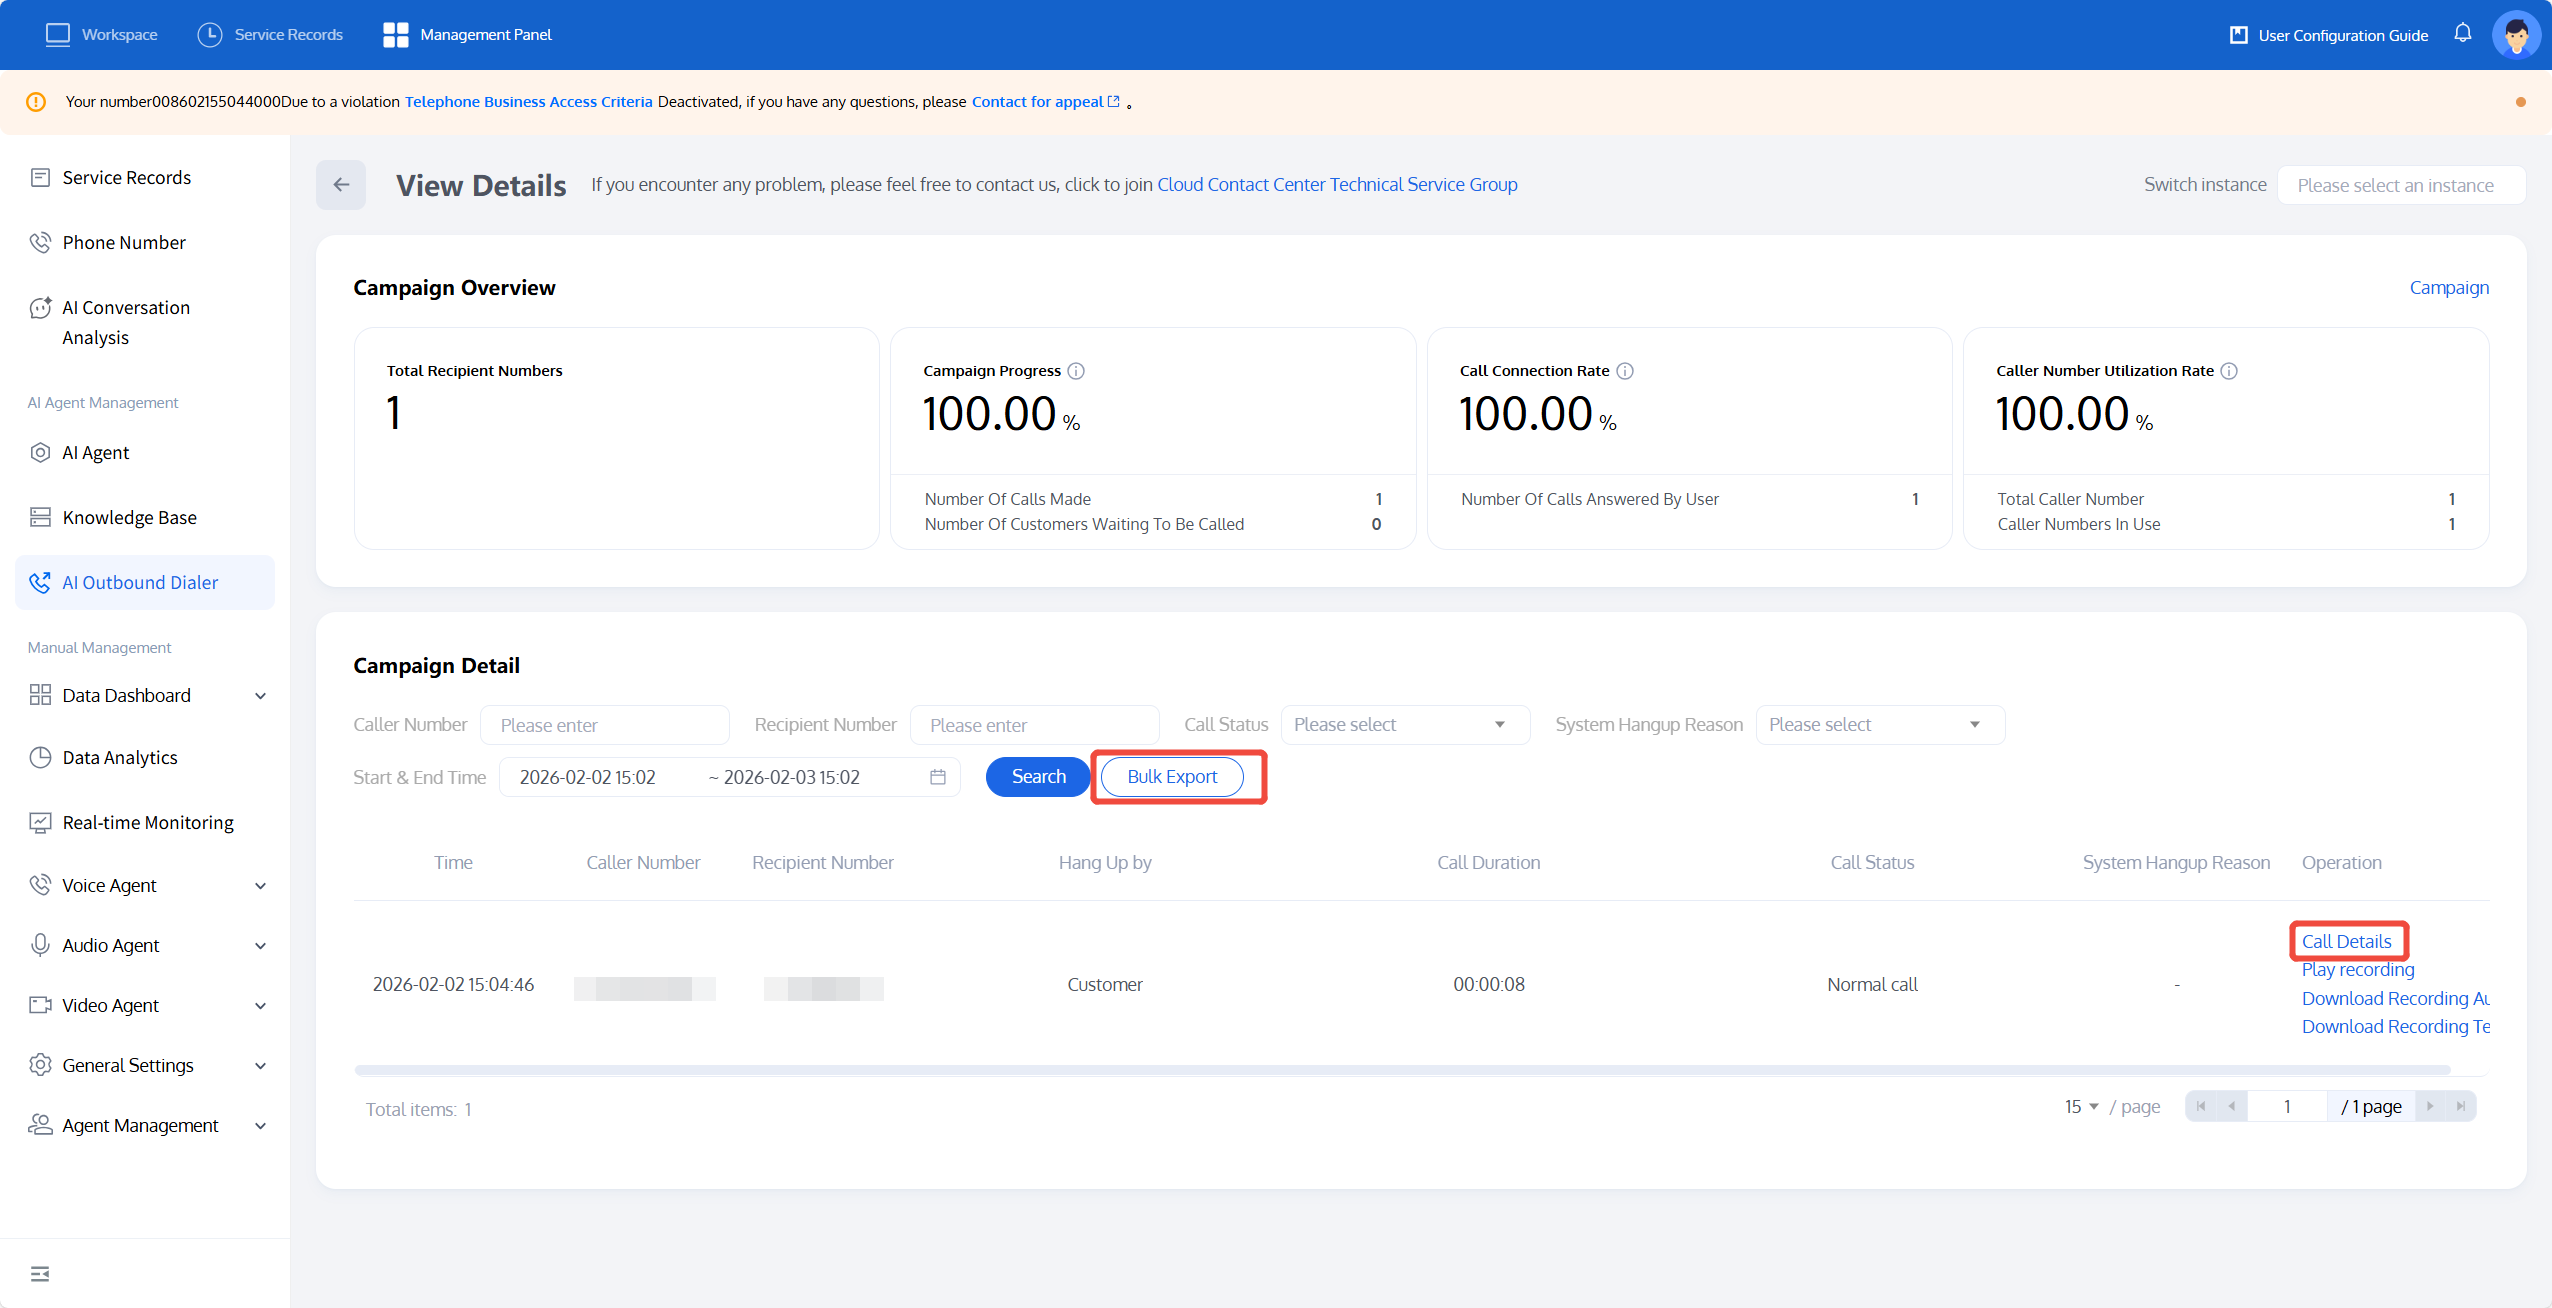
Detailed information includes Conversation Analytics (post-call Tag status), call process, and Automatic Speech Recognition (call transcript).

You can also click Batch Export to view all call information under this outbound call task. The exported content is as shown in the example below:

フィードバック