tencent cloud

TencentDB for MariaDB

Release Notes and Announcements
Release Notes
Announcements
Product Introduction
Overview
Strengths
Use Cases
System Architecture
Instance Types
Instance Architecture
TDSQL Edition
Database Version
Purchase Guide
Billing Overview
Pricing
Refund
Payment Overdue
Upgrade Pricing
Backup Space Billing
Getting Started
Creating Instance
Managing Account
Accessing Instance
Operation Guide
Precautions
Instance Management
Disaster Recovery Read-Only Instance
Account Management
Read/Write Separation
Changing Networks
Backup and Rollback
Migrating Data
Database Sync(Legacy)
Security Management
Monitoring and Alarms
Killing Threads
Parameter Templates and Settings
Database Audit
Practical Tutorial
Programming and Usage Specification
Programming and Usage Specification of Distributed Version
Using Hotspot Update for Flash Sales
Security White Paper
Platform Security Features
Tenant Security Features
Development Guide
Functional Limitations
Performance Test
Intra-city Active-Active Solution
Binlog Consumption Format
Slow Query Analysis
Database Audit
Syntax Supported
API Documentation
History
Introduction
API Category
Making API Requests
Security Group APIs
Other APIs
Account APIs
Parameter Management APIs
Monitoring Management APIs
Instance Management APIs
Backup and Restoration APIs
Data Types
Error Codes
FAQs
Product
Account Login
Features
Performance
Backup
Ops
Disk Overuse
IO Metric Exception
General References
Standards and Certification
Main Specification Performance Description
Performance Comparison Data for Strong Sync
Glossary

Creating Account

PDF
フォーカスモード
フォントサイズ
最終更新日: 2024-01-11 15:28:38

Overview

This document describes how to create a TencentDB for MariaDB account in the console to manage and connect to the database instance.

Directions

1. Log in to the TencentDB for MariaDB console. In the instance list, click an instance ID or Manage in the Operation column to enter the instance management page.
2. On the instance management page, select Account Management and click Create Account.


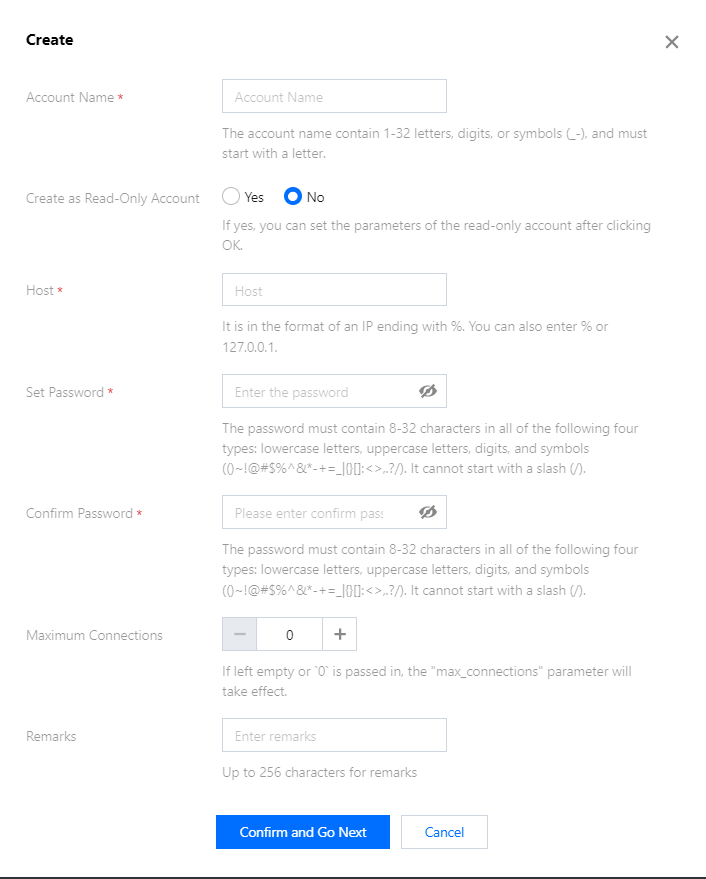
3. In the pop-up dialog box, enter the account name, host, and password. After confirming that everything is correct, click Next.
Account ID: It must contain 1-32 letters, digits, or symbols, and start with a letter.
Host: It can be an IP and contain %.
Password: It must contain 8-32 lowercase letters, uppercase letters, digits, and symbols (()~!@#$%^&*-+=_|{}[]:<>,.?/), and cannot start with a slash (/).
Maximum connections: If left empty or 0 is passed in, the "max_connections" parameter will take effect.


4. To create a read-only account, you need to configure read/write separation for it. Confirm the information you enter, click OK. -If Primary Server is selected, read from the primary server when the delay of replica server times out. If Report Errors is selected, report an error when all replica servers are delayed.
If Read Only from Replica Server is selected, ignore the replica delay and always read from replica server (generally used to fetch binlog for sync).
If your instance architecture is 1-primary-1-replica, select Read Only from Replica Server carefully to prevent high-load tasks like large transactions from affecting backup tasks and replica server availability.


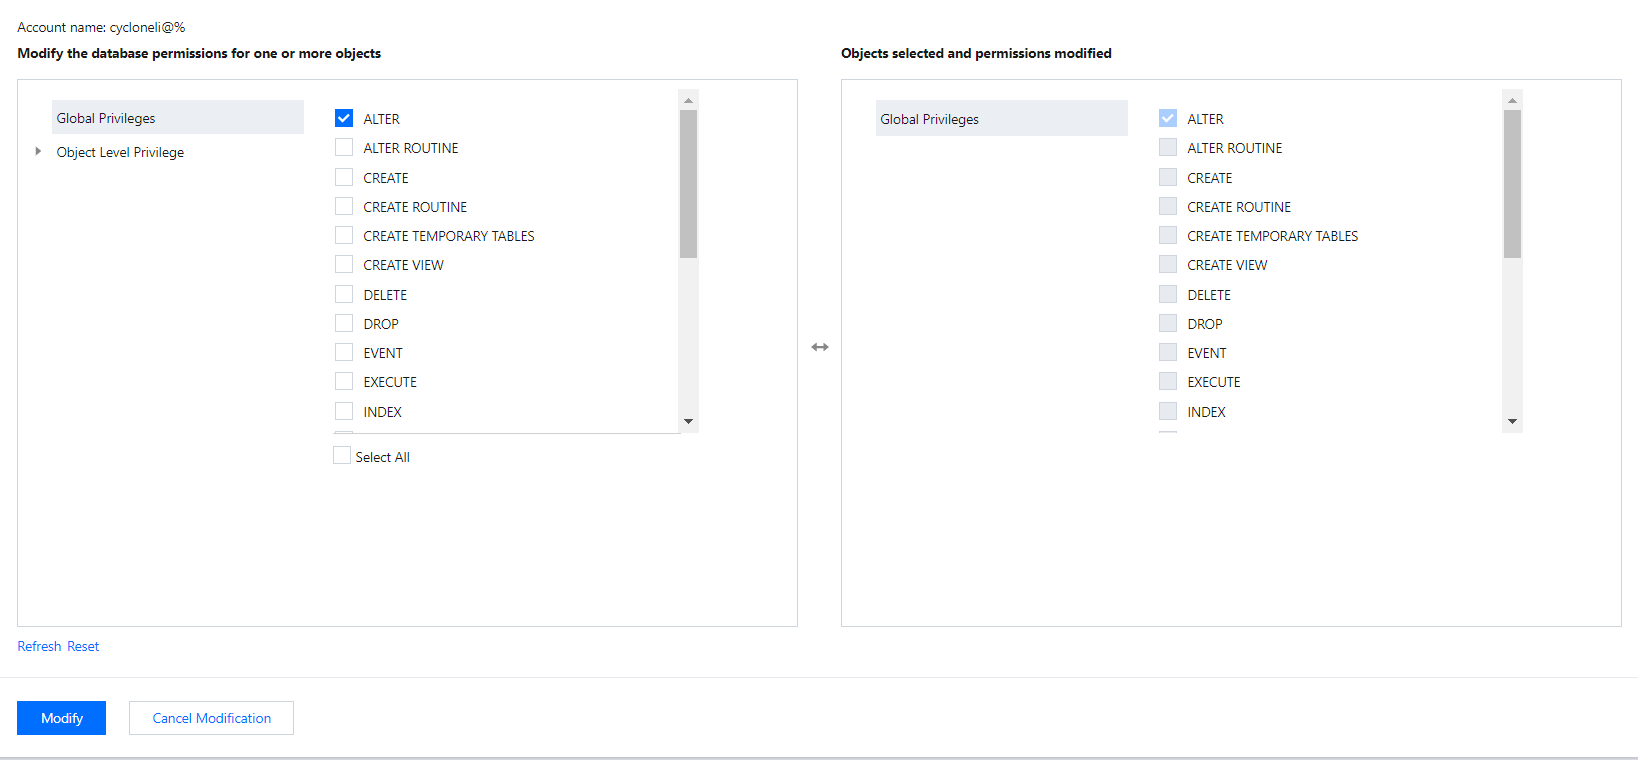
5. In the Modify Permissions pop-up window, grant permissions as needed and click Modify. To discard the changes, click Cancel Modification.


API Name
Description
Creates an account


ヘルプとサポート

この記事はお役に立ちましたか?

フィードバック