2. Add SDK/TXLiteAVSDK_Player_Premium.framework to the project to be integrated and select Do Not Embed.
3. You need to configure -ObjC of the project target; otherwise, the SDK will crash as the SDK category cannot be loaded.
Open Xcode, select the target, select the **Build Settings** tab, search for "Other Link Flag", and enter "-ObjC".
4. Add library files (in the SDK directory)
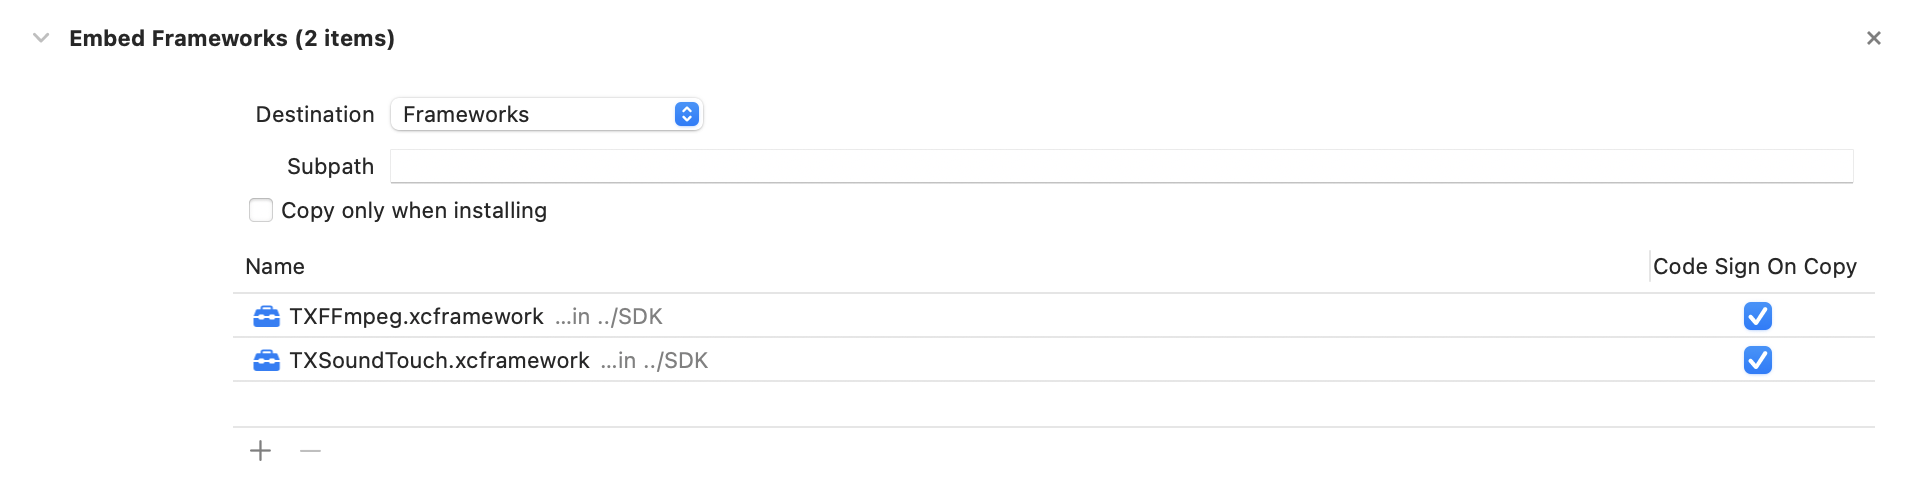
TXFFmpeg.xcframework: Add the .xcframework file to the project, set it to Embed & Sign in General > Frameworks, Libraries, and Embedded Content, and check whether Code Sign On Copy is selected in Build Phases > Embed Frameworks in your project settings as shown below:
TXSoundTouch.xcframework: Add the .xcframework file to the project, set it to Embed & Sign in General > Frameworks, Libraries, and Embedded Content, and check whether Code Sign On Copy is selected in Build Phases > Embed Frameworks in your project settings as shown below:
Then, select Build Settings > Search Paths in Xcode and add the path of the above frameworks in Framework Search Paths.
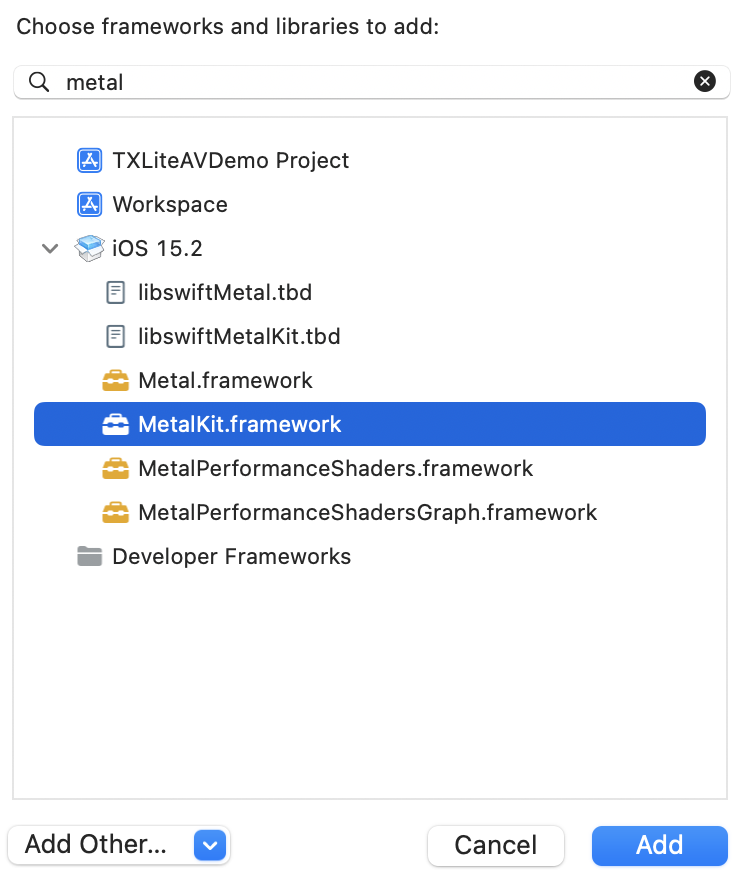
MetalKit.framework: Open Xcode, go to your project settings, select Build Phases > Link Binary With Libraries, click + in the bottom-left corner, and enter "MetalKit" to add it to the project as shown below:
ReplayKit.framework: Open Xcode, go to your project settings, select Build Phases > Link Binary With Libraries, click + in the bottom-left corner, and enter "ReplayKit" to add it to the project as shown below:
Add the following system libraries in the same way:
System frameworks: SystemConfiguration, CoreTelephony, VideoToolbox, CoreGraphics, AVFoundation, Accelerate, and MobileCoreServices.
System libraries: libz, libresolv, libiconv, libc++, and libsqlite3.
Picture-in-picture (PiP) feature
To use the PiP feature, configure as shown below. If you don’t need the PiP feature, skip this part.
1. To use the PiP feature of iOS, upgrade the SDK to 10.3 or later.
2. To use the PiP feature, you need to enable the background mode. In Xcode, select the target, click Signing & Capabilities > Background Modes, and select Audio, AirPlay, and Picture in Picture as shown below:
Importing the SDK
There are two ways to import the SDK in your project code.
Method 1: import the SDK module in the files that need to use the SDK’s APIs in your project
@import TXLiteAVSDK_Player_Premium;
// If you are using the basic version of the player, please use: @import TXLiteAVSDK_Player;
Method 2: import a specific header file in the files that need to use the SDK’s APIs in your project
// If you are using the basic version of the player, please use: #import "TXLiteAVSDK_Player/TXLiteAVSDK.h"
Configuring License
1. Enter VOD console. to apply for a trial license as instructed in Adding and Renewing a License. If no license is configured, video playback will fail. You will get two strings: a license URL and a decryption key.
2. After obtaining the License information, you need to initialize and configure the License before calling the relevant interfaces of the SDK. For detailed tutorials, please see Configuring View License.
FAQs
What should I do if a duplicate symbol error occurs because my project integrates multiple editions of LiteAVSDK such as CSS, TRTC, and Player?
If you integrate two or more editions of LiteAVSDK (MLVB, Player, TRTC, UGSV), a library conflict error will occur when you build your project. This is because some symbol files are shared among the underlying libraries of the SDKs. To solve the problem, we recommend you integrate the All-in-One SDK, which includes the features of MLVB, Player, TRTC, and UGSV. For details, see SDK Download.
How to call the API method of the SDK in Swift project?
If you want to call the API interface of the SDK in the Swift project, there are two ways:
Method 1: Using a bridging header file
1. Create a bridging header file, for example, ***-Bridging-Header.h, and add the following code: #import <TXLiteAVSDK_Player_Premium/TXLiteAVSDK.h>.
2. Configure the Objective-c Bridging header option in the Build Setting of the project. Set the path of the bridging file and add it to Objective-c Bridging header (e.g., $(SRCROOT)/SwiftCallOC/***-Bridging-Header.h, depending on the specific path of the project). Compile and run the project.
Method 2: Using the module.modulemap file in the SDK
1. Check if the TXLiteAVSDK_Player_Premium.framework contains the Modules - module.modulemap file (Player SDK provides it by default).
2. Configure the Swift Compiler - Search Paths option in the Build Setting of the project. Add the directory path where the module.modulemap file is located or the parent directory path. Here, it can be: ${PODS_ROOT}/TXLiteAVSDK_Player_Premium/TXLiteAVSDK_Player_Premium/TXLiteAVSDK_Player_Premium.framework/Modules (depending on the specific path of the project).
3. At the top of the class where you need to call the method, use import TXLiteAVSDK_Player_Premium to import and call the relevant methods.
For the above integration methods and demo, please refer to the GitHub demo for details.