Template deployment - quick deployment of Flask project
1. Log in to the SCF console and click Functions on the left sidebar.
2. Select the region where to create a function at the top of the page and click Create to enter the function creation process.
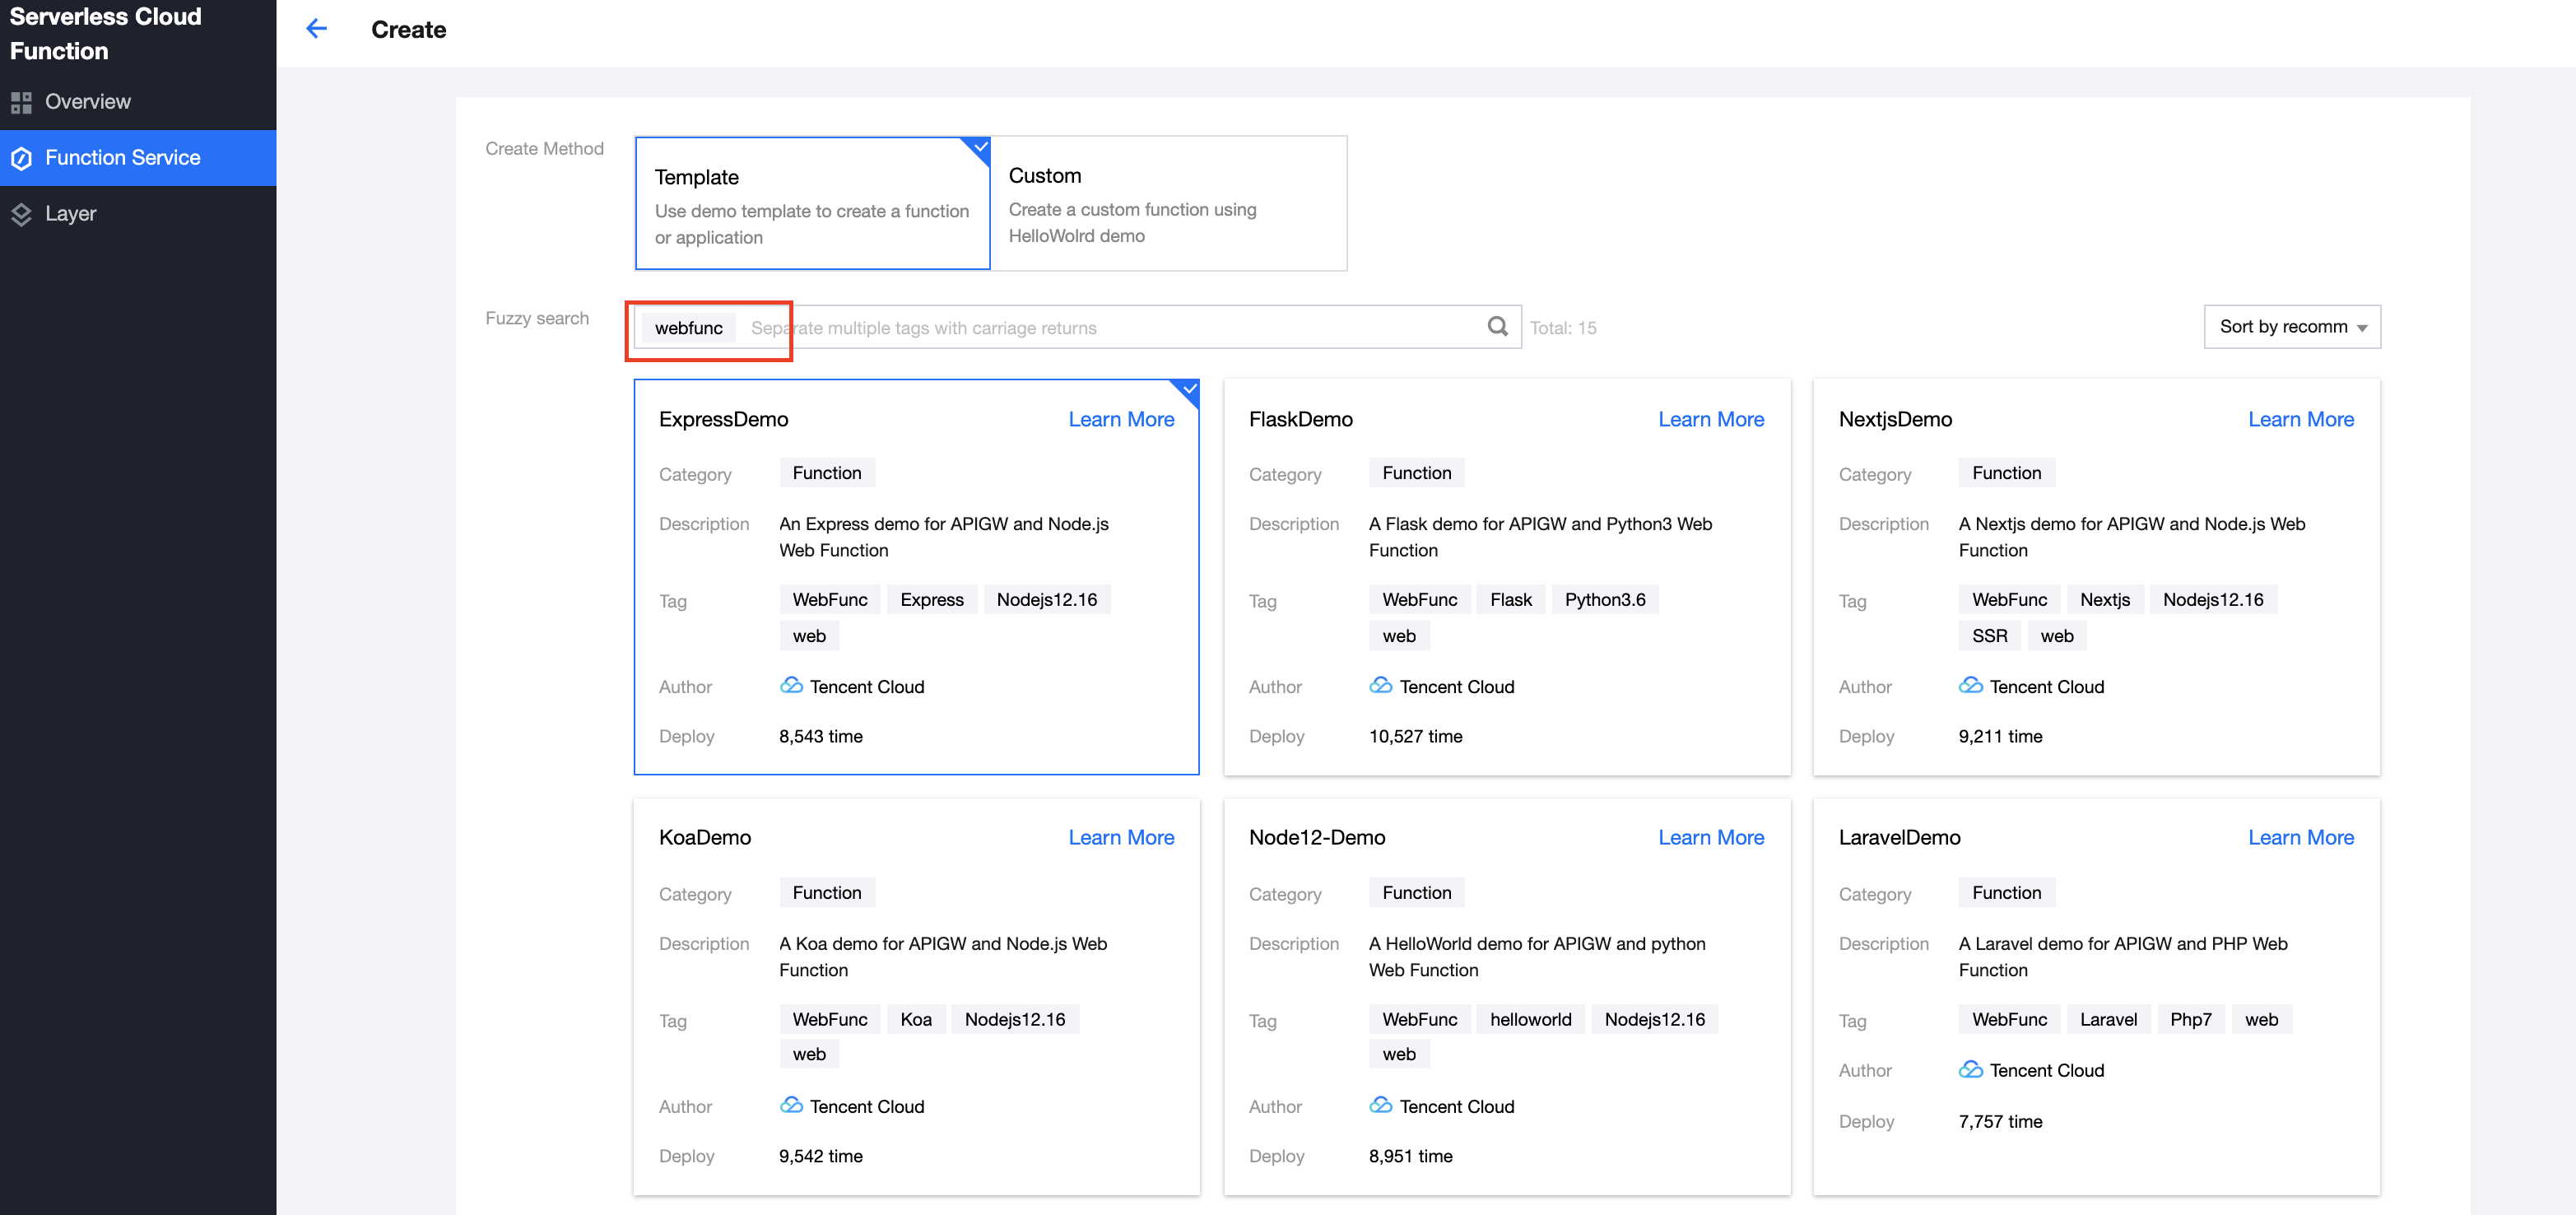
3. Select Template, enter WebFunc in the search box to filter all HTTP-triggered function templates, select FlaskDemo, and click Next as shown below:
4. On the Create page, you can view and modify the specific configuration information of the template project.
5. Click Complete. After creating the HTTP-triggered function, you can view its basic information on the Function management page.
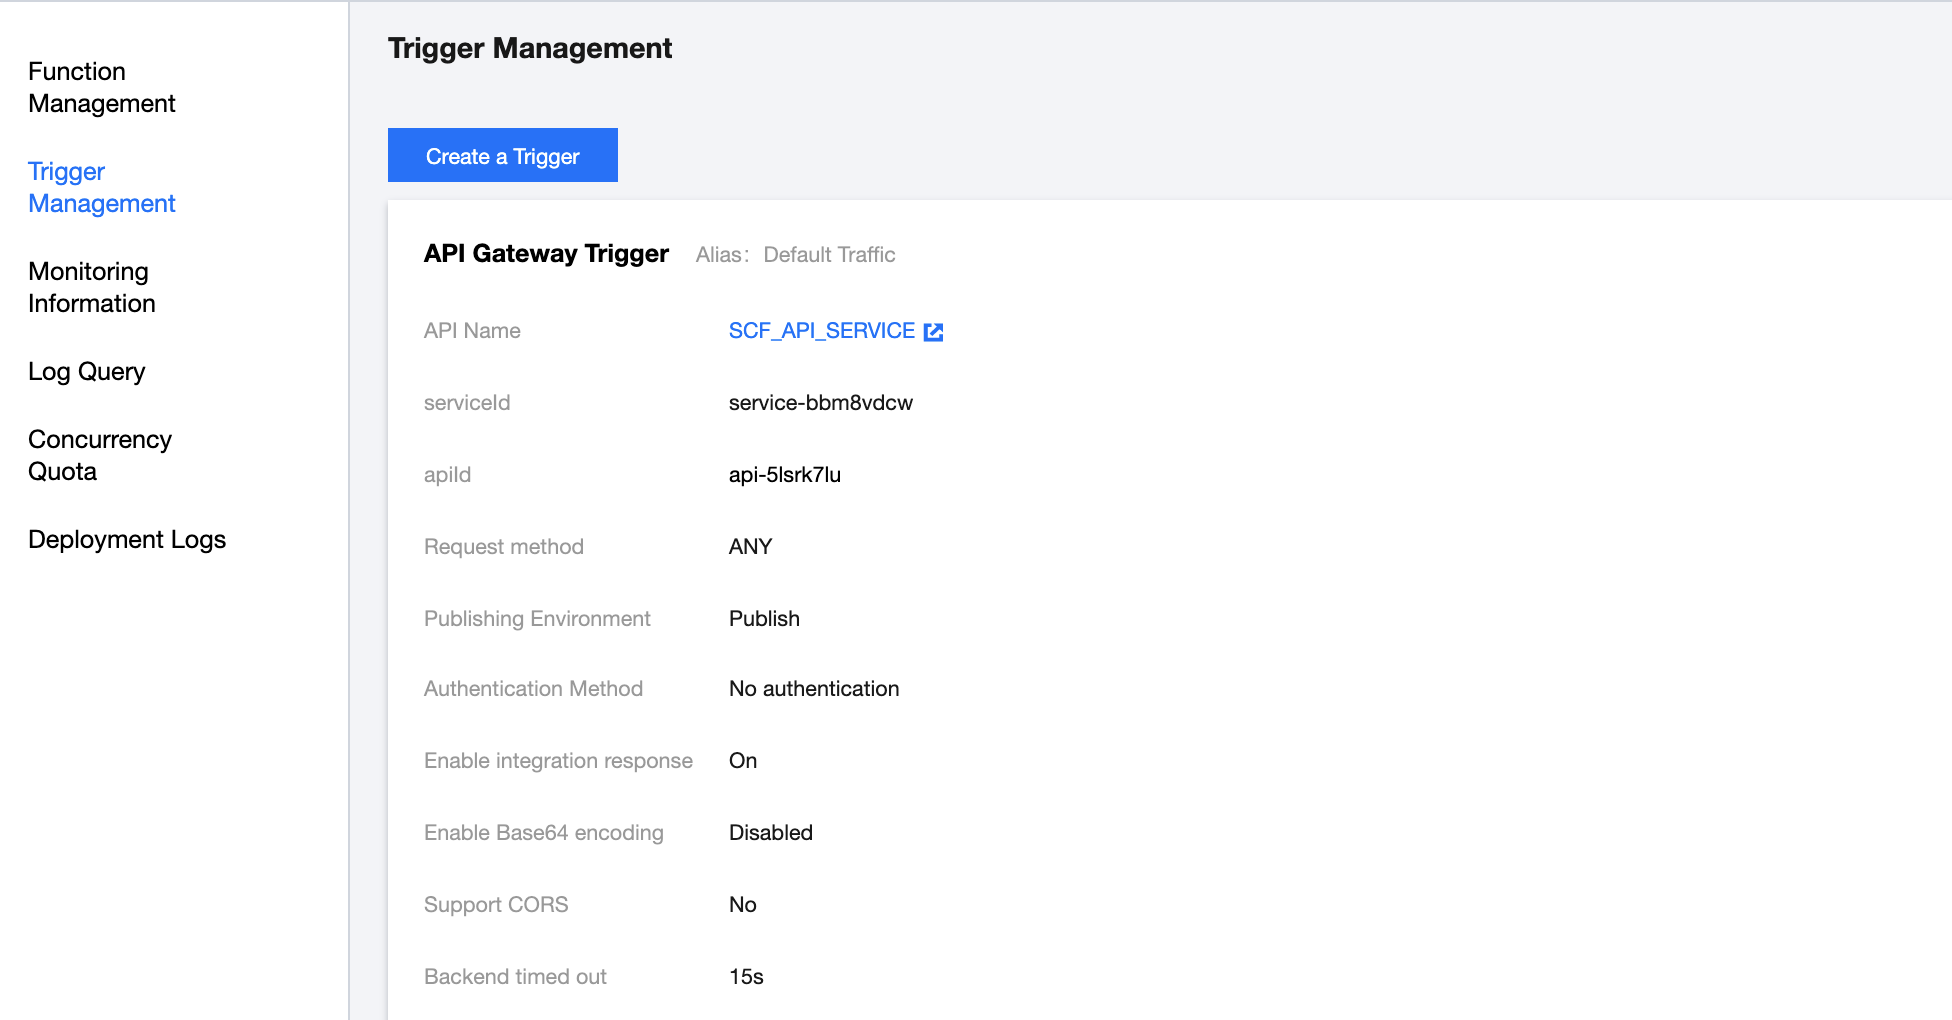
6. You can access the deployed Flask project at the access path URL generated automatically. Click Trigger management on the left to view the access path as shown below:
7. Click the access path URL to access the Flask project.
Custom deployment - quick migration of local project to cloud
Local development
1. Run the following command to confirm that Flask has been installed in your local environment.
pip install Flask
2. Create the Hello World sample project locally.
In the project directory, create the app.py file to implement the Hello World application. Below is the sample code:
from flask import Flask
app = Flask(__name__)
@app.route('/')
defhello_world():
return'Hello World'
if __name__ =='__main__':
app.run()
3. Run the python3 app.py command locally to start the app.py file. Below is the sample code:
$ python3 app.py
* Serving Flask app "app"(lazy loading)
* Environment: production
WARNING: Do not use the development server in a production environment.
Use a production WSGI server instead.
* Debug mode: off
* Running on http://127.0.0.1:5000/(Press CTRL+C to quit)
4. Visit http://127.0.0.1:5000 in a browser, and you can access the sample Flask project locally as shown below:
Deployment in cloud
Next, perform the following steps to make simple modifications to the locally created project, so that it can be quickly deployed through a web function. The steps of project transformation for Flask are as follows:
1. Install dependencies
1.1 As the Flask dependency library is not provided in the standard cloud environment of SCF, you must install the dependencies and upload them together with the project code. Create the requirements.txt file first with the following content:
#requirements.txt
Flask==1.0.2
werkzeug==0.16.0
Note:
Due to the limitation of SCF's built-in runtime environment version (Python 3.6), only lower versions of Werkzeug (<=1.0.x) can be used, while later versions may not work. The runtime environment version upgrade has been planned. Stay tuned.
1.2 Run the following command to install:
pip install -r requirements.txt
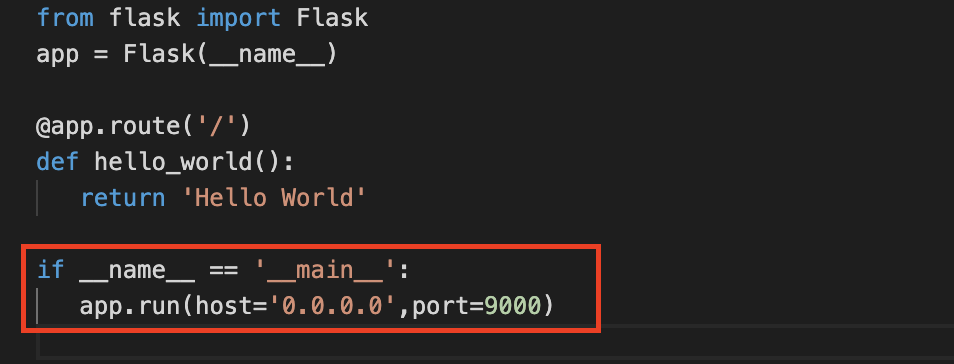
2. Modify the listening address and port
The listening port in the HTTP-triggered function must be 9000, so you need to change the listening address and port to 0.0.0.0:9000 as shown below:
Note:
You can also configure the listening port through the environment variable in scf_bootstrap.
3. Add the scf_bootstrap bootstrap file
3.1 Create the scf_bootstrap bootstrap file in the project root directory and add the following content to it (which is used to configure environment variables, specify service startup commands, and make sure that your service can be started normally through this file):
#!/bin/bash
/var/lang/python3/bin/python3 app.py
3.2 After the creation is completed, you need to run the following command to modify the executable permission of the file. By default, the permission 777 or 755 is required for it to start normally. Below is the sample code:
chmod777 scf_bootstrap
Note:
In the SCF environment, only files in the /tmp directory are readable/writable. We recommend you select /tmp when outputting files. If you select other directories, write will fail due to the lack of permissions.
If you want to output environment variables in the log, you need to add the -u parameter before the startup command, such as python -u app.py.
4. After the local configuration is completed, run the following command to start the service (with execution in the scf_bootstrap directory as an example) and make sure that your service can be normally started locally.
./scf_bootstrap
5. Log in to the SCF console and click Functions on the left sidebar.
6. Select the region where to create a function at the top of the page and click Create to enter the function creation process.
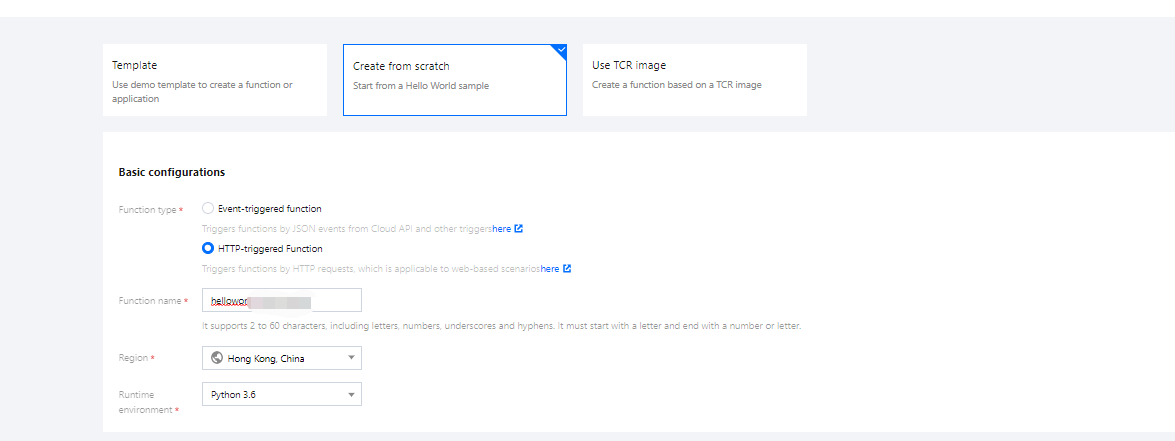
7. Select Create from scratch and configure the options as prompted as shown below:
Function type: Select HTTP-triggered function.
Function name: Enter the name of your function.
Region: Enter your function deployment region.
Deployment mode: Select Code deployment and upload your local project.
Runtime Environment: Select Python 3.6.
8. Click Complete.
Development management
After the deployment is completed, you can quickly access and test your web service in the SCF console and try out various features of SCF, such as layer binding and log management. In this way, you can enjoy the advantages of low cost and flexible scaling brought by the serverless architecture.