tencent cloud

Serverless Cloud Function

Release Notes and Announcements
Release Notes
Announcements
User Guide
Product Introduction
Overview
Related Concepts
How It Works
Strengths
Scenarios
Related Products
Purchase Guide
Billing Overview
Billing Mode
Billable Items and Billing Modes
Function Computing Power Support
Free Tier
SCF Pricing
Billing Example
Payment Overdue
Getting Started
Creating Event Function in Console
User Guide
Quota Management
Managing Functions
Web Function Management
Log Management
Concurrence Management
Trigger Management
Function URL
A Custom Domain Name
Version Management
Alias Management
Permission Management
Running Instance Management
Plugin Management
Managing Monitors and Alarms
Network Configuration
Layer Management
Execution Configuration
Extended Storage Management
DNS Caching Configuration
Resource Managed Mode Management
Near-Offline Resource Hosting Model
Workflow
Triggers
Trigger Overview
Trigger Event Message Structure Summary
API Gateway Trigger
COS Trigger
CLS Trigger
Timer Trigger
CKafka Trigger
Apache Kafka Trigger
MQTT Trigger
Trigger Configuration Description
MPS Trigger
CLB Trigger Description
TencentCloud API Trigger
Development Guide
Basic Concepts
Testing a Function
Environment Variables
Dependency Installation
Using Container Image
Error Types and Retry Policies
Dead Letter Queue
Connecting SCF to Database
Automated Deployment
Cloud Function Status Code
Common Errors and Solutions
Developer Tools
Serverless Web IDE
Calling SDK Across Functions
Third-Party Tools
Code Development
Python
Node.js
Golang
PHP
Java
Custom Runtime
Deploying Image as Function
Web Framework Development
Deploying Framework on Command Line
Quickly Deploying Egg Framework
Quickly Deploying Express Framework
Quickly Deploying Flask Framework
Quickly Deploying Koa Framework
Quickly Deploying Laravel Framework
Quickly Deploying Nest.js Framework
Quickly Deploying Next.js Framework
Quickly Deploying Nuxt.js Framework
Quickly Deploying Django Framework
Use Cases
Overview
Solutions with Tencent Cloud Services
Business Development
TRTC Practices
COS Practices
CKafka Practice
CLS
CLB Practice
MPS
CDN
CDWPG
VOD
SMS
ES
Scheduled Task
Video Processing
Success Stories
Tencent Online Education
Online Video Industry
Tencent Online Education
Best Practice of Tencent IEG Going Global
API Documentation
History
Introduction
API Category
Making API Requests
Other APIs
Namespace APIs
Layer Management APIs
Async Event Management APIs
Trigger APIs
Function APIs
Function and Layer Status Description
Data Types
Error Codes
SDK Documentation
FAQs
General
Web Function
Billing FAQs
Network FAQs
Log FAQs
SCF utility class
Event Handling FAQs
API Gateway Trigger FAQs
Related Agreement
Service Level Agreement
Contact Us
Glossary

Using Custom Font in SCF

PDF
フォーカスモード
フォントサイズ
最終更新日: 2024-12-02 16:35:34

Use Cases

By using Puppeteer in SCF, you can take screenshots of, save, screencap, and generate PDFs from specific webpages as needed. This feature extends the on-demand launch feature of SCF and only starts instance execution when needed, without using virtual machines or containers to continuously run the service. Therefore, you can easily encapsulate the feature as a general capability.
The runtime environment of SCF currently has only one built-in font. This document describes how to use custom fonts in SCF to meet your personalized needs. This document takes using the WenQuanZhengHei font in Node.js 16.13 as an example to describe how to use custom fonts in SCF.

Prerequisites

Prepare the desired custom font file, such as WenQuanZhengHei-1.ttf.

Overall Process

1. Put the font file in the specified directory of the function code.
2. Set the font file configuration file fonts.config to make it able to load the font file in the directory specified in step 1.
3. Set the SCF environment variable XDG_CONFIG_HOME to specify the load path of the font configuration file.

Directions

1. Create the folder fonts in the root directory of the function code and put the prepared font file in this directory.
2. Create the folder fontconfig in the root directory of the function code and create the font configuration file fonts.conf in it with the following content: Note: /var/user/fonts in line 27 is the path of the fonts folder created in step 1 in the SCF environment.
<?xml version="1.0"?>
<!DOCTYPE fontconfig SYSTEM "fonts.dtd">
<!-- /etc/fonts/fonts.conf file to configure system font access -->
<fontconfig>

<!--
DO NOT EDIT THIS FILE.
IT WILL BE REPLACED WHEN FONTCONFIG IS UPDATED.
LOCAL CHANGES BELONG IN 'local.conf'.

The intent of this standard configuration file is to be adequate for
most environments. If you have a reasonably normal environment and
have found problems with this configuration, they are probably
things that others will also want fixed. Please submit any
problems to the fontconfig bugzilla system located at fontconfig.org

Note that the normal 'make install' procedure for fontconfig is to
replace any existing fonts.conf file with the new version. Place
any local customizations in local.conf which this file references.

Keith Packard
-->

<!-- Font directory list -->

<dir>/usr/share/fonts</dir>
<dir>/var/user/fonts</dir>
<dir>/usr/share/X11/fonts/Type1</dir> <dir>/usr/share/X11/fonts/TTF</dir> <dir>/usr/local/share/fonts</dir>
<dir prefix="xdg">fonts</dir>
<!-- the following element will be removed in the future -->
<dir>~/.fonts</dir>

<!--
Accept deprecated 'mono' alias, replacing it with 'monospace'
-->
<match target="pattern">
<test qual="any" name="family">
<string>mono</string>
</test>
<edit name="family" mode="assign" binding="same">
<string>monospace</string>
</edit>
</match>

<!--
Accept alternate 'sans serif' spelling, replacing it with 'sans-serif'
-->
<match target="pattern">
<test qual="any" name="family">
<string>sans serif</string>
</test>
<edit name="family" mode="assign" binding="same">
<string>sans-serif</string>
</edit>
</match>

<!--
Accept deprecated 'sans' alias, replacing it with 'sans-serif'
-->
<match target="pattern">
<test qual="any" name="family">
<string>sans</string>
</test>
<edit name="family" mode="assign" binding="same">
<string>sans-serif</string>
</edit>
</match>

<!--
Load local system customization file
-->
<include ignore_missing="yes">/etc/fonts/conf.d</include>

<!-- Font cache directory list -->

<cachedir>/var/cache/fontconfig</cachedir>
<cachedir prefix="xdg">fontconfig</cachedir>
<!-- the following element will be removed in the future -->
<cachedir>~/.fontconfig</cachedir>

<config>
<!--
These are the default Unicode chars that are expected to be blank
in fonts. All other blank chars are assumed to be broken and
won't appear in the resulting charsets
-->
<blank>
<int>0x0020</int> <!-- SPACE -->
<int>0x00A0</int> <!-- NO-BREAK SPACE -->
<int>0x00AD</int> <!-- SOFT HYPHEN -->
<int>0x034F</int> <!-- COMBINING GRAPHEME JOINER -->
<int>0x0600</int> <!-- ARABIC NUMBER SIGN -->
<int>0x0601</int> <!-- ARABIC SIGN SANAH -->
<int>0x0602</int> <!-- ARABIC FOOTNOTE MARKER -->
<int>0x0603</int> <!-- ARABIC SIGN SAFHA -->
<int>0x06DD</int> <!-- ARABIC END OF AYAH -->
<int>0x070F</int> <!-- SYRIAC ABBREVIATION MARK -->
<int>0x115F</int> <!-- HANGUL CHOSEONG FILLER -->
<int>0x1160</int> <!-- HANGUL JUNGSEONG FILLER -->
<int>0x1680</int> <!-- OGHAM SPACE MARK -->
<int>0x17B4</int> <!-- KHMER VOWEL INHERENT AQ -->
<int>0x17B5</int> <!-- KHMER VOWEL INHERENT AA -->
<int>0x180E</int> <!-- MONGOLIAN VOWEL SEPARATOR -->
<int>0x2000</int> <!-- EN QUAD -->
<int>0x2001</int> <!-- EM QUAD -->
<int>0x2002</int> <!-- EN SPACE -->
<int>0x2003</int> <!-- EM SPACE -->
<int>0x2004</int> <!-- THREE-PER-EM SPACE -->
<int>0x2005</int> <!-- FOUR-PER-EM SPACE -->
<int>0x2006</int> <!-- SIX-PER-EM SPACE -->
<int>0x2007</int> <!-- FIGURE SPACE -->
<int>0x2008</int> <!-- PUNCTUATION SPACE -->
<int>0x2009</int> <!-- THIN SPACE -->
<int>0x200A</int> <!-- HAIR SPACE -->
<int>0x200B</int> <!-- ZERO WIDTH SPACE -->
<int>0x200C</int> <!-- ZERO WIDTH NON-JOINER -->
<int>0x200D</int> <!-- ZERO WIDTH JOINER -->
<int>0x200E</int> <!-- LEFT-TO-RIGHT MARK -->
<int>0x200F</int> <!-- RIGHT-TO-LEFT MARK -->
<int>0x2028</int> <!-- LINE SEPARATOR -->
<int>0x2029</int> <!-- PARAGRAPH SEPARATOR -->
<int>0x202A</int> <!-- LEFT-TO-RIGHT EMBEDDING -->
<int>0x202B</int> <!-- RIGHT-TO-LEFT EMBEDDING -->
<int>0x202C</int> <!-- POP DIRECTIONAL FORMATTING -->
<int>0x202D</int> <!-- LEFT-TO-RIGHT OVERRIDE -->
<int>0x202E</int> <!-- RIGHT-TO-LEFT OVERRIDE -->
<int>0x202F</int> <!-- NARROW NO-BREAK SPACE -->
<int>0x205F</int> <!-- MEDIUM MATHEMATICAL SPACE -->
<int>0x2060</int> <!-- WORD JOINER -->
<int>0x2061</int> <!-- FUNCTION APPLICATION -->
<int>0x2062</int> <!-- INVISIBLE TIMES -->
<int>0x2063</int> <!-- INVISIBLE SEPARATOR -->
<int>0x206A</int> <!-- INHIBIT SYMMETRIC SWAPPING -->
<int>0x206B</int> <!-- ACTIVATE SYMMETRIC SWAPPING -->
<int>0x206C</int> <!-- INHIBIT ARABIC FORM SHAPING -->
<int>0x206D</int> <!-- ACTIVATE ARABIC FORM SHAPING -->
<int>0x206E</int> <!-- NATIONAL DIGIT SHAPES -->
<int>0x206F</int> <!-- NOMINAL DIGIT SHAPES -->
<int>0x2800</int> <!-- BRAILLE PATTERN BLANK -->
<int>0x3000</int> <!-- IDEOGRAPHIC SPACE -->
<int>0x3164</int> <!-- HANGUL FILLER -->
<int>0xFEFF</int> <!-- ZERO WIDTH NO-BREAK SPACE -->
<int>0xFFA0</int> <!-- HALFWIDTH HANGUL FILLER -->
<int>0xFFF9</int> <!-- INTERLINEAR ANNOTATION ANCHOR -->
<int>0xFFFA</int> <!-- INTERLINEAR ANNOTATION SEPARATOR -->
<int>0xFFFB</int> <!-- INTERLINEAR ANNOTATION TERMINATOR -->
</blank>
<!--
Rescan configuration every 30 seconds when FcFontSetList is called
-->
<rescan>
<int>30</int>
</rescan>
</config>

</fontconfig>
After steps 1 and 2 are completed, the function code directory structure is as follows:
├── Function code files (such as index.js and app.js)
├── fonts
| └── WenQuanZhengHei-1.ttf
├── fontconfig
| └── fonts.conf
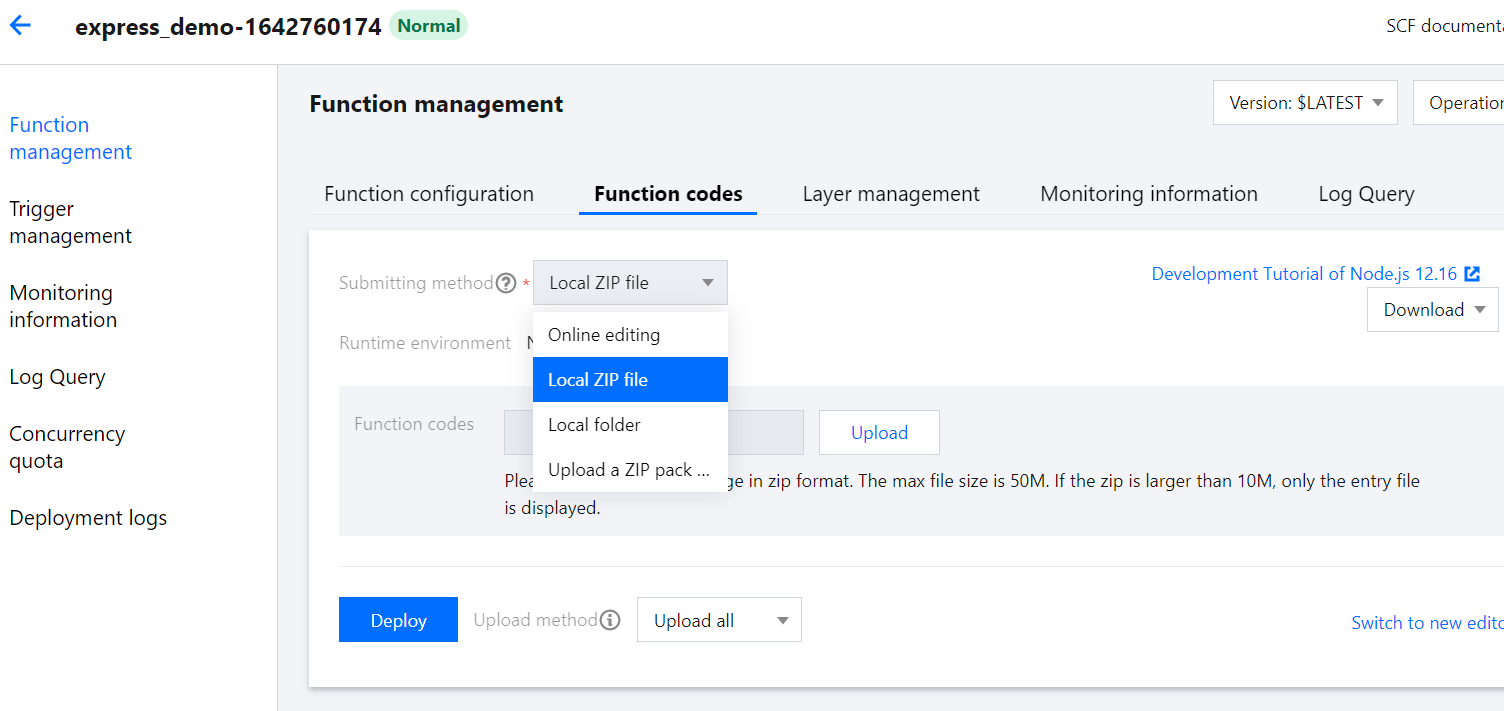
3. Package the function code in zip format, select Local ZIP file, create a function or update the function code, and click Deploy to update the function code in the cloud after successful upload.
Note:
When the function code is packaged, all the files in the code root directory are included, i.e., all the files in the above file structure. The outer folder doesn't need to be packaged.


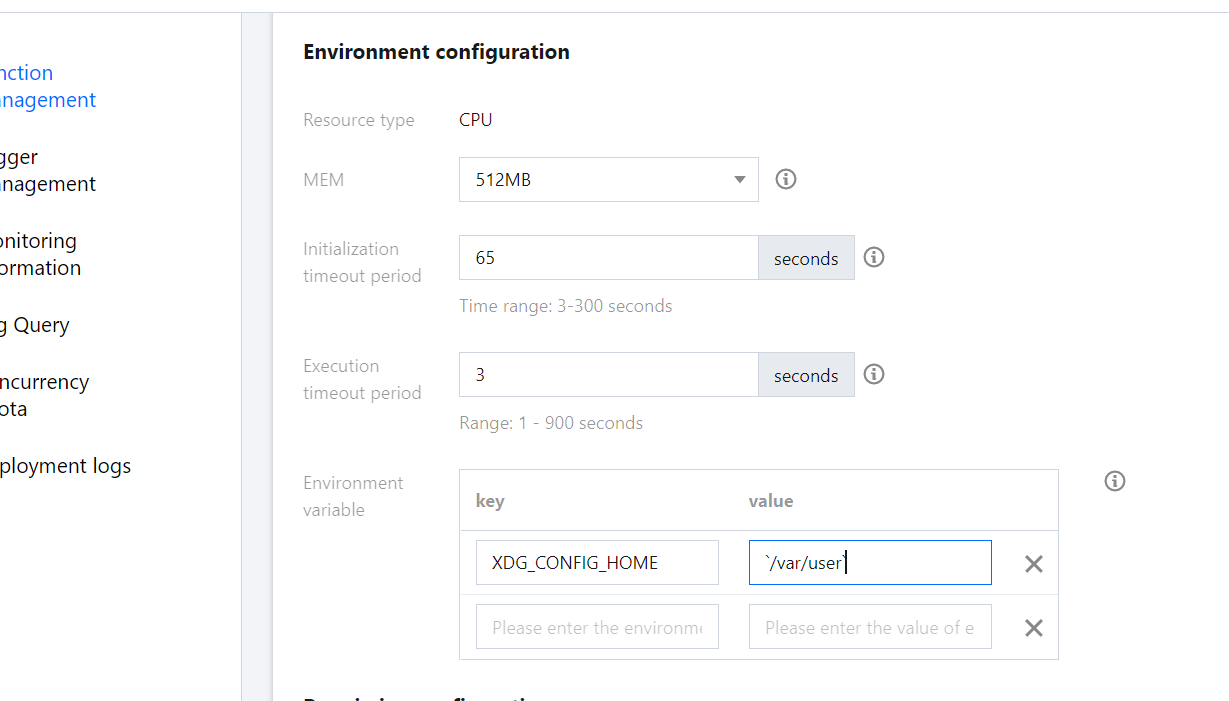
4. Edit the function's environment variable. After adding the environment variable, click Save to complete the configuration update.
key
value
XDG_CONFIG_HOME
/var/user


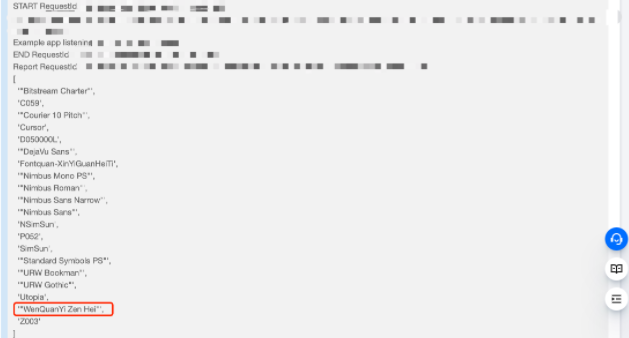
5. Verify whether the font is added successfully. In the Node.js environment, use the font-list library to print out the fonts supported in the environment. After completing the above configuration, you can see that the WenQuanZhengHei font has been successfully loaded in the environment.
var fontList = require('font-list')
console.log(await fontList.getFonts()) // Print the fonts supported in the environment


You can also implement custom fonts for image deployment-based functions in the following way. For example, to package Chrome, Puppeteer, and the desired font files in an image and deploy a function with this image, the steps are as follows:

1. Write the dockerfile

This document provides a simple Alpine-based image to create an image build file that includes Chrome and Puppeteer. The file can be named mypuppeteer.dockerfile as shown below:
FROM alpine

# Installs latest Chromium (92) package.
RUN apk add --no-cache \\
chromium \\
nss \\
freetype \\
harfbuzz \\
ca-certificates \\
ttf-freefont \\
nodejs \\
yarn


# Tell Puppeteer to skip installing Chrome. We'll be using the installed package.
ENV PUPPETEER_SKIP_CHROMIUM_DOWNLOAD=true \\
PUPPETEER_EXECUTABLE_PATH=/usr/bin/chromium-browser

# Puppeteer v10.0.0 works with Chromium 92.
RUN yarn add puppeteer@10.0.0

# Add the CJK font to support Chinese character
COPY NotoSansCJK.ttc /usr/share/fonts/TTF

Note:
The font file used in the code needs to be downloaded and placed in the same directory as the docker file.
This document only provides a sample. You can select font files as needed and adjust the filenames and corresponding fields in the docker file.

2. Build an image

You can build the image by running the following command, which will create an image named mypuppeteer:v1:
docker build -t mypuppeteer:v1 -f mypuppeteer.dockerfile .

3. Perform local testing

After the local image is built, you can use the following test.js script to quickly test and verify it by taking and saving a screenshot of a webpage.
const puppeteer = require('puppeteer');
(async () => {
const browser = await puppeteer.launch({
executablePath: '/usr/bin/chromium-browser',
args: ['--no-sandbox','--disable-setuid-sandbox','--ignore-certificate-errors'],
defaultViewport: {
width: 1920,
height: 1080,
deviceScaleFactor: 3,
},
});
const page = await browser.newPage();
await page.goto('https://www.baidu.com');
await page.screenshot({path: '/home/test.png'});
await browser.close();
})();
Run the following command to run the image, mount the test script directory into a container and run it, and the screenshot file will also be generated in this directory.
docker run -it --rm -v $(pwd):/home mypuppeteer:v1 node /home/test.js
You can verify whether the font file works by checking whether the screenshot file is output.

4. Perform subsequent operations

After the image that can run Chrome and Puppeteer is built, you can further build a function runtime environment based on it, push it to the image repository of Tencent Cloud, and then use SCF's custom image deployment capabilities to create your own services. For the description of custom image deployment in SCF and how to use it, see Feature Description.

ヘルプとサポート

この記事はお役に立ちましたか?

フィードバック