Usage
Download
フォーカスモード
フォントサイズ
This document provides a guide on creating a self-built Apache Kafka trigger and calling the function, using the example of cross-region consumption of a CKafka cluster.
Prerequisites
The function has been created.
The Kafka cluster and topic have been created.
Directions
Step 1: Creating an Apache Kafka Trigger
1. Log in to the Serverless Console and click Function Service in the left sidebar.
2. At the top of the main interface, select the region and namespace where the function is located. Then, click the function name in the list to access the function details page.
3. In the left sidebar, choose Trigger Management and click Create trigger.
4. In the Create Trigger panel, select Apache Kafka Trigger and fill in the relevant trigger information, as shown below:
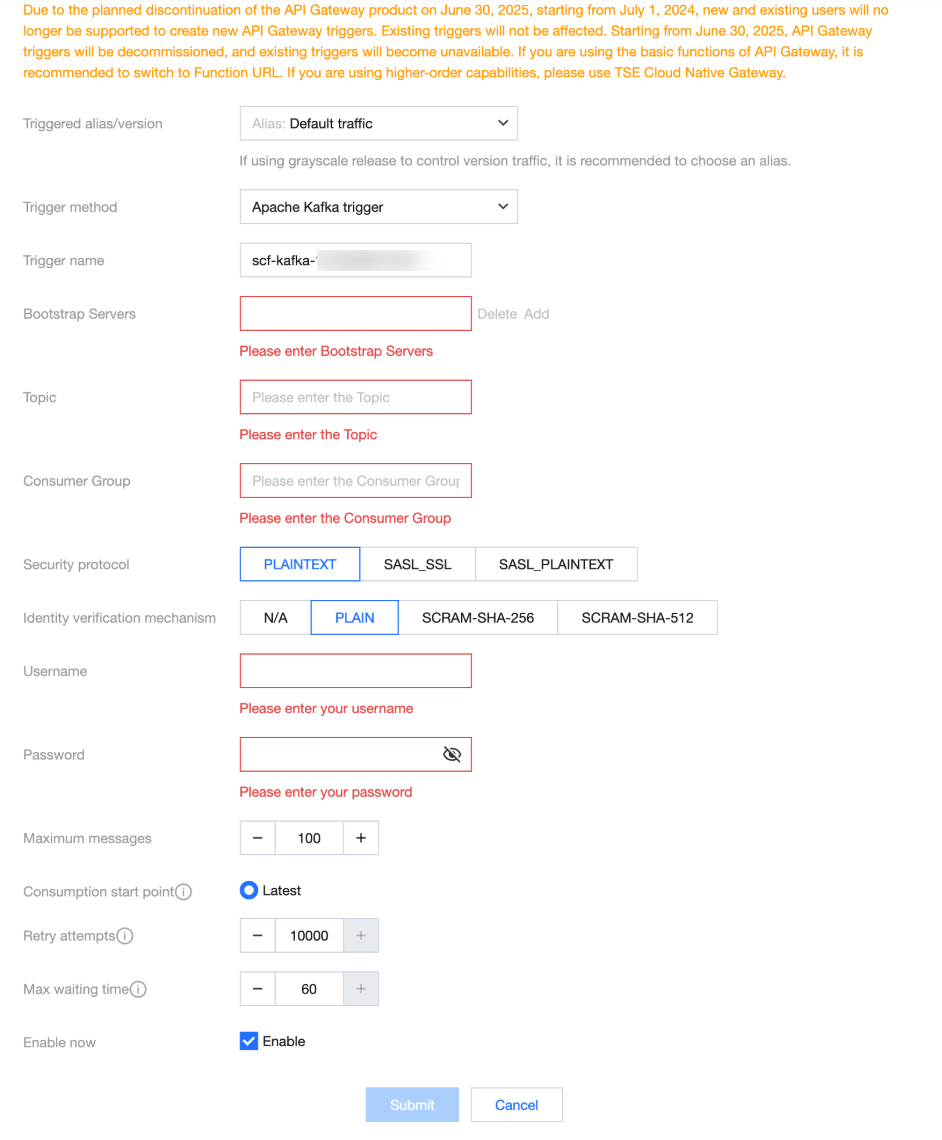
Configuration Item | Operation | Example in this Document |
Trigger version/alias | The default value is Default, but it can also be switched to an alias or other versions of the published function. | Default |
Trigger method | Apache Kafka trigger. | Apache Kafka trigger |
Trigger name | Enter a custom trigger name. | scf-kafka-1728981649432 |
Bootstrap Servers | Enter the host and port addresses of the Kafka instance to be accessed. Multiple entries are allowed. | 11.135.x.x:7661 |
Topic | Select the topic of the existing Kafka instance. | test1015 |
Consumer Group | The desired consumer group name. If the consumer group already exists under the topic, it will continue consuming from that group; otherwise, a consumer group will be created. | A new consumer group, test1015, is used here. |
Security protocol | The security protocol applied by the Kafka instance. The available values are as follows: PLAINTEXT SASL_SSL SASL_PLAINTEXT | SASL_PLAINTEXT |
Identity verification mechanism | The authentication mechanism used by the Kafka instance. The available values are as follows: None PLAIN SCRAM-SHA-256 SCRAM-SHA-512 | PLAIN |
Username | When authentication in the mechanism requires verification through username and password information, you need to configure the Apache Kafka username for authentication. | admin |
Password | When the authentication mechanism requires username and password verification, the Apache Kafka username should be configured for authentication. | ****** |
Maximum messages | The maximum number of messages to be pulled and delivered to SCF in a single batch, with a current maximum configuration of 10,000. Due to factors such as message size and write speed, the actual number of messages delivered during each trigger may not always reach the maximum value, but will vary between 1 and the specified maximum batch size. | 1 |
Consumption start point | Select the consumption offset for messages. Currently, it supports consuming from the latest position. | Latest position |
Retry attempts | The maximum number of retries when the function encounters execution errors (including user code errors and execution errors). The maximum supported configuration is 10,000. | 1 |
Max waiting time | The longest waiting time for one trigger. For example, if the user configures the maximum batch size as 1,000 messages and the maximum waiting time as 60 seconds, the function will be triggered if 1,000 messages are collected within 10 seconds. If only 50 messages are collected after 60 seconds, the function will still be triggered. | 1 |
Trigger status | Indicates whether the trigger is enabled immediately after creation. By default, the trigger is enabled, meaning it will be activated as soon as it is created. | Enable the trigger |
5. Click Submit.
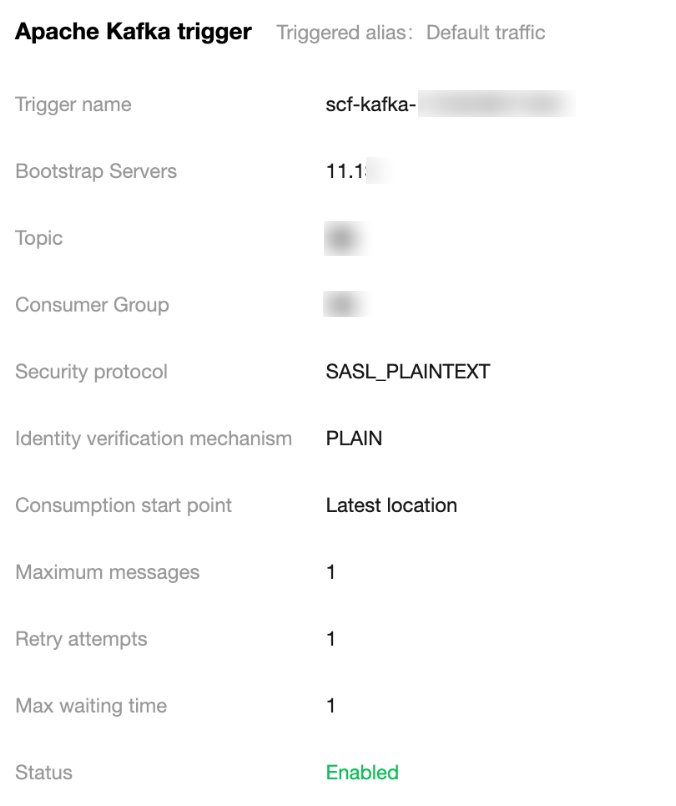
Step 2: Checking the Trigger Status
After the trigger is successfully created, go to the Trigger Management page to check the trigger status, as shown below:
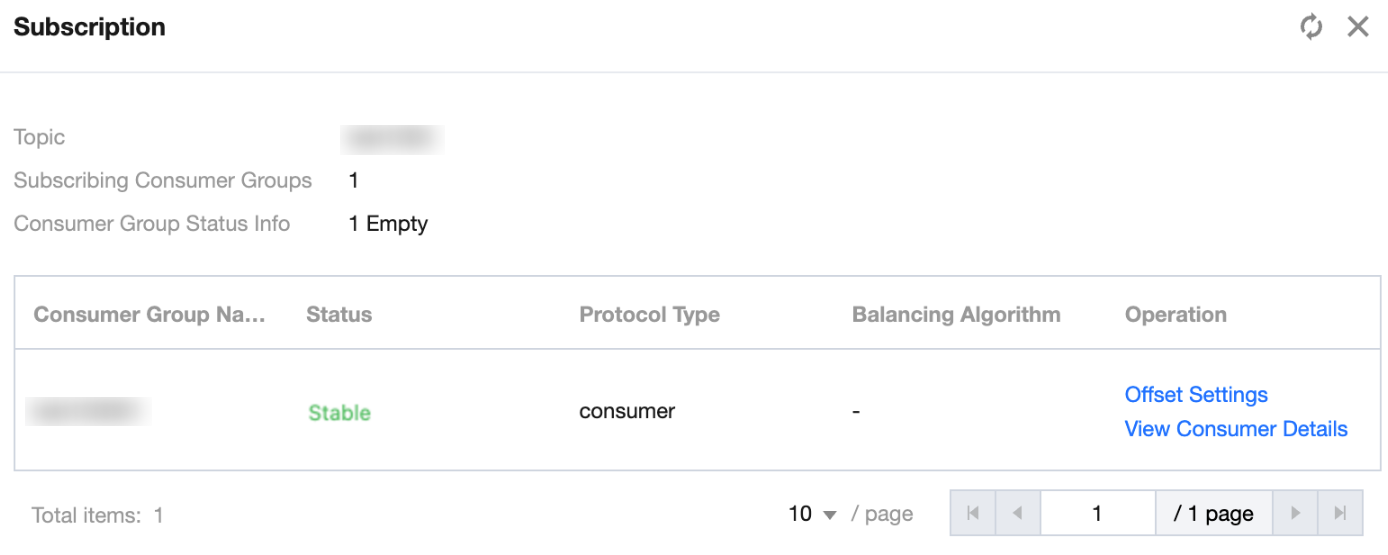
The system will automatically create a consumer group and bind the subscription relationship. As shown below:
Step 3: Kafka Message Consumption and Testing
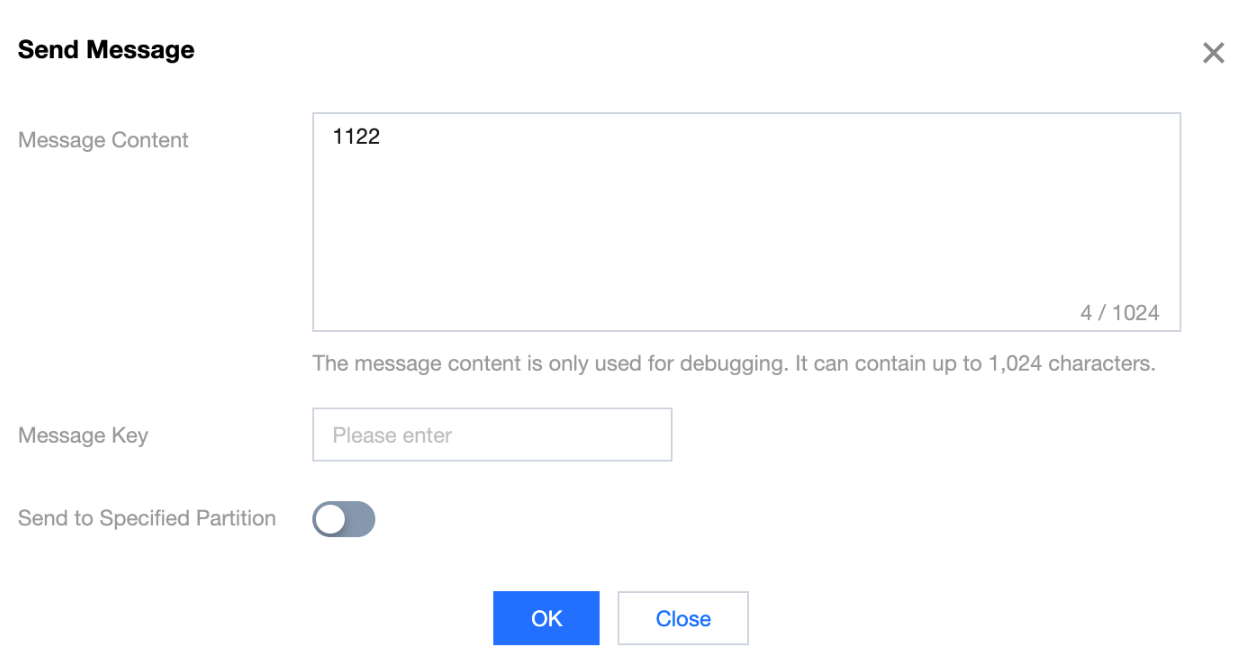
1. Deliver messages to Kafka, as shown below:
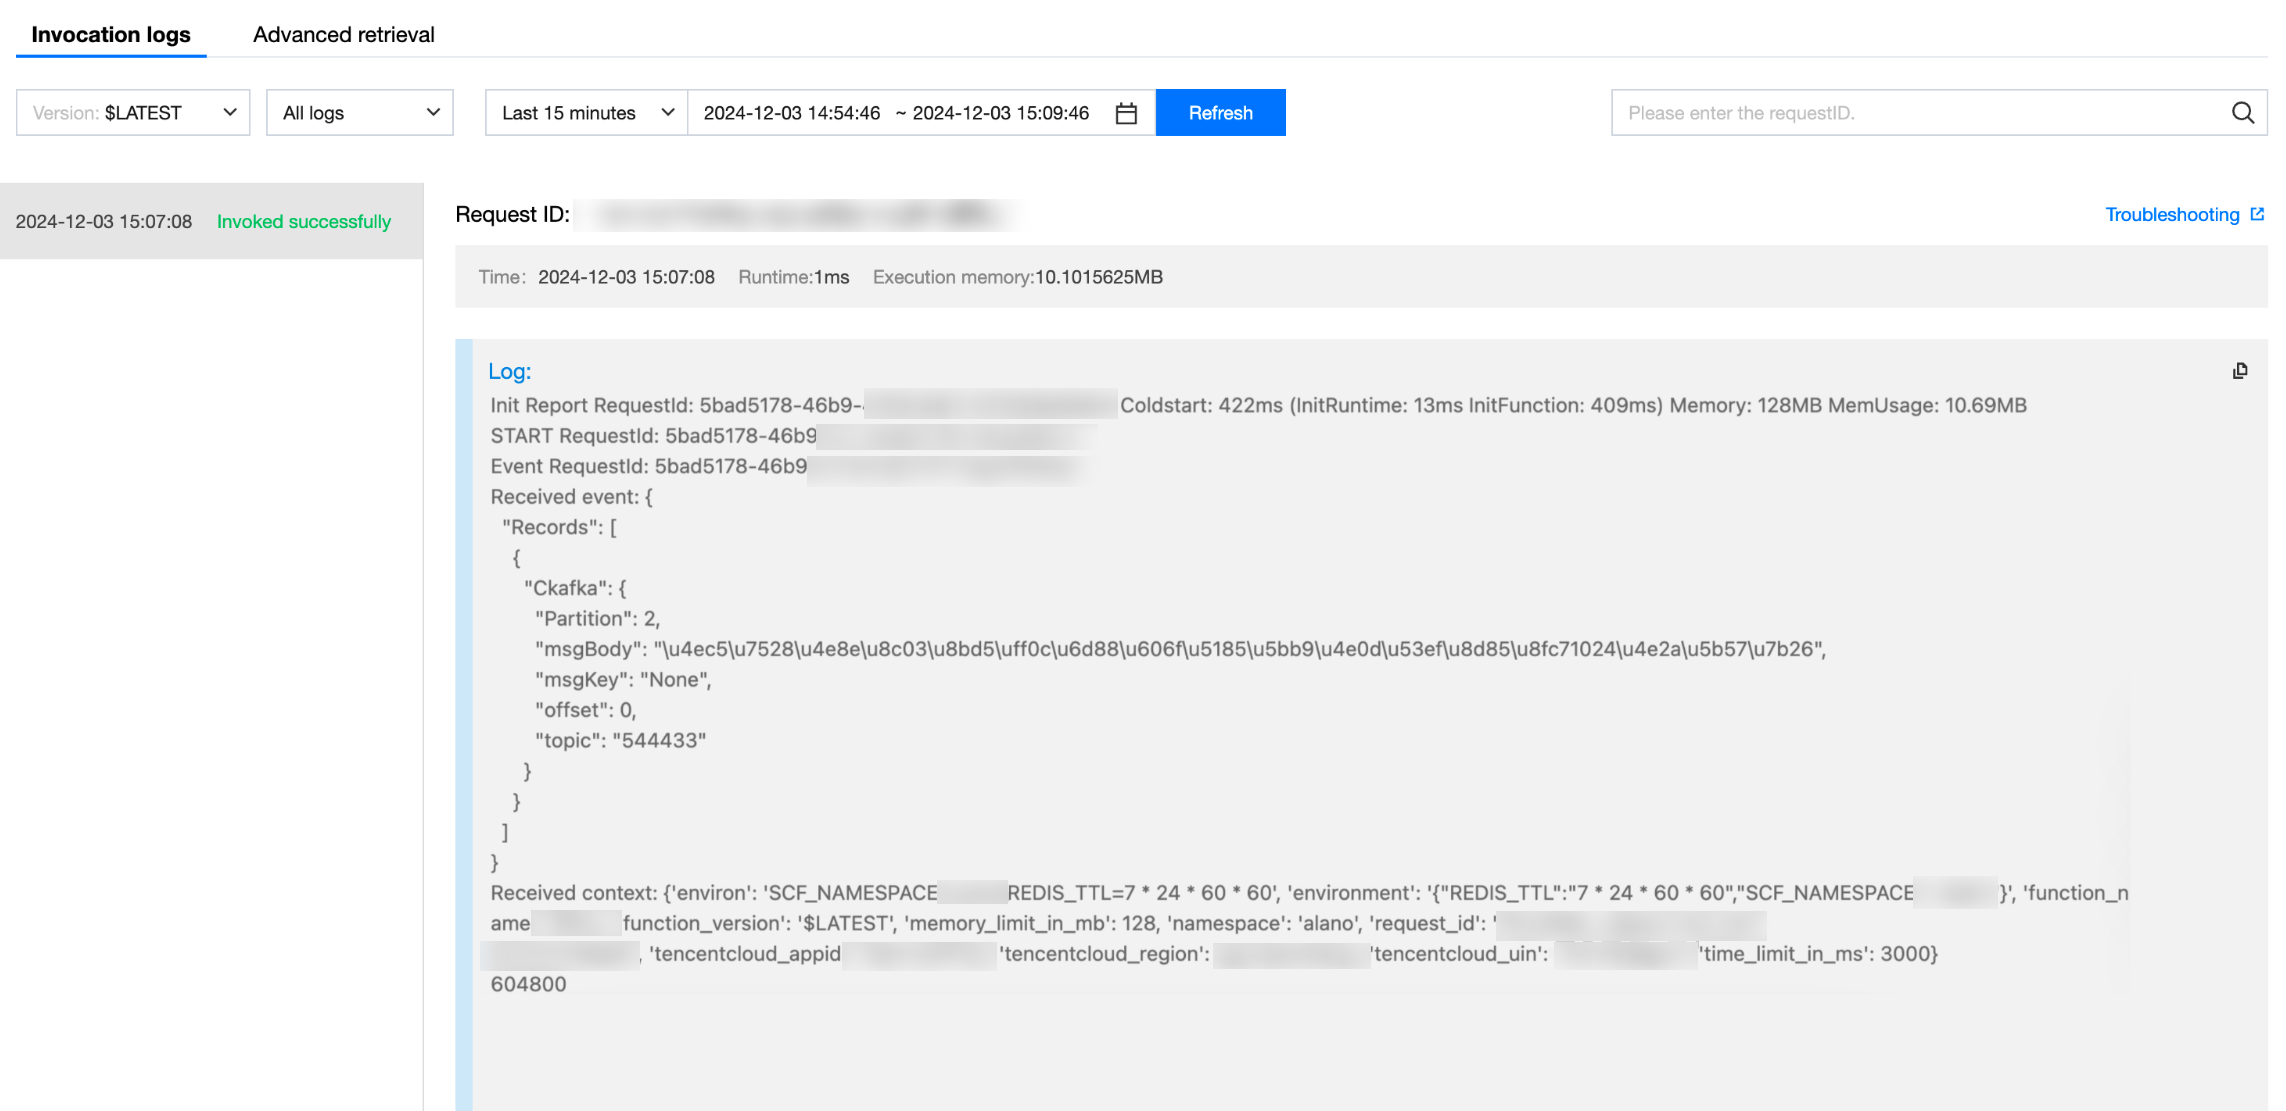
2. On the function details page, select the Log Query tab and search for the function execution records. You will then be able to see that the function has been successfully consumed and triggered.
フィードバック