The software WebUI entry feature is the accessibility to native component UIs provided by EMR. Such UIs can be quickly accessed through the public IP address of a master node (it is recommended to configure a security policy in a timely manner). If the private network of your cluster is interconnected with your organizational public network, you can disable this public IP address and access the UIs directly through the private network.
Viewing WebUI Address
1. Log in to the EMR console and click the ID/Name of the target cluster in the cluster list to enter the cluster details page.
2. Click Cluster Services and then click WebUI address below a target component to access its WebUI.
The access address requires authentication. The username is "root", and the default password is the one entered when the cluster was created. To change the password, click Reset WebUI password on the page.
WebUI Access over Private Network
If Enable public network for master nodes is not selected during the cluster creation, you cannot access the WebUIs of components via the WebUI addresses given on the Cluster Services page. You can access these WebUIs with a browser via the following links in a private network environment.
Component
Link
HDFS UI
http://{cluster IP in private network}:4008
YARN UI
http://{cluster IP in private network}:5004
HBase UI
http://{cluster IP in private network}:6001
Hive UI
http://{cluster IP in private network}:7003
Hue UI
http://{cluster IP in private network}:13000
Ranger UI
http://cluster IP in private network}:6080
Storm UI
http://{cluster IP in private network}:15001
Oozie UI
http://{cluster IP in private network}:12000
Ganglia UI
http://{cluster IP in private network}:1800
Presto UI
http://{cluster IP in private network}:9000
Allexio UI
http://{cluster IP in private network}:19999
To access the WebUI of a component over a public network after the cluster is created, you can set an EIP for the master node as instructed below:
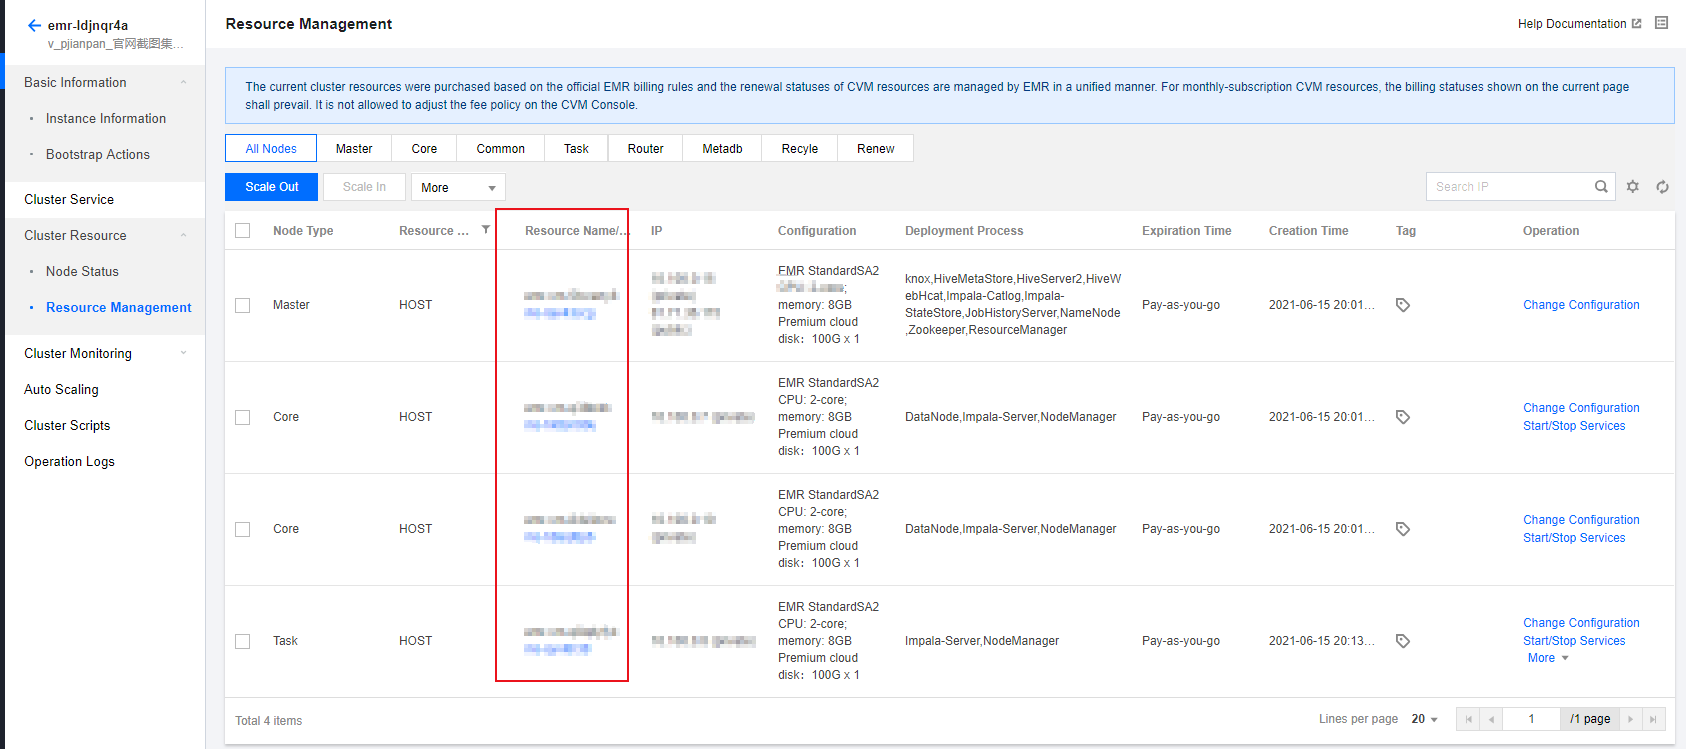
1. Log in to the EMR console, click the Cluster ID of the target cluster to enter the cluster details page, then select Cluster Resources > Resource Management, and click the Resource name/ID of the target master node to go to the CVM console.
2. Change the network bandwidth setting of the CVM instance to be bound with an EIP, so that its bandwidth is not 0 to ensure connection.
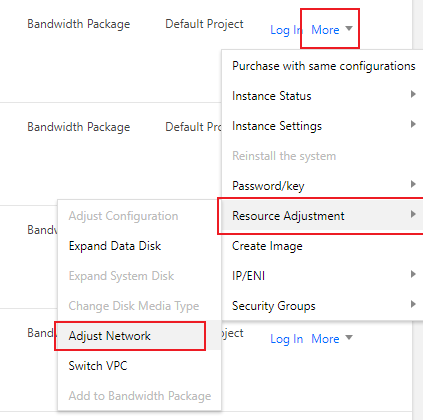
In the CVM console, select More actions > Resource adjustment > Adjust network against the target instance in the CVM instance list.
Set an appropriate target bandwidth cap to ensure the bandwidth of the CVM instance is greater than 0.
3. Click Instance ID of the CVM instance to enter its basic information page, and select the ENI tab.
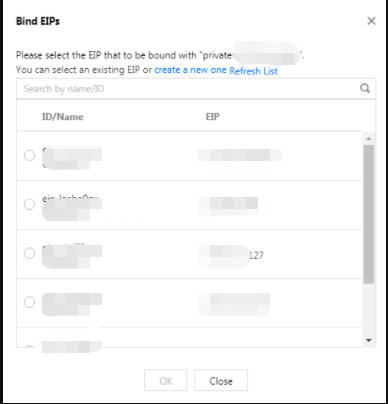
4. Click Bind to bind an existing EIP or create a new EIP for the CVM instance.
After the EIP is bound, you can see the EIP information beside the public network IP bound to the primary ENI on the ENI page.
5. Check the CVM access over public network.
6. Use the ping or ssh command to check whether the EIP is effective. Ensure the security group inbound rule is available to ICMP and port 22. Then, access WebUIs of components.
EMR v1.3.1, EMR v2.0.1, EMR v2.1.0, and EMR v3.0.0 now support Apache Knox. By default, you can access WebUIs of components over a public network with Knox as the proxy. For UI details of all components and Knox usage, see Knox Development Guide.
Note
After an EIP is bound, the WebUI addresses given in the EMR console will remain unchanged. To change these addresses, please contact us.
Resetting WebUI Password
The access address requires authentication. The username is "root", and the default password is the one entered when the cluster was created. You can change the password as instructed below.
1. Log in to the EMR console and click the ID/Name of a target cluster in the cluster list to enter the cluster details page.
2. Click Cluster Services on the cluster details page and click Reset WebUI password in the top-left corner to reset the password.
Caution
The password must contain 8 to 16 characters in at least three of the following character types: uppercase letters, lowercase letters, digits, and special symbols (! @ # % ^ *). The first character cannot be a special symbol.
If OpenLDAP is installed in the cluster (EMR v2.6.0 and EMR v3.2.1 or later), you can change the password only on the User Management page. To reset the WebUI password, go to User Management and create a user.