TUILiveKit Release Notes
Live SDK Release Notes
npm install tuikit-atomicx-vue3 @tencentcloud/uikit-base-component-vue3 --save
pnpm add tuikit-atomicx-vue3 @tencentcloud/uikit-base-component-vue3
yarn add tuikit-atomicx-vue3 @tencentcloud/uikit-base-component-vue3
<template><UIKitProvider language="zh-CN"><div class="container"><header class="header"><h1 class="title">Online Live Streaming</h1></header><main class="main"><LiveList @live-room-click="handleLiveRoomClick" /></main></div></UIKitProvider></template><script setup lang="ts">import { onMounted } from 'vue';import { LiveList, type LiveInfo, useLoginState } from 'tuikit-atomicx-vue3';import { UIKitProvider } from '@tencentcloud/uikit-base-component-vue3';const { login } = useLoginState();async function initLogin() {try {await login({sdkAppId: 0, // SDKAppID, see Step 1 to obtainuserId: '', // UserID, see Step 1 to obtainuserSig: '', // userSig, see Step 1 to obtain});} catch (error) {console.error('login error:', error);}}onMounted(async () => {await initLogin();});</script><style>:global(*),:global(::after),:global(::before){box-sizing:border-box;margin:0}.container{display:flex;flex-direction:column;height:100vh;width:100vw;background:var(--bg-color-default)}.header{display:flex;align-items:center;flex-shrink:0}.title{margin:0;font-size:24px;font-weight:600;color:var(--text-color-primary);letter-spacing:-.5px}.main{flex:1;padding:24px;overflow-y:auto;min-height:0}</style>
npm run dev
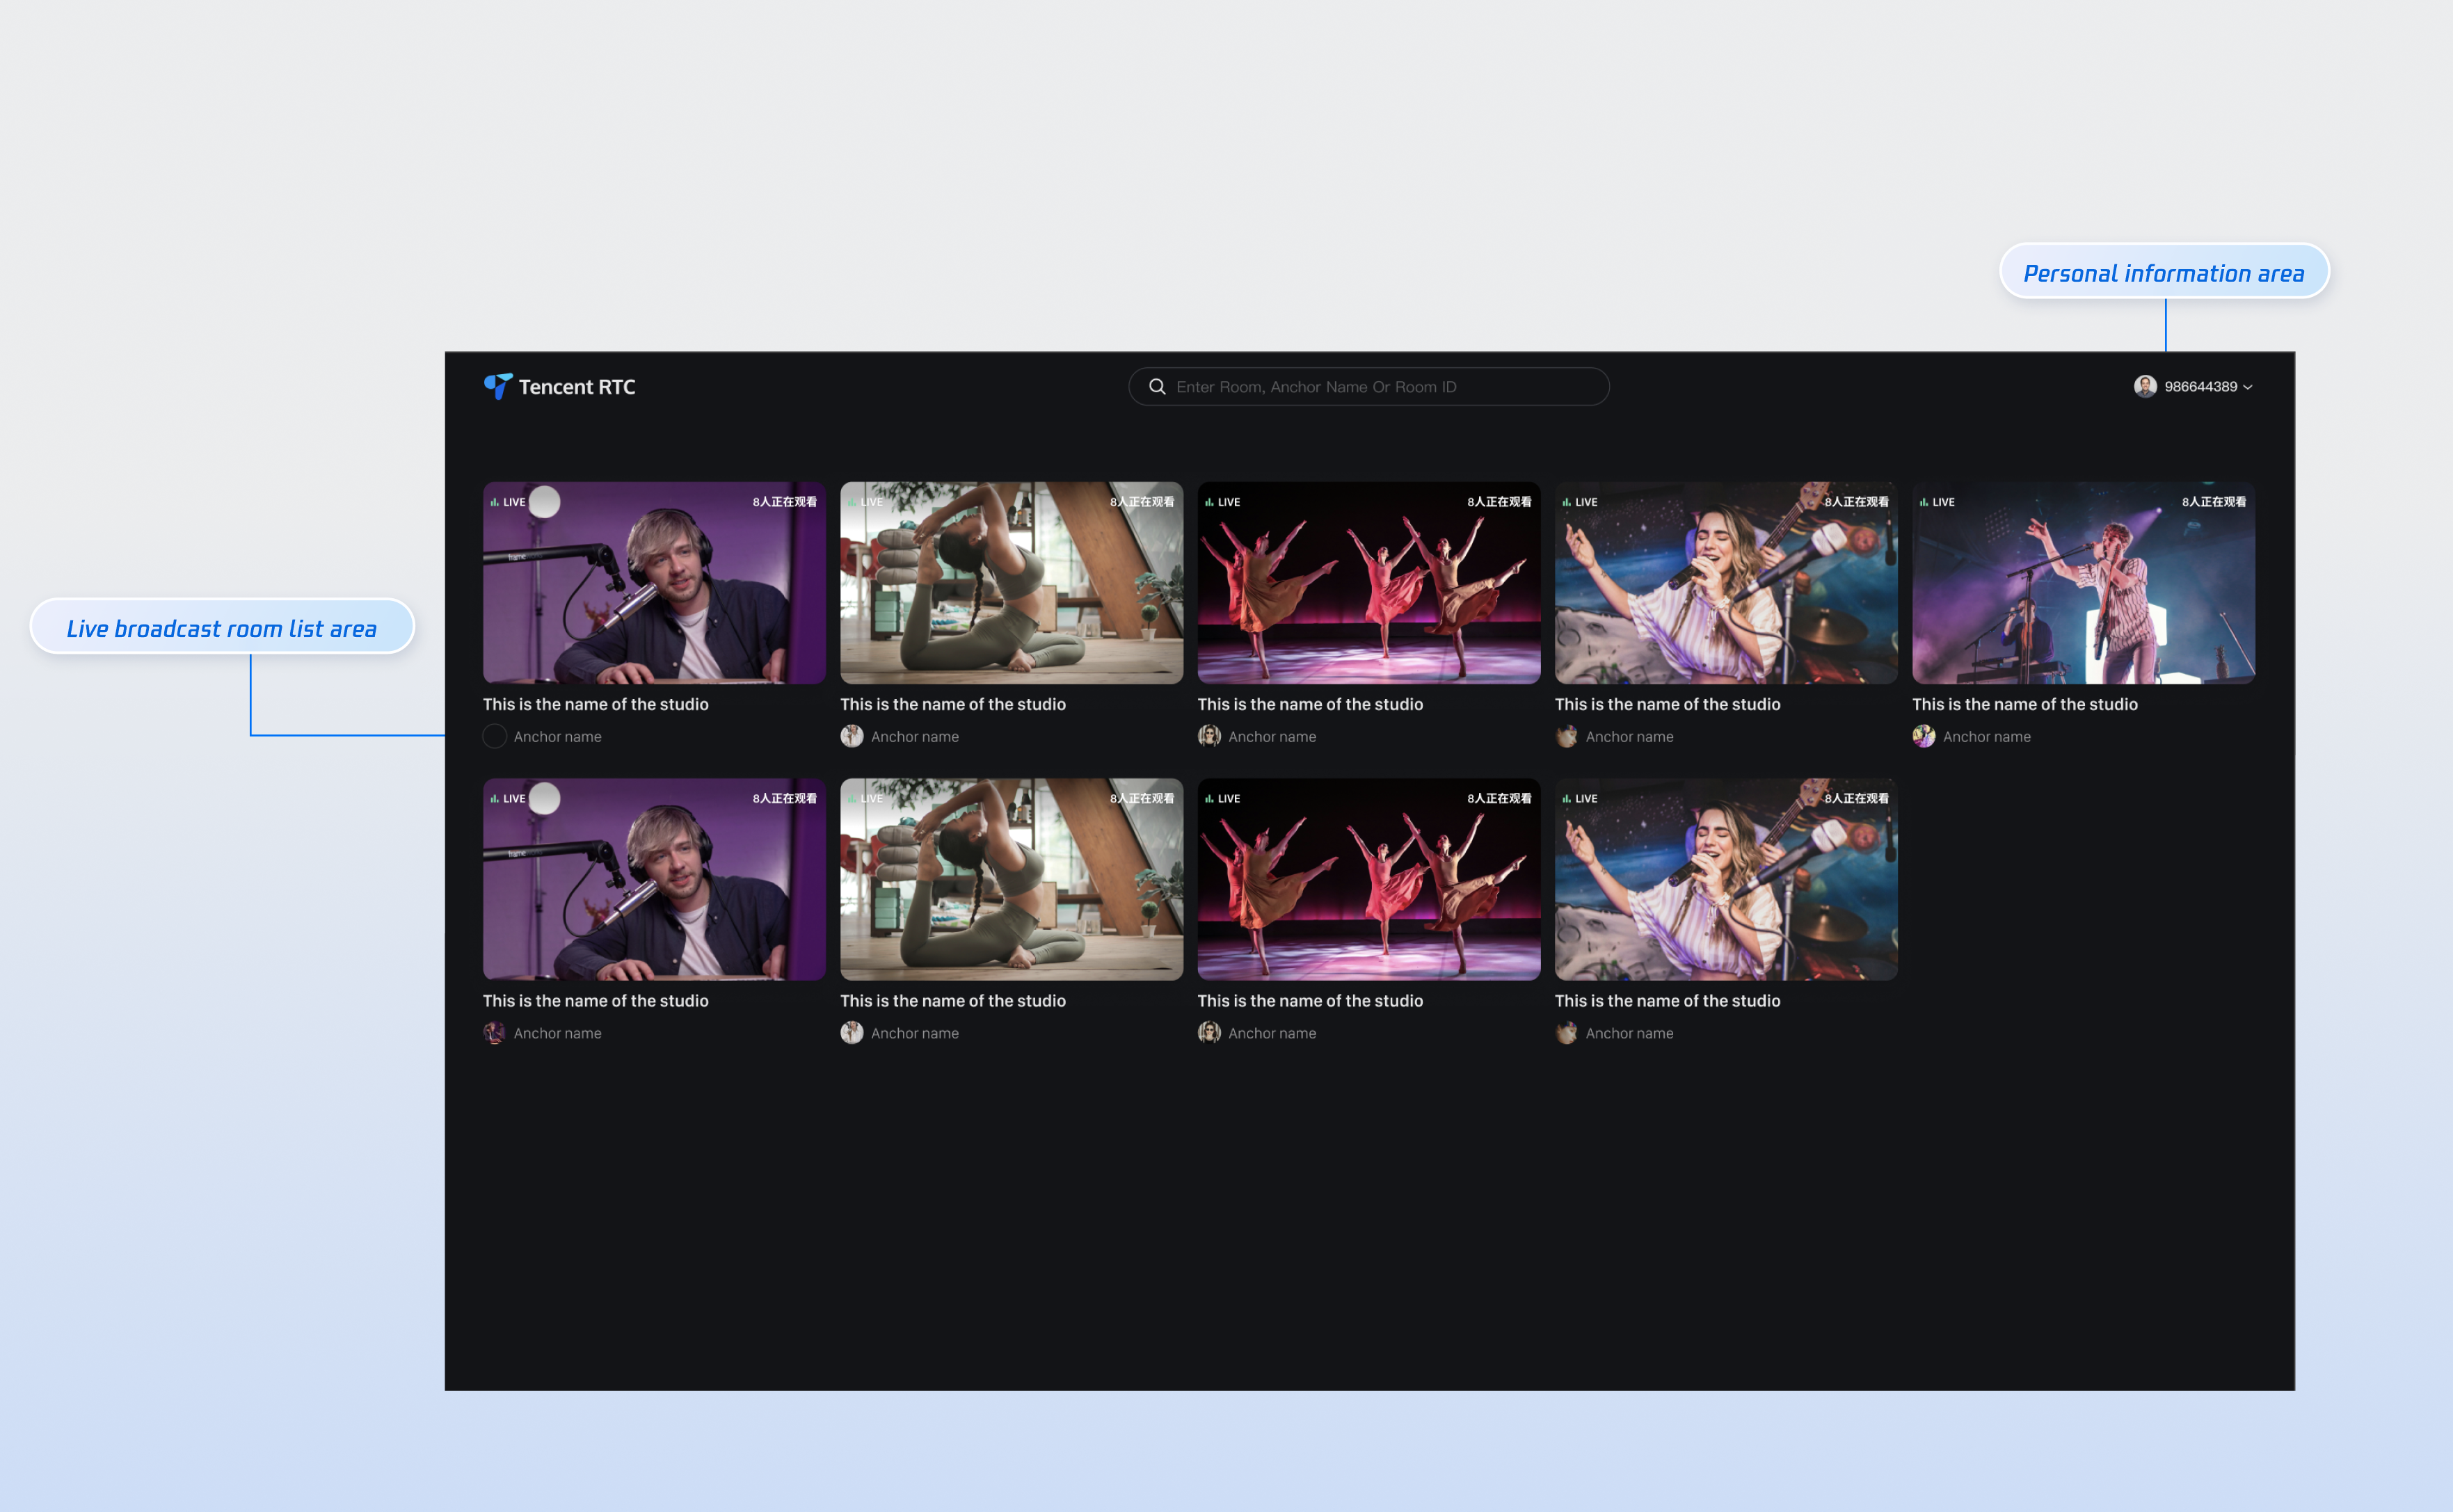
Category | Function | Description |
Live Room List | Custom live room list display | Supported: Live room information text display/hide, UI customization Custom fixed quantity display per line/column in live room |
Personal information | Custom personal information display | Supported: Show/Hide personal info Personal info font, color UI customization |
src directory of your project, create a new router folder and create the index.ts file. Then, in your main file (such as main.ts or index.ts), import and use the router. See the GitHub sample code. If you need the live list, see the documentation for the Live Stream List Page.// live-list.vue can be incrementally added to your code<template><UIKitProvider>// .....abbreviated part see quick integration procedure 3 part<LiveList @live-room-click="handleLiveRoomClick" /></UIKitProvider></template><script setup lang="ts">import { useRouter, useRoute } from 'vue-router';const router = useRouter();const route = useRoute();function handleLiveRoomClick(liveInfo: LiveInfo) {if (liveInfo?.liveId) {router.push({ path: '/live-player', query: { ...route.query, liveId: liveInfo.liveId } });}}<script>//src/router/index.tsimport { createRouter, createWebHistory } from 'vue-router';const routes = [{// Route jumping to the viewing pagepath: '/live-player',component: () => import('../views/live-player.vue'),},];const router = createRouter({history: createWebHistory(),routes,});export default router;// src/main.tsimport { createApp } from 'vue';import App from './App.vue';import router from './router';const app = createApp(App);app.use(router);app.mount('#app');
Function | Description | Experience Link |
Host Streaming | The live streamer's entire live streaming process is supported, including pre-streaming preparation and post-streaming interactions. | |
Audience Viewing | Viewers can enter the live streamer's room to watch the live stream, connect to the microphone, view live stream room information, view online viewers, and display comments. |
피드백