Monitoring Webpage (Web Desktop Browser React)
Download
포커스 모드
폰트 크기
Description
This document provides a detailed introduction to the Monitoring Webpage in TUILiveKit Demo. You can integrate our pre-developed viewing page into your existing project as specified in this document, or customize the webpage style, layout, and feature items according to your needs.
Feature Overview
Feature Category | Specific Abilities |
Multi-stream live room monitoring | Support showing 8+ live streams at the same time (actual quantity customizable). |
Low-latency playback | Pull live stream in real time with ≤3s delay. |
Standalone audio control | Enable/disable sound for any live streaming room individually to avoid interference. |
View details via a click | Click any live streaming room window to quickly enter the details page and view key information such as anchor information. |
Dismiss rule-violating live streaming rooms with one click | Operate directly on the details page or monitoring panel to quickly disable rule-violating live streaming rooms and enhance handling efficiency. |
Feature Demonstration
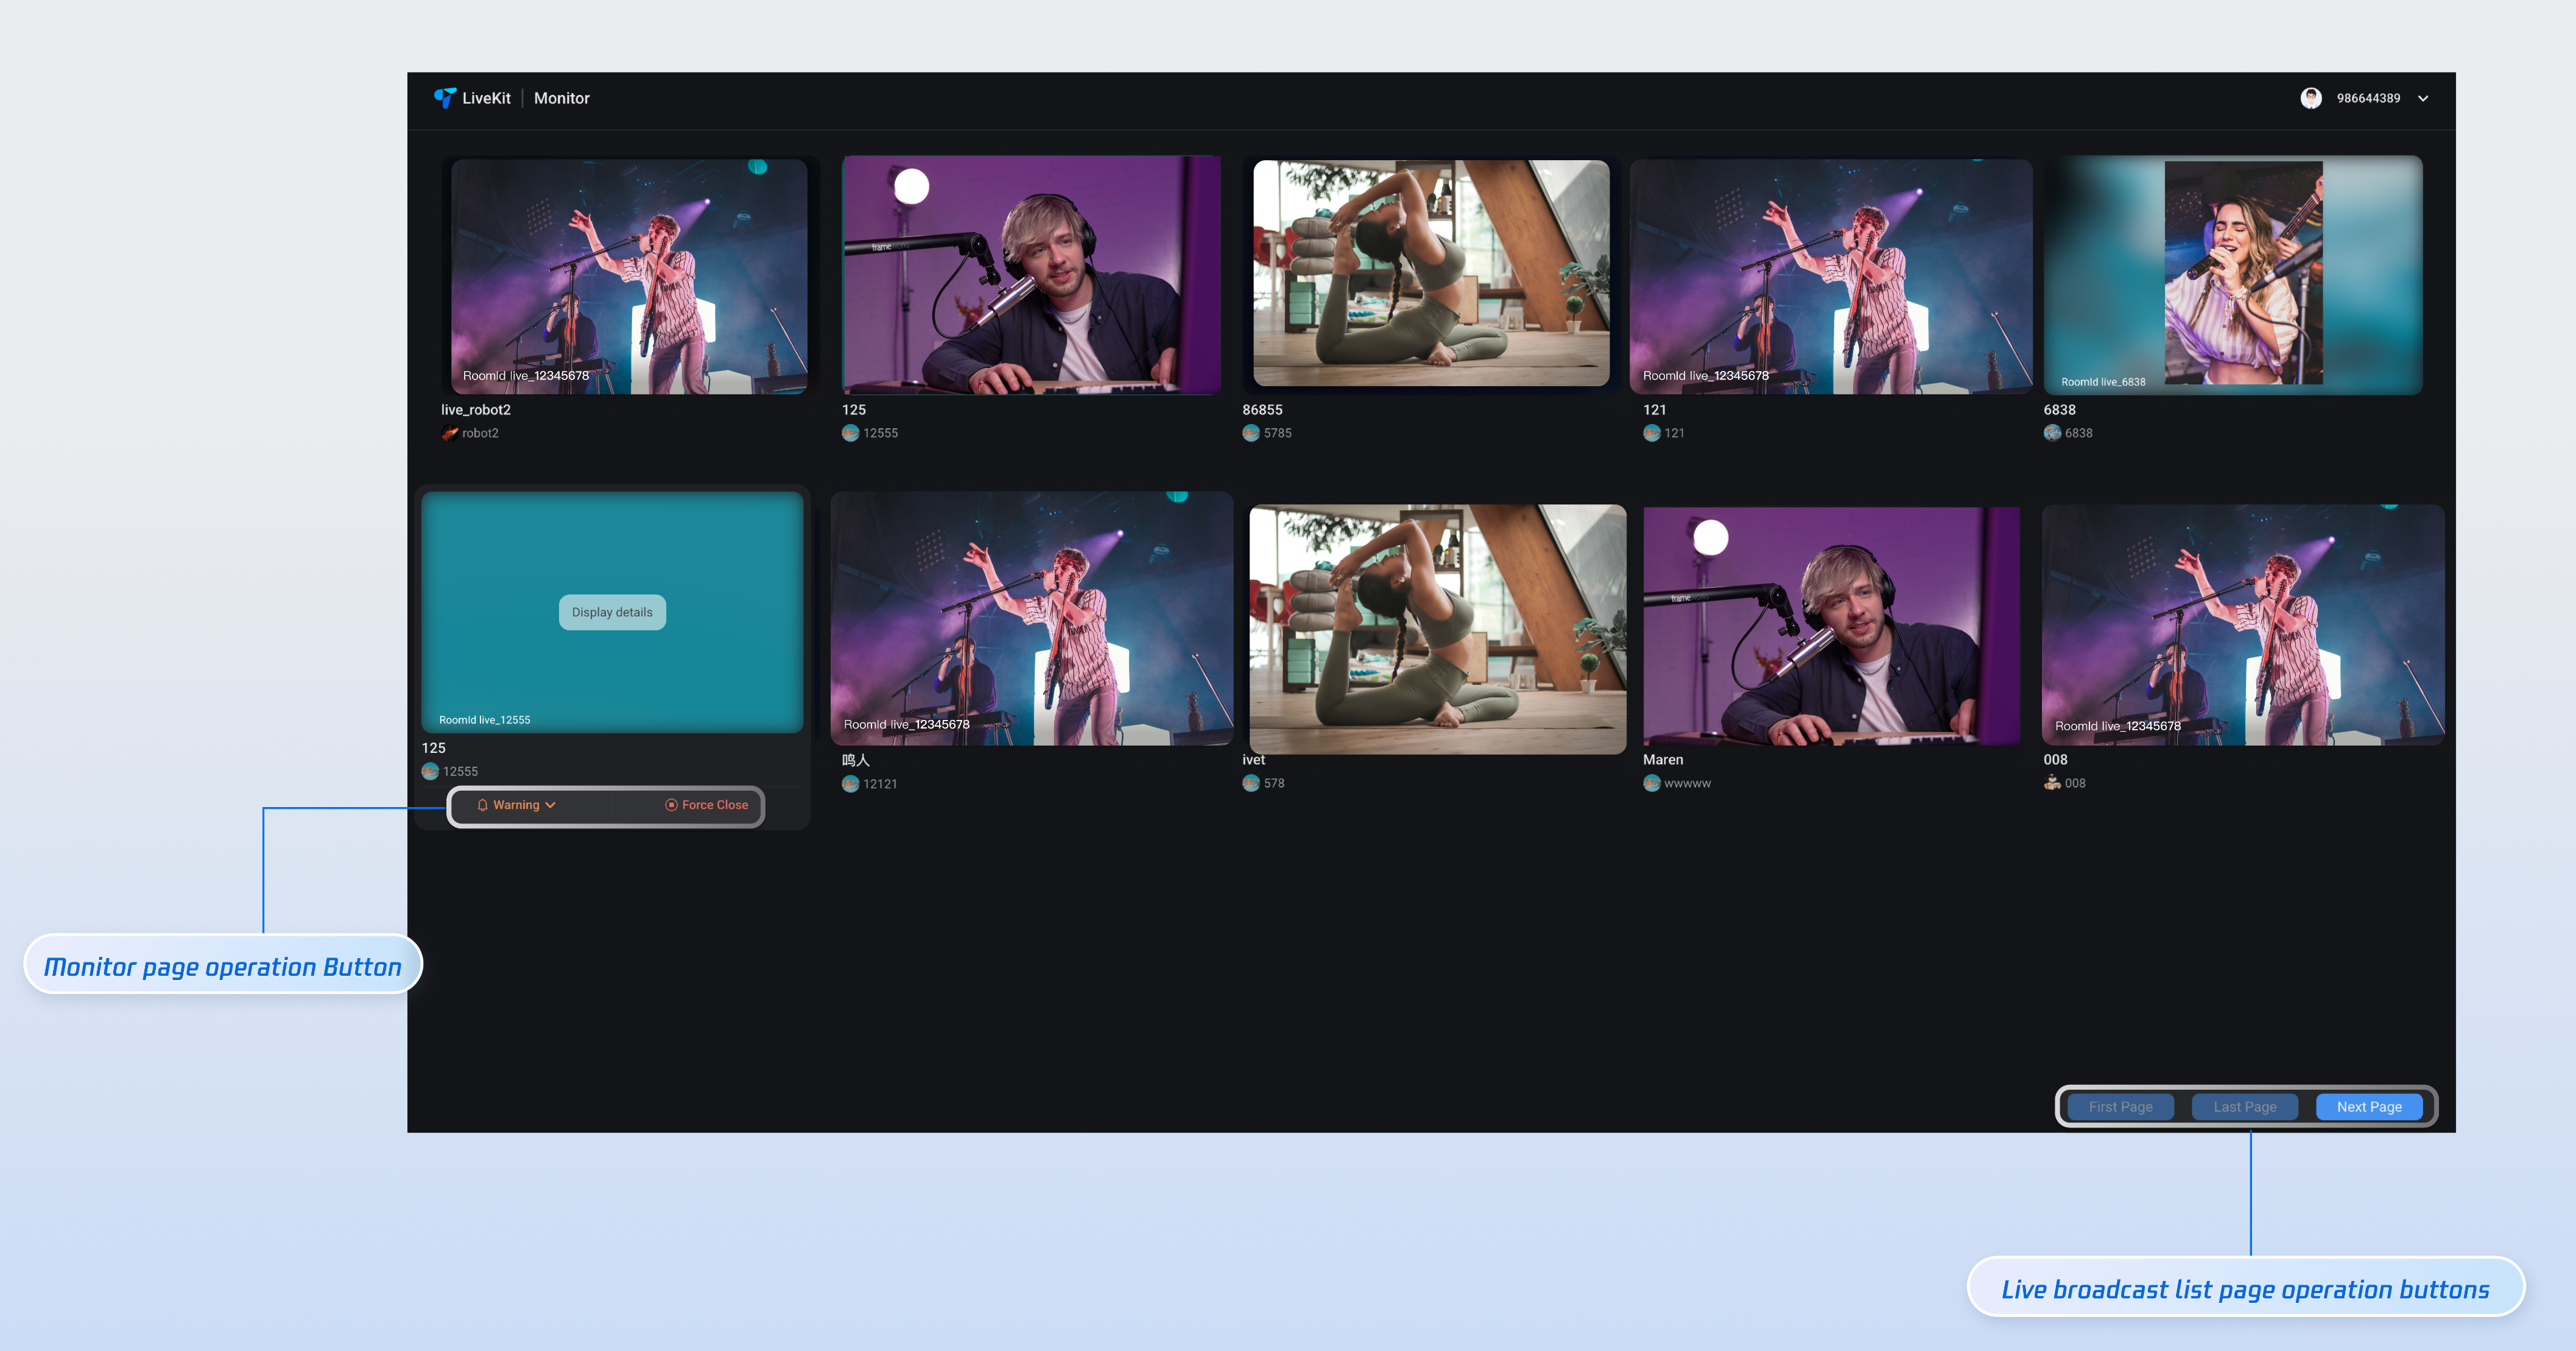
The monitoring page provides default behavior and style. However, if the default behavior and style cannot fully meet your requirements, you can also customize the UI. It mainly includes live stream multi-stream room simultaneous monitoring, low-delay playback, independent audio control, one-click view detail, and one-click dismiss rule-violating live streaming rooms.
Quick Run-Through
Step 1: Configuring the Environment and Activating the Service
Before performing quick integration, you need to refer to Preparations to meet the required environment configuration and activate the corresponding service.
Step 2: Downloading the Demo
git clone https://github.com/Tencent-RTC/TUIKit_React.git
Step 3: Dependency Installation
cd TUIKit_React/demos/live-monitor-react && npm install && cd server && npm install
Step 4: Starting the Server Project
// cd TUIKit_React/demos/live-monitor-react/server/config/index.jsconst Config = {SdkAppId: 0, // Enter theSDKAppIDof your TUILiveKit serviceSecretKey: '', // Enter theSDKSecretKeyfor your TUILiveKit serviceIdentifier: 'administrator',Protocol: 'https://',Domain: 'console.tim.qq.com',Port: 9000,};module.exports = { Config };
// Execute the following command to start the service. The default access address is:http://localhost:9000/apinpm run start
Step 5: Starting the Front-End Project
// cd TUIKit_React/demos/live-monitor-react/src/config/index.tsimport { getBasicInfo } from './basic-info-config';const sdkAppId = 0; // Enter theSDKAppIDfor your TUILiveKit serviceconst secretKey = ''; // Enter theSDKSecretKeyfor your TUILiveKit serviceconst defaultCoverUrl = ''; // Configure the default image address for your live coverconst createBasicAccount = (userId?: string) => {return getBasicInfo(userId || `live_${Math.ceil(Math.random() * 10000000)}`, sdkAppId, secretKey);};export { sdkAppId, secretKey, createBasicAccount, defaultCoverUrl };
// cd TUIKit_React/demos/live-monitor-react/src/views/LiveMointor/index.tsximport React, { useLayoutEffect } from 'react';import { useNavigate } from 'react-router-dom';import { useLiveMonitorState } from 'tuikit-atomicx-react';import { safelyParse } from '../../utils';import { Header } from '../../components/Header';import { LiveList } from '../../components/LiveList';import { Pagination } from '../../components/Pagination';import { PaginationProvider } from '../../context/PaginationContext';import styles from './LiveMonitor.module.scss';const LiveMonitor: React.FC = () => {const { init, monitorLiveInfoList } = useLiveMonitorState();const navigate = useNavigate();useLayoutEffect(() => {const account = safelyParse(localStorage.getItem('tuiLiveMonitor-userInfo') || '');if (account) {init({baseUrl: 'http://localhost:9000/api', // Default access address in procedure 4account: {sdkAppId: 0, // TheSDKAppIDof your TUILiveKit serviceuserId: '', //The userId of the user in procedure 1password: '', //The userSig of the user in procedure 1},});} else {navigate('/login');}}, [init, navigate]);return (<UIKitProvider theme="dark"><div className={styles['live-monitor']}><Header /><PaginationProvider><LiveList monitorLiveInfoList={monitorLiveInfoList} /><div className={styles['live-pagination']}><Pagination pageSize={10} /></div></PaginationProvider></div></UIKitProvider>);};export default LiveMonitor;
npm run start
Tailor-Made
You have successfully launched the monitoring page Demo. If you need to customize the UI, see the following implementation methods. Custom content includes but is not limited to
color themes, fonts, rounded corners, buttons, icons, input boxes, pop-ups in the source code, and you can add, delete, or modify them. Below are examples of customizing color themes, buttons, and icons. You can refer to these implementation approaches and apply them to other components to meet your UI customization needs.
Color Theme
As shown in step 5 example code, you can use the theme value to switch color themes.
<UIKitProvider theme="dark"> // When theme is set to dark, the interface adopts a black color theme overallxxx // When theme is set to light, the interface adopts a white-theme overall</UIKitProvider>
Button
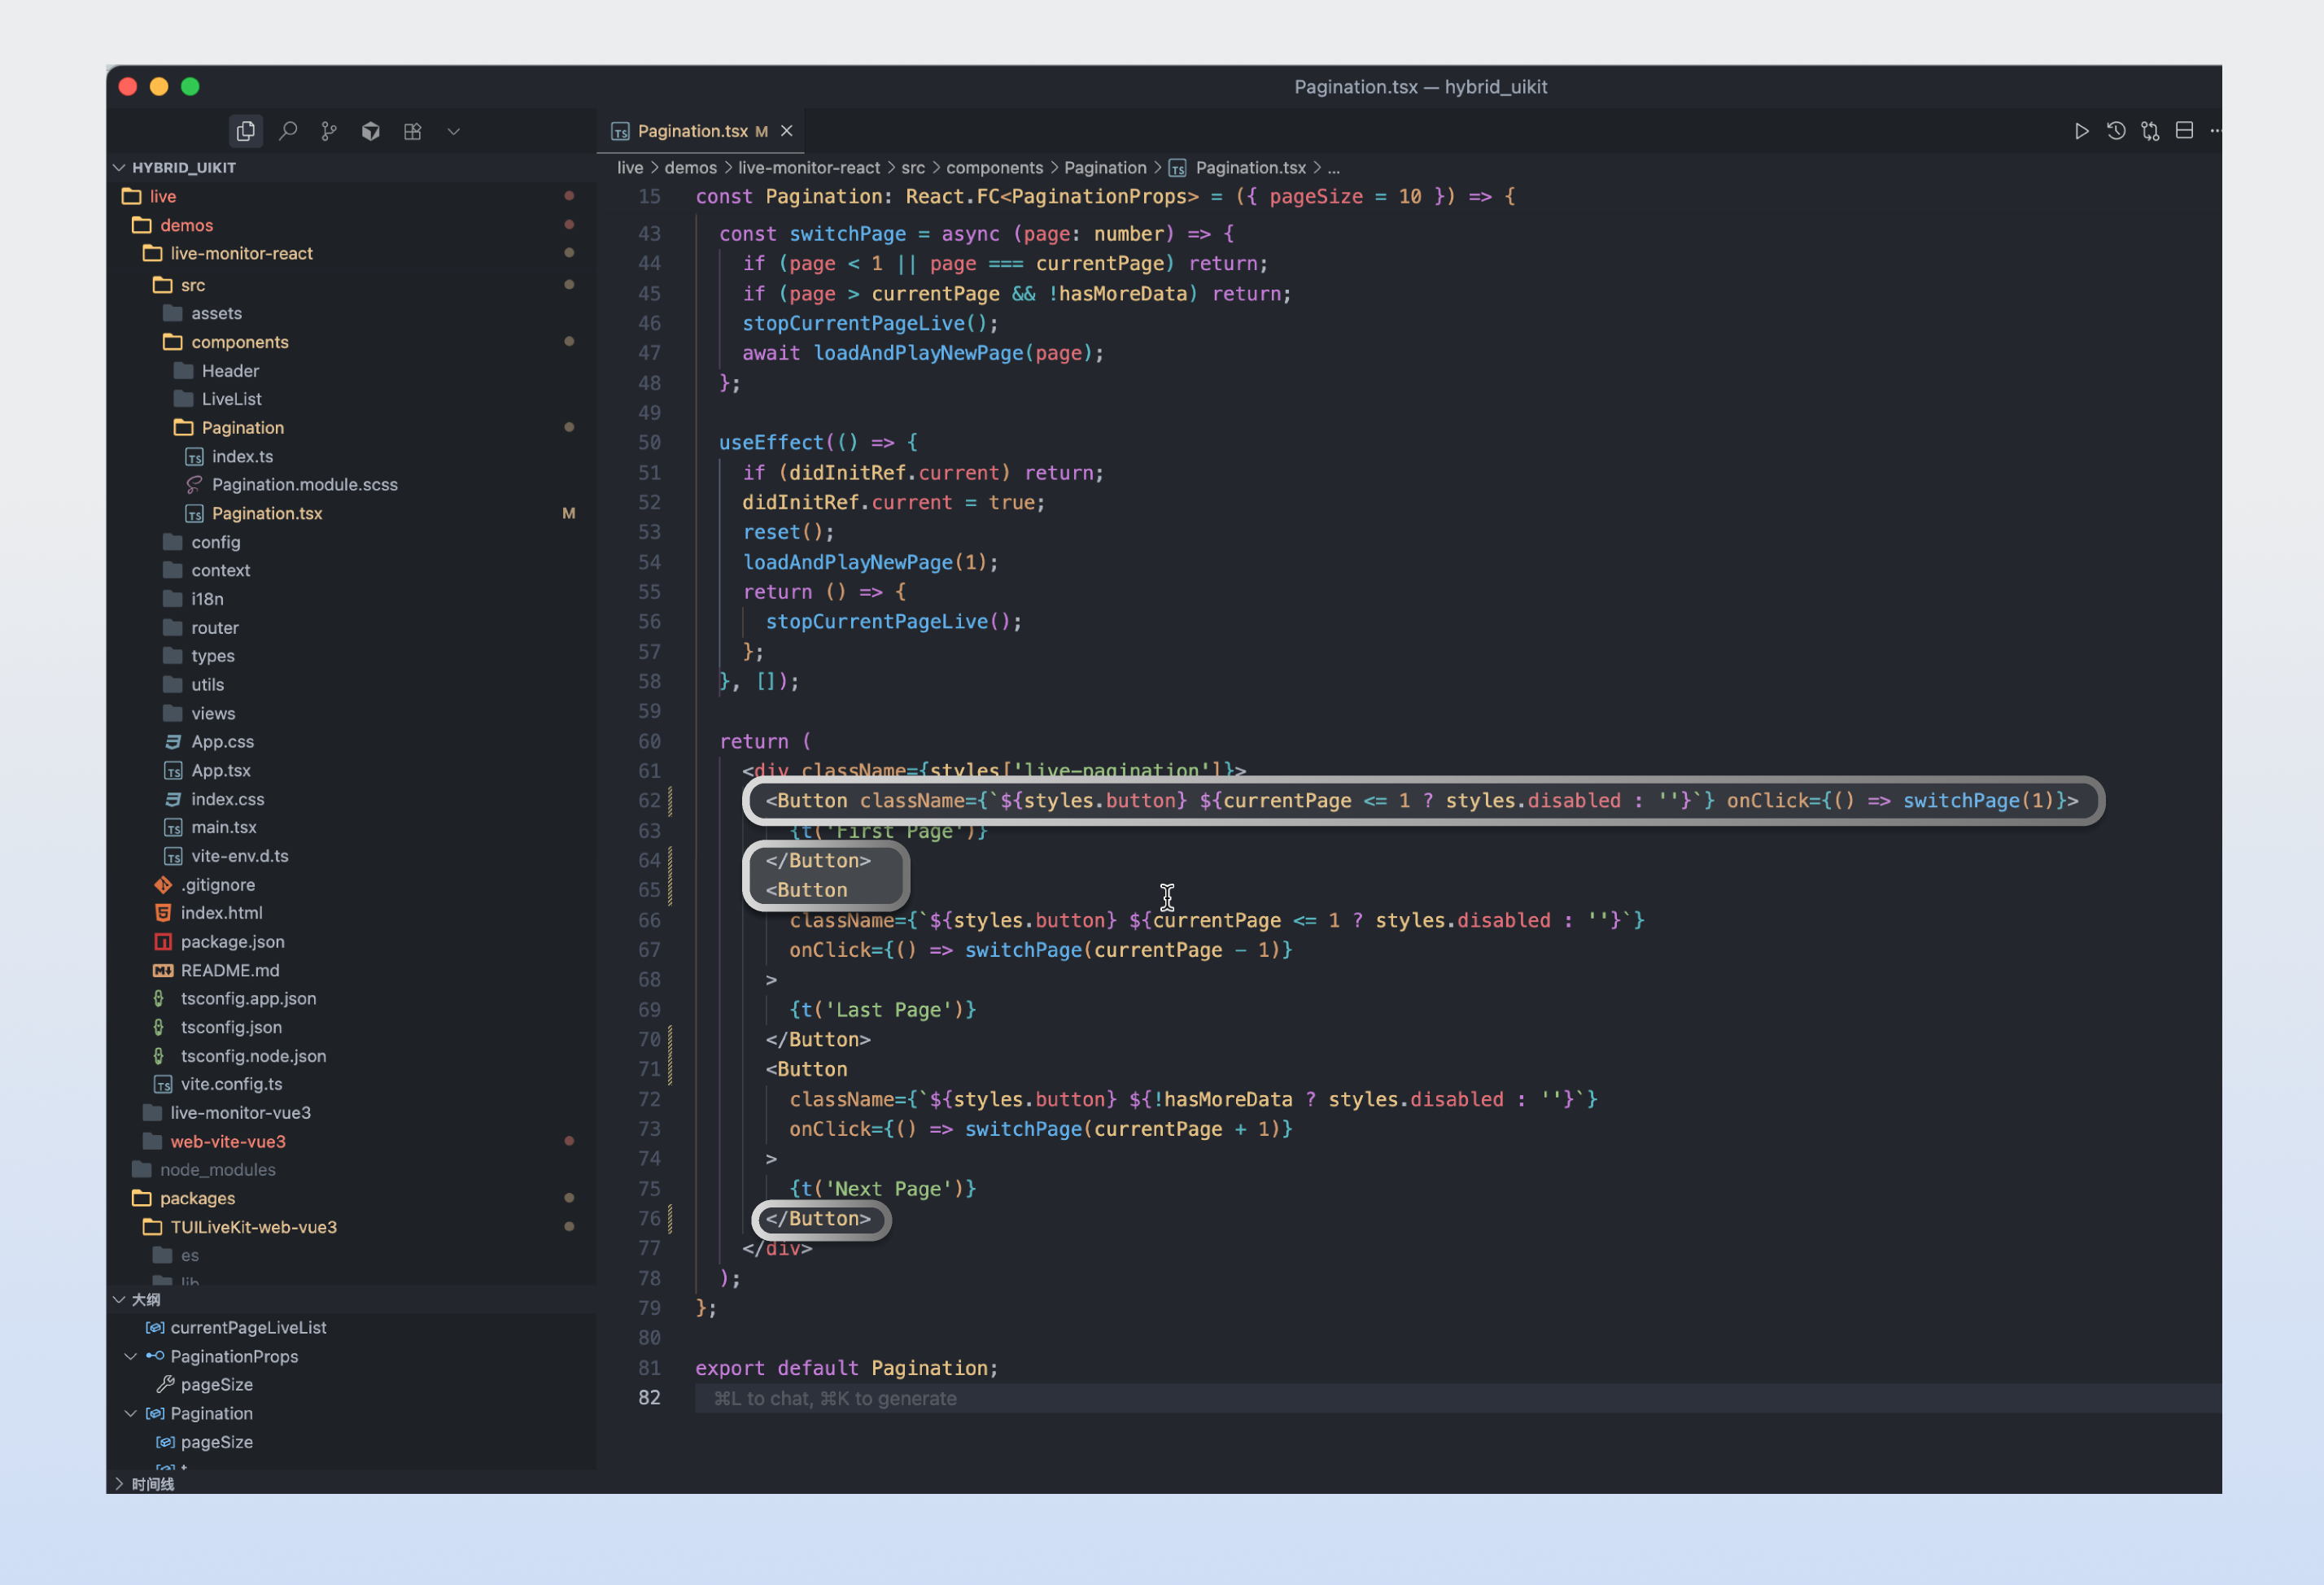
If you need to perform UI customization such as adding or replacing buttons, you can implement it as follows, using the three buttons in the live stream list page operation as an example. Refer to the figure below, you can find the source code at the specified position of the corresponding Button and perform UI customization operations like addition, deletion, replacement on the current part of the buttons.
Icon
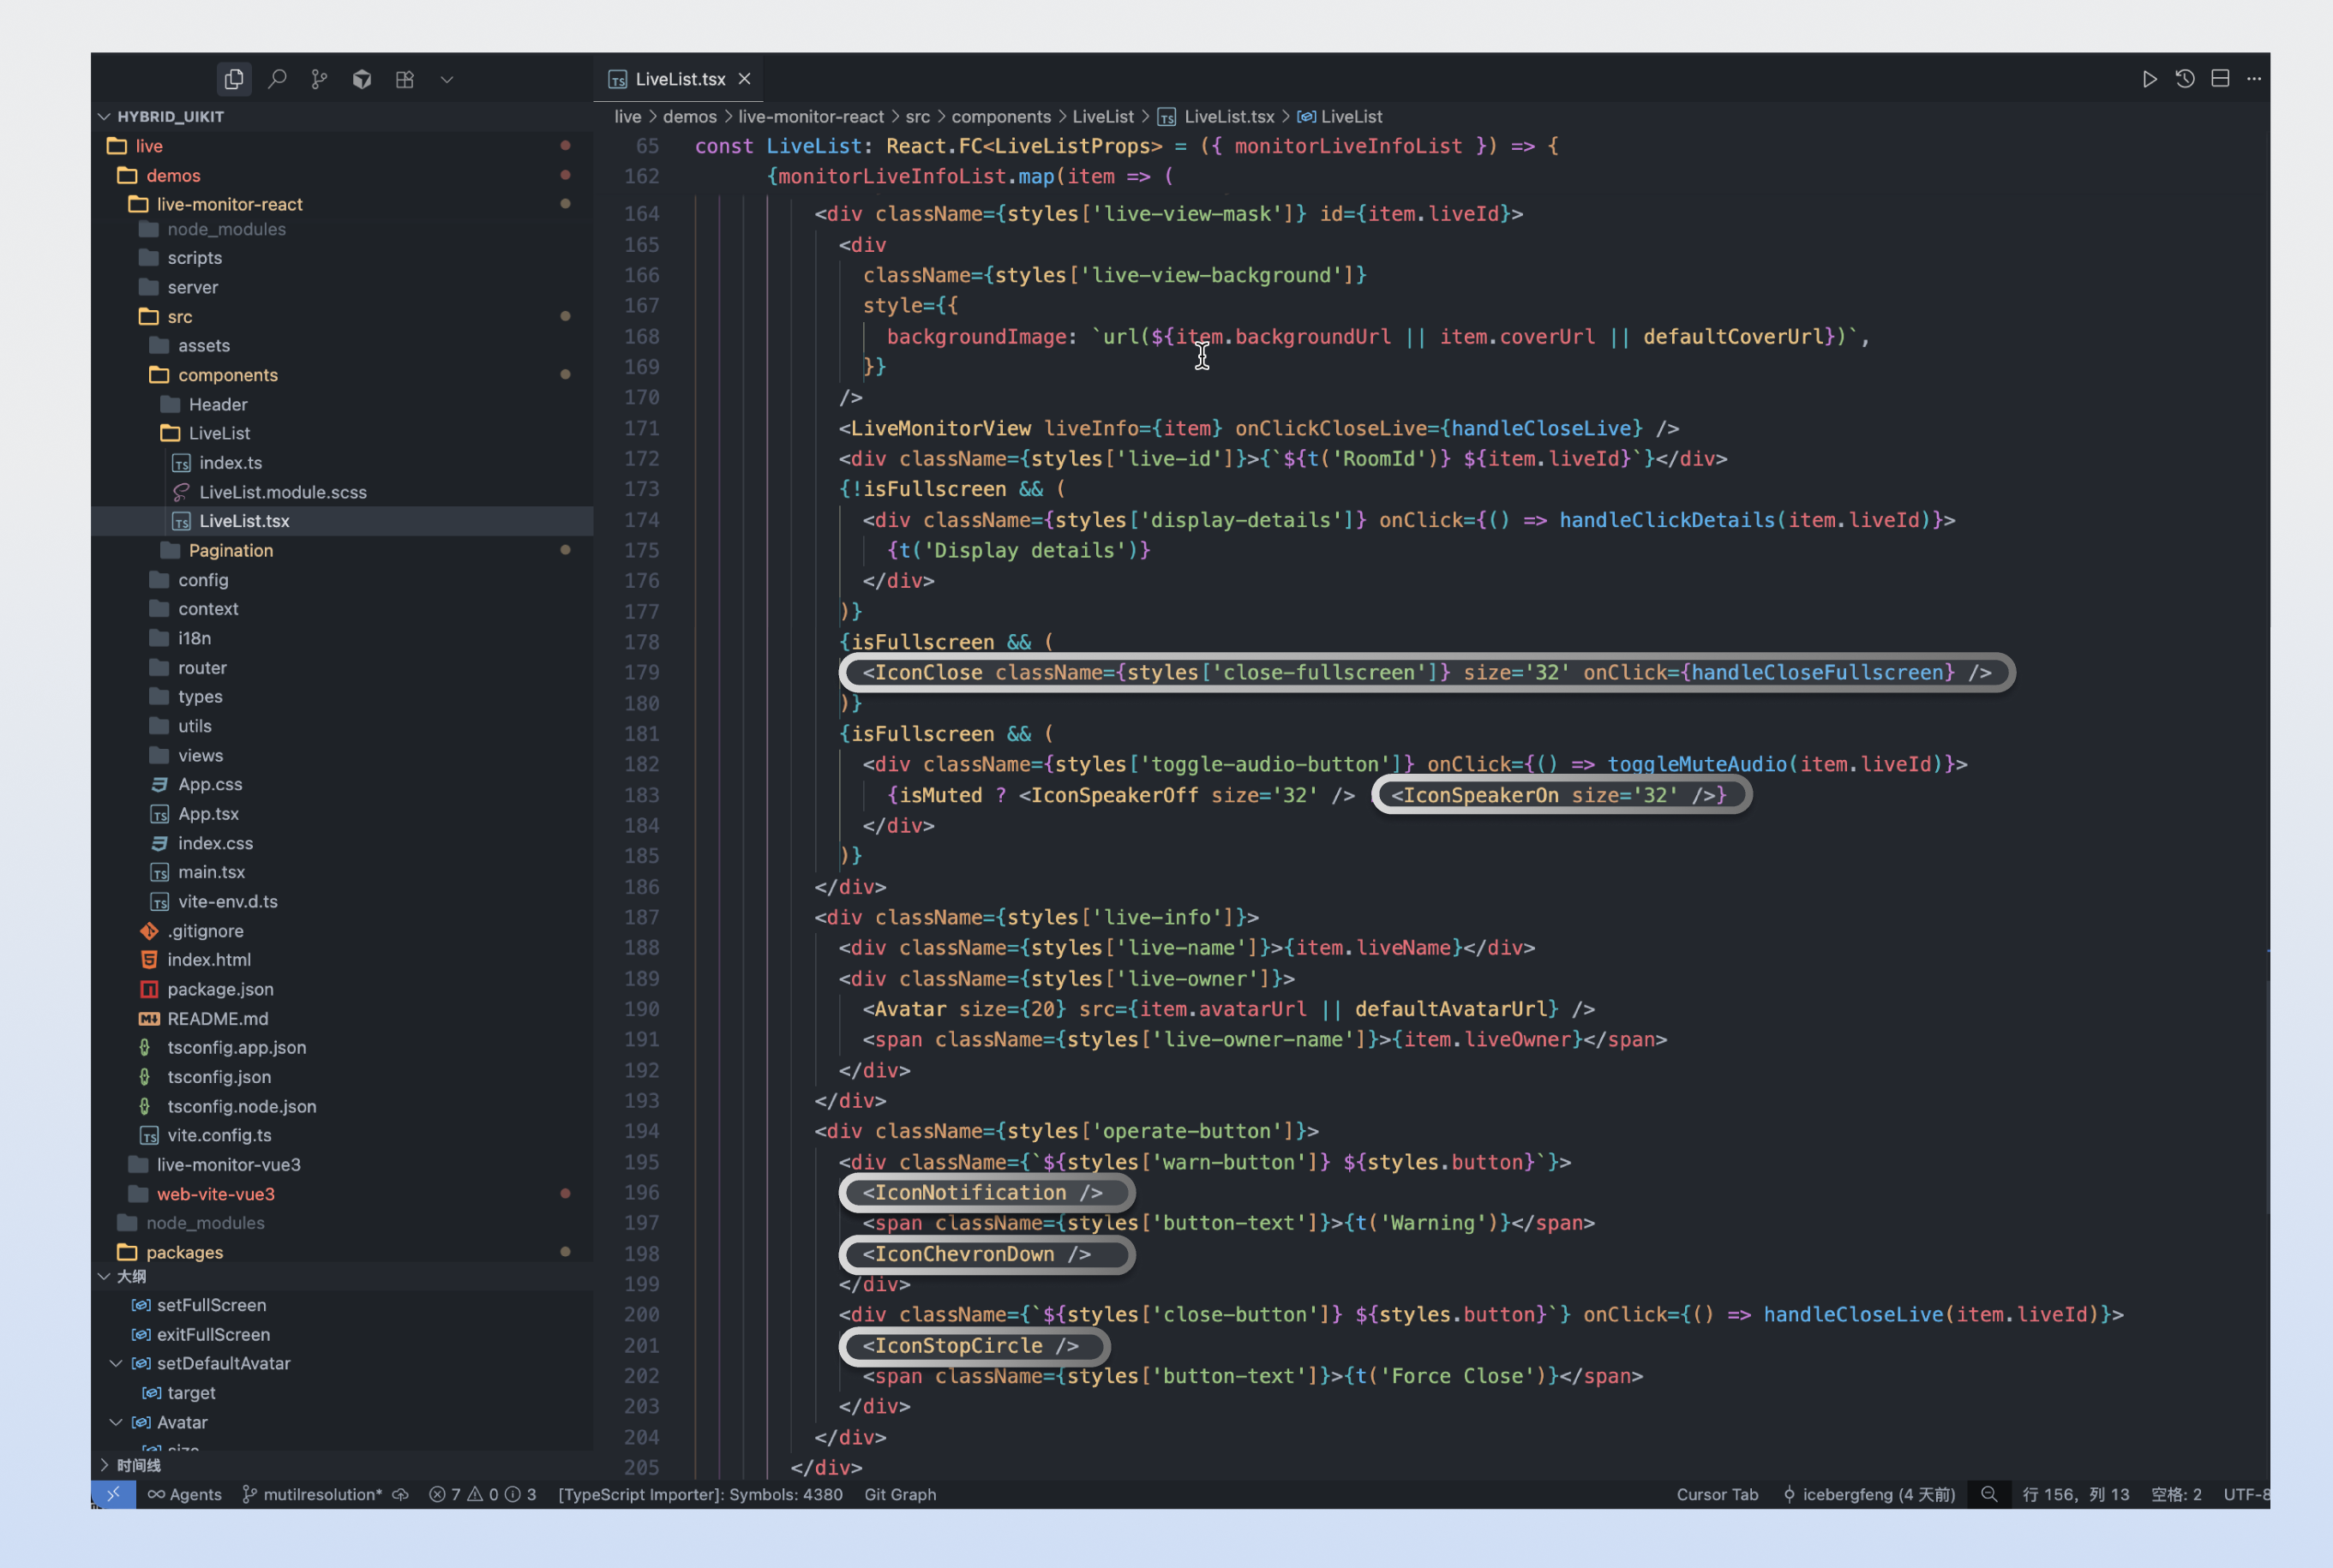
If you need to perform UI customization such as adding or replacing icons, you can implement it as follows, using the Icon in the live stream list as an example. Follow the guideline below to find the corresponding Icon location and perform UI customization operations like addition, deletion, or replacement.
피드백