Scenario 1: Enabling the Proxy Cache Plugin for a Specified API
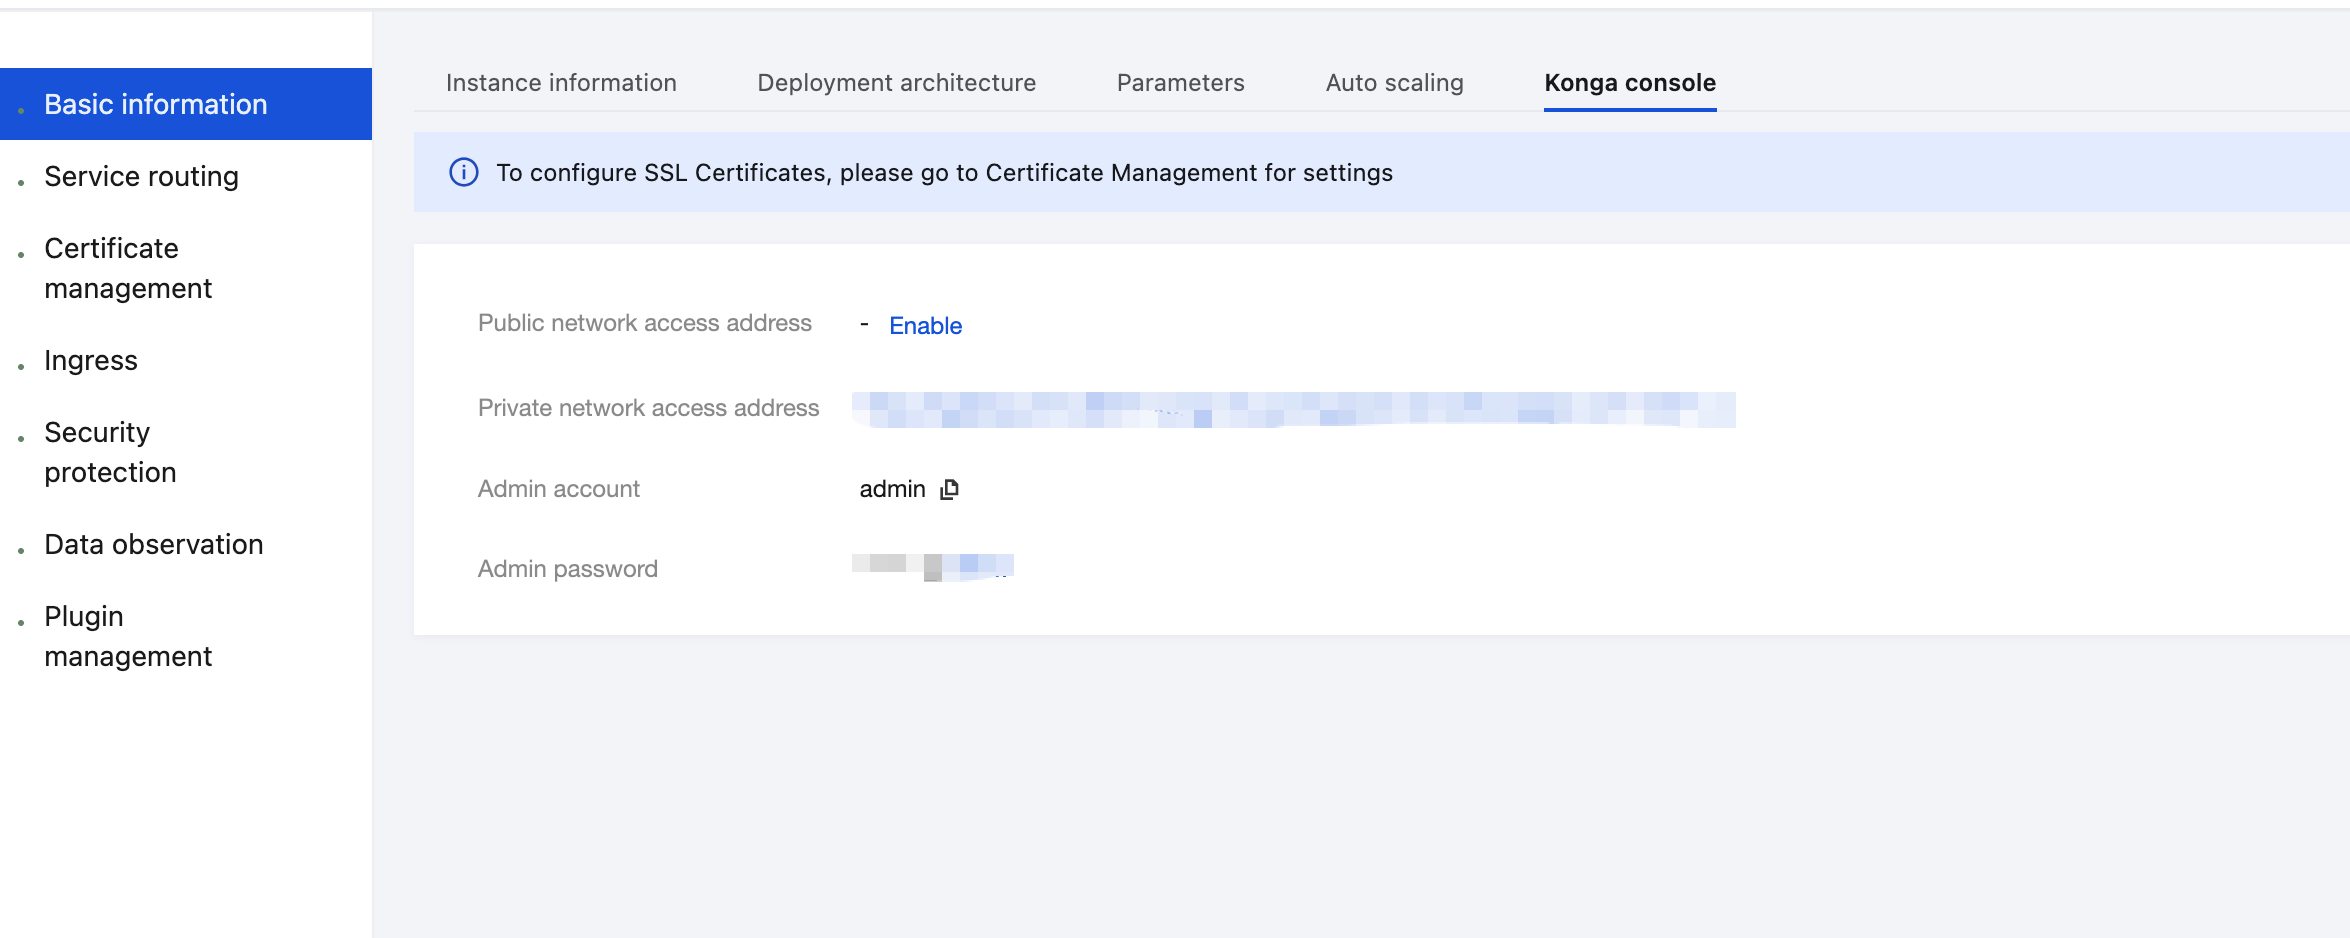
1. Log in to the Tencent Service Framework (TSF) console, go to the details page of the Cloud Native API Gateway instance for which the Proxy Cache plugin needs to be configured, and view the Konga console login method on the Konga Console tab page.
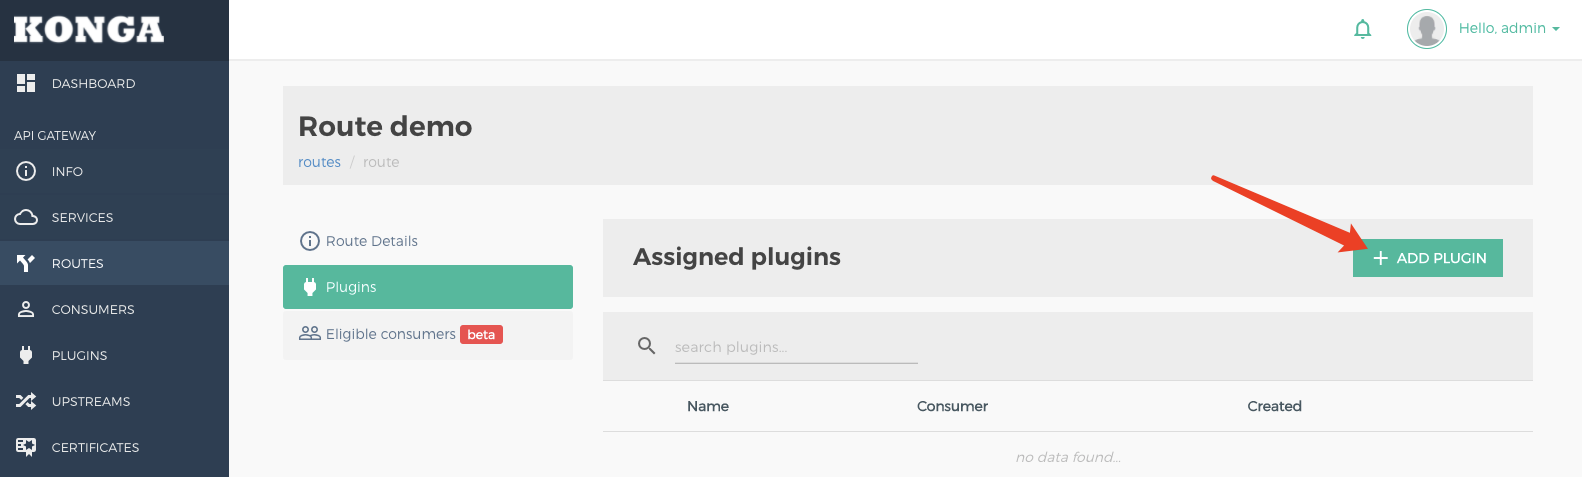
2. Log in to the Konga console, go to the details page of the route to be cached, click ADD PLUGIN, and select Proxy Cache under the Traffic Control group.
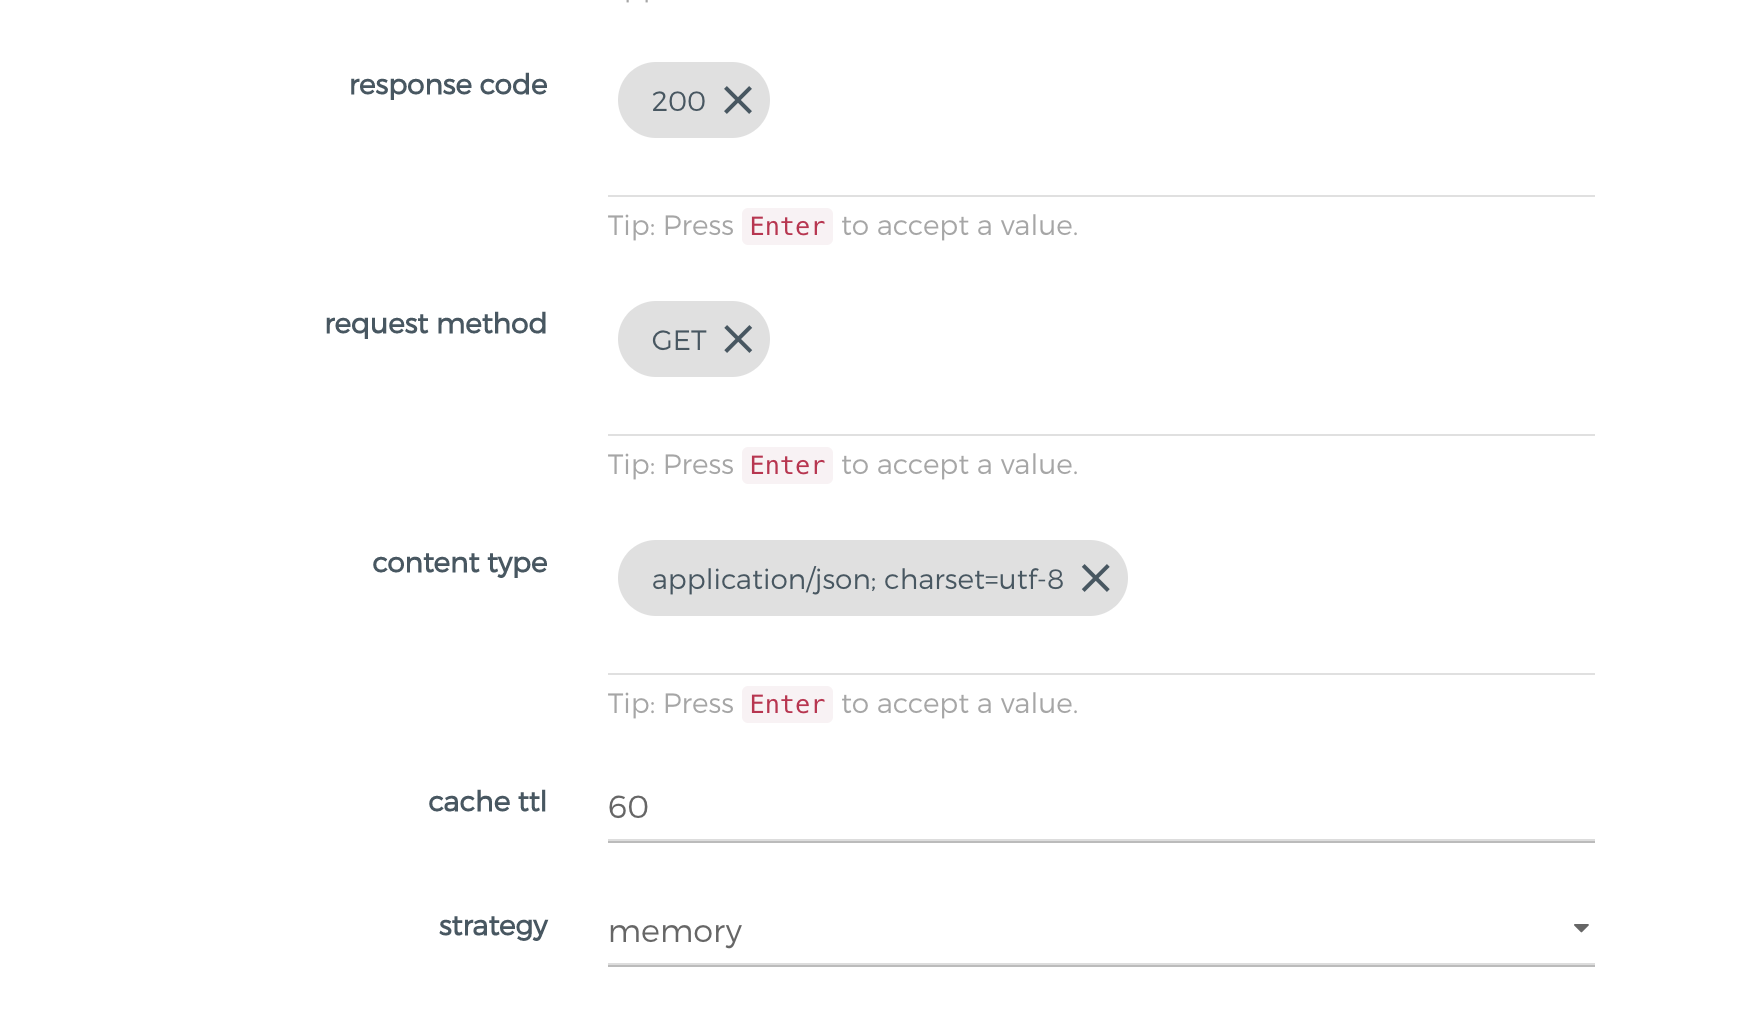
3. In the plugin configuration, enter the following configuration, press Enter, and save.
response code: 200 // List of backend response codes that can be cached. It is recommended that normal response codes (such as 200) be entered to prevent abnormal response content from being cached.
request method: GET // Request methods that can be cached.
content type: application/json; charset=utf-8 // Backend response Content-Type that can be cached. Note that the value should fully match the response header. For example, "application/json" and "application/json; charset=utf-8" do not match.
cache ttl: 60 // Caching duration, in seconds.
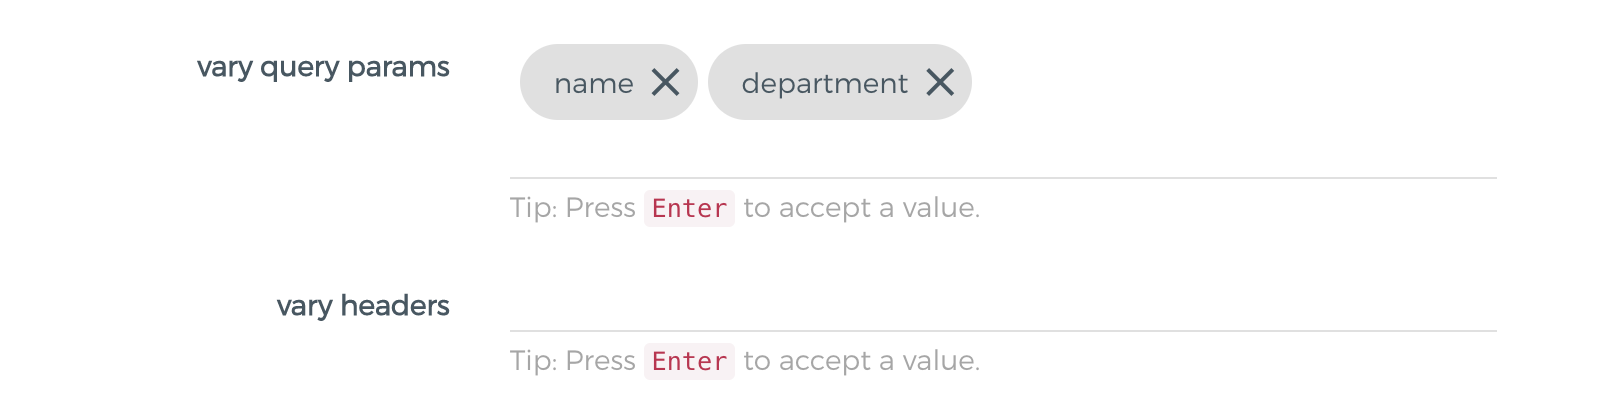
4. If caching needs to be performed by parameters, the following parameters need to be configured:
vary query params: name, department // List of query parameter names used as the cache keys, which is empty by default.
vary headers: x-cache-header // Used to cache the list of header parameter names for the key, which is empty by default.
5. Initiate an API request and verify that the cache takes effect.
For the first request with the API URL set to GET /cache/it, the cache does not exist, the request is sent to the backend service, and the response header X-Cache-Status is set to Miss.
HTTP/1.1 200 OK
Content-Type: application/json;charset=utf-8
Content-Length: 335
X-Cache-Key: 6fb1b6a4440980c758b0eff31177a41d
X-Cache-Status: Miss
Date: Tue, 26 Apr 202216:04:19 GMT
X-Kong-Upstream-Latency: 948
X-Kong-Proxy-Latency: 321
Via: kong/2.4.1
When a request with the API URL set to GET /cache/it is sent again within the cache time to live (TTL), the cache hits, and the response header X-Cache-Status is set to Hit.
HTTP/1.1 200 OK
Server: openresty
Content-Type: application/json;charset=utf-8
X-Cache-Key: 6fb1b6a4440980c758b0eff31177a41d
Age: 2
X-Cache-Status: Hit
Date: Tue, 26 Apr 202216:09:23 GMT
Vary: Accept-Encoding
Content-Length: 335
X-Kong-Upstream-Latency: 0
X-Kong-Proxy-Latency: 0
Via: kong/2.4.1
When the name parameter is included in vary query params:
For the first request with the API URL set to GET /cache/it?name=john, the cache does not exist, the request is sent to the backend, and the response header X-Cache-Status is set to Miss.
When a request with the API URL set to GET /cache/it?name=john is sent again within the cache TTL, the cache hits, and the response header X-Cache-Status is set to Hit.
When a request with the API URL set to GET /cache/it?name=tom is sent within the cache TTL, the response header X-Cache-Status is set to Miss because the name parameter differs.
Scenario 2: Viewing a Specified Cache Using admin api
The cached content includes the response body and response headers (excluding Hop-By-Hop headers).
To dynamically control the caching behavior on the client through the Cache-Control request header, enable the cache-control configuration item in the plugin.
X-Cache-Status response header description:
Miss: The request matches the cache policy but does not hit the cache.
Hit: The request hits the cache.
Bypass: The request does not meet the matching condition set by the cache plugin.
Refresh: The cache does not expire. However, the request bypasses the cache due to Cache-Control in the request header.