This document demonstrates, through a demo, the full-process operation of using polaris-java to access the hosted Polaris (North Star) by the microservices engine, helping you quickly understand how to use PolarisMesh.
Download the Github demo source code to your local machine and extract it.
The local build environment has the Java JDK and Maven installed and can access the Maven Central Repository.
Based on your business needs, the resources for business deployment have been prepared. Choose one of the methods: virtual machine deployment, containerized deployment, or TEM deployment.
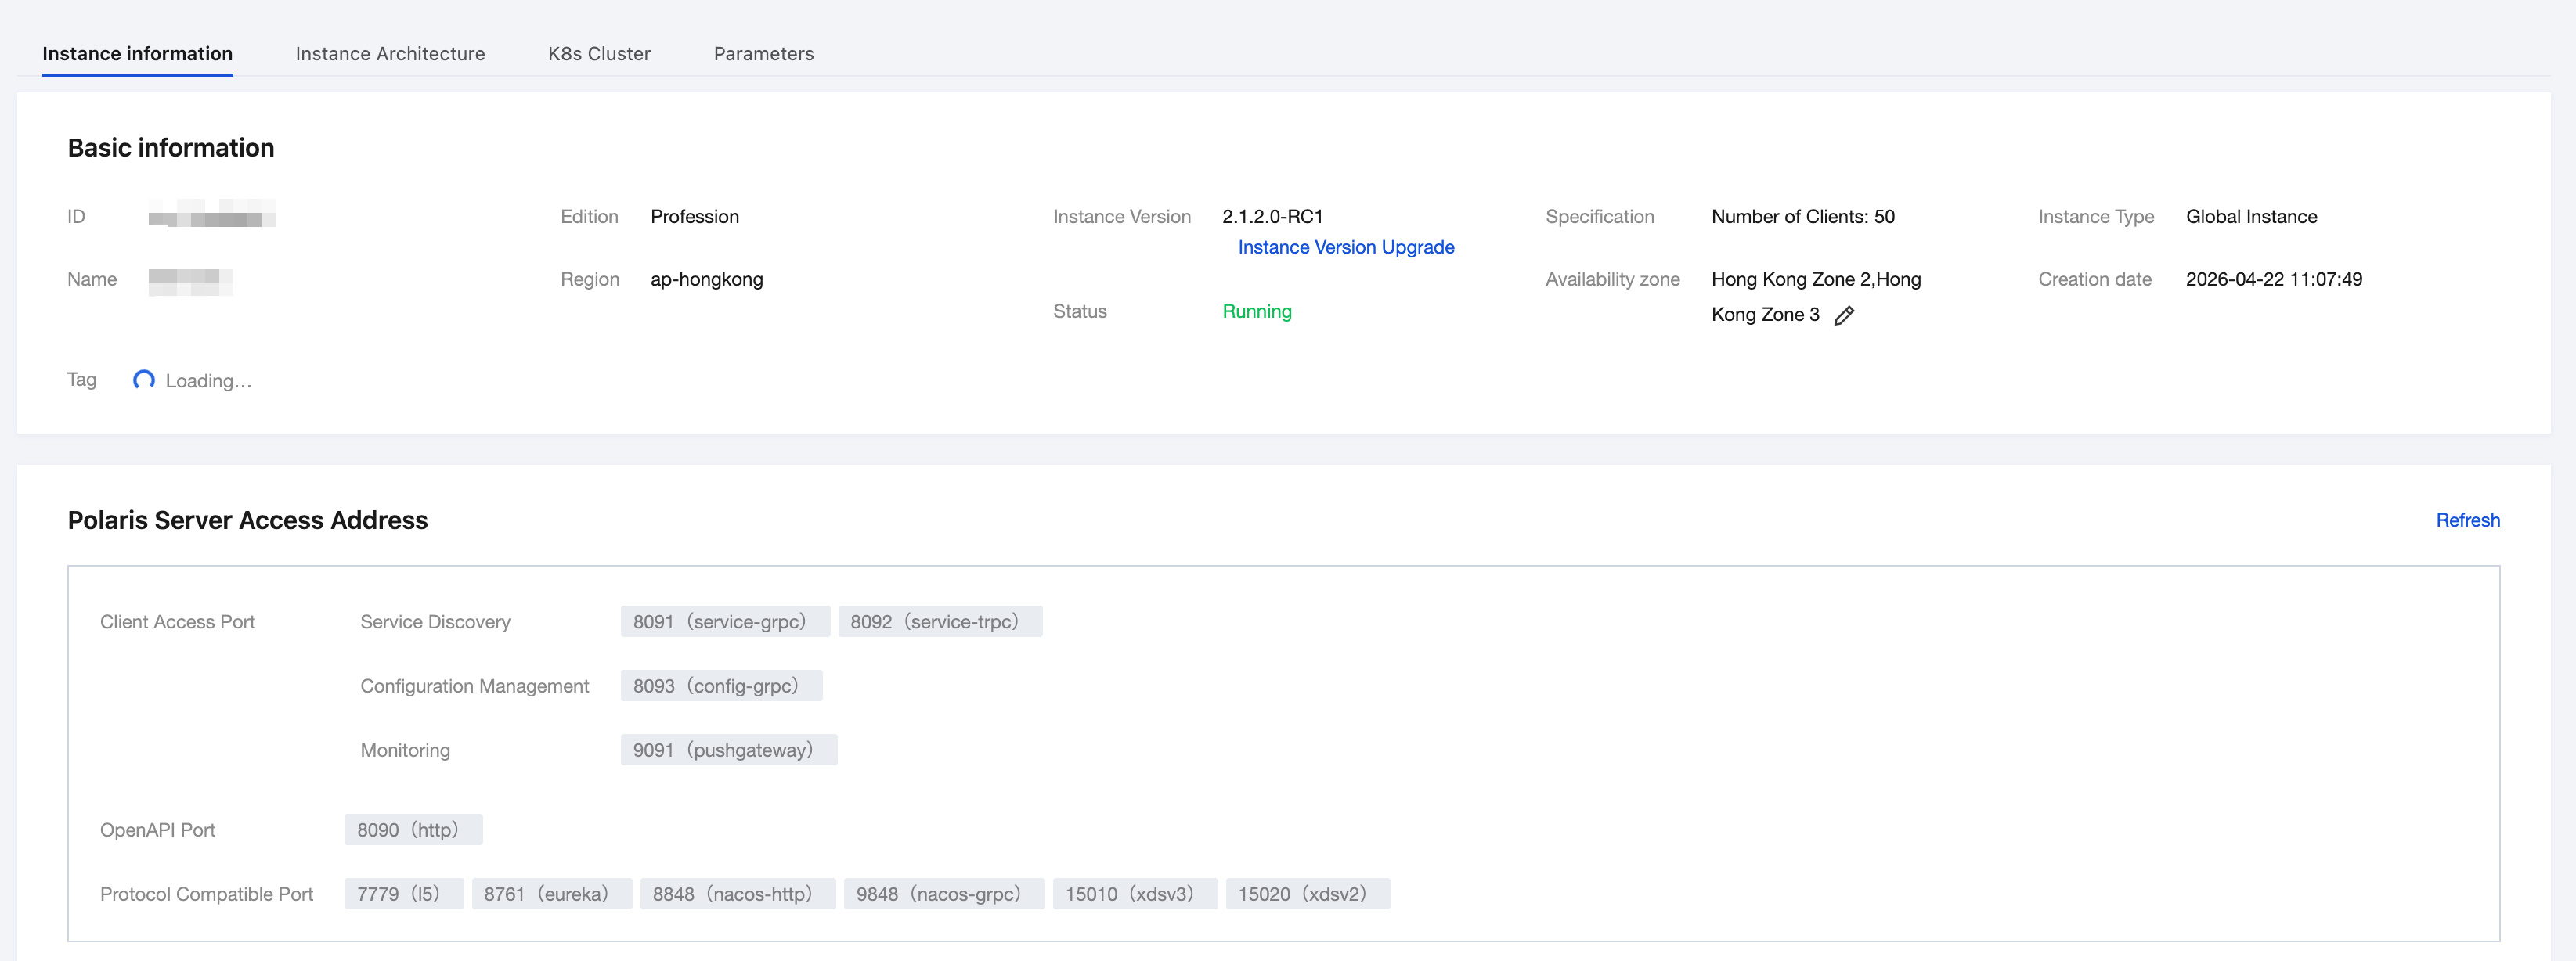
2. In the left sidebar, select Polaris (North Star), go to the Polaris instance list page, and click the target instance to access the instance details page.
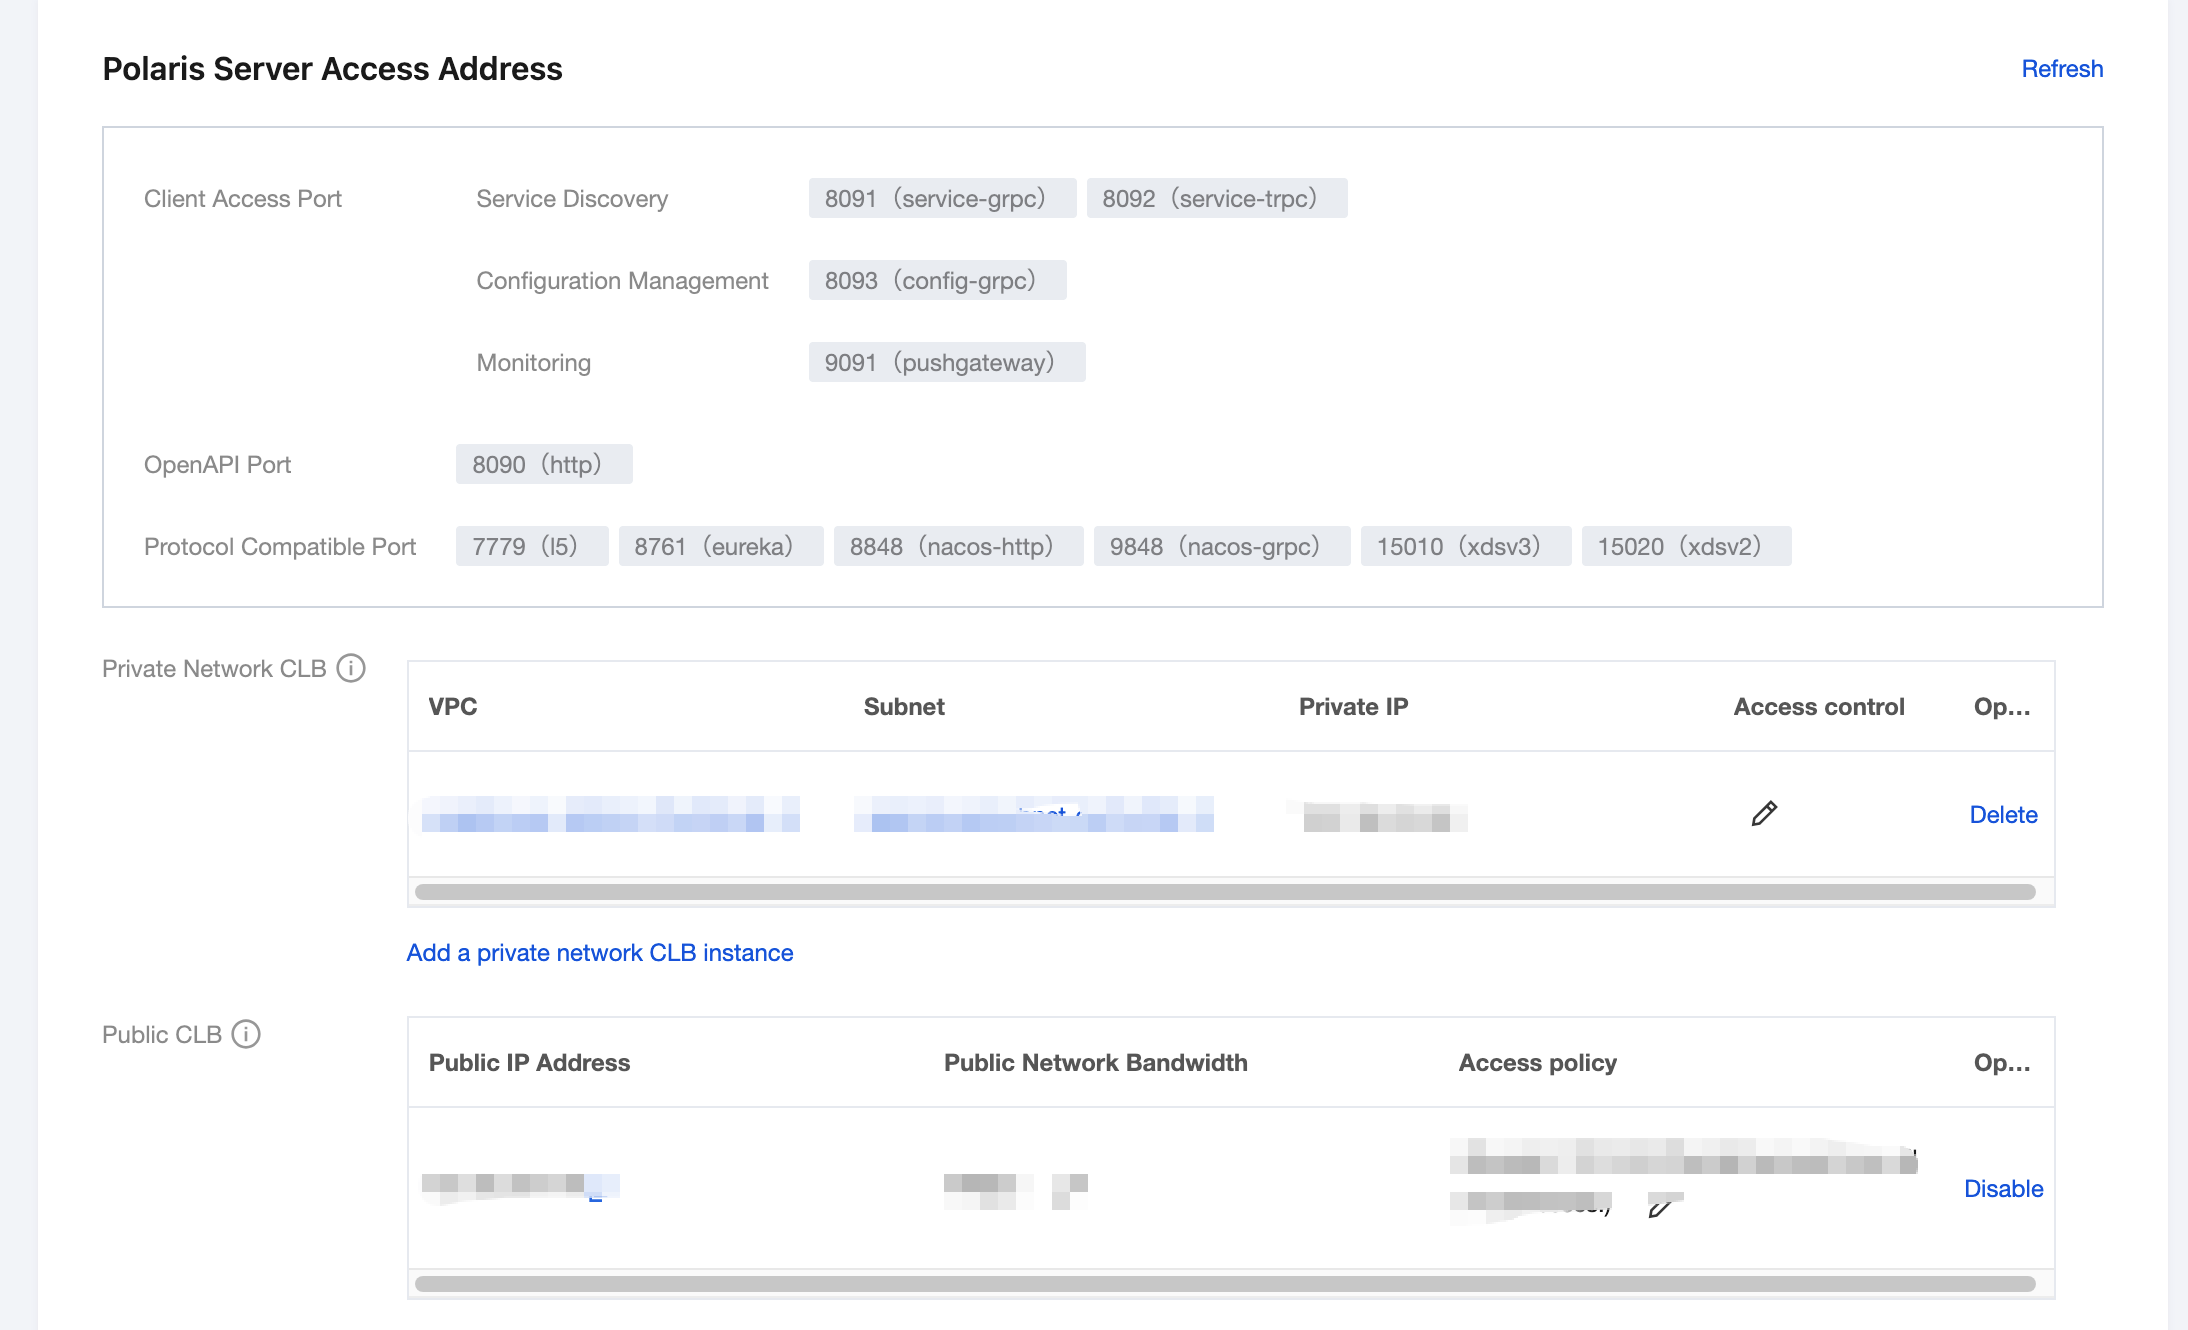
3. On the Engine Management - Instance Information page, view the access address. The polaris-java application accesses using the gRPC port (8091):
4. Modify the registry center IP address in the demo.
4.1 In the downloaded demo source code directory, locate the following two files respectively:
quickstart-example\\quickstart-example-provider\\src\\main\\resources\\polaris.yml andquickstart-example\\quickstart-example-consumer\\src\\main\\resources\\polaris.yml.
4.2 Add the Microservices Engine PolarisMesh grid IP address to the project configuration file (taking quickstart-example\\quickstart-example-consumer\\src\\main\\resources\\polaris.yml as an example).
global:
serverConnector:
addresses:
- 10.0.4.6:8091
5. Package the demo source code into a jar file.
5.1 Under the root directory of the quickstart-example source code, open a command prompt and execute the command `mvn clean package` to package and compile the project.
5.2 After successful compilation, two Jar packages are generated as shown in the following table.
6. Deploy the provider and consumer microservices applications. Choose one deployment method based on your actual business needs from VM deployment, containerized deployment, and TEM deployment.
6.1 VM deployment
Upload the Jar package to the Cloud Virtual Machine (CVM) instance.
Run the start command to launch:
nohup java -jar [jar package name]&
6.2 Containerized deployment
Write the dockerfile to build the image. Refer to:
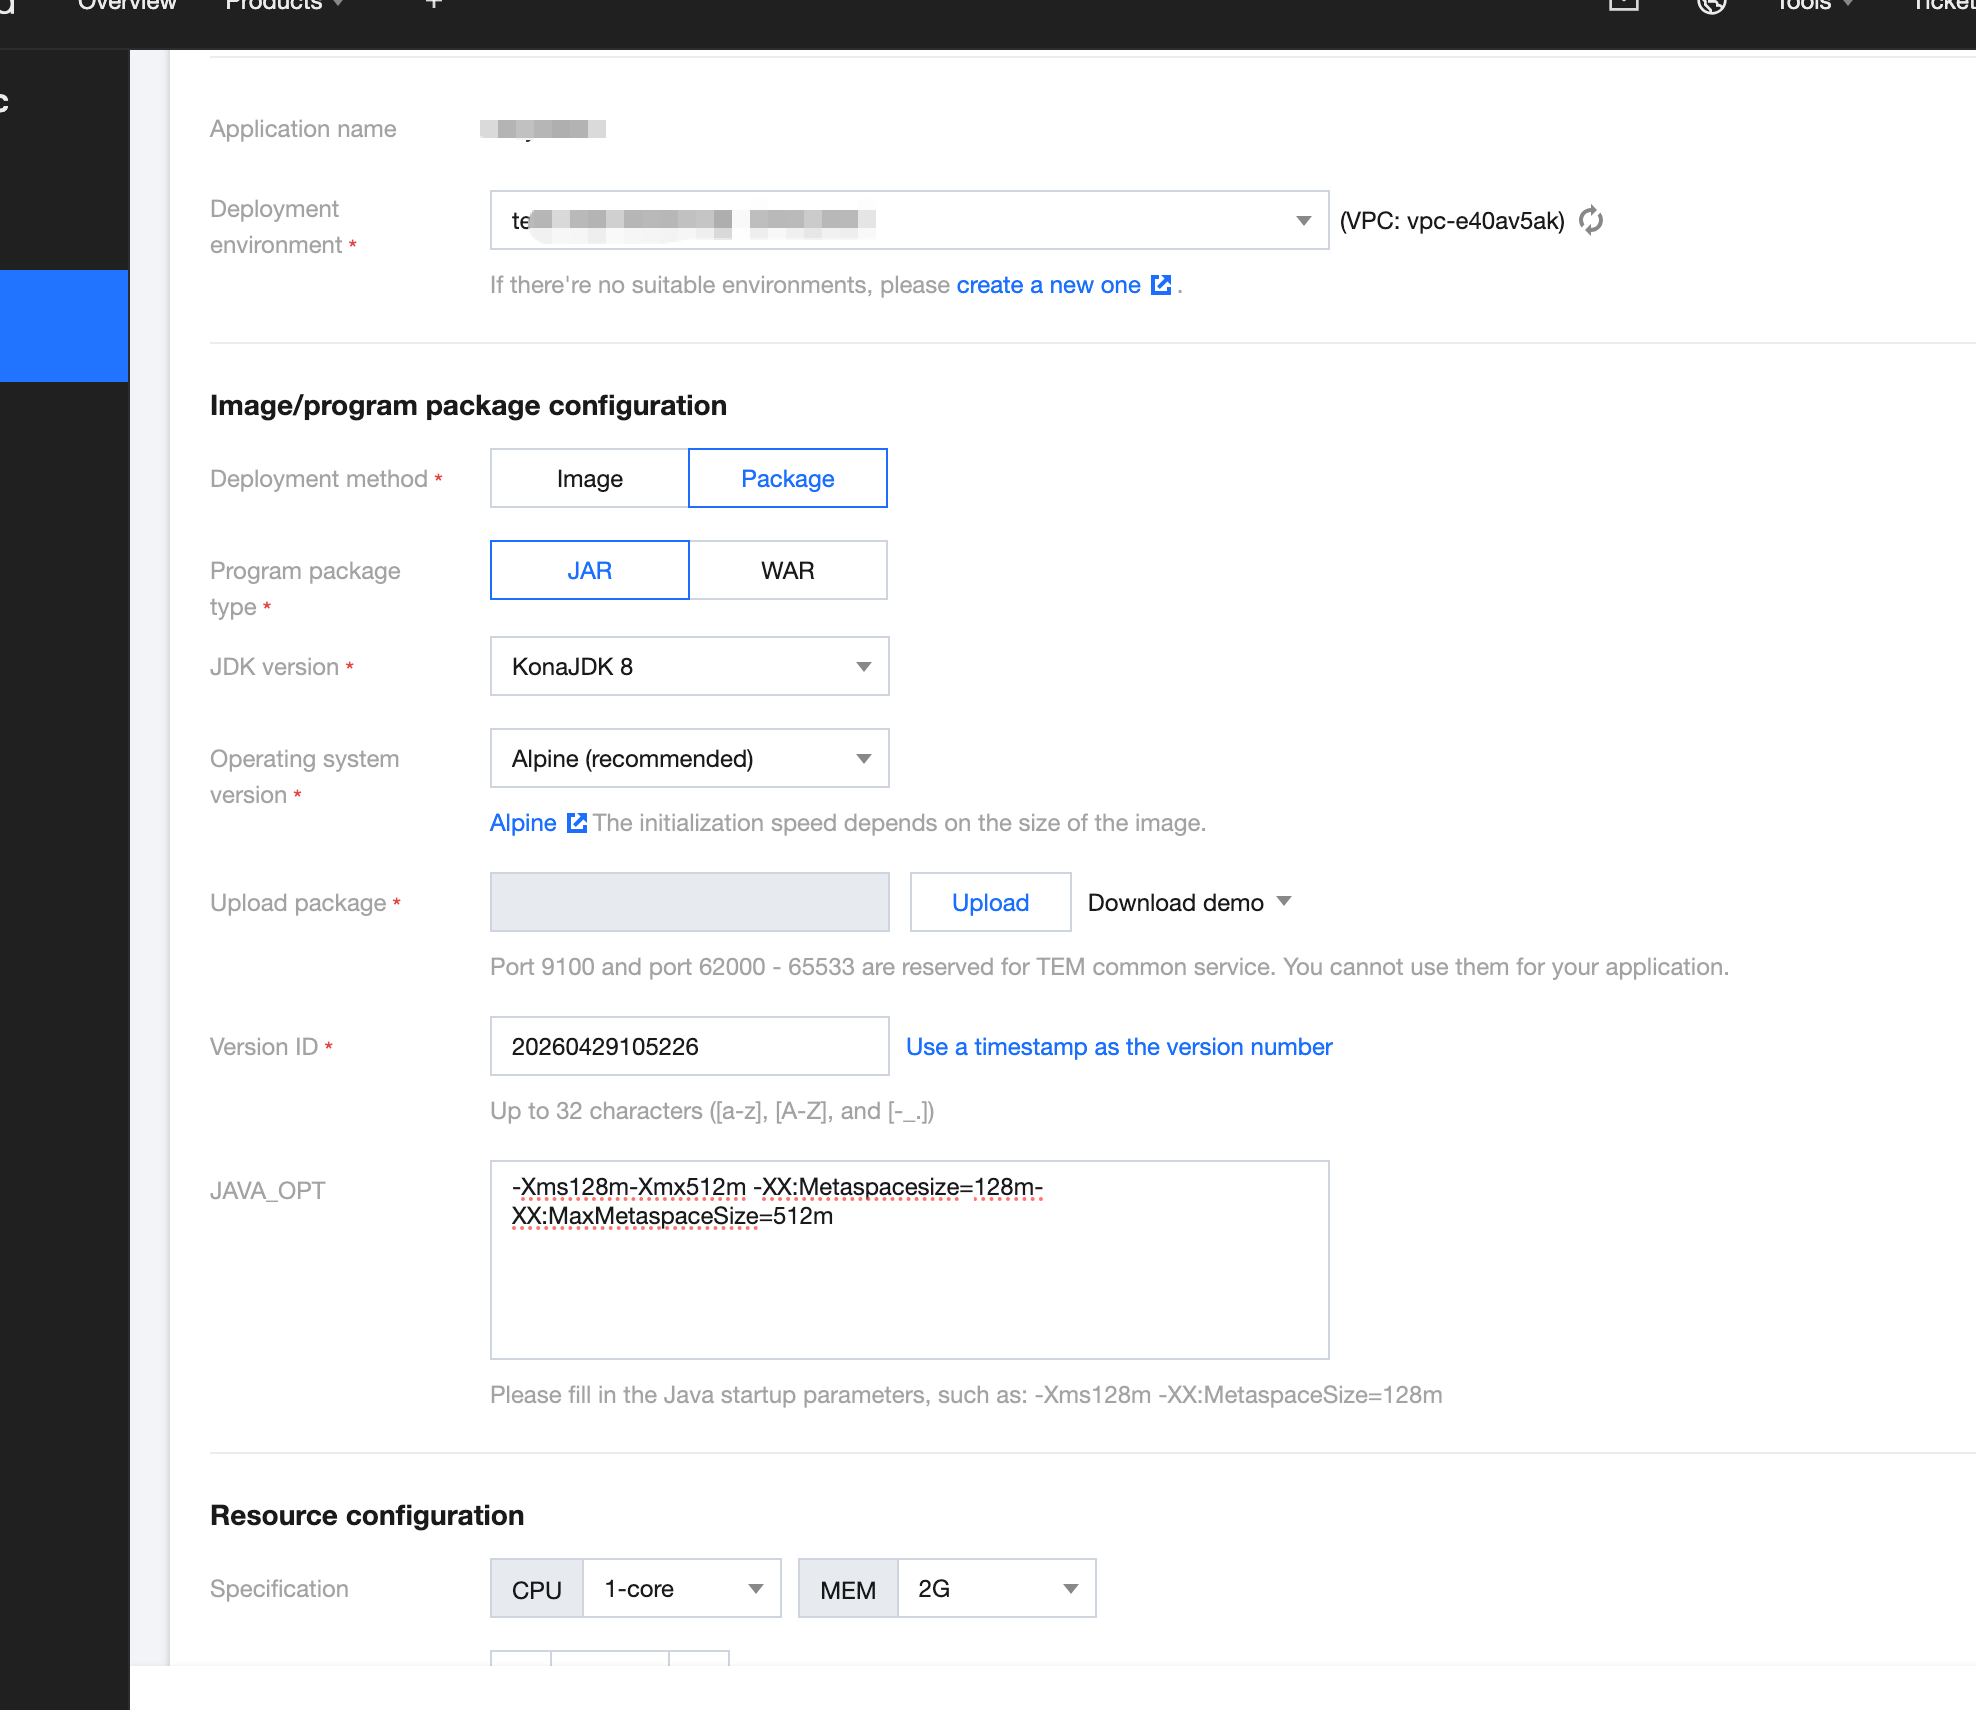
Select the TEM environment. Note that the VPC on which the selected environment depends must be the same as the VPC on which the PolarisMesh instance created above depends:
In the selected environment, create a new TEM application. Refer to the following for parameter configuration:
Deploy the application. For parameter configuration, see (port mapping: the default port for consumer is 15700, and for provider is 15800):
Check the access path. After the consumer application is deployed, view the access IP address in Basic Information > Access Configuration. To enable public network access, edit and update to enable public network access:
7. Verify the deployment results.
7.1 Go to the Micro PolarisMesh instance page mentioned earlier.
Choose Service Management > Service List to view the number of instances for the EchoServerGRPC microservice:
If the number of instances is not zero, it indicates that the microservices engine has been successfully connected.
If the number of instances is 0 or the EchoServerGRPC service name cannot be found, it indicates that the microservice application failed to connect to the microservice engine.
7.2 Invoke the HTTP interface of the consumer. Execute the HTTP call, replacing ${app.port} with the listening port of the consumer (default: 16011), and ${add.address} with the exposed IP address of the consumer.
curl -L -X GET 'http://${add.address}:${app.port}/echo?value=hello_world'