릴리스 노트
제품 공지
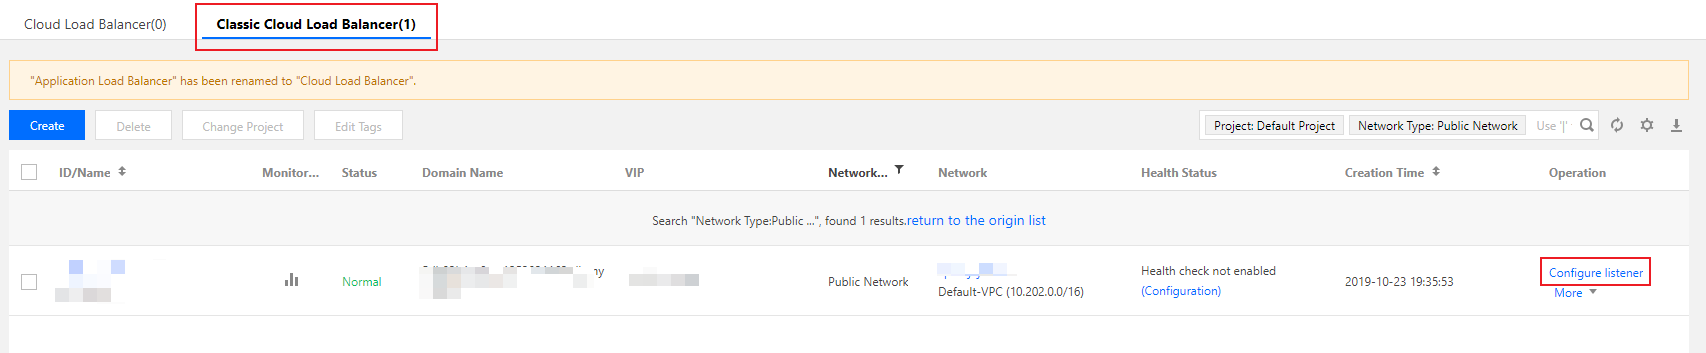
Configuration Item | Description | Example |
Name | Listener name. | test-tcp-80 |
Listener Protocol Ports | Listener protocol and listening port Listener protocol: CLB supports protocols such as TCP, UDP, HTTP, and HTTPS. This example uses TCP. Listening port: used to receive and forward requests to real servers. The port range is 1-65535. The listening port must be unique in the same CLB instance. | TCP:80 |
Backend Port | The port through which the CVM instance provides services, receives and processes traffic from a CLB instance. | 80 |

Configuration Item | Description | Example |
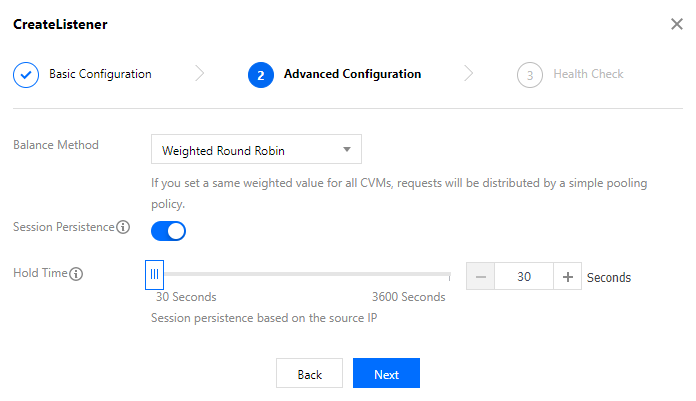
Balance Method | For TCP listeners, CLB supports two scheduling algorithms: weighted round robin (WRR) and weighted least-connection (WLC). WRR: requests are forwarded to different real servers sequentially according to their weights. Scheduling is based on the number of new connections, where servers with higher weights have more polls (i.e., a higher probability) and servers with the same weight process the same number of connections. WLC: loads on servers are estimated according to their number of active connections. Scheduling is based on server loads and weights. If their weights are the same, real servers with fewer active connections will have more polls (i.e., a higher probability). | WRR |
Session Persistence | Whether to enable or disable session persistence. After session persistence is enabled, CLB listener will distribute access requests from the same client to the same real server. TCP session persistence is implemented based on client IP address. The access requests from the same IP address are forwarded to the same real server. Session persistence can be enabled for WRR scheduling but not WLC scheduling. | Enabled |
Hold Time | Session persistence time. If there is no new request in the connection within the session persistence time, session persistence will be automatically disconnected. Value range: 30-3600 seconds. | 30s |
Configuration Item | Description | Example |
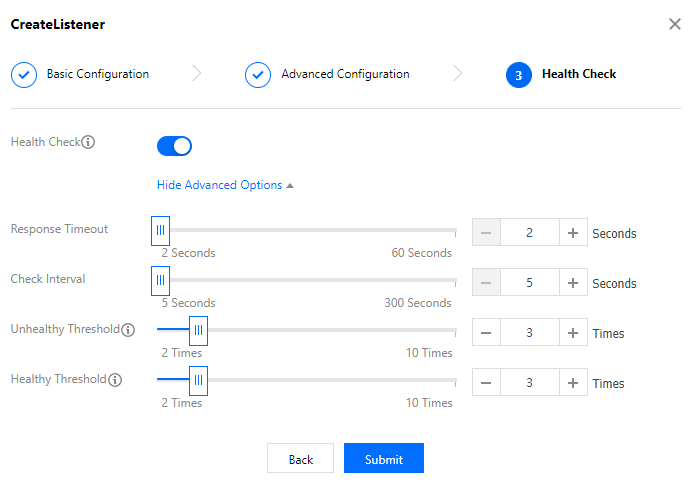
Health Check | Whether to enable or disable health check. In TCP listeners, CLB instances send SYN packets to specified server ports to perform health checks. | Enabled |
Check Protocol | To be added. | To be added |
Check Port | To be added. | To be added |
Response Timeout | Maximum response timeout period for health check. If a real server fails to respond within the timeout period, it is considered as unhealthy. Value range: 2-60 seconds. Default value: 2s. | 2s |
Check Interval | Interval between two health checks. Value range: 5-300 seconds. Default value: 5s. | 5s |
Unhealthy Threshold | If the health check returns failure for n consecutive times (n is user-defined), the real server is unhealthy and the unhealthy status is displayed in the console.Value range: 2-10 times. Default value: 3 times | 3 times |
Healthy Threshold | If the health check returns success for n consecutive times (n is user-defined), the real server is healthy and the healthy status is displayed in the console.Value range: 2-10 times. Default value: 3 times. | 3 times |


피드백