You can manage a created replication group as needed in your actual Ops use cases. Specifically, you can set read-only instances as master instances, switch the roles of master and read-only instances, remove instances, or delete the replication group.
You can set a read-only instance in a replication group as a master instance for data writes. This change only updates the instance configuration without causing data migration. The entire process takes approximately three minutes.
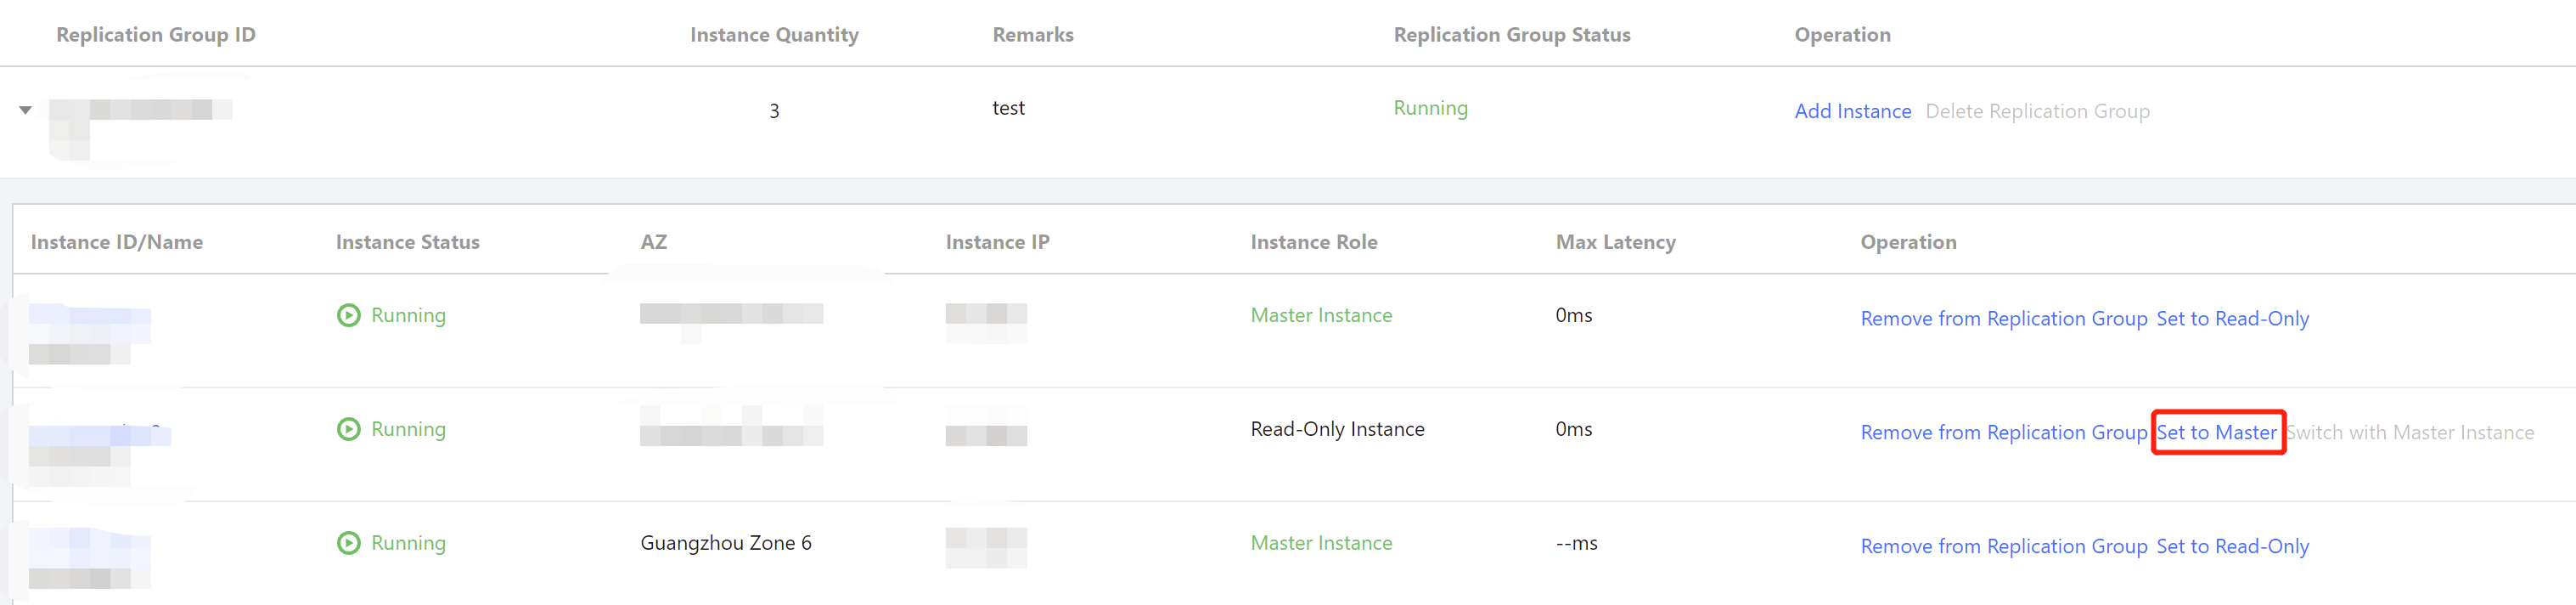
before the replication group name to expand the instance list within the replication group.
2. Locate the read-only instance to be set as the primary instance, and in its Operation column, click Set to Master.
Note:
The replica count of read-only instances in the replication group must be >=2 to be promoted to the primary instance.
3. In the Set to Master dialog box, carefully read the prompt information and click OK.
In the replication group instance list, the Instance Status changes to Switching Instance Roles. Wait for the instance switch to complete, and the Instance Role will change to Master Instance.
Set the Primary Instance as a Read-Only Instance
You can also change the primary instance added to the replication group to a read-only instance. For specific operations, see the following figure.
Note:
If there is only a primary instance in the replication group, this primary instance cannot be set as a read-only instance.
Switch the instance role
You can switch the master instance only in the disaster recovery use case; that is, there is only one master instance and one read-only instance in the replication group. Usually, the replication group will become inaccessible for one minute during the switch.
Note:
While data is being replicated to the new primary instance (formerly read-only instance), the read-only instance remains accessible for read operations.
To switch the primary instance, see the steps below:
before the replication group name to expand the instance list within the replication group.
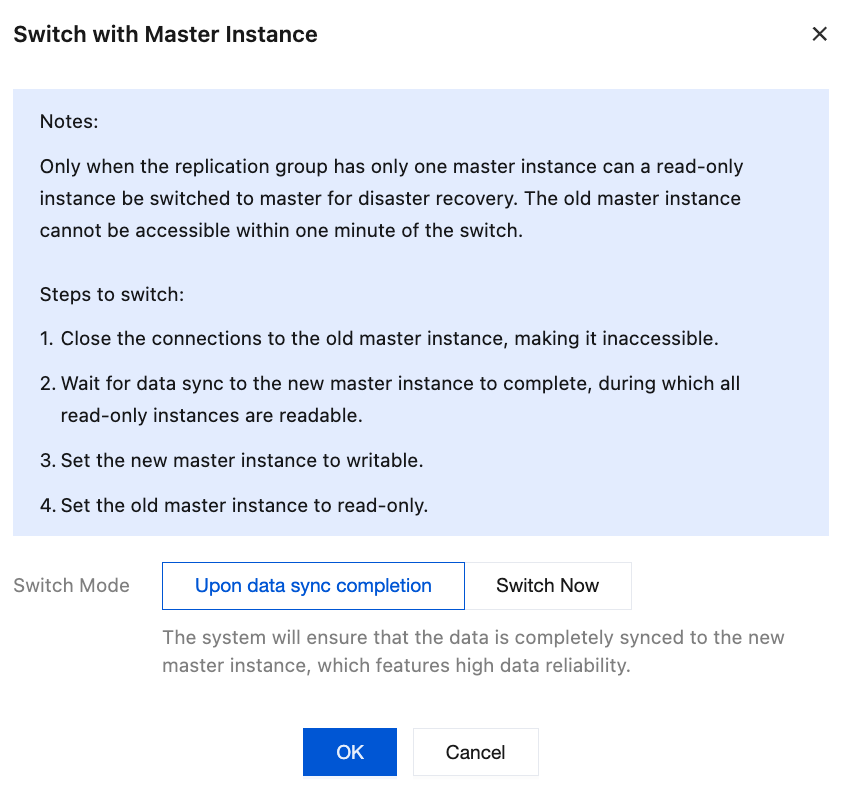
2. Locate a read-only instance for which you want to switch the primary instance. In its Operation column, click Switch with Master Instance.
3. In the Switch to Master Instance window, read the prompt information and select the switch mode.
Upon data sync completion: Prioritizes data reliability. The switchover is performed only when data from the current primary instance has been fully synchronized to the new primary instance.
Switch Now: Prioritizes the availability of the new primary instance without waiting for data synchronization to complete.
4. Click OK, and the instance status of both the primary instance and read-only instance in the replication group changes to Switching with master instance in the replication group. Wait for the switch to complete. You will see that the original primary instance role changes to read-only instance, and the original read-only instance role changes to primary instance.
Remove Instance from Replication Group
You can remove an instance from the replication group. After removal, the instance will cease synchronizing data from other instances in the replication group.
How to remove an instance from a replication group, see the steps below:
before the replication group name to expand the instance list within the replication group.
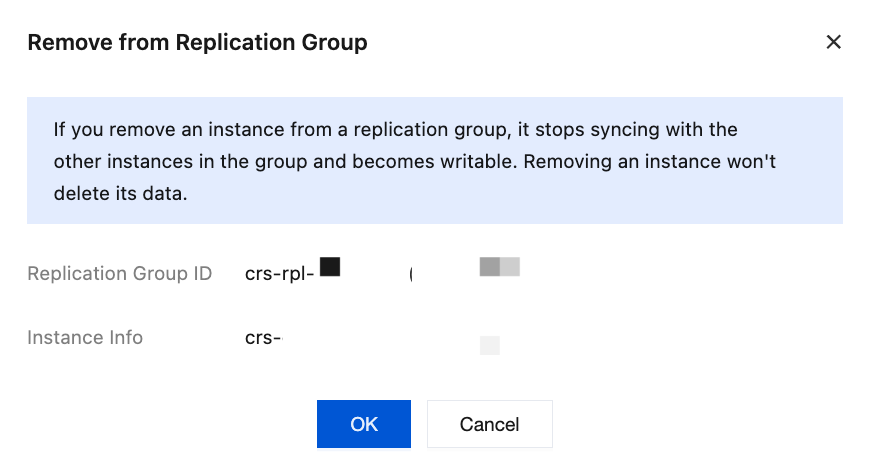
2. Locate the instance to be removed. In its Operation column, click Remove from Replication Group.
Note:
When the instance is the only primary instance in the replication group and read-only instances exist, this primary instance cannot be removed.
3. In the Remove from Replication Group dialog box, confirm the instance information to be removed, and click OK.
If the instance to be removed is a primary instance, you need to select the removal mode.
Remove immediately: Immediately disconnects data synchronization within the replication group without waiting for whether data synchronization from this primary instance to other nodes is complete, which may result in partial data loss.
Wait for data synchronization to complete: The system first sets the instance to read-only status, waits for other nodes in the replication group to complete data synchronization from this primary instance, disconnects the replication relationships between this primary instance and all other nodes in the replication group, removes it from the replication group, cancels the read-only status, and enables write access for this primary instance.
4. In the replication group instance list, the instance status changes to replication group unbinding in progress, wait for the instance removal to complete.
Delete Replication Group
Before deleting a replication group, you must first remove all instances within the replication group to perform the deletion operation.
1. In the replication group list, select the replication group to be deleted. In its Operation column, click Delete replication group.
2. In the Delete replication group dialog box, confirm the replication group information, and click OK.