tencent cloud

Cloud File Storage

Releases Notes and Announcements
Release Notes
Announcements
Product Introduction
Overview
Strengths
Storage Classes and Performance
Use Cases
Recommended Regions
Use Limits
Service Regions and Service Providers
Purchase Guide
Billing Overview
Pricing Overview
General Series Billing
Turbo Series Billing
High-Throughput CFS Billing
Billing Mode
IA ‍Storage Billing
Storage Resource Units
Resource Purchase
Viewing Bills
Arrears Reminder
Getting Started
Creating File Systems and Mount Targets
Using CFS File Systems on Linux Clients
Using CFS File Systems on Windows Clients
Using CFS Turbo on Linux Clients
Using the CFS Client Assistant to Mount File Systems
Operation Guide
Access Management
Managing File Systems
Permission Management
Using Tags
Snapshot Management
Guide for Cross-AZ and Cross-Network Access
Automatically Mounting File Systems
Data Migration Service
User Permission Management
User Quotas
Data Encryption
Data Lifecycle Management
Upgrading Standard File Systems
Practical Tutorial
Selecting Kernels for NFS Clients
Managing Turbo CFS Directories
Terminating Compute Instances
Using CFS on TKE
Using CFS on SCF
Using CFS Turbo on TKE
Using CFS Turbo on TKE Serverless Cluster
Selecting a Network for Turbo CFS
Copying Data
CFS Storage Performance Testing
API Documentation
History
Introduction
API Category
Snapshot APIs
File system APIs
Lifecycle APIs
Other APIs
Data Flow APIs
Making API Requests
Permission Group APIs
Service APIs
Scaling APIs
Data Migration APIs
Data Types
Error Codes
Troubleshooting
Client Use Bottleneck due to Large Number of Small Files or Parallel Requests
FAQs
CFS Service Level Agreement
Contact Us
Glossary

‍Operation ‍Guide

PDF
포커스 모드
폰트 크기
마지막 업데이트 시간: 2024-01-22 22:15:47

Setting quotas

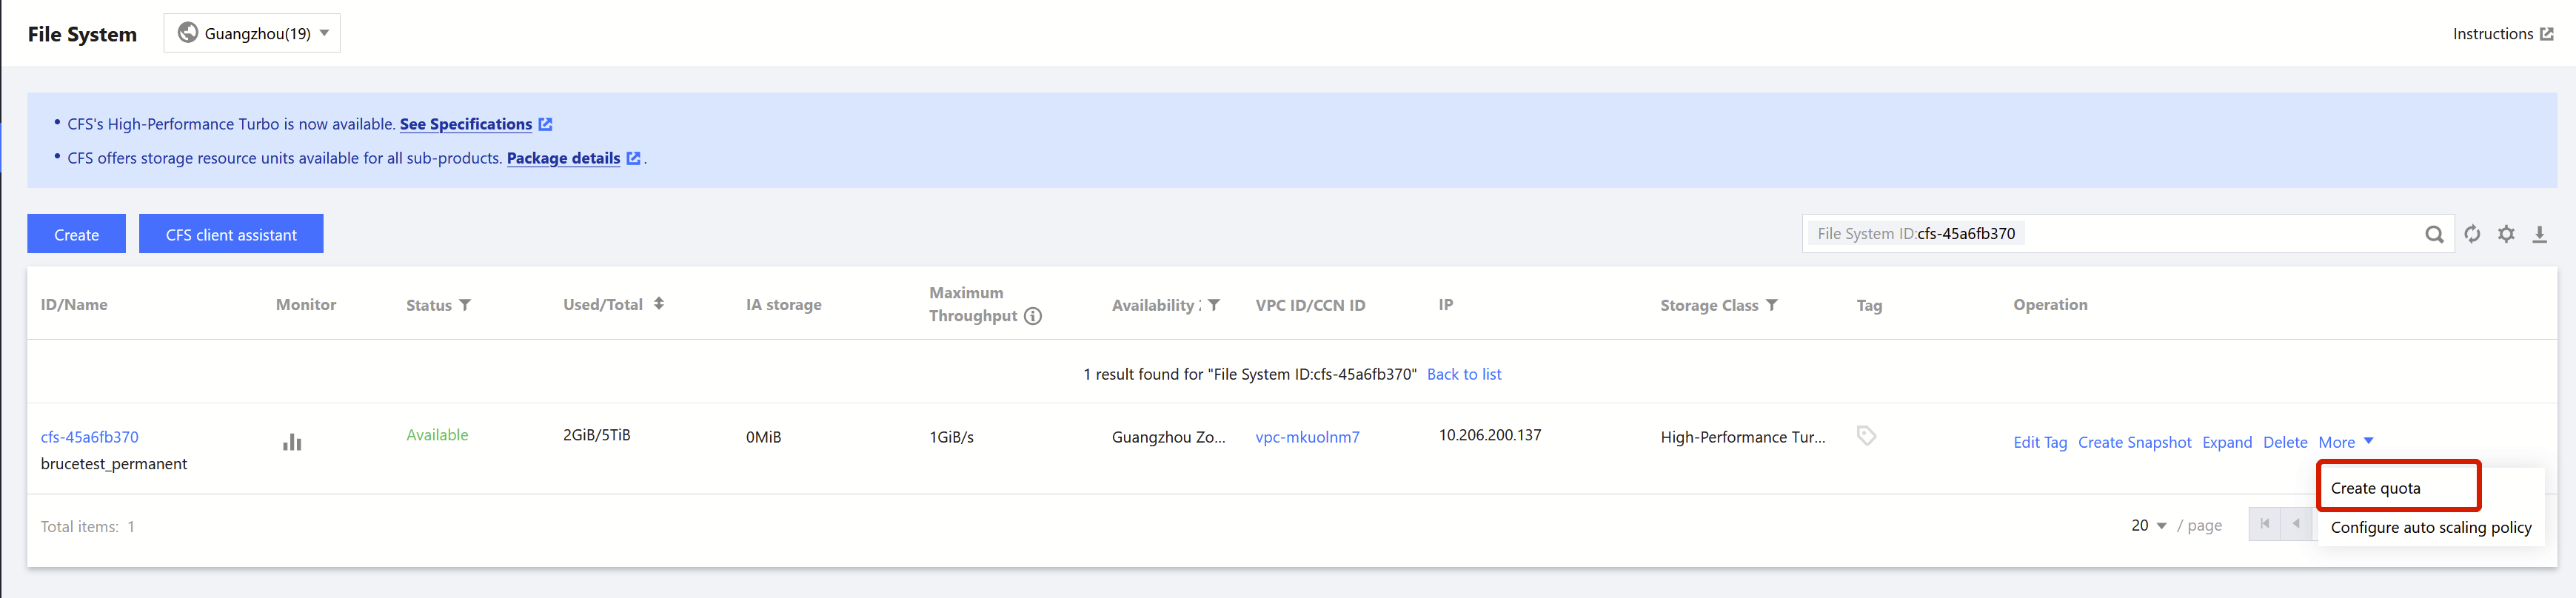
1. Go to the quota setting page: Log in to the CFS console, and click Create quota.
Note:
Your account needs to be added to the allowlist before you can use this feature. If you need it, submit a ticket for application.


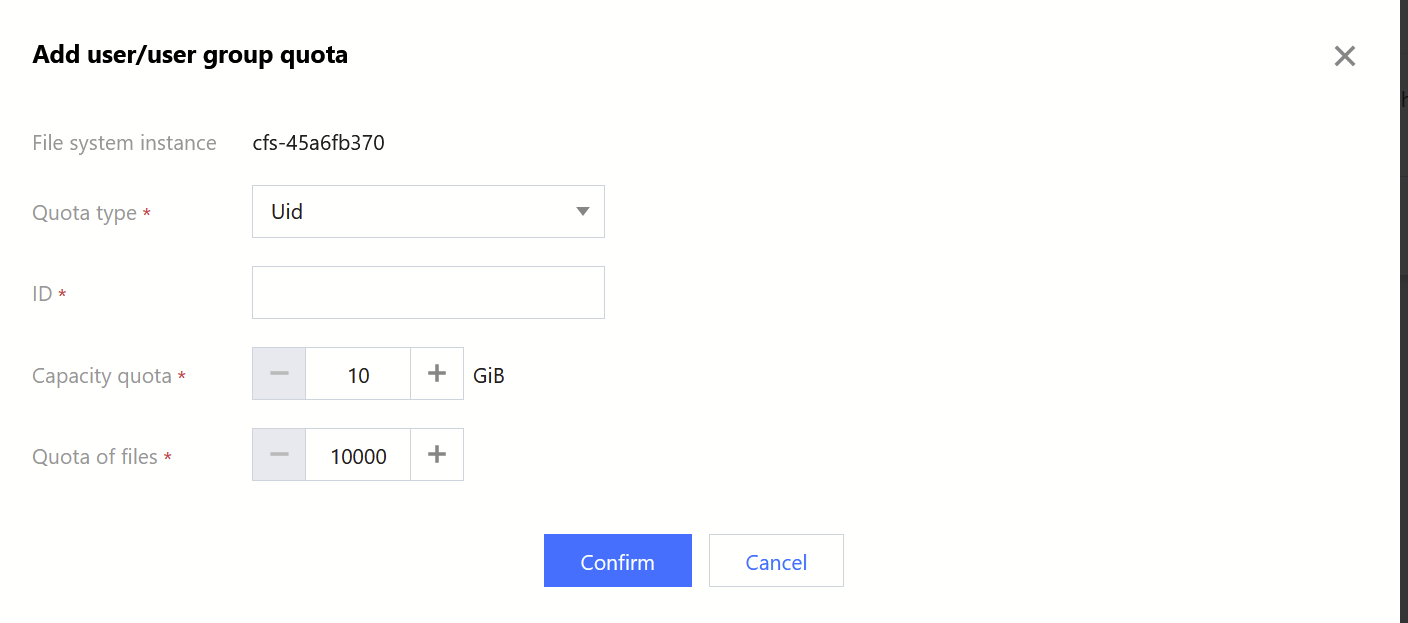
2. Create a user quota: Set the quota type to Uid (user ID), enter an ID and the corresponding capacity ‍quota and file count quota, and click Confirm.
Note:
Uid is a user ID in the Unix system. If no Uid is available, create one with the useradd command.


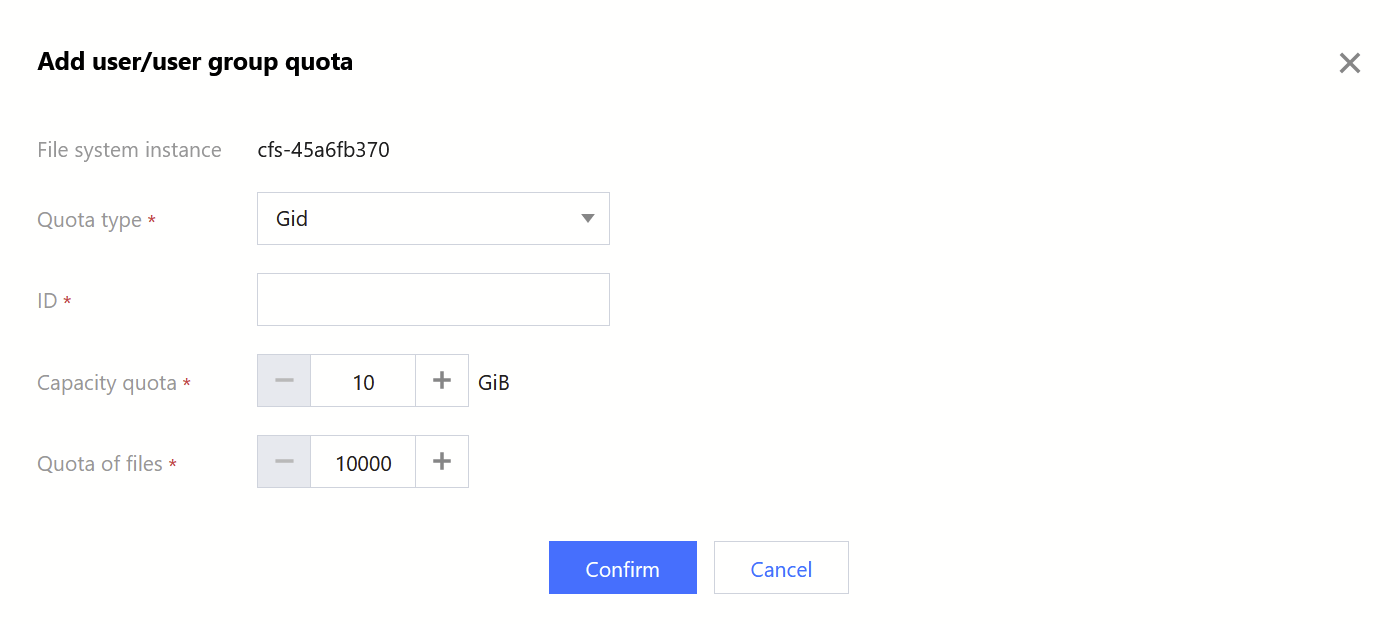
3. Create a user group quota: Set the quota type to Gid (group ID), enter an ID and the corresponding capacity ‍quota and file count quota, and click Confirm.
Note:
Gid is a group ID in the Unix system. If no Gid is available, create one with the groupadd command.


Viewing quotas

Click the ID/name of a file system to go to its details page, and select Quota information to view quotas.


Modifying quotas

Set quotas for the same Uid/Gid of the existing quotas to modify the quotas.


Deleting quotas

Click the ID/name of a file system to go to its details page, select Quota information, and click Delete to delete the quota.


도움말 및 지원

문제 해결에 도움이 되었나요?

피드백