Purchase a Web Application Firewall (WAF) plan with package for bot traffic management, and enabled bot analytics features for your domain name.
Bot allowlist
1. Log in to the WAF console and select Configuration Center > Bot and Application Security on the left sidebar.
2. On the Bot and Application Security page, select the target domain name in the top-left corner and choose Bot management > Bot allowlist.
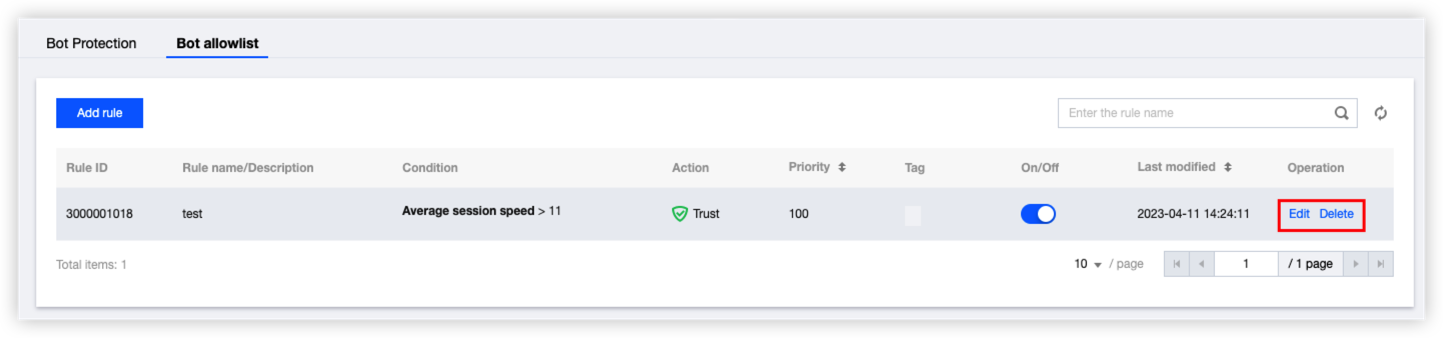
3. On the bot allowlist settings page, click Add rule, configure parameters, and click OK.
Field description
Rule name:: The rule name.
Rule description: The rule description.
On/Off: Indicates whether the rule is enabled. A rule is enabled by default.
Condition: Conditions for matching bot policies. Up to 10 match conditions can be set, which are connected by the "AND" relationship. When you hover the cursor over a match condition, you can view its description.
Priority: Enter an integer between 1 to 100. A smaller integer indicates a higher priority. If the priority values are the same, the latest rule prevails.
Custom tag: You can set the tag to Friendly bot or Normal traffic.
4. Now you can view the created rule in the policy list. Click Edit or Delete to edit or delete it.
5. Priority from high to low: Bot allowlist > Scenario 1 (priority 1) > Scenario 2 (priority 2) > ... > Scenario n (priority m).
Session Management
This feature is similar to session setting in CC protection. With different token IDs, you can differentiate between access requests from different requesters through the same IP and record their behavior features.
You can also use token IDs to continuously track the access behaviors of different requesters. This helps identify bot access behaviors through residential or public egress IPs and record session features when proxy IPs are frequently changed.
1. Log in to the WAF console and select Configuration Center > Bot and Application Security on the left sidebar.
2. On the Bot and Application Security page, select the target domain name in the top-left corner and choose Bot management > Bot Protection.
3. On the Bot Protection page, click Configure now in the Session management area.
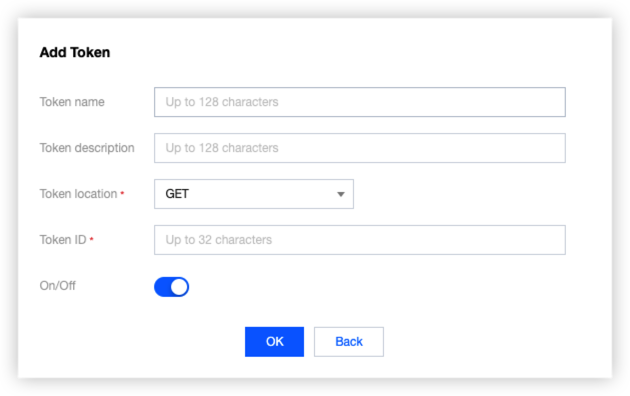
4. On the Session management page, click Add a configuration, configure parameters, and click OK.
Note:
A token ID should be a continuous tracking ID, such as the value of set-cookies after login.
Field description
Token location: HEADER, COOKIE, GET, or POST. Here, GET and POST are HTTP request parameters rather than HTTP headers.
Token ID: Token ID.
5. The configuration will take effect immediately upon completion. Then, bot traffic analysis will analyze traffic according to the field of the session feature.
Setting a custom rule
1. Log in to the WAF console and select Configuration Center > Bot and Application Security on the left sidebar.
2. On the Bot and Application Security page, select the target domain name in the top-left corner and choose Bot management > Bot Protection.
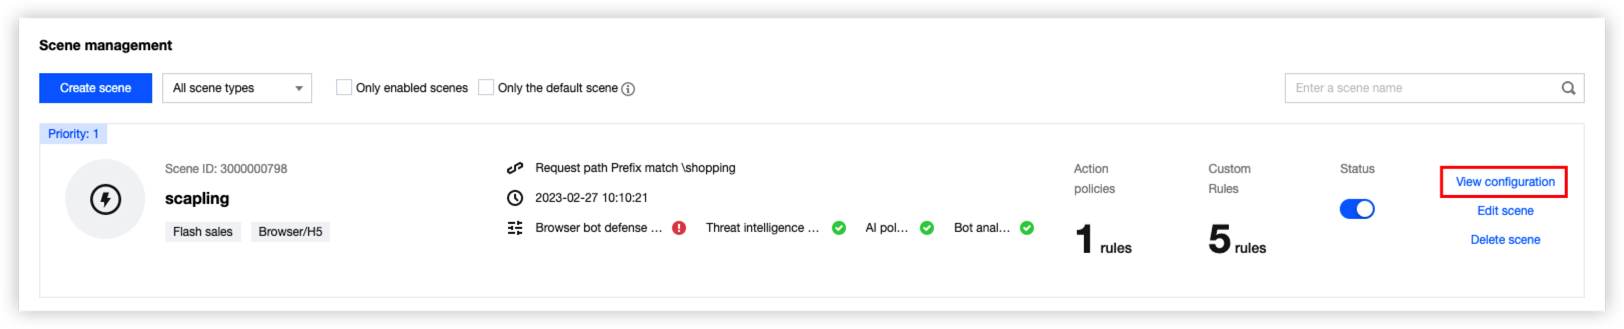
3. In the Scene management area, select the target scene, and click View configuration.
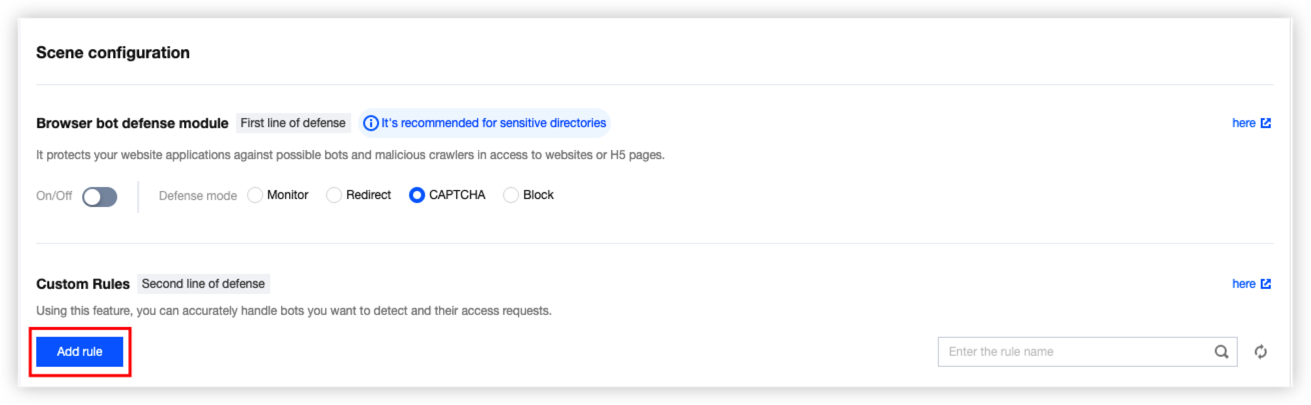
4. On the scene details page, click Add rule in the Custom Rules area.
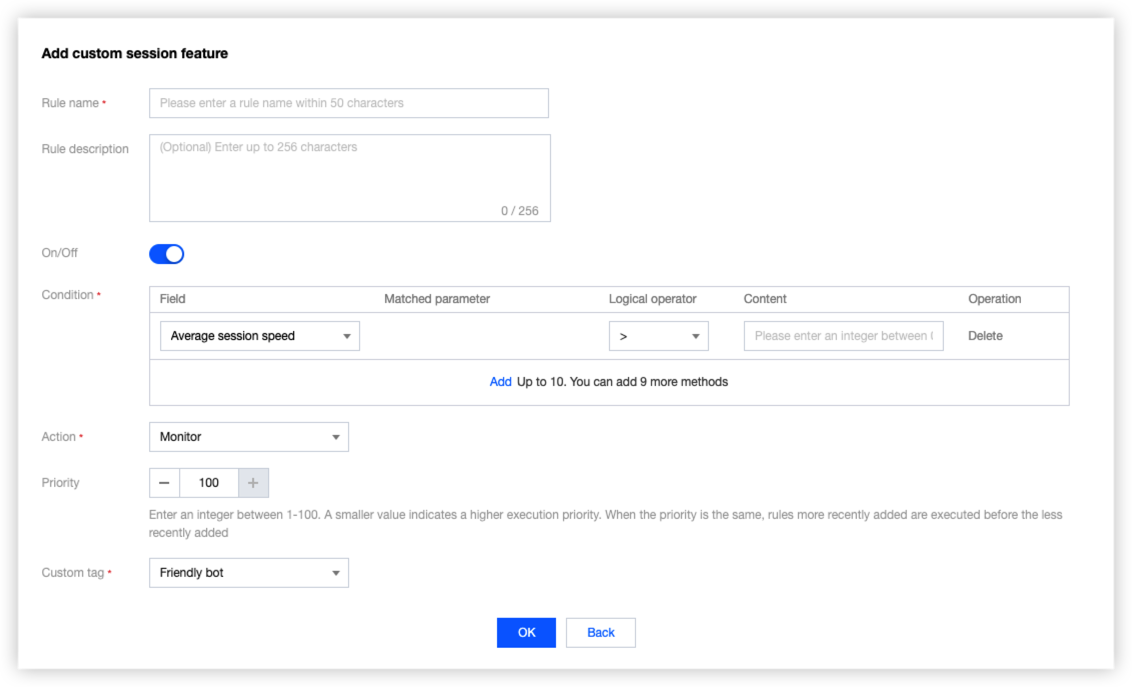
5. In the Add custom session feature pop-up window, configure relevant parameters and click OK.
Field description
Rule name:: The rule name.
Rule description: the rule description.
Rule Switch: enabled by default.
Condition: Conditions to manage detected bots. You can set up to 10 conditions, which are combined with AND. Mouse over a condition to see the details.
Action: Action to be executed.
Action
Description
Trust
Allow hit requests without logging.
Monitor
Allow and log hit requests. You can check details in the Custom type of the Bot details.
CAPTCHA
This action is applicable only to the access through browsers. Session requests that match the specified conditions will be verified through CAPTCHA. If they fail, they will be blocked. Otherwise, the access is allowed.
Redirect
Session requests that match the specified conditions will be redirected to a specific URL of the current domain name.
Block
Block and log the hit requests. You can check the logs in Attack Logs. To check the blocked IPs, go to IP blocking status.
Priority: Enter an integer between 1 to 100. A smaller integer indicates a higher priority. If the priority values are the same, the latest rule prevails.
Custom tag: You can set the tag to Friendly bot, Malicious bot, Normal traffic, or Suspicious bot.
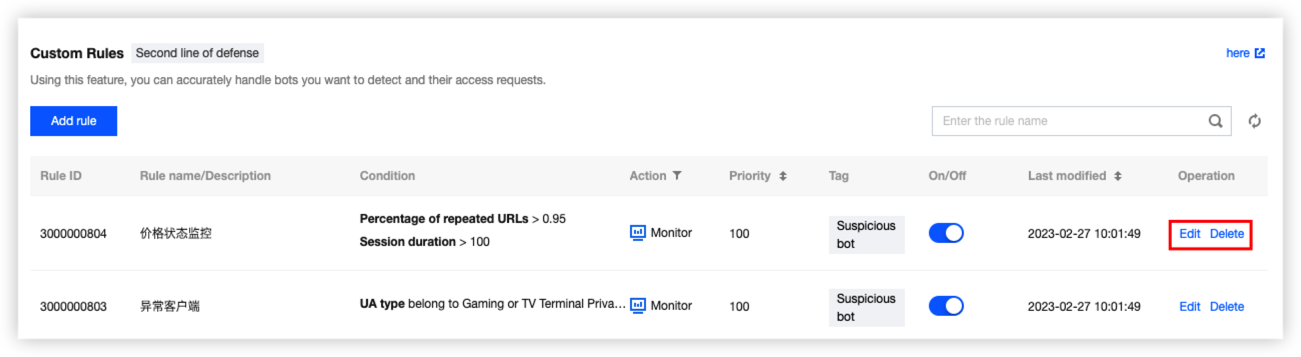
6. Now you can see the created rule in the policy list.
Legitimate Bots
1. Log in to the WAF console and select Configuration Center > Bot and Application Security on the left sidebar.
2. On the Bot and Application Security page, select the target domain name in the top-left corner and choose Bot management > Bot Protection.
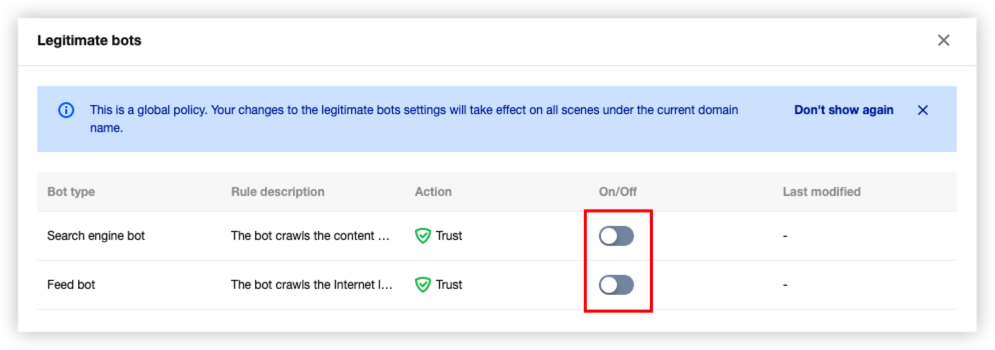
3. On the Bot Protection page, click Configure now in the Legitimate bots area.
4. On the Legitimate bots page, toggle on the switch to allow bots useful to the website data, such as search engines and external cooperative crawlers.