You can use the policy feature in the Cloud Access Management (CAM) console to grant the read/write permissions for TDMQ for RocketMQ resources owned by a root account and bound with tags to its sub-accounts based on the authorization by tag method. Sub-accounts that obtain the permissions can control resources under the corresponding tags.
Currently, TDMQ for RocketMQ supports tag management at three resource levels: cluster, topic, and group.
Note:
There is a subordinate relationship between clusters and topics/groups. That is, topics and groups are secondary resources within a cluster. During tag maintenance or authorization by tag, note the resource tag relationships between clusters and topics/groups.
If a cluster has a tag of TAG=1, a topic/group in the cluster has a tag of TAG=2, and a sub-account is only granted permissions for the tag of TAG=2, the sub-account cannot locate the topic/group in the console because the topic/group is within the cluster and the sub-account does not have permissions for the tag of the cluster.
In such a scenario, both tags of TAG=1 and TAG=2 need to be assigned to the topic/group, and the sub-account needs to be granted permissions for both tags of TAG=1 and TAG=2.
Prerequisites
A sub-account has been created for an employee using the Tencent Cloud root account. For detailed operations, see Creating a Sub-account.
At least one TDMQ for RocketMQ cluster has been created for the root account.
At least one tag has been set for the root account. If not, see Configuring Resource Tags to create one.
2. For created resources, you can edit the resource tags directly.
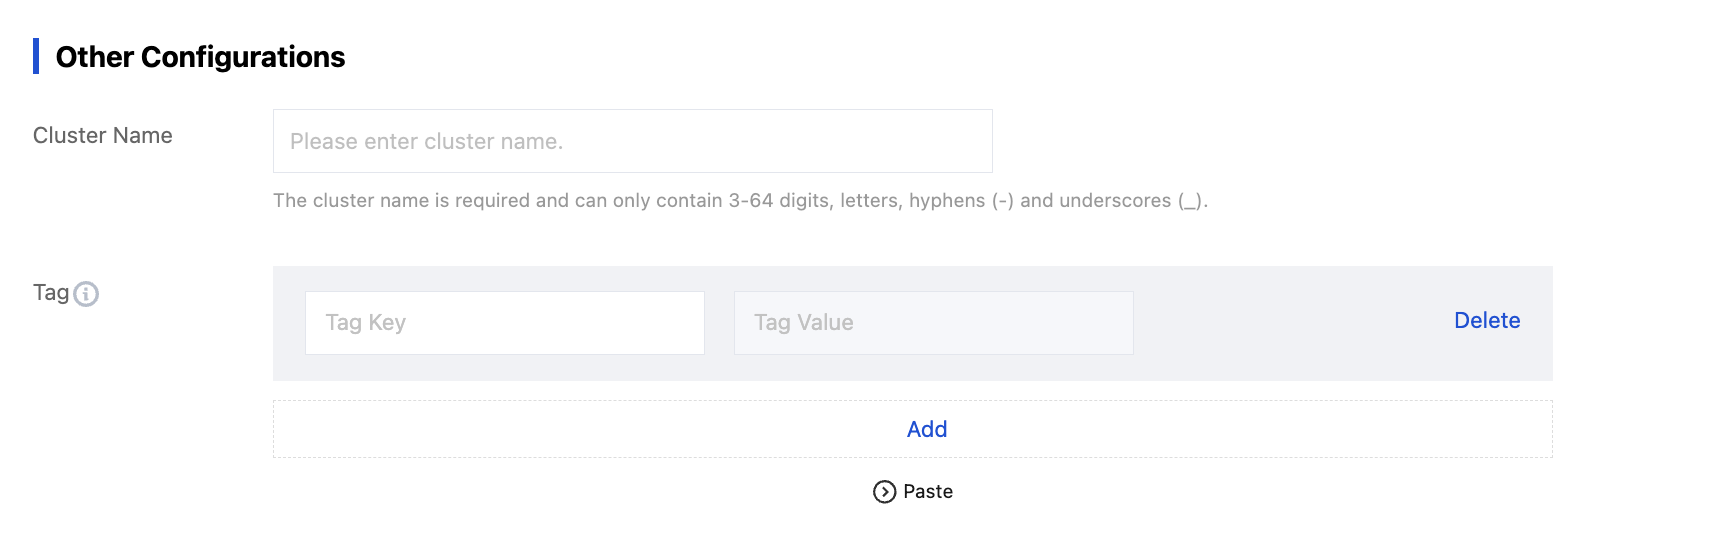
Cluster: Select the target resources, click Edit Resource Tag in the upper-left corner, and bind resource tags to the cluster.
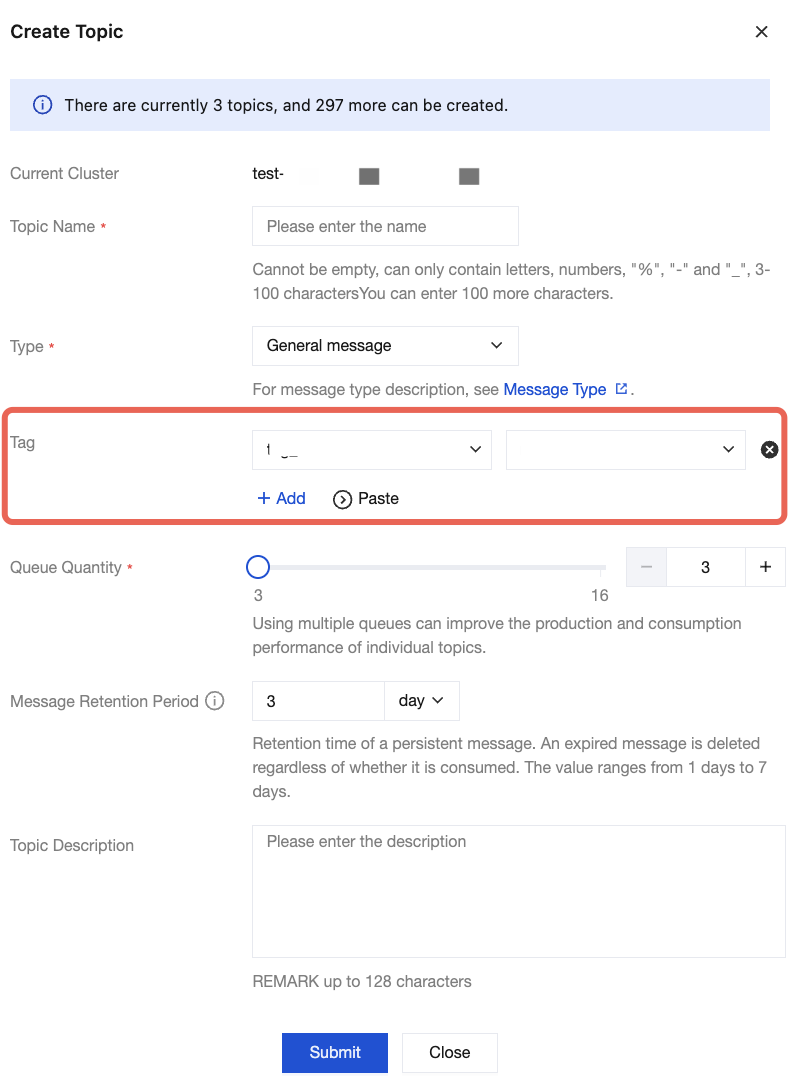
Topic/Group: Click the
icon in Resource Tag at the column header to expand all resource tags (if they are already fully expanded, as shown in the following figure, there is no need to expand the tags again), and click a specific resource tag to edit it.
2. In the left sidebar, select Policies, click Create a custom policy, and select Authorize by Tag for the policy creation method.
3. In the visualized policy generator, select the service. The service is selected as follows:
4.x version: Enter tdmq for filtering, and select TDMQ from the results.
5.x version: Enter trocket for filtering, and select RocketMQ (trocket) from the results.
4. Select All actions for Action. You can also select specific operations based on actual business requirements.
Note:
All APIs of the services are included in the operations allowed. You can use Whether tag-based authorization is supported to filter APIs and check whether they support authorization by tag.
Yes: APIs support authorization by tag and have the operation permissions for resources associated with the tags.
No: APIs do not support authorization by tag.
To support authorization for multiple services, you can click Add in the upper-left corner to add multiple authorization statements and configure authorization policies for other services.
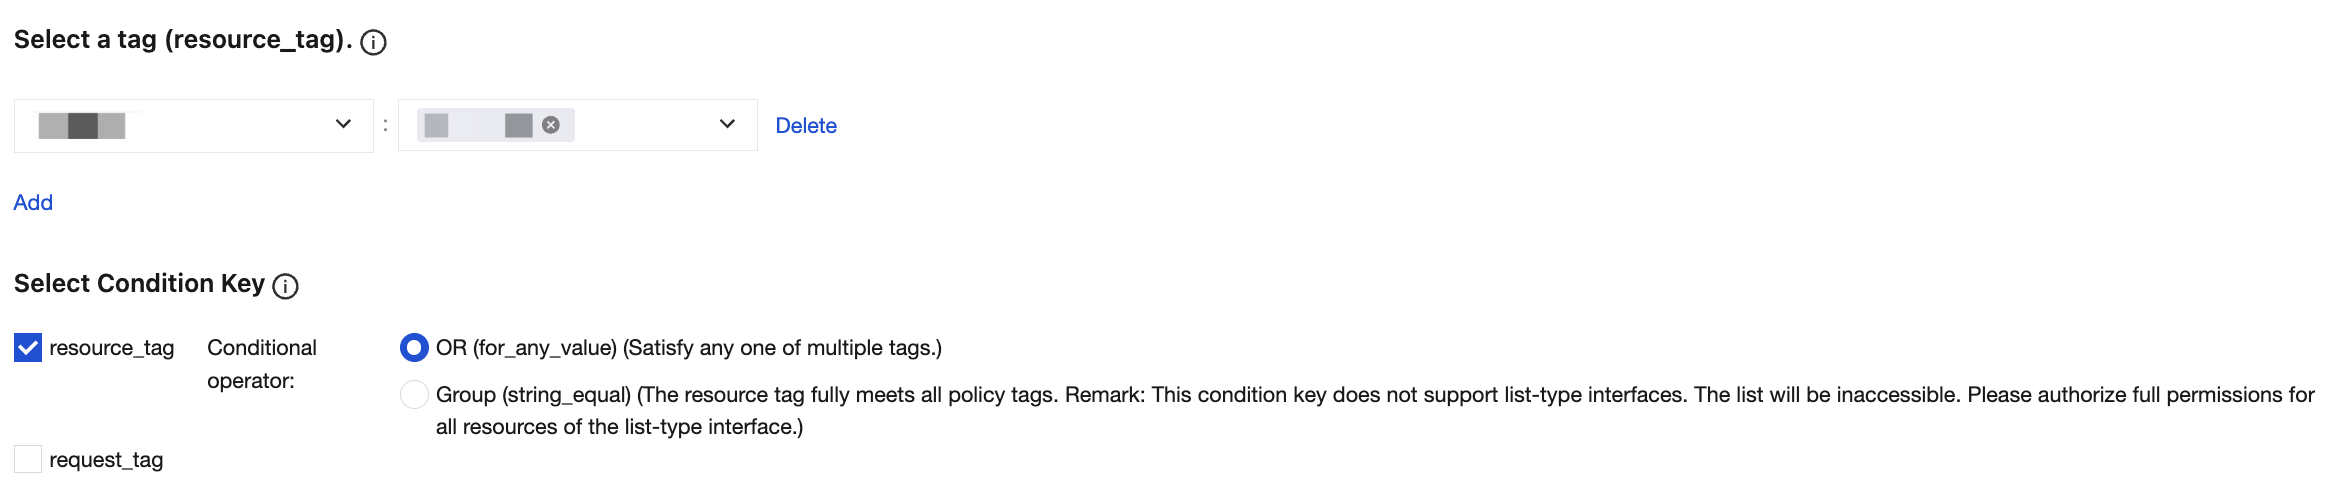
5. In the Select a Tag section, select the tag keys and tag values bound to the cluster resources. You can select multiple tag keys and tag values.
6. In the Select Condition Key section, select condition keys. You can select both resource_tag and request_tag, or select either of them.
7. Determine whether to grant permission "resource": "*" to APIs that do not support tags. If you select this option, APIs that do not support tags have operation permissions for all resources.
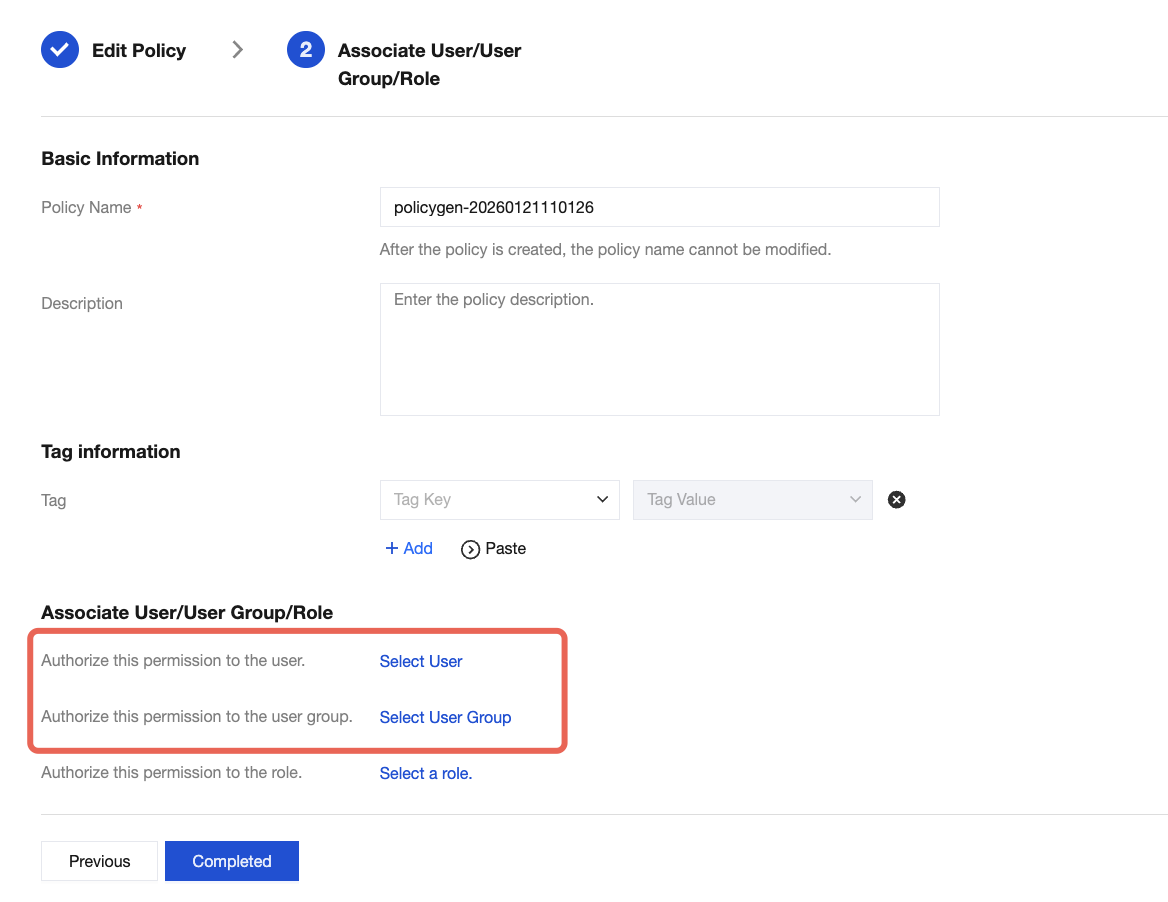
8. Click Next and set the policy name. The policy name is automatically generated by the console and is set to policygen by default, with a suffix number generated based on the creation date. You can customize it.
9. Click Select User or Select User Group to select the users or user groups to be granted resource permissions.
10. Click Completed. The relevant sub-accounts can control resources under the specified tags based on the policy.