- Release Notes and Announcements
- User Guide
- Product Introduction
- Purchase Guide
- Getting Started
- User Guide
- Quota Management
- Managing Functions
- Web Function Management
- Log Management
- Concurrence Management
- Trigger Management
- Version Management
- Alias Management
- Permission Management
- Managing Monitors and Alarms
- Network Configuration
- Layer Management
- Execution Configuration
- Extended Storage Management
- DNS Caching Configuration
- Triggers
- Development Guide
- Developer Tools
- Code Development
- Web Framework Development
- Deploying Framework on Command Line
- Quickly Deploying Egg Framework
- Quickly Deploying Express Framework
- Quickly Deploying Flask Framework
- Quickly Deploying Koa Framework
- Quickly Deploying Laravel Framework
- Quickly Deploying Nest.js Framework
- Quickly Deploying Next.js Framework
- Quickly Deploying Nuxt.js Framework
- Quickly Deploying Django Framework
- Best Practice
- Overview
- Solutions with Tencent Cloud Services
- Business Development
- ServerlessFramework Practices
- API Gateway
- TRTC Practices
- COS Practices
- CKafka Practice
- CLS
- CLB Practice
- MPS
- CDN
- CDWPG
- VOD
- SMS
- ES
- Scheduled Task
- Video Processing
- Success Stories
- API Documentation
- History
- Introduction
- API Category
- Making API Requests
- Trigger APIs
- Function APIs
- Invoke
- UpdateFunctionConfiguration
- UpdateFunctionCode
- ListFunctions
- GetFunctionLogs
- GetFunction
- DeleteFunction
- CreateFunction
- CopyFunction
- PublishVersion
- ListVersionByFunction
- GetFunctionAddress
- DeleteAlias
- UpdateAlias
- ListAliases
- GetAlias
- CreateAlias
- PutTotalConcurrencyConfig
- PutReservedConcurrencyConfig
- PutProvisionedConcurrencyConfig
- GetReservedConcurrencyConfig
- GetProvisionedConcurrencyConfig
- DeleteReservedConcurrencyConfig
- DeleteProvisionedConcurrencyConfig
- UpdateFunctionEventInvokeConfig
- GetFunctionEventInvokeConfig
- InvokeFunction
- GetRequestStatus
- Namespace APIs
- Layer Management APIs
- Async Event Management APIs
- Other APIs
- Data Types
- Error Codes
- Function and Layer Status Description
- SDK Documentation
- FAQs
- Related Agreement
- Contact Us
- Glossary
Overview
This document describes how to use an HTTP-triggered function to quickly migrate a local Laravel service to the cloud.
Note:This document mainly describes how to deploy in the console. You can also complete the deployment on the command line. For more information, see Deploying Framework on Command Line.
Prerequisites
Before using SCF, you need to sign up for a Tencent Cloud account and complete identity verification first.
Directions
Template deployment: Quick deployment of Laravel project
- Log in to the SCF console and click Functions on the left sidebar.
- Select the region and namespace where to create a function at the top of the page and click Create to enter the function creation process.
- Select Template, enter
WebFuncin the search box to filter all HTTP-triggered function templates, select the Laravel template, and click Next. - On the Create page, you can view and modify the specific configuration information of the template project.
- Click Complete. After creating the HTTP-triggered function, you can view its basic information on the Function management page.
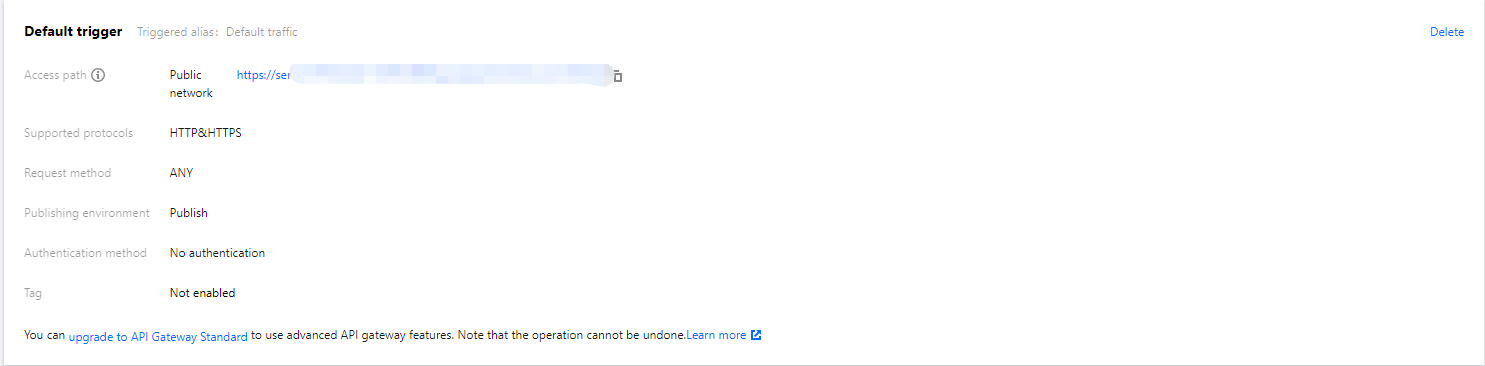
- Click Trigger management on the left to view the access path and access your deployed Laravel project as shown below:
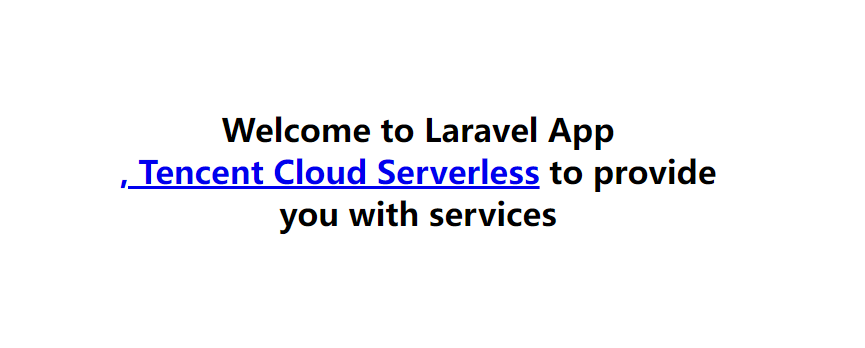
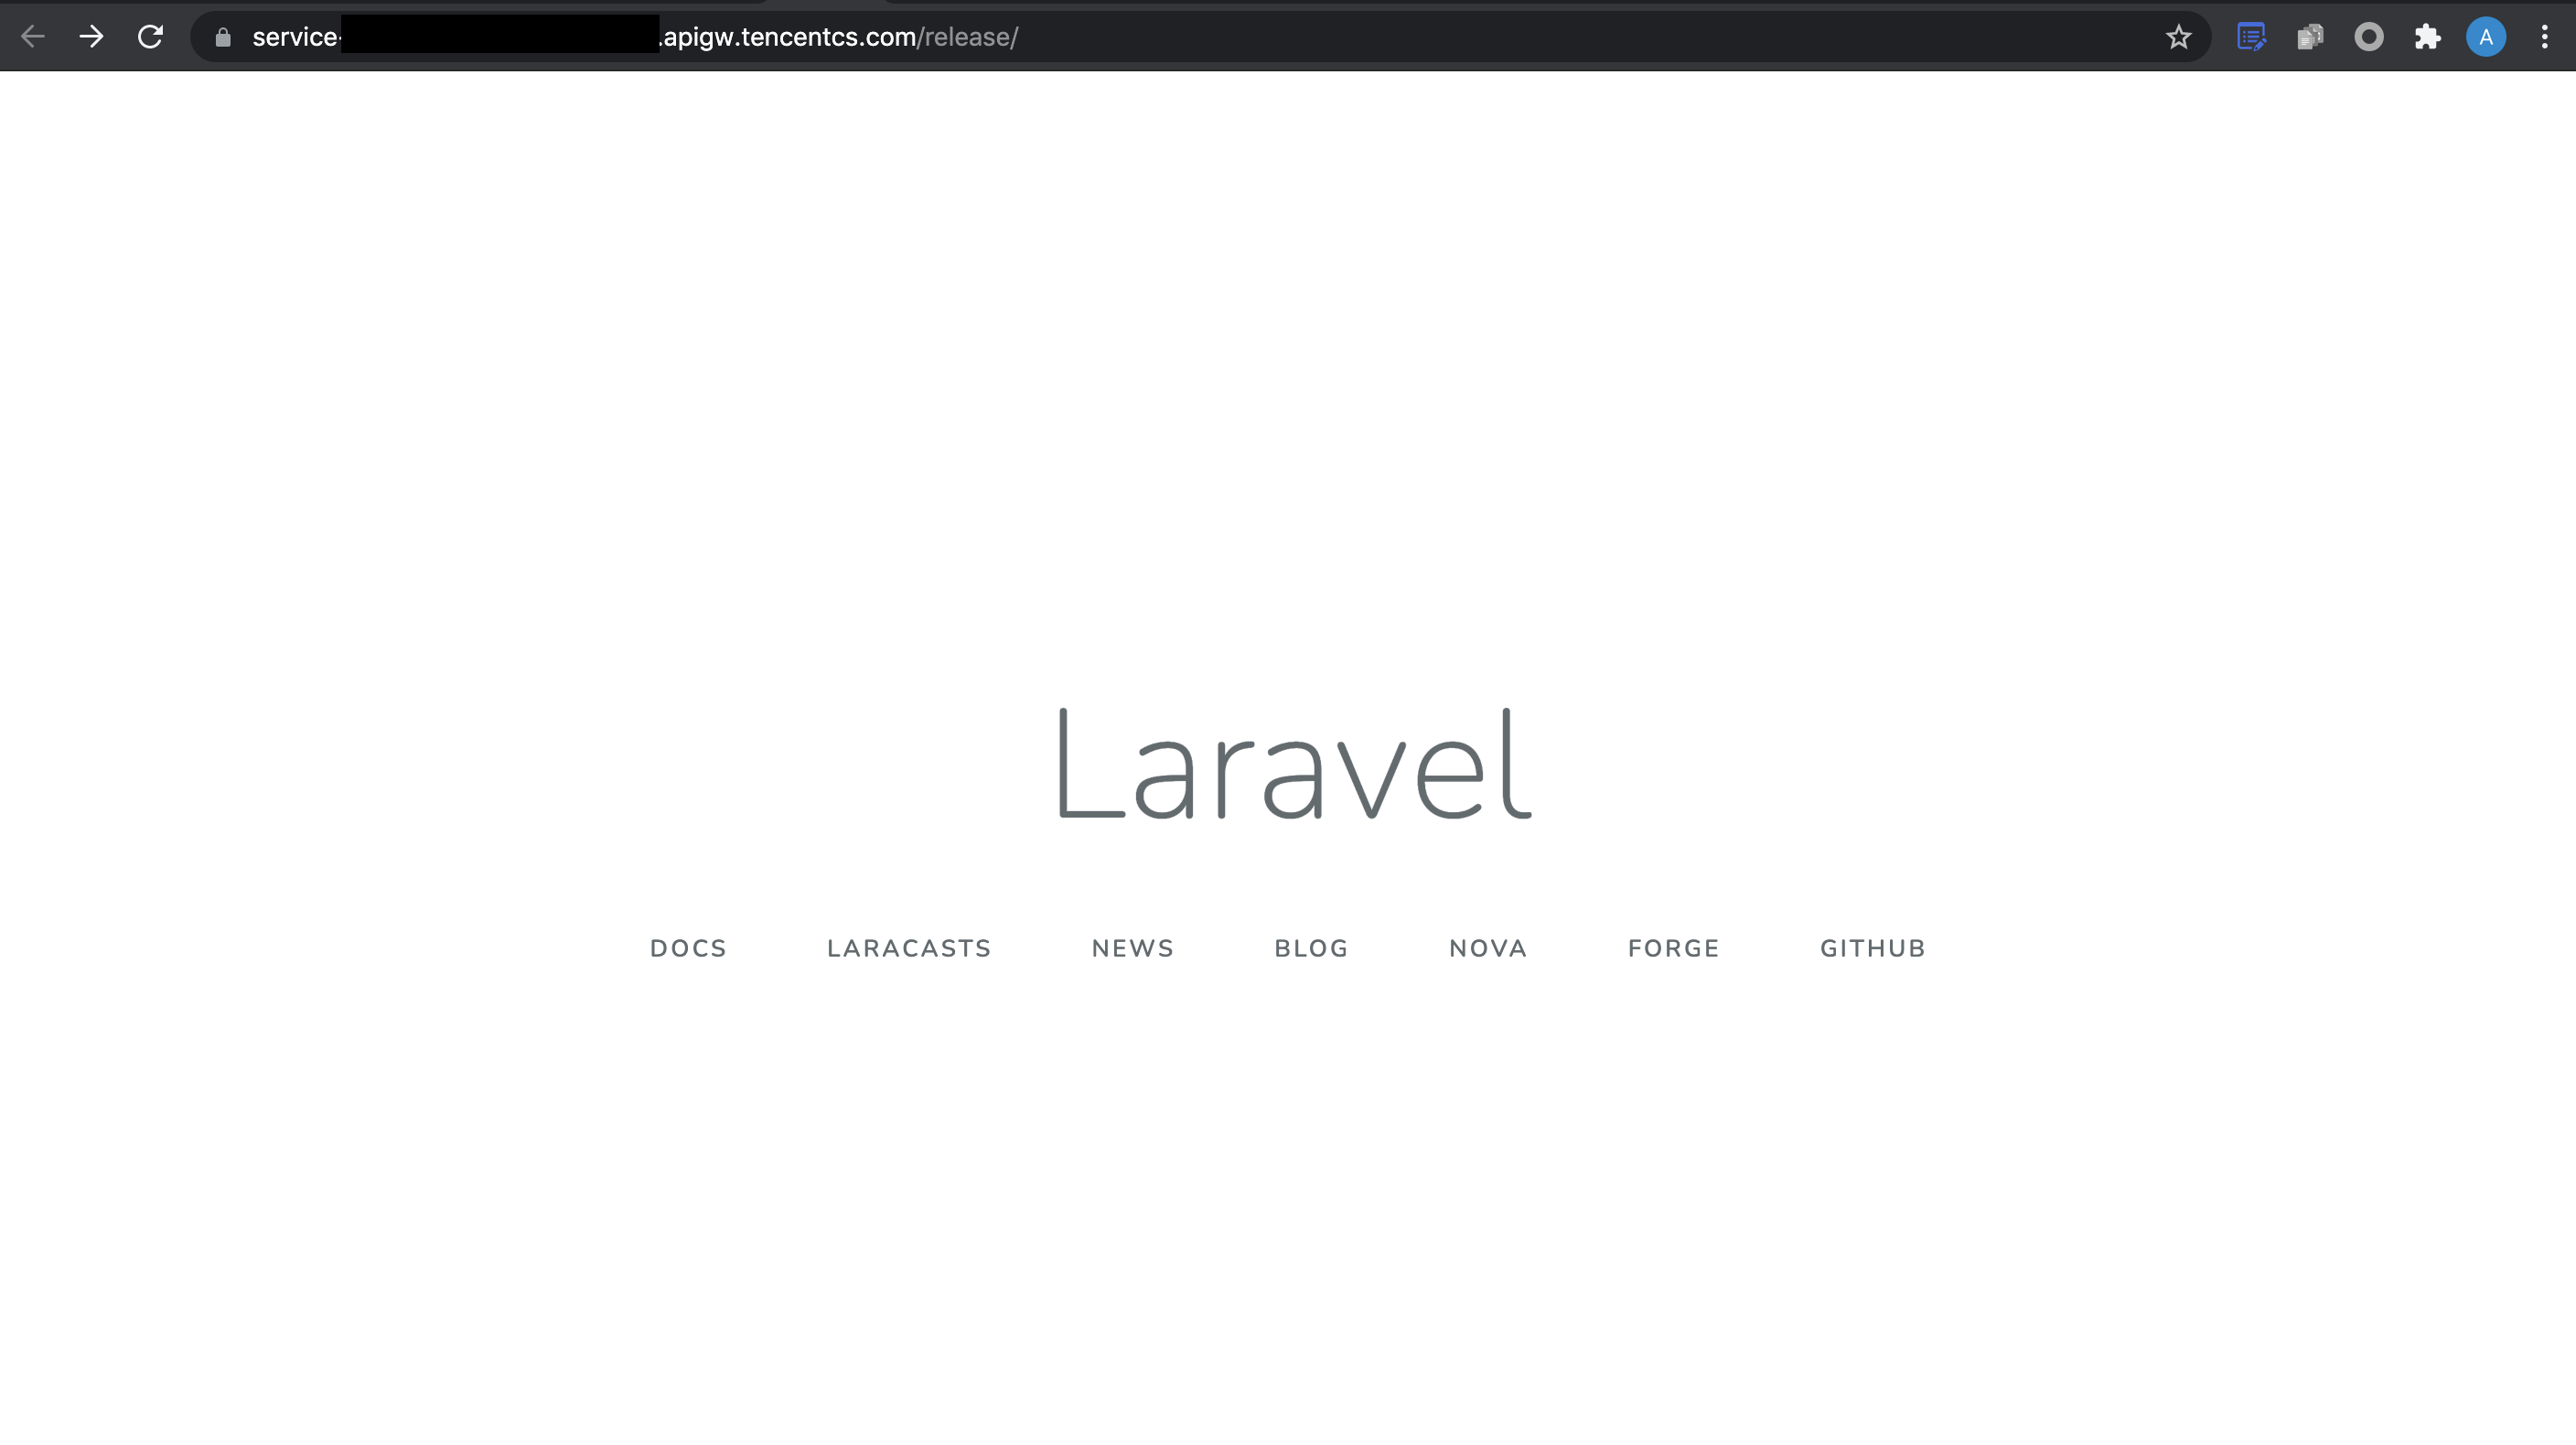
- Click the access path URL to access the Laravel project as shown below:
Custom deployment: Quick migration of local project to cloud
Local development
- Refer to Getting Started on macOS to set up the Laravel development environment locally.
- Create the sample Laravel project locally. Enter the project directory and run the following command to initialize it.
composer create-project --prefer-dist laravel/laravel blog - Run the following command to start the sample project locally. Below is the sample code:
$ php artisan serve --host 0.0.0.0 --port 9000
   Laravel development server started: <http: 0.0.0.0:9000="">
[Wed Jul 7 11:22:05 2021] 127.0.0.1:54350 [200]: /favicon.ico - Visit
http://0.0.0.0:9000in a browser, and you can access the sample Laravel project locally as shown below: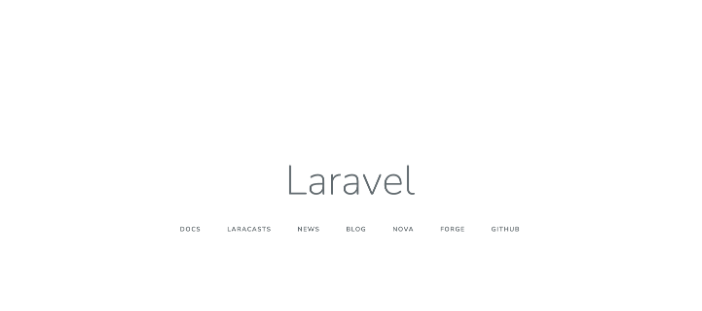
Deployment in cloud
Perform the following steps to make simple modifications to the initialized project, so that it can be quickly deployed through an HTTP-triggered function. The steps of project transformation are as follows:
Add the
scf_bootstrapbootstrap file
Create thescf_bootstrapbootstrap file in the project root directory. This file is used to configure environment variables, specify service bootstrap commands, and make sure that your service can be started normally through this file.Note:scf_bootstrapmust have the executable permission of755or777.- If you want to output environment variables in the log, you need to add the
-uparameter before the bootstrap command, such aspython -u app.py.
Modify the file read/write path
In the SCF environment, only files in the/tmpdirectory are readable/writable. If you select other directories, write will fail due to the lack of permissions. Therefore, you need to inject environment variables in thescf_bootstrapfile to adjust the output directory of the Laravel framework:#!/bin/bash # Inject the SERVERLESS flag export SERVERLESS=1 # Modify the template compilation cache path, as only `/tmp` is readable/writable in SCF export VIEW_COMPILED_PATH=/tmp/storage/framework/views # Modify `session` to store it in the memory (array type) export SESSION_DRIVER=array # Output logs to `stderr` export LOG_CHANNEL=stderr # Modify the application storage path export APP_STORAGE=/tmp/storage # Initialize the template cache directory mkdir -p /tmp/storage/framework/viewsModify the listening address and port
The listening port in the HTTP-triggered function must be9000, so you need to specify the listening port inscf_bootstrapthrough the following command:/var/lang/php7/bin/php artisan serve --host 0.0.0.0 --port 9000The content of
scf_bootstrapis as follows: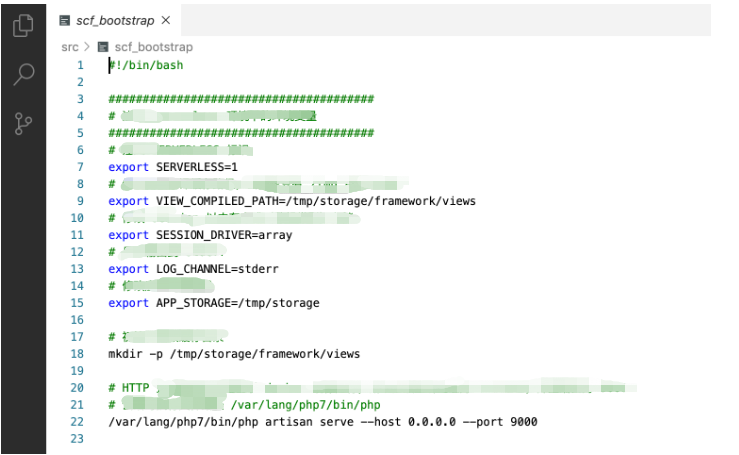
Deploy Laravel
After the local configuration is completed, run the bootstrap file and make sure that your service can be normally started locally. Then, perform the following steps to deploy Laravel:- Log in to the SCF console and click Functions on the left sidebar.
- Select the region where to create a function at the top of the page and click Create to enter the function creation process.
- Select Create from scratch and configure the options as prompted:
- Function type: Select HTTP-triggered function.
- Function name: Enter the name of your function.
- Region: Enter your function deployment region, such as Chengdu.
- Runtime environment: Select Php7.
- Submitting method: Select Local folder and upload your local project.
- Function codes: Select the specific local folder where the function code is.
- After the deployment is completed, click the generated URL to access your Laravel application as shown below:
Development management
After the deployment is completed, you can quickly access and test your web service in the SCF console and try out various features of SCF, such as layer binding and log management. In this way, you can enjoy the advantages of low cost and flexible scaling brought by the serverless architecture.

 Yes
Yes
 No
No
Was this page helpful?