- Release Notes and Announcements
- User Guide
- Product Introduction
- Purchase Guide
- Getting Started
- User Guide
- Quota Management
- Managing Functions
- Web Function Management
- Log Management
- Concurrence Management
- Trigger Management
- Version Management
- Alias Management
- Permission Management
- Managing Monitors and Alarms
- Network Configuration
- Layer Management
- Execution Configuration
- Extended Storage Management
- DNS Caching Configuration
- Triggers
- Development Guide
- Developer Tools
- Code Development
- Web Framework Development
- Deploying Framework on Command Line
- Quickly Deploying Egg Framework
- Quickly Deploying Express Framework
- Quickly Deploying Flask Framework
- Quickly Deploying Koa Framework
- Quickly Deploying Laravel Framework
- Quickly Deploying Nest.js Framework
- Quickly Deploying Next.js Framework
- Quickly Deploying Nuxt.js Framework
- Quickly Deploying Django Framework
- Best Practice
- Overview
- Solutions with Tencent Cloud Services
- Business Development
- ServerlessFramework Practices
- API Gateway
- TRTC Practices
- COS Practices
- CKafka Practice
- CLS
- CLB Practice
- MPS
- CDN
- CDWPG
- VOD
- SMS
- ES
- Scheduled Task
- Video Processing
- Success Stories
- API Documentation
- History
- Introduction
- API Category
- Making API Requests
- Trigger APIs
- Function APIs
- Invoke
- UpdateFunctionConfiguration
- UpdateFunctionCode
- ListFunctions
- GetFunctionLogs
- GetFunction
- DeleteFunction
- CreateFunction
- CopyFunction
- PublishVersion
- ListVersionByFunction
- GetFunctionAddress
- DeleteAlias
- UpdateAlias
- ListAliases
- GetAlias
- CreateAlias
- PutTotalConcurrencyConfig
- PutReservedConcurrencyConfig
- PutProvisionedConcurrencyConfig
- GetReservedConcurrencyConfig
- GetProvisionedConcurrencyConfig
- DeleteReservedConcurrencyConfig
- DeleteProvisionedConcurrencyConfig
- UpdateFunctionEventInvokeConfig
- GetFunctionEventInvokeConfig
- InvokeFunction
- GetRequestStatus
- Namespace APIs
- Layer Management APIs
- Async Event Management APIs
- Other APIs
- Data Types
- Error Codes
- Function and Layer Status Description
- SDK Documentation
- FAQs
- Related Agreement
- Contact Us
- Glossary
Overview
The data lake formation scheme of the serverless architecture is to capture and record the information of a batch of data after starting a data call through a function trigger. This implements various capabilities such as structure conversion, data format conversion, and data compression in the function. In this document, SCF and COS are used to back up TDMQ messages.
Directions
Creating COS bucket
- Log in to the COS console.
- Select Bucket List on the left sidebar and click Create Bucket to create the source COS bucket.
- Set the Name to scf-data-lake, the Region to Guangzhou, and the Access Permission to Private Read/Write (default), and click OK.
Creating TDMQ resources
- Create resources such as cluster and topic in the TDMQ console. For more information, see Resource Creation and Preparation.
- Connect the TDMQ cluster to a VPC. For more information, see VPC Access.
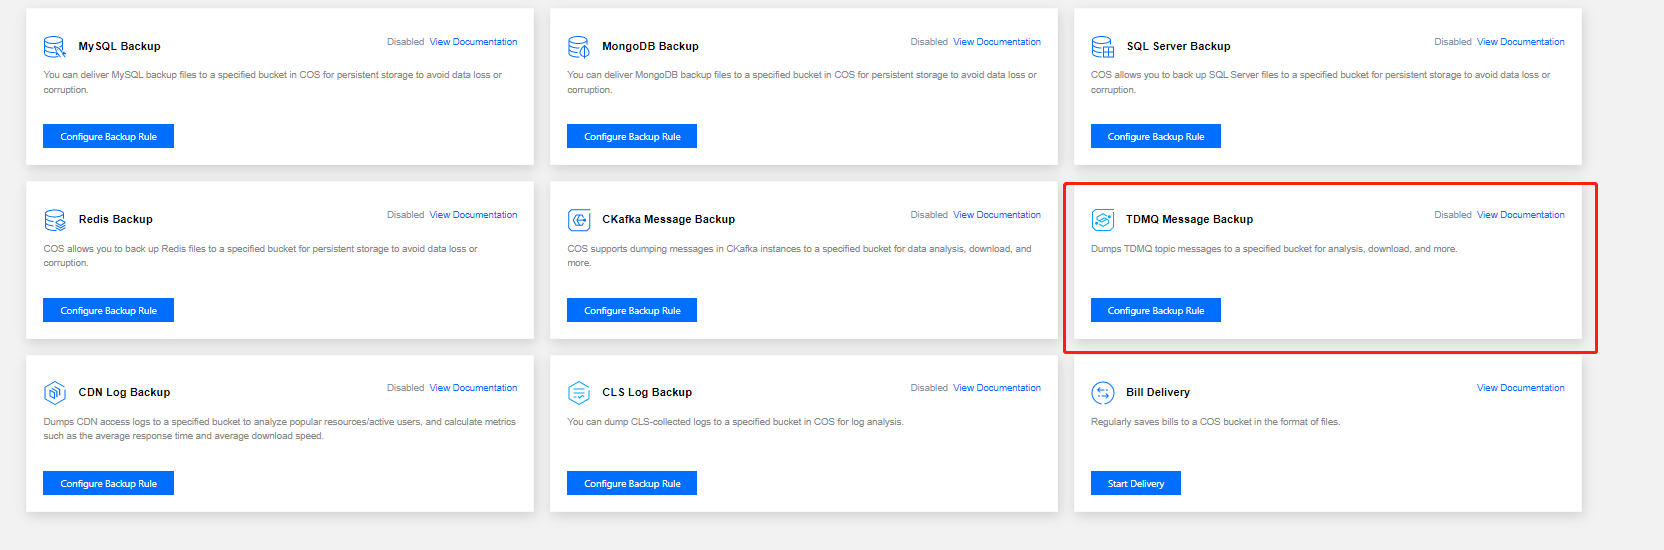
Configuring function through COS app integration
- Log in to the COS console.
- Select App Integration on the left sidebar and select TDMQ Message Backup in Data Migration and Backup as shown below:
- On the TDMQ Message Backup page, select the region of the created COS bucket and click Add Function.
- In the Create TDMQ Message Backup Function pop-up window, enter the Function Name such as
data-lake, associate the createdscf-data-lakebucket, select Authorize SCF Service, and then click Next. - Click Next to configure TDMQ as follows:
- Cluster: A TDMQ cluster as the message source. Only TDMQ clusters in the same region are supported.
- Namespace: A namespace in the cluster
- Topic: A topic used as the message source
- Subscription: Select a subscription. If existing subscriptions cannot meet your needs, you can create a new one in Consumption Management in the TDMQ console.
- Start Point: Start point of historical messages
- Role: Select the TDMQ role (a TDMQ-specific concept, which is different from that mentioned in Tencent Cloud), which is the minimum unit for permission division within TDMQ. You can create multiple roles and grant them different message production/consumption permissions in different namespaces.
- Role Key: Select the TDMQ role key, which is an authentication tool. You can add a key in the client to access TDMQ to produce/consume messages. Each role has a unique key corresponding to itself.
- Address: It must be a VPC access address.Note
There must be an available IP in the VPC subnet, and DHCP must be supported.
- Click Next to configure delivery. The configuration item is as follows:
- Delivery Path: It is the delivery path prefix of the backups. If it is not specified, backups will be stored in the root directory of the bucket. The specified prefix must end with a slash (/).
- Click Confirm.
You can perform the following operations on the created function:- Click View Log to view the historical running status of TDMQ message backup. If an error is reported, you can click View Log to quickly redirect to the SCF console to view the error log details.
- Click Edit to modify a TDMQ message backup rule.
- Click Delete to delete an unwanted TDMQ message backup rule.
Testing function
- Log in to the TDMQ console.
- Click Topic Management on the left sidebar and select the target region, cluster, and namespace.
- On the Topic Management list page, click Send Message on the right of the associated topic.
- Enter the message content of up to 64 KB in the pop-up window.
- Click Submit.
- Go to the details page of the associated COS bucket. For example, check whether a file has been created in the Delivery Path defined in
scf-data-lake, and if so, the TDMQ message backup is successful.

 Yes
Yes
 No
No
Was this page helpful?