This document introduces you to the quick start guide for Firewall Manager (FWM).
FWM supports two usage scenarios:
Single-Account Scenario: Manage various boundary policies for CFW under a single Tencent Cloud account.
Multi-Account Scenario: As an administrator or delegated administrator of an enterprise organization, you centrally manage policies for multiple member accounts.
The following procedures apply to both scenarios. Differences are highlighted with the Multi-Account Scenario tag.
Preparations
1. FWM requires user authorization before it can be used. For detailed authorization steps, see the Welcome Page.
2. For the Multi-Account Scenario, you also need to complete the following prerequisites:
You have invited the target member account to join the Tencent Cloud Organization, and the member account has accepted the invitation.
The enterprise administrator or delegated administrator account must complete the FWM authorization.
Operation Steps
Configuring Multi-Account Management (Optional)
Note:
For the single-account scenario, skip this step and proceed directly to Step 1.
This step is used to set up delegated administrators, divide account groups, manage member accounts, and optionally configure specification sharing roles.
1. Log in to the FWM console using an administrator account. In the left sidebar, select Member Management.
2. Set Delegated Aministrator (Optional): An enterprise administrator can delegate daily FWM tasks to a member account as a delegated administrator.
2.1 At the top of the member list page, click Set Delegated Administrator. You will be redirected to the Organization console.
2.3 Locate the target account in the member list. You can view the updated result in the Identity column.
3. New Account Group: Group member accounts based on different dimensions. You can then deploy rules to all accounts in a group at once.
3.1 Above the member list, click New Group Management to go to the account group management panel.
3.2 In the account group management panel, click New Account Group.
3.3 Enter the account group name and click Confirm.
3.4 Locate the target account in the member list. Click the in the
column.
3.5 In the drop-down list, select the account group you created in the previous step and click OK.
4. Manage Member Account: In the member list, toggle the switch in the CFW Management column and click OK to add the member accounts that need to be managed to the management list. After the accounts are managed, the CFW policies under those accounts can be centrally managed by an administrator or a delegated administrator.
5. Set CFW Shared Role (Optional): If you want one share account to centrally activate CFW specifications and other user accounts to share those specifications, you can configure the sharing account and consuming accounts on the CFW Shared Role column. This feature relies on CFW specification management. For details, see Specification Management.
5.1 Log in to the FWM console using an administrator or delegated administrator account. In the left sidebar, select Member Management.
5.2 Locate the target account in the member list. Click the
in the CFW Shared Role column to change the shared role.
Step 1: Viewing Security Posture Overview
1. Log in to the FWM console. In the left-side navigation pane, select Overview.
2. In the Policy Management area, view the number of rule groups and recent policy changes for each security product (Cloud Firewall - Enterprise Security Group, Internet Boundary, NAT Boundary, VPC Boundary).
Note:
Multi-Account Scenario: The data in this area is aggregated from all managed accounts.
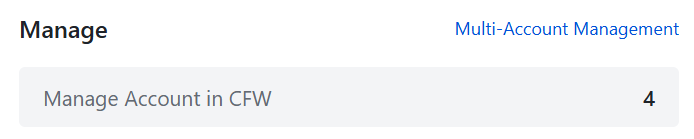
3. In the Manage area, view the number of managed accounts and the current quota usage for each security product.
Note:
Multi-Account Scenario: You can also view the number of account groups to verify that the account management setup meets expectations.
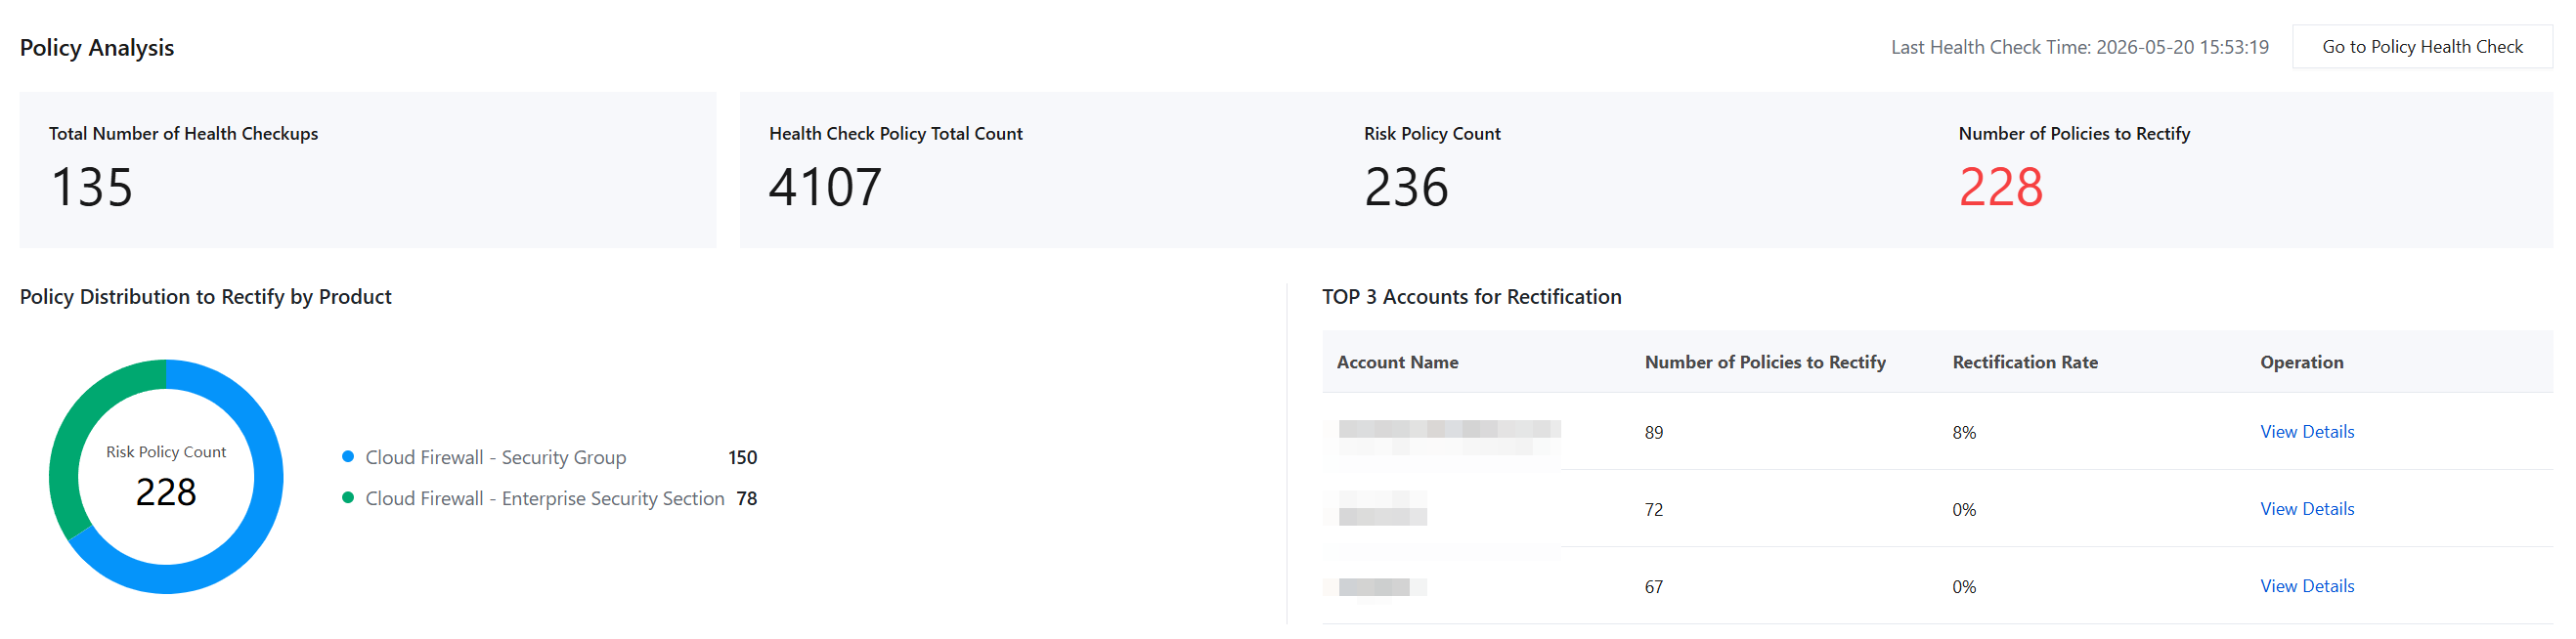
4. In the Policy Analysis area, view the results of the latest full policy inspection, including Total Number of Health Checkups, Health Check Policy Total Count, Risk Policy Count and Number of Policies to Rectify, to understand the overall policy health.
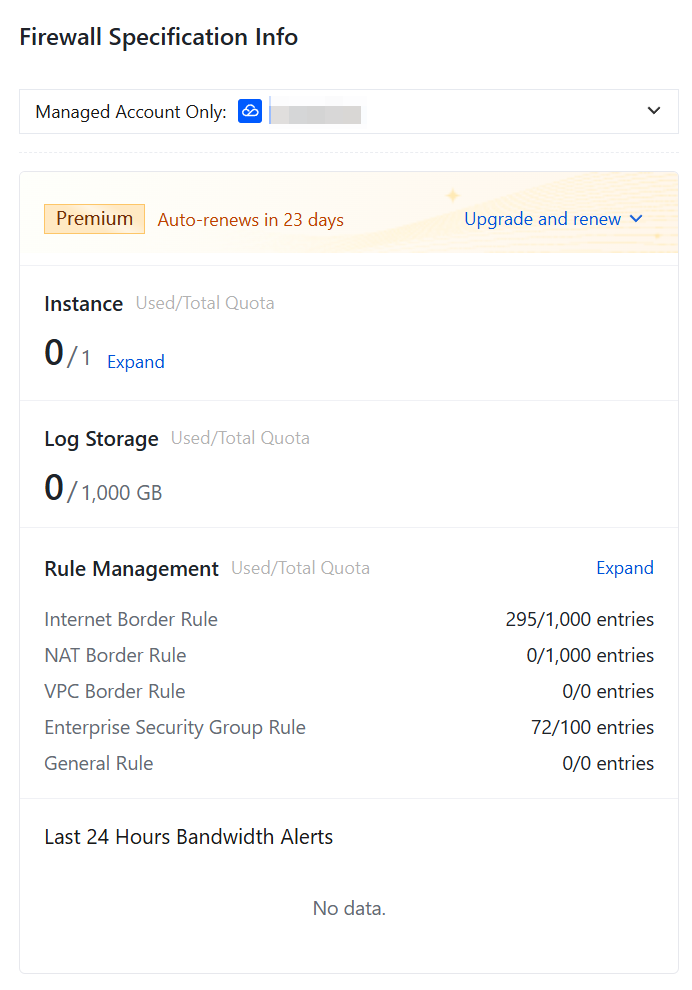
5. In the Firewall Specification Info area, view the edition, specifications, and expiration time of the CFW under your current account. If necessary, you can click Upgrade and renew.
Note:
Multi-Account Scenario: The specification information of the sharing account is displayed here.
Step 2: Create and Deploy Security Rule
1. Create Rule Group
1. Log in to the FWM console. In the left-side navigation pane, select Rule Group.
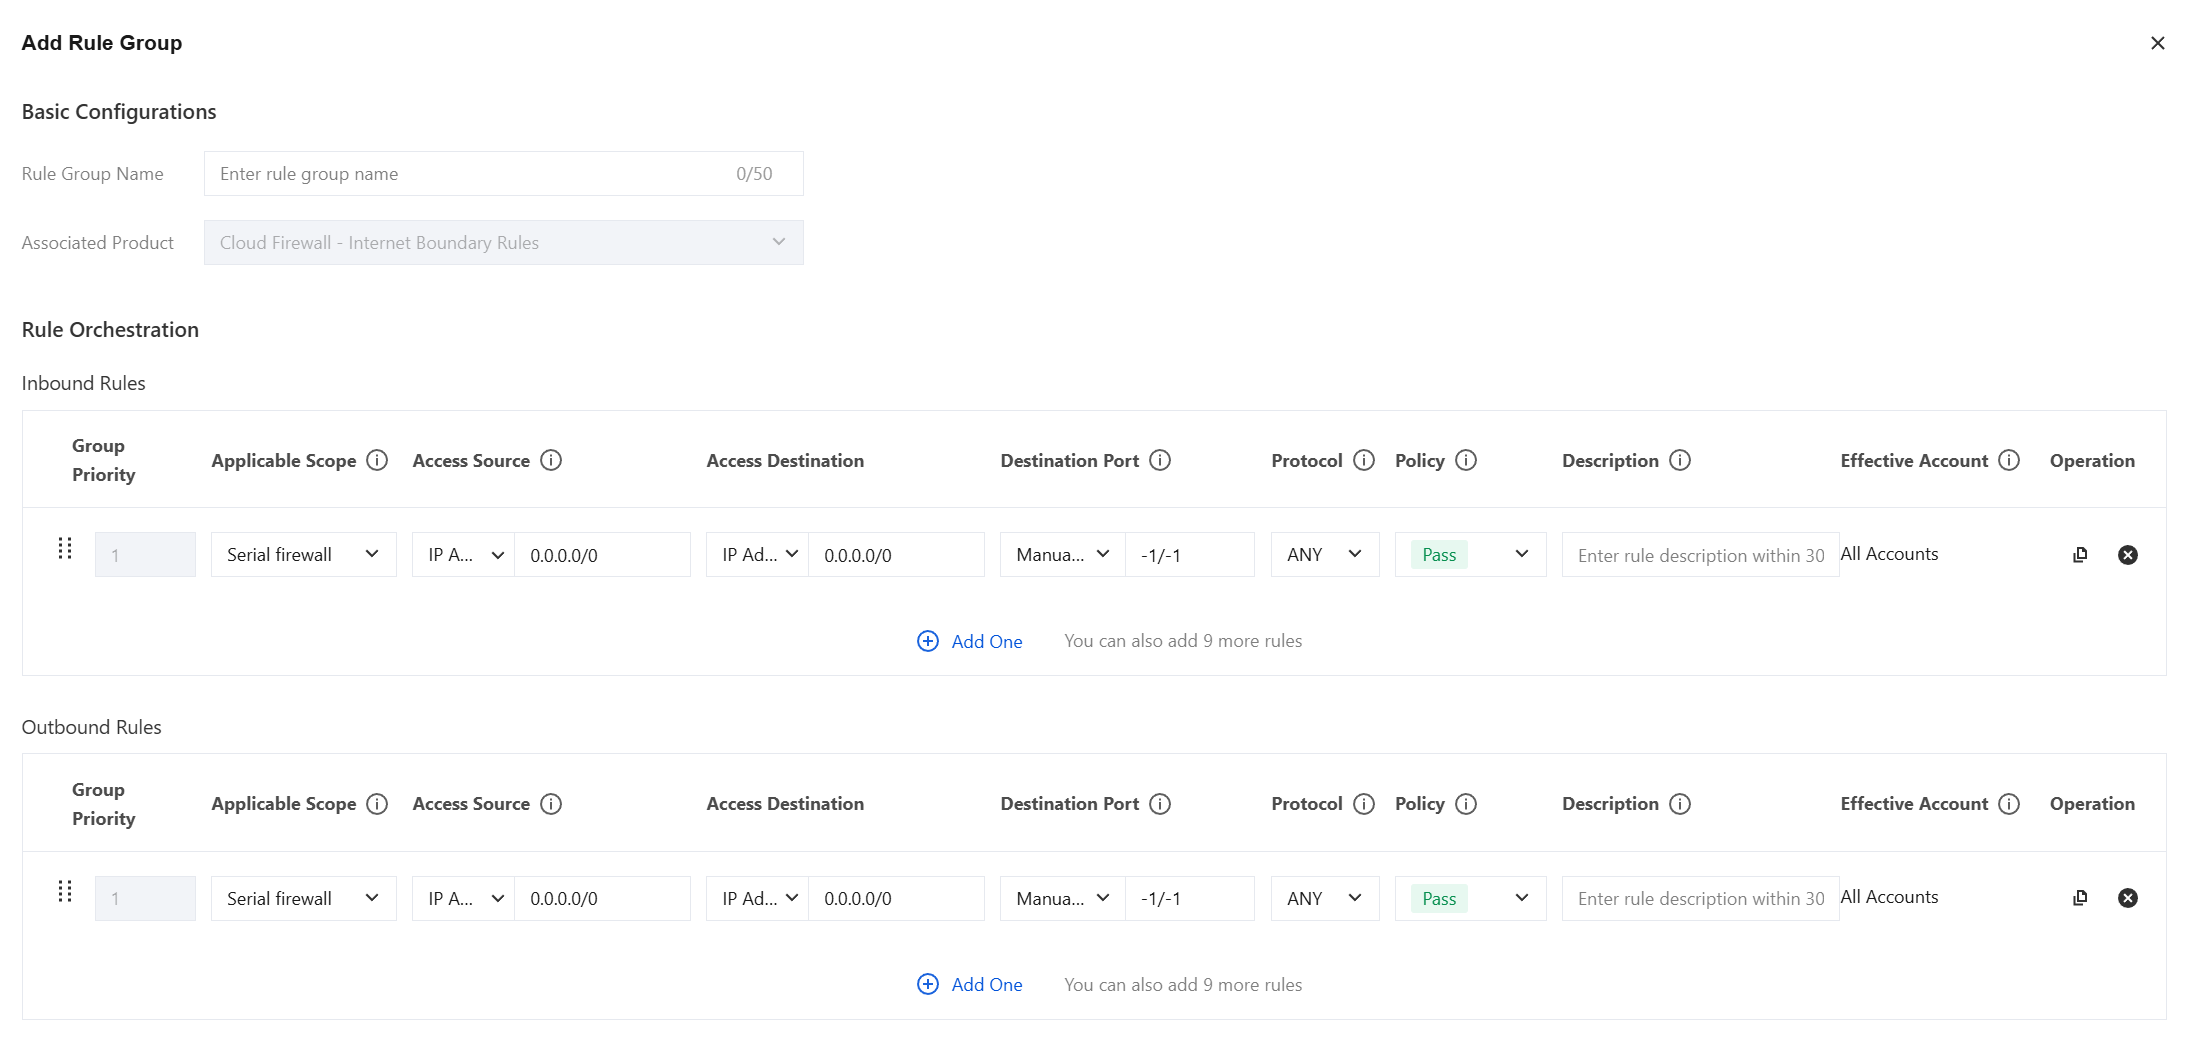
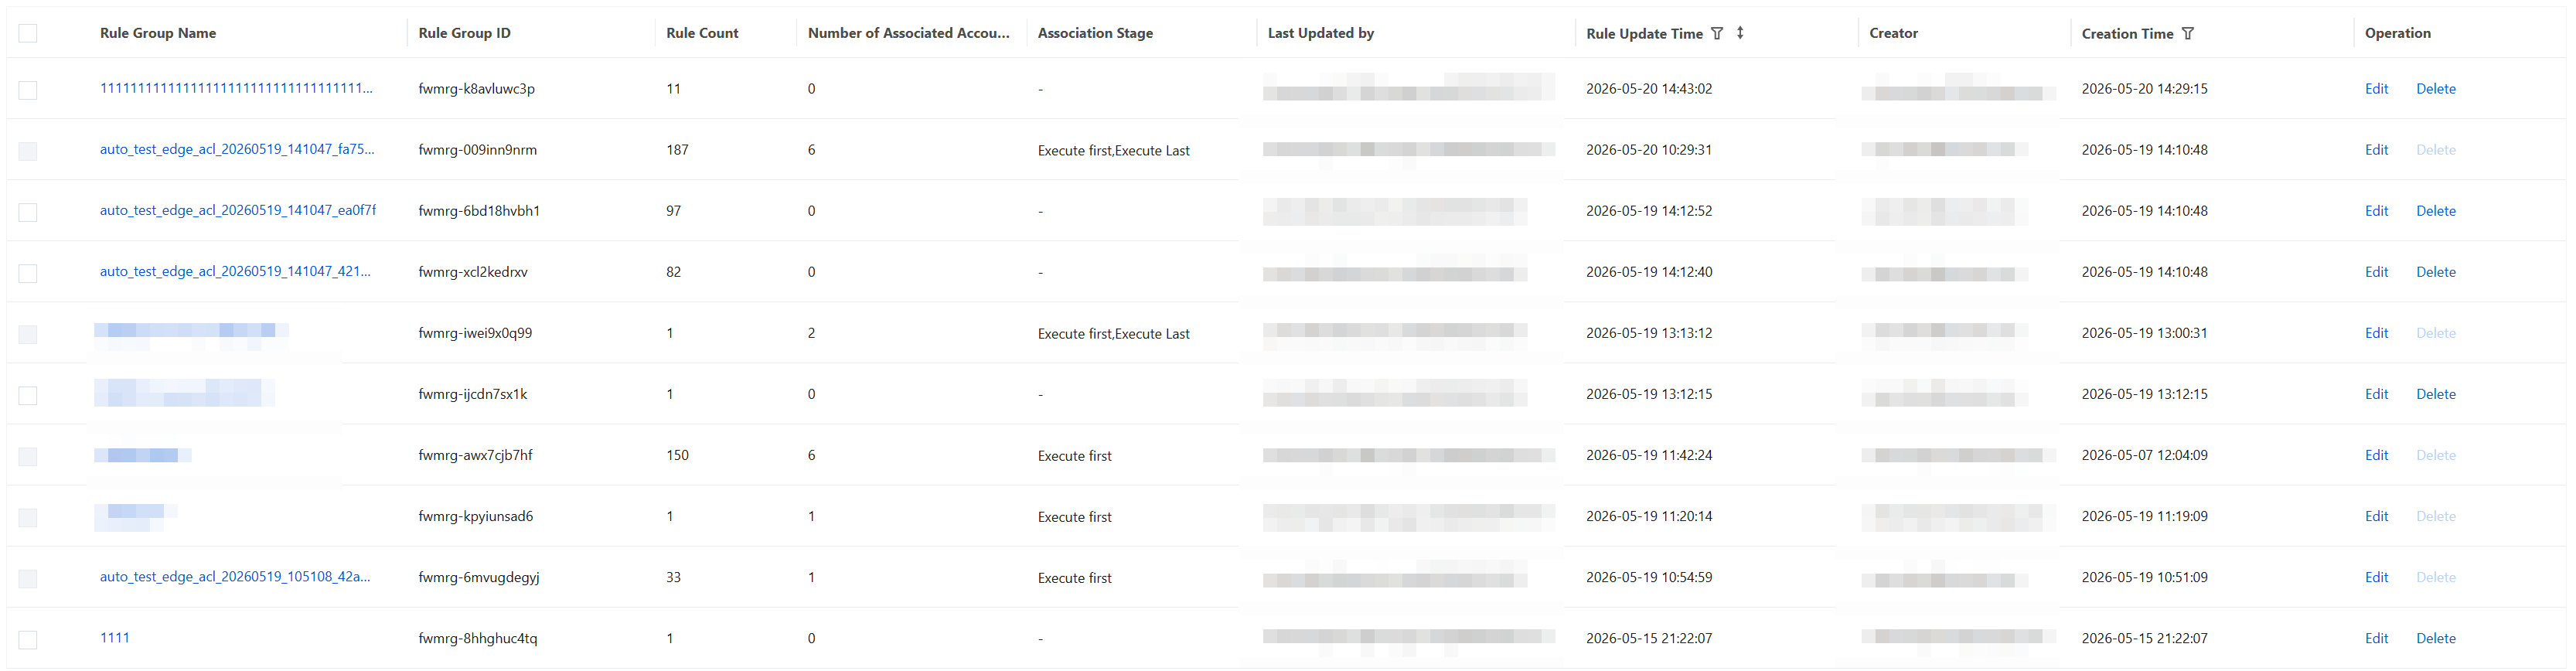
2. Select the target security product tab (Cloud Firewall - Internet Boundary Rules, NAT Boundary Rules, VPC Boundary Rules, or Enterprise Security Group), and then click Create Rule Group.
3. On the Create Rule Group page, configure parameters such as the rule group name, description, and rule content.
Note:
Multi-Account Scenario: Rule groups are uniformly orchestrated under the administrator/delegated administrator account and can be deployed to any managed account or account group.
4. Click Confirm. The newly created rule group will be displayed in the list.
2. Deploy Rule
1. Log in to the FWM console. In the left-side navigation pane, select Rule Management.
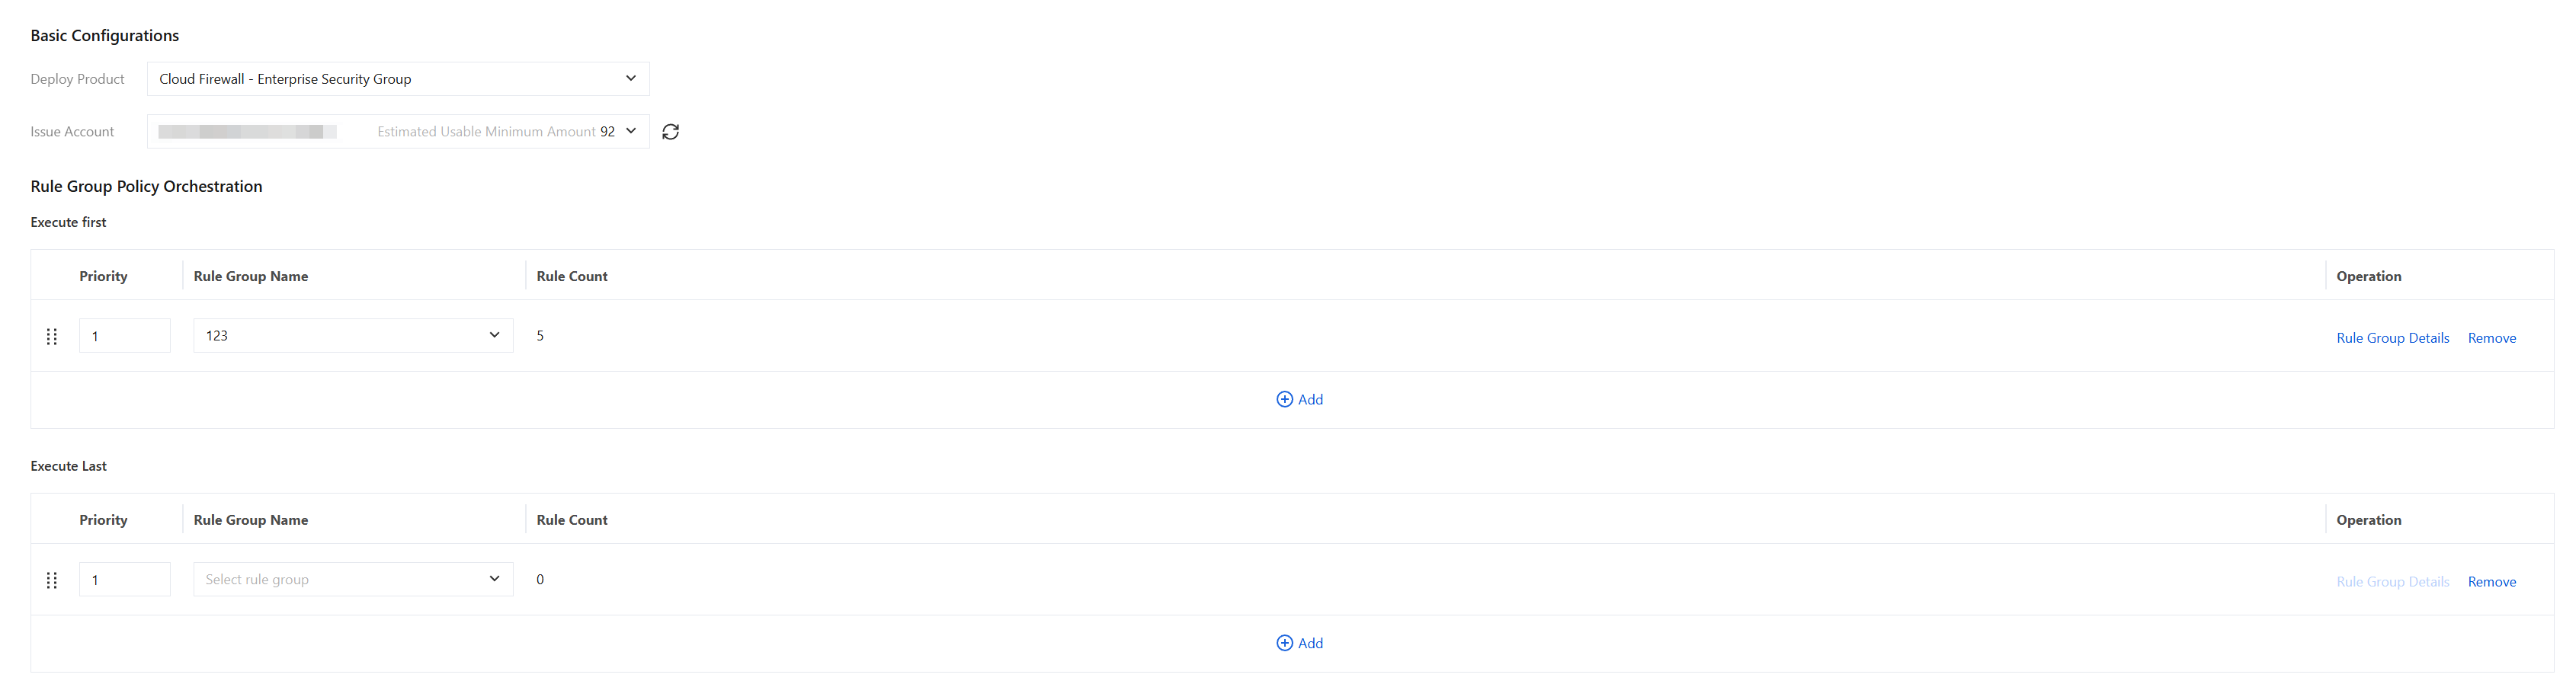
2. Select the target security product tab, and then click Create Rule Issue.
3. On the Create Rule Issue page, configure the relevant parameters. Key Parameter Description:
Issue Account:
Single-Account Scenario: Select This Account.
Multi-Account Scenario: You can select either a single member account or an account group. If you select an account group, the deployment rule will be automatically inherited by new members added to the group, eliminating the need for repeated configuration. Click Deploy Now to make it effective.
Associate Rule Group: Select the rule group created in the previous step.
4. After the parameters are configured, deploy them as follows:
Cloud Firewall - Enterprise Security Group: Click Save and Preview Changes to preview the instance rule changes that this deployment will trigger. After confirming that everything is correct, click Immediate Distribution to execute the deployment. Alternatively, you can directly click Immediate Distribution or Save.
Cloud Firewall - Internet Boundary / NAT Boundary / VPC Boundary: Click Immediate Distribution to execute the deployment directly, or click Save to only save the deployment rule. You can deploy it later from the rule management list.
Step 3: Analysis and Optimize Existing Rule
1. Log in to the FWM console. In the left-side navigation pane, select Policy Analysis.
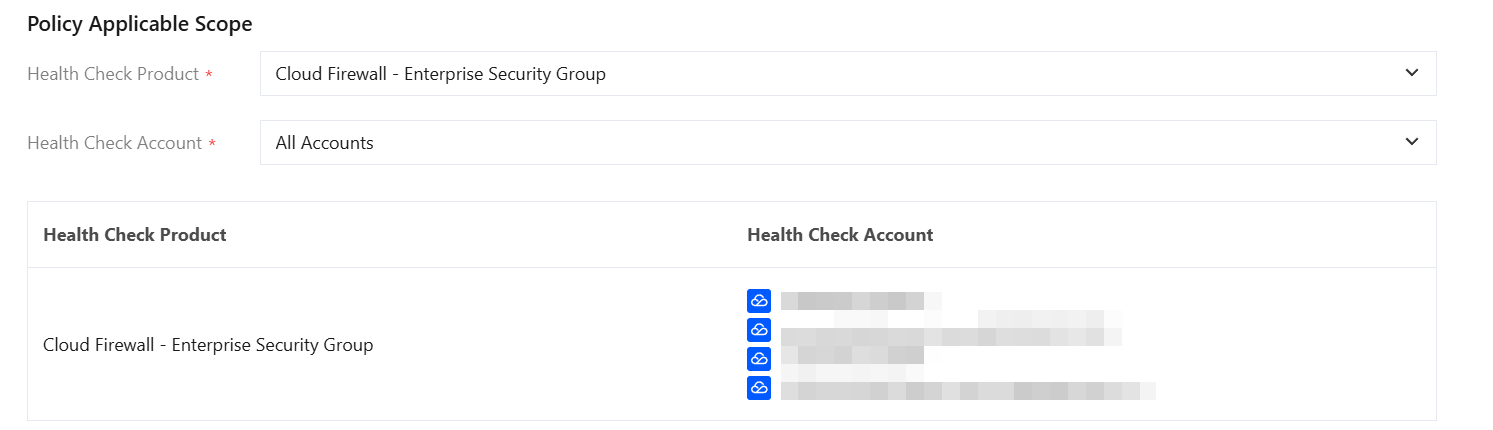
2. Click Start Analysis. In the pop-up window, select Health Check Product and then click Start Analysis.
Note:
Multi-Account Scenario: You can also select Health Check Account and specify either a single member account or all managed accounts.
3. The page will display a "Scanning in Progress" loading status. Please wait patiently for the analysis to complete.
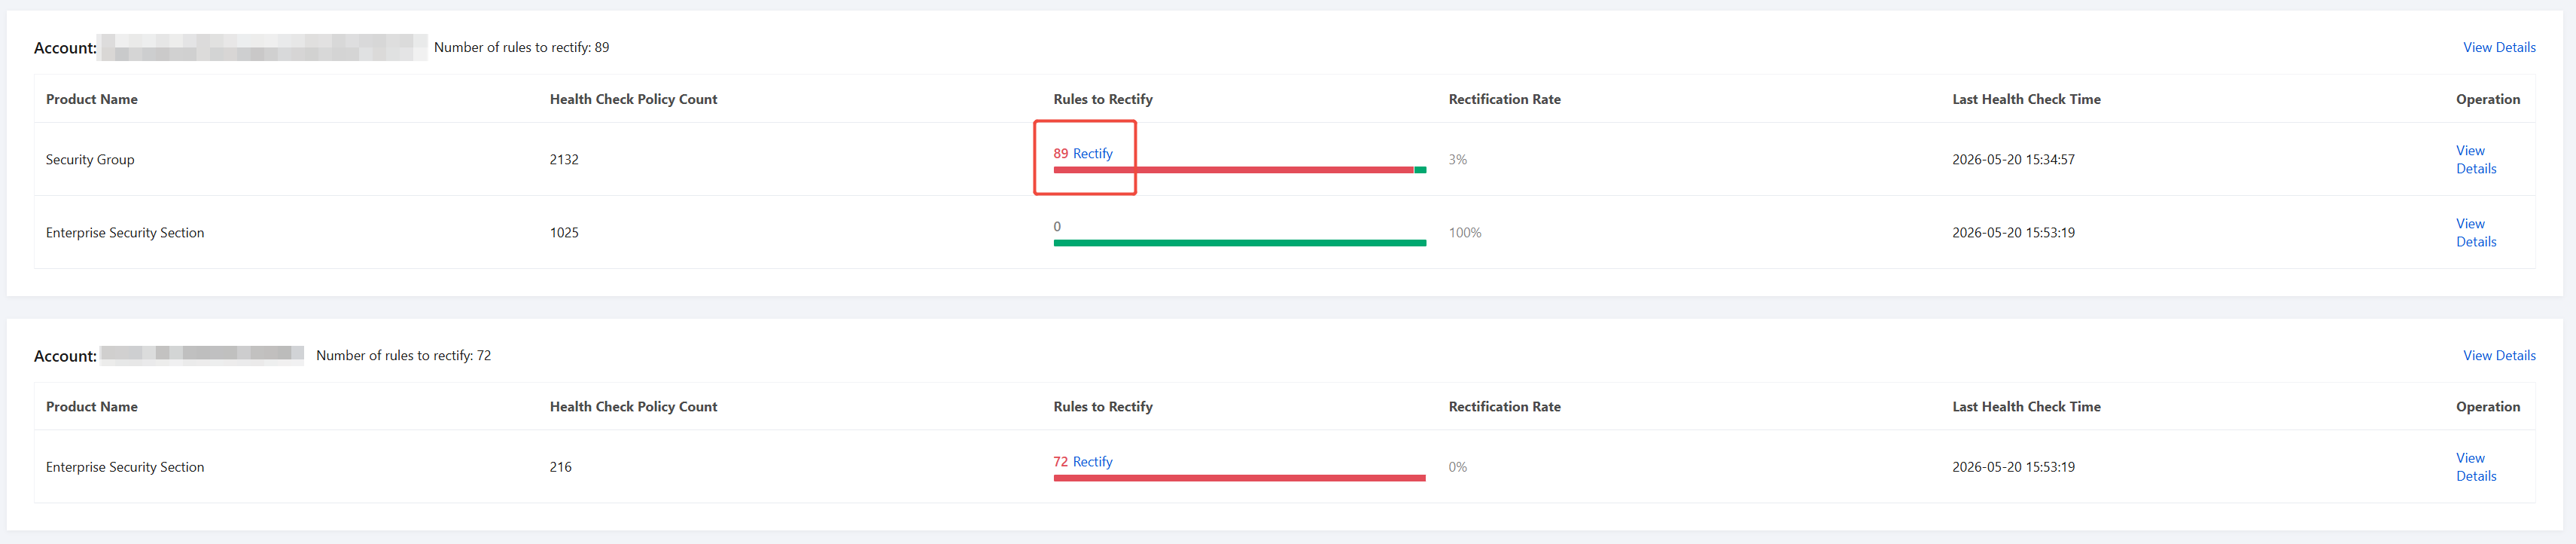
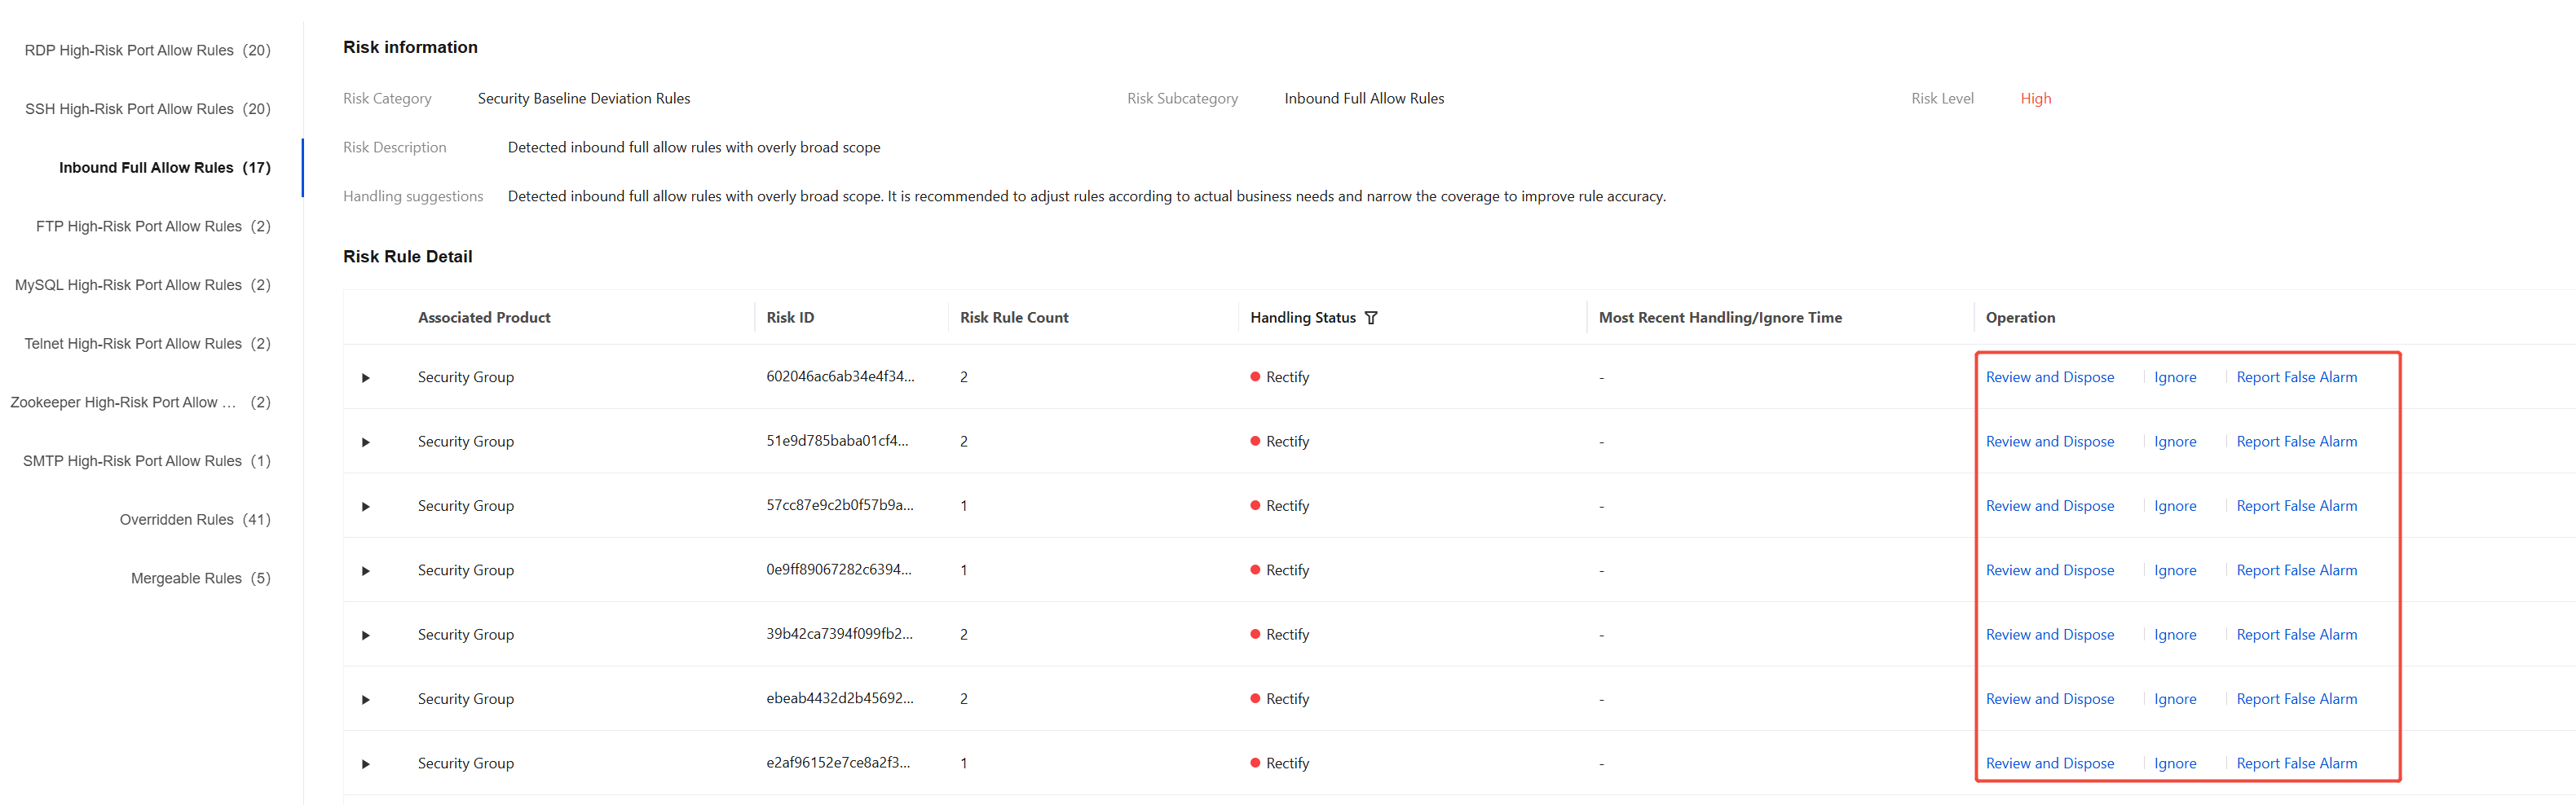
4. After the analysis is complete, for risk items that require handling, click Rectify.
5. On the risk item details page for remediation, you can select:
Review and Dispose: After performing real-time detection, the system provides the latest list of risk rules. It supports directly Edit or Delete rules for remediation.
Ignore: For risks that are confirmed to require no remediation, you can mark them as "Ignored".
Report False Alarm: If you believe the detection results are incorrect, you can submit feedback.
Note:
Multi-Account Scenario: If you need to go to a member account to perform more complex operations, you can use Impersonate Login to switch to that member account and continue remediation.
Step 4: Audit Operation Log
1. Log in to the FWM console. In the left-side navigation pane, select Log Audit.
2. Switch between logs of different modules using tabs:
Rule Management: Logs operations related to rule deployment, such as creation, modification, and deployment.
Rule Group: Logs operations related to rule groups, such as creation, editing, and deletion.
Policy Analysis: Logs operations such as inspection, remediation, ignoring, and feedback.
Member Management (Multi-Account Scenario Only): Logs operations related to the multi-account scenario, such as delegated administrator configuration, account group changes, member onboarding, and shared role configuration.
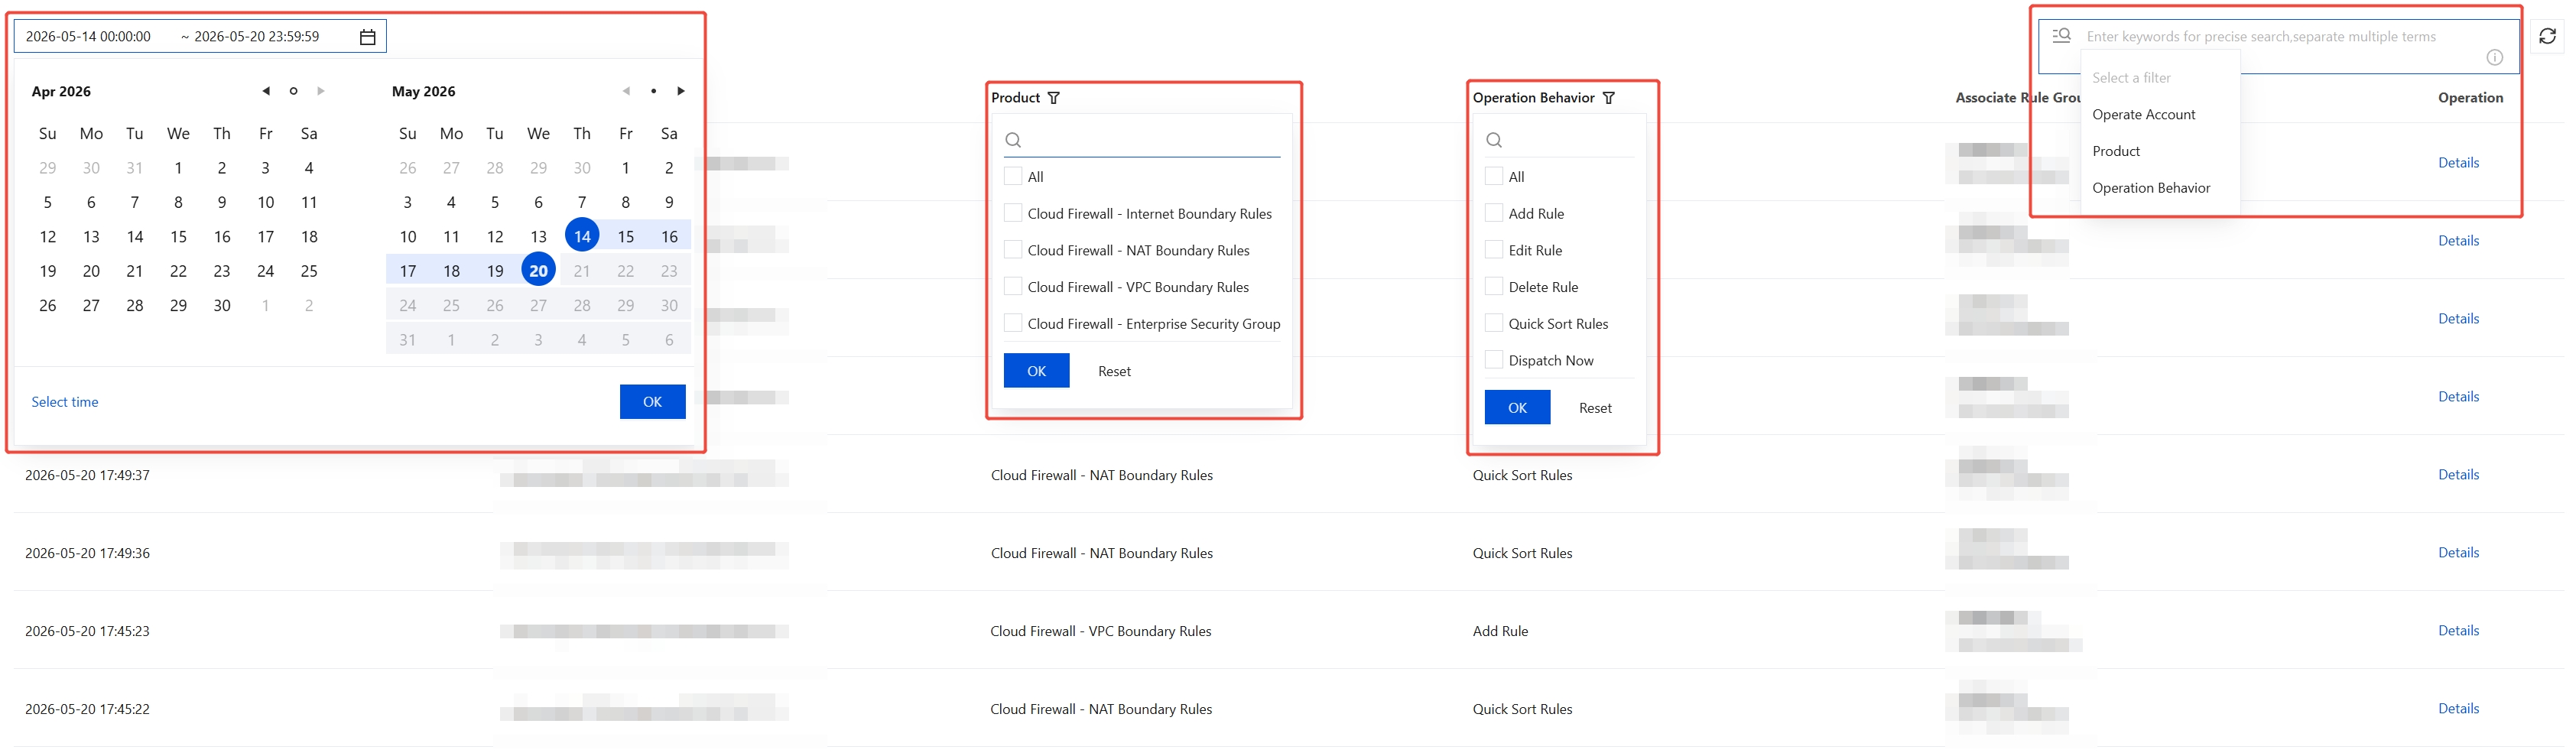
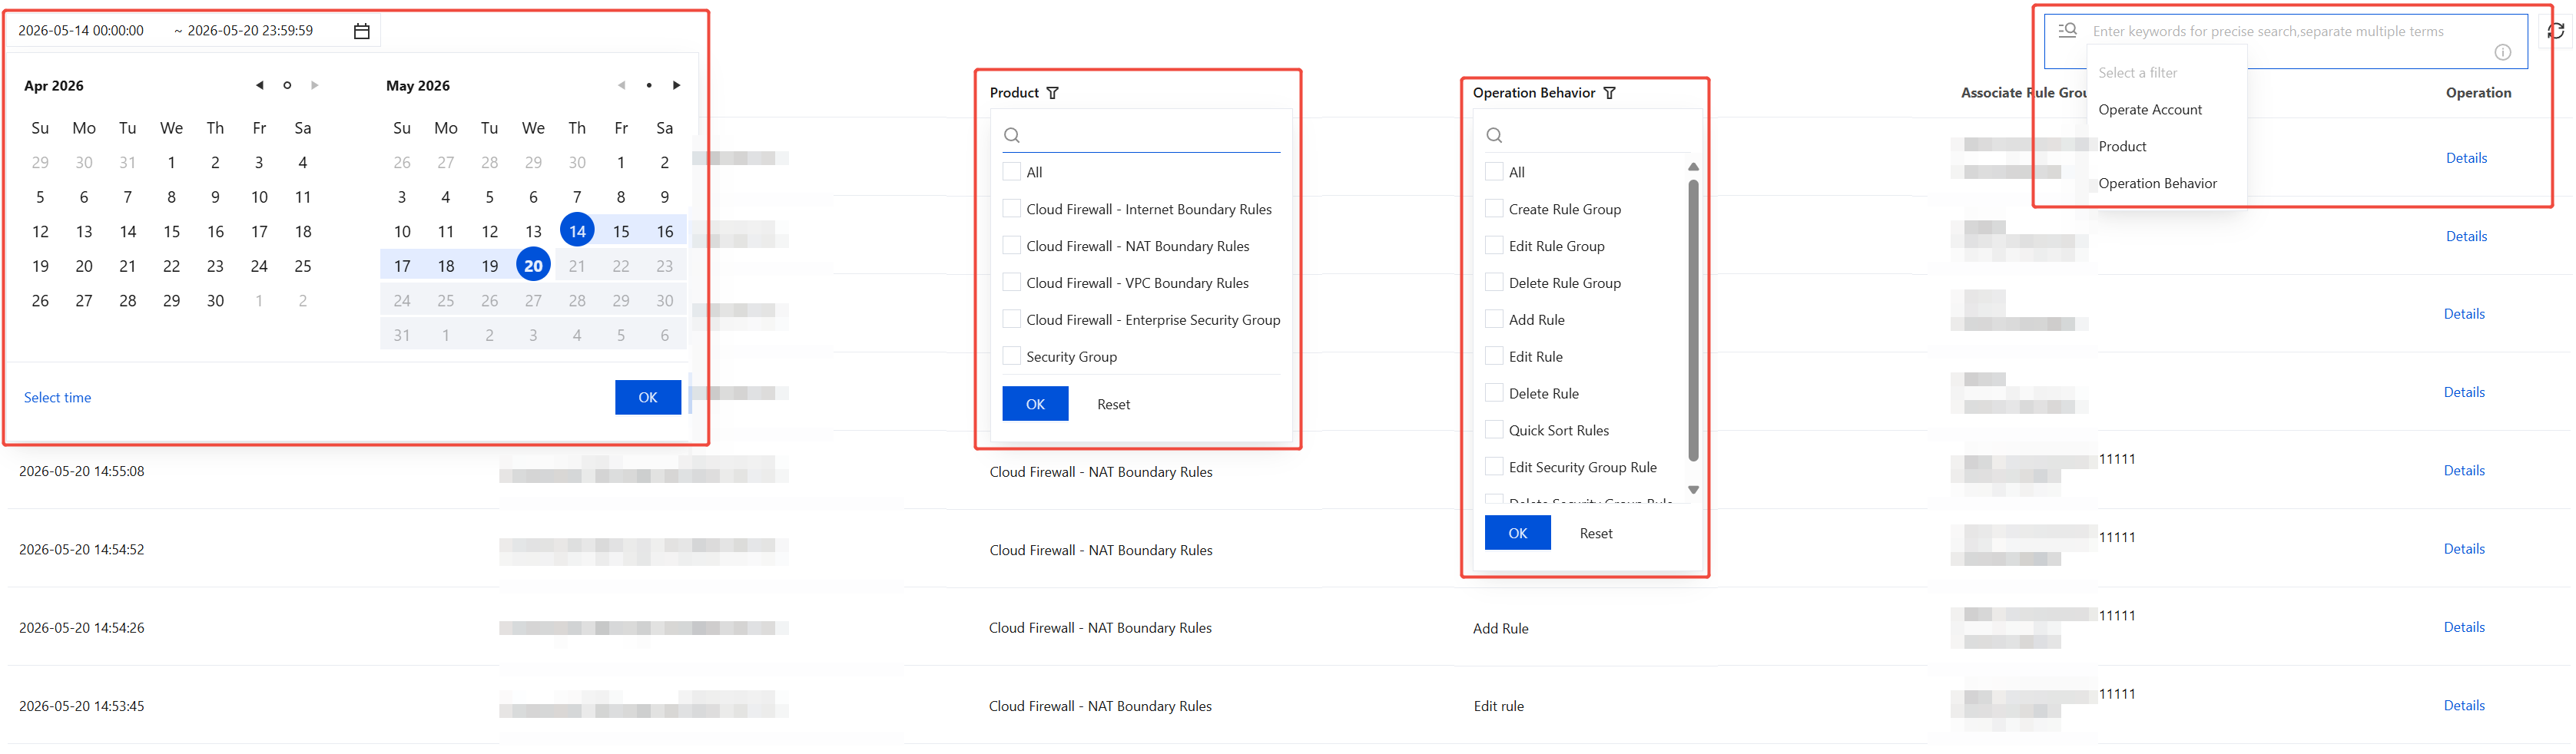
3. The system displays recent logs by default. You can filter them by criteria such as time range, operator account, and operation type.
Note:
Multi-Account Scenario: You can filter by operator account to quickly locate specific operations under a member account.
4. Click Details in the Operation column to view the detailed information of the log, such as rule change content and risk remediation details.