This document describes how Tencent Cloud TCHouse-D achieves resource isolation by configuring resource groups to avoid resource preemption and mutual interference among multiple businesses.
Note:
Only 2.0 and 2.1 kernel versions support configuring resource groups.
The 2.0 kernel version supports CPU soft isolation + memory hard isolation, while the 2.1 kernel version supports CPU hard isolation + memory hard isolation.
Operation Guide
1. Enter Cluster List and click Cluster ID/Name you want to back up.
2. Go to the Account Management page, click Resource Group, and enable the resource group configuration through the switch.
Note:
Enabling/disabling the resource group will synchronously modify the related cluster configuration, which is expected to take 2 to 5 minutes and will not affect your business during the process.
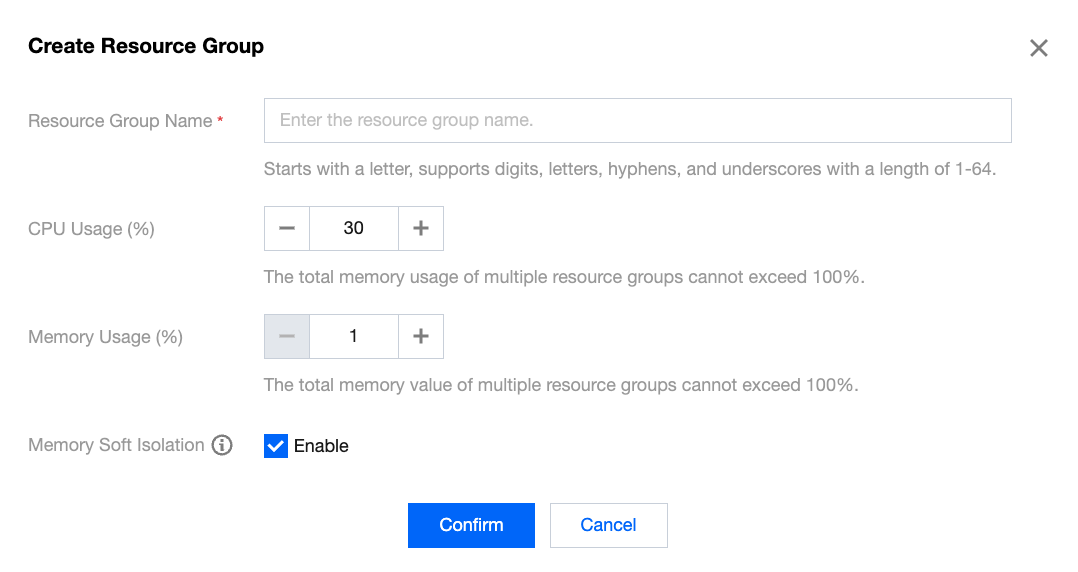
3. After enabling the resource group, you can click the Add Resource Group button to complete the creation of the resource group.
Note:
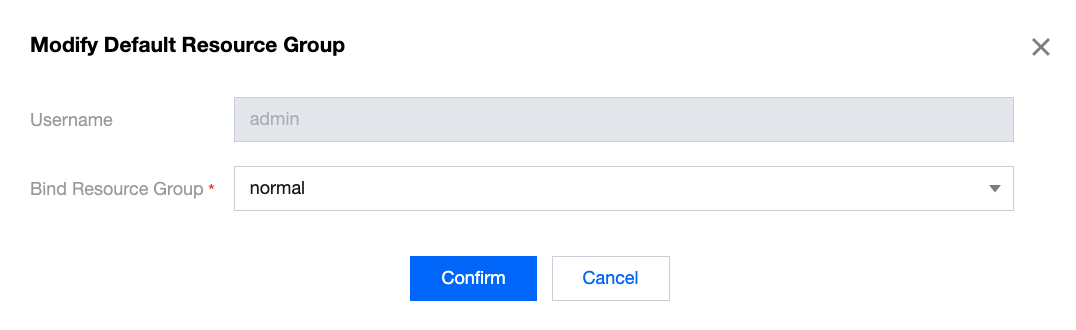
Once resource groups are enabled, a normal resource group will be created by default, and all users will be bound to the normal resource group by default.
Field
Applicable Versions
Description
Resource group name
2.0/2.1
Customizable, starting with a letter, supports numbers, letters, hyphens, and underscores with a length from 1 to 64.
CPU weight
2.0
Fill in for the 2.0 kernel version, the weight of CPU resources that this resource group can obtain in each BE node (soft Isolation).
Example 1: Three resource groups rg-a, rg-b, and rg-c are created with weights of 10, 30, and 40, respectively. At a certain time, rg-a and rg-b are running tasks, while rg-c has no tasks. At this time, rg-a can obtain (10 / (10 + 30)) = 25% of CPU resources, and rg-b can obtain 75% of CPU resources.
Example 2: If only one resource group is running, regardless of its weight, it can obtain all the CPU resources.
CPU usage (%)
2.1
Filled in for the 2.1 kernel version, the maximum CPU usage that this resource group can use in each BE node (CPU hard isolation between different resource groups).
Memory usage (%)
2.1
Filled in for both 2.0 and 2.1 kernel versions, the maximum memory proportion that this resource group can use in each BE node.
Memory soft isolation
2.0/2.1
If memory soft isolation is enabled and memory resources are available in the system, the resource group can temporarily use system memory after its memory usage exceeds the limit.
If memory soft isolation is disabled, tasks with the highest memory usage are canceled immediately once memory usage exceeds the limit.
4. After the resource group is created, click the Account Management tab to bind the resource group to a user. Click Actions > More > Modify Default Resource Group to complete the binding of the user and the resource group.