This document introduces the complete process of quickly creating an EMR on TKE cluster through the EMR console, submitting a job, and viewing the results.
Preparations
1. Before using an EMR cluster, you need to register a Tencent Cloud account and complete identity verification. For detailed directions, see Enterprise Identity Verification Guide.
2. Grant the system default role EMR_QCSRole to the service account for EMR. For detailed directions, see Role Authorization.
3. Complete the authorization of the service account for EMR with the relevant roles. For detailed directions, see Administrative Privileges.
4. For online account recharge, EMR on TKE offers pay-as-you-go billing. Before creating a cluster, you need to recharge your account balance to ensure it is greater than or equal to the configuration fees required for cluster creation, excluding vouchers, and other promotions. For detailed instructions, see Top-up.
Creating Clusters
Log in to the EMR Console, click Create Cluster on the EMR on TKE cluster list page, and complete the relevant configuration on the purchase page. When the cluster status shows Running, it indicates that the cluster has been successfully created.
Configuration Item
Configuration Items Description
Example
Cluster name
The name of the cluster, which is customizable.
EMR-7sx2aqmu
Region
The physical data center where the cluster is deployed.
Note: Once the cluster is created, the region cannot be changed, so choose carefully.
Beijing, Shanghai, Guangzhou, Nanjing, and Singapore.
Container type
The service role is deployed by using resources provided by the container layer, supporting both TKE General and TKE Serverless clusters.
TKE
Cluster network and subnet
Used for purchasing a db. It is necessary to ensure that the EMR cluster network is consistent with the container cluster network.
Guangzhou Zone 7.
Security group
Configure security groups at the cluster level.
Create a security group.
Billing mode
Billing mode for cluster deployment.
Pay-as-You-go
Cluster Type
The data lake and machine learning cluster types are supported. The default is data lake cluster type.
Data lake
Product version
The components and their versions bundled with different product versions vary.
EMR-TKE1.0.0 includes Hadoop 2.8.5 and Spark 3.2.1.
Deployment service
Optional components that can be customized and combined based on your needs. Select at least one component.
Hive-2.3.9 and Impala-3.4.1.
COS bucket
Used for storing logs, JAR packages, and other information.
-
Set Password
Set the webUI password. The current password is only used to initially set up the service webUI access password.
8-16 characters, including uppercase letters, lowercase letters, numbers, and special characters. Special characters supported are !@%^*, and the password cannot start with a special character.
Submitting Jobs and Viewing Results
After the cluster is successfully created, you can create and submit jobs on that cluster. This document takes submitting Kyuubi Spark and Hive on Spark jobs and viewing job information as examples. The operations are as follows.
Hue Submission
1. Click the corresponding Cluster ID/Name in the cluster list to enter the cluster details page.
2. In the cluster details page, click Cluster Services and select Hue.
3. In the role management page, open the More dropdown in the action column, click Enable Network Access, then select Public Network LB and click Confirm Enable. Once the process is completed, the public network LB for the pod where hue is located will be successfully created.
4. Click View Info/View WebUI in the upper right corner to view the access address for Hue, and click Access Hue WebUI.
5. Authenticate to enter the Hue page. Typically, the authentication user is root, and the password is the one set during cluster creation.
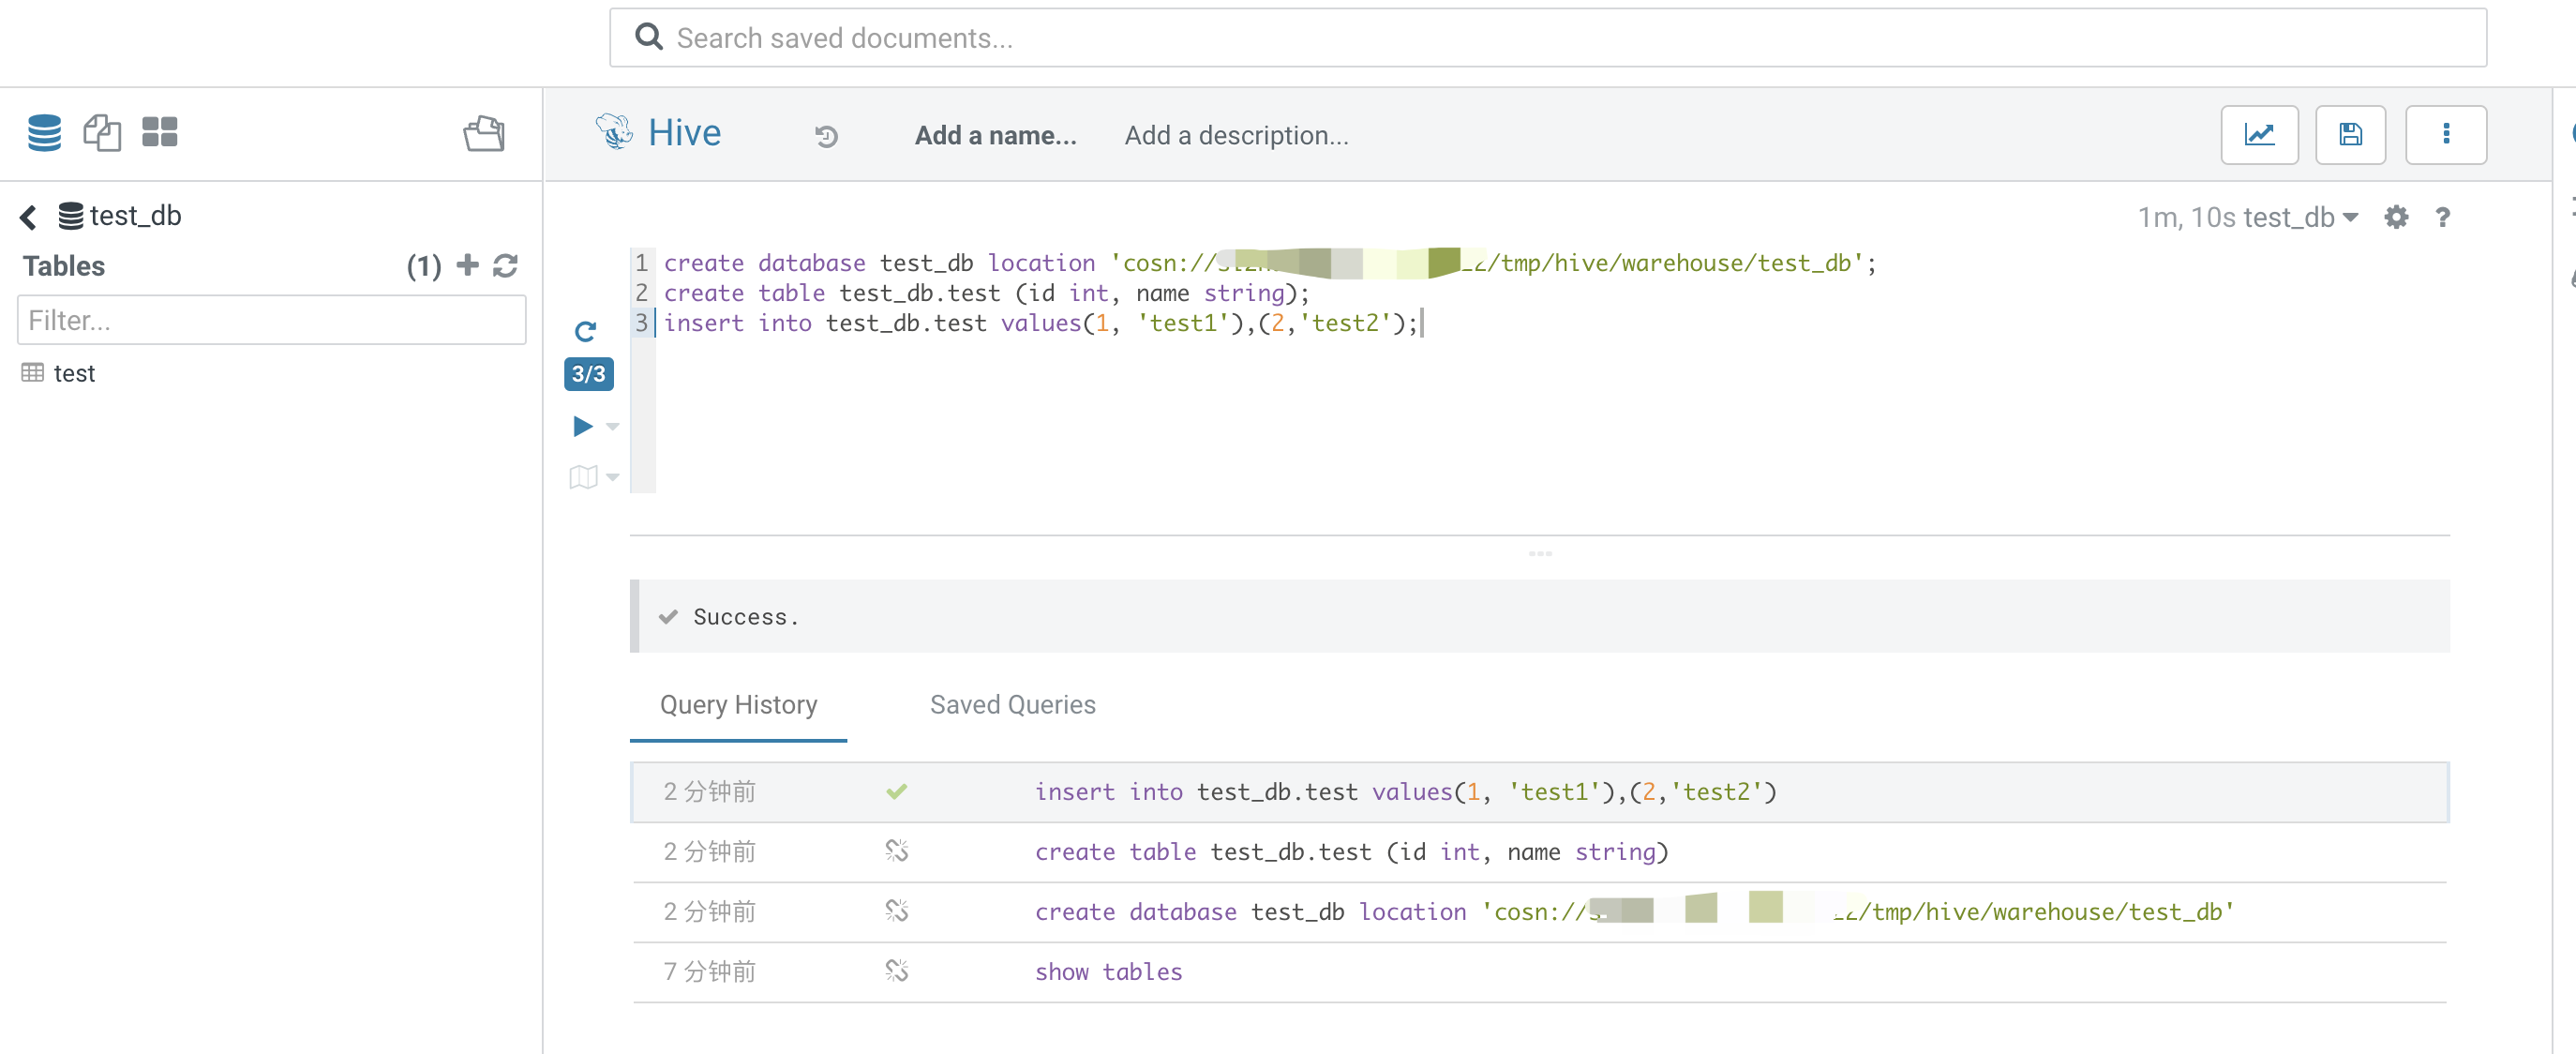
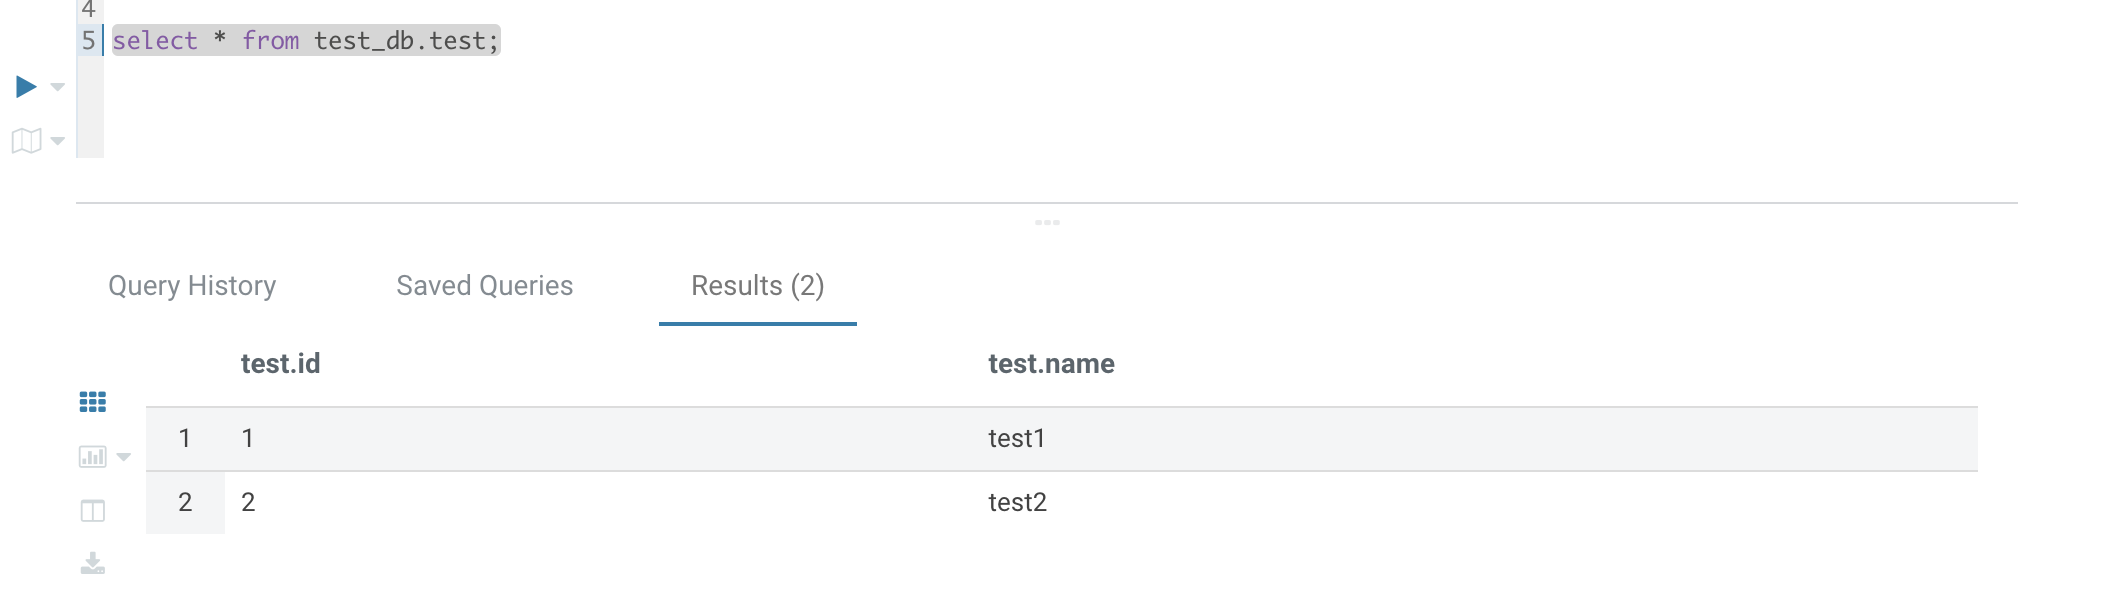
6. Use the Hive tab to submit a Hive on Spark task.
7. Use SparkSql_Kyuubi to submit a SparkSQL task.
Hive on Spark table creation and queries:
Kyuubi queries:
JDBC Submission for Hive Spark
1. If you need to connect to HiveServer using a public IP address, go to Cluster Services > Hive > HiveServer2 > Operations > More > Enable Network Access, and enable public network access for HiveServer2.
2. If using a public network connection, you need to check the security group in Cluster Information, then go to CVM > Security Groups and edit the security group to allow client IP access to port 7001. If using a private network connection, you can skip steps 1 and 2.
Using Maven to Write JDBC Code
First, add the following dependencies required for JDBC in the pom.xml file:
<dependency>
<groupId>org.apache.hive</groupId>
<artifactId>hive-jdbc</artifactId>
<version>2.3.7</version>
</dependency>
<dependency>
<groupId>org.apache.hadoop</groupId>
<artifactId>hadoop-common</artifactId>
<version>2.8.5</version>
</dependency>
Add the following packaging and compilation plugins:
Replace $hs2host in the code with your HiveServer2 address.This program will create a test_jdbc table in test_db, insert two records, and query to output the data. Run the following command to package the entire project:
mvn package
Uploading JAR and Running
Upload the JAR packaged by using the above command to a machine that can access the HiveServer2 service or to your local machine (if it is local, ensure it can access HiveServer2 properly), and run it using the following command:
Package is your custom artifactId-version. The results are as follows:
Create table success!
Running: show tables 'test_jdbc'
test_jdbc
Running: describe test_jdbc
key int
value string
Running: select * from test_jdbc
42 hello
48 world
Running: select count(1) from test_jdbc
2
JDBC Submission for Hive Spark
1. If you need to connect to HiveServer using a public IP address, go to Cluster Services > Kyuubi > KyuubiServer > Operations > More > Enable Network Access, and enable public network access for HiveServer2.
2. If using a public network connection, you need to check the security group in Cluster Information, then go to CVM > Security Groups and edit the security group to allow client IP access to port 10009. If using a private network connection, you can skip steps 1 and 2.
Using Maven to Write JDBC Code
The JDBC dependencies and packaging plugin configurations are the same as in JDBC Submission for Hive Spark. Create KyuubiJdbcTest.java with the following content:
Replace $kyuubihost in the code with your KyuubiServer address.This program will create a test_jdbc table in test_db, insert two records, and query to output the data. Run the following command to package the entire project:
mvn package
Uploading JAR and Running
The upload process is the same as in JDBC Submission for Hive Spark. Run KyuubiJdbcTest using the following command:
#### Uploading JAR and Running
The upload process is the same as in JDBC Submission for Hive Spark. Run KyuubiJdbcTest using the following command:
Package is your custom artifactId-version. The results are as follows:
<<p243>Create table success!
Running: show tables 'test_kyuubi'
test_db
Running: describe test_kyuubi
key int
value string
Running: select * from test_kyuubi
42 hello
48 world
Running: select count(1) from test_kyuubi
Terminating Clusters
When the created cluster is no longer needed, you can terminate the cluster and return the resources. Terminating the cluster will forcibly stop all services provided by the cluster and release the resources.
On the EMR on TKE page, select Terminate from the More options for the target cluster. In the pop-up dialog box, click Terminate Now.