Image Processing
Download
フォーカスモード
フォントサイズ
Feature Overview
For files already existing in the Bucket, you can perform asynchronous image processing by creating tasks via the Template feature. You may directly use system preset templates provided by Cloud Infinite or create custom templates. For template details, see the Template Documentation.
Image Processing supports flexible image editing, such as rotation, cropping, transcoding, scaling, etc. It also provides image size reduction solutions including AVIF compression and Smart Compression, along with copyright protection solutions like image/text watermarks and Blind Watermark, meeting diverse business scenarios' image requirements.
Note:
When initiating an Image Processing task, you must enter the complete file name and file format; otherwise, the format and processing cannot be recognized.
Currently, the task feature can only operate on existing files. If you need to process files during upload, use the Workflow feature.
After creating a task, corresponding feature fees will be incurred. For billing details, see Image Processing Billing Documentation.
When using services, ensure resource availability by not enabling access restriction features such as Original Image Protection and Hotlink Protection.
When using Image Processing, please first confirm the relevant limitations and Region. For details, see Usage Limitations.
Image Processing
Operation Steps
1. Log in to the Cloud Infinite console.
2. In the left sidebar, click Bucket Management to go to the Bucket Management page.
3. Select and click the Bucket Name to go to the target Bucket.
4. In the left sidebar, select Tasks and Workflows > Task Management, and select the Image Processing tab at the top of the page.
5. Select Image Processing for the feature category, choose Image Processing for the task type, click Create Task, configure according to the following settings, and then click OK.
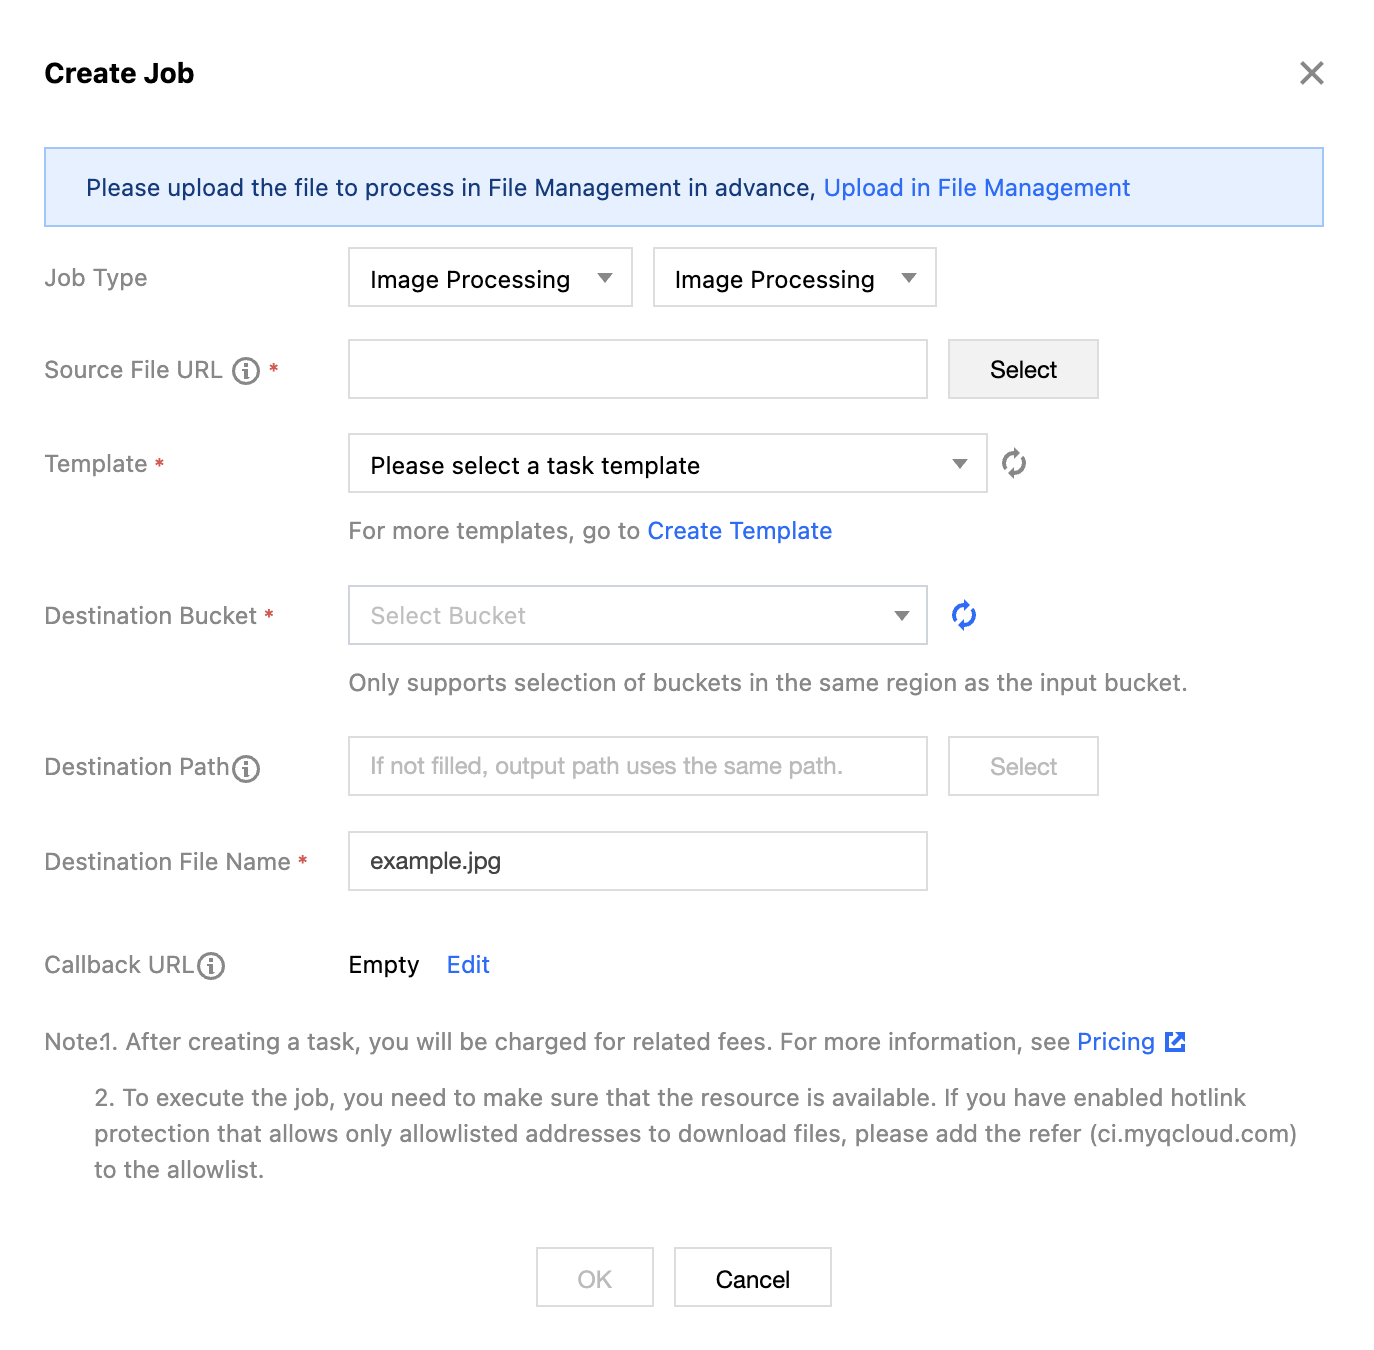
Task Type: Select Image Processing - Image Processing.
Source file path: Enter the path of the file to be processed. Note that the file path must start with
/, use / to separate folders, and must not end with /.Select Template: Templates can be specified.
Processing Rules: After selecting a Template, the corresponding rules will appear.
Target Bucket: Supports selecting Buckets in the same Region that have Image Processing enabled.
Target Path: The storage path for Image Processing results.
Target file name: You can specify the file name of the target file here.
Callback URL: the callback address information bound to the Queue. For details, see Queue and Callback.
Abnormal Image Detection
Operation Steps
1. Log in to the Cloud Infinite console.
2. In the left sidebar, click Bucket Management to go to the Bucket Management page.
3. Select and click the Bucket Name to go to the target Bucket.
4. In the left sidebar, select Tasks and Workflows > Task Management, and select the Image Processing tab at the top of the page.
5. Select Image Processing for the feature category, choose Abnormal Image Detection for the task type, click Create Task, configure according to the following settings, and then click OK.
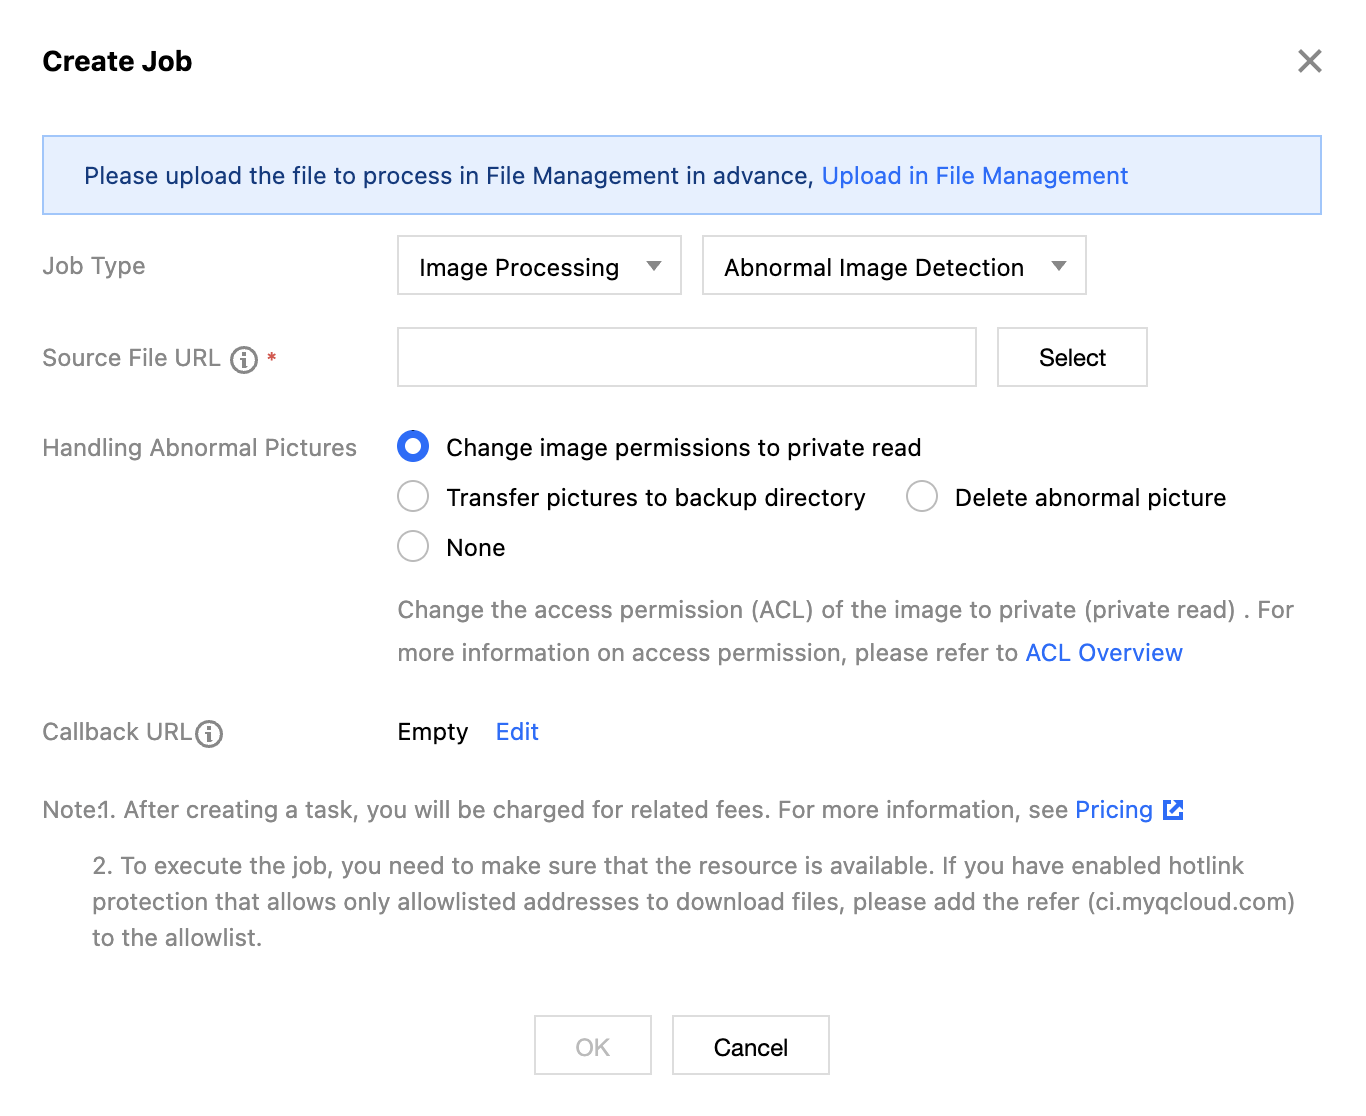
Task Type: Select Image Processing - Abnormal Image Detection.
Source file path: Enter the path of the file to be processed. Note that the file path must start with
/, use / to separate folders, and must not end with /.Post-processing Settings: Choose to change the permissions of abnormal images to private read, transfer abnormal images to a backup directory, delete abnormal images, or take no action.
Callback URL: the callback address information bound to the Queue. For details, see Queue and Callback.
フィードバック