Connecting to a Linux Instance via a Third-Party SSH Terminal
ダウンロード
フォーカスモード
フォントサイズ
最終更新日: 2025-11-12 15:14:46
Overview
This document takes PuTTY as an example to describe how to log in to a Linux instance from a Windows local computer by using the remote login software.
You have obtained the username and password (or SSH key) to log in to the instance.
Note:
If it is your first time to log in to a Linux instance through a local remote login application, you need to reset the password of your username (e.g., root and ubuntu) or bind your key. For detailed directions, see Resetting Password and Managing Key.
Make sure the network connection between the local computer and the instance is working, and the port 22 is open in the firewall policies of the instance (Port 22 is open by default upon the creation of the instance).
Limits
For instances created with Ubuntu images, password login is disabled by default for the root account. To enable it, see Uploading Local Files.
Directions
Password login
SSH key login
1. Download the Windows remote login software: PuTTY.
Download PuTTY
2. Double-click putty.exe to open the PuTTY Client.
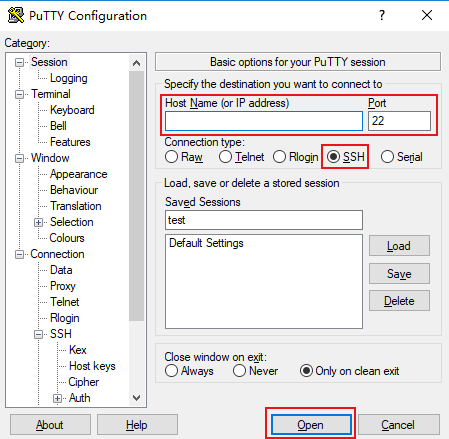
3. In the PuTTY Configuration window, enter the following content, as shown below:
Configure parameters as follows:
Host Name (or IP address): The public IP of the Lighthouse instance. You can check this public IP in the Lighthouse console.
Port: The port open for remote login on the Lighthouse side. For a Linux instance, it defaults to 22.
Connection type: Select SSH.
Saved Sessions: Enter the session name, such as test.
After configuring Host Name, configure and save Saved Sessions. You can double-click the session name saved under Saved Sessions to log in to the instance.
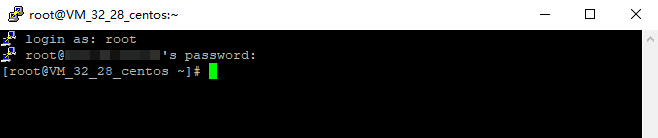
4. Click Open to enter the PuTTY page. The login as: command prompt appears.
5. Enter your username after login as: (e.g., root) and press Enter.
Note:
For all Linux images, except Ubuntu images, you can log in with the root account. For Ubuntu system, the default username is ubuntu. To log in with the root account, see How do I log in to an instance with root on Ubuntu?
6. Enter your password after Password and press Enter.
The entered password is invisible by default.
Once logged in, you can see the information about the current Lighthouse instance on the left side of the command prompt.
1. Download the Windows remote login software, PuTTY.
Download both putty.exe and puttygen.exe. To download PuTTY, click here.
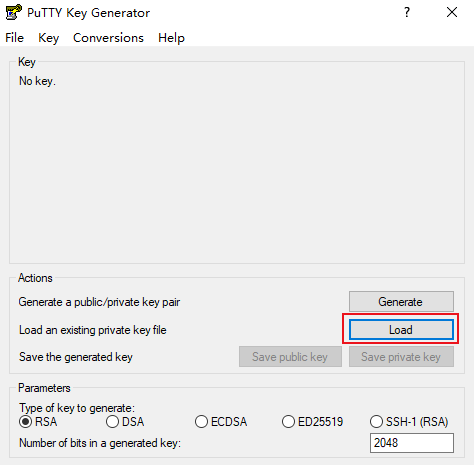
2. Double-click puttygen.exe to open the PuTTY Key Client.
3. Click Load, select and open the path where the downloaded private key is saved, as shown below:
For example, select and open the private key file david.
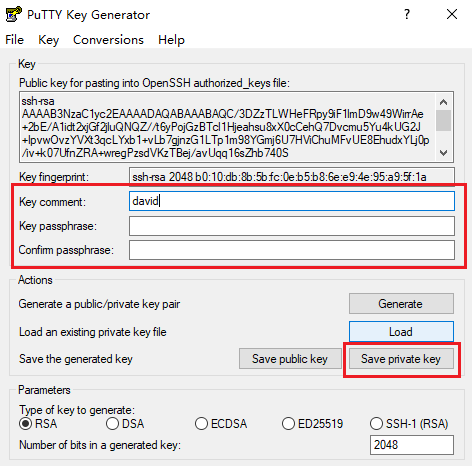
4.
In the PuTTY Key Generator window,
you can enter the key name and create a password for the key (optional). When finished, click Save private key, as shown below:
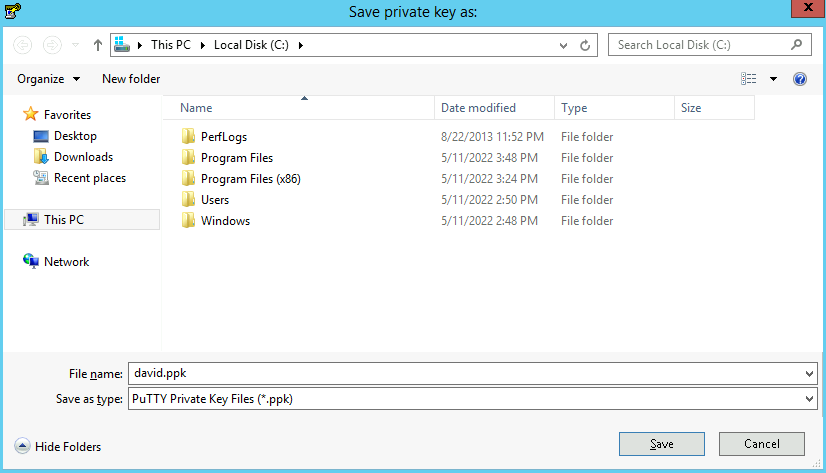
5. In the pop-up window, select the path to store the key. In the File name field, enter “[Key Name].ppk” and click Save. For example, save the private key file david as david.ppk.
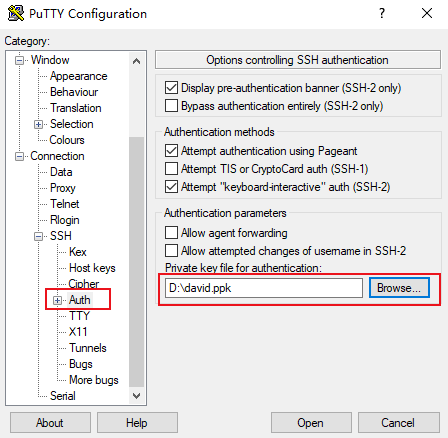
6. Double-click putty.exe to open the PuTTY Client.
In the left sidebar, select Connection > SSH > Auth to enter the Auth configuration page.
7. Click Browse to select and open the path where the key is saved.
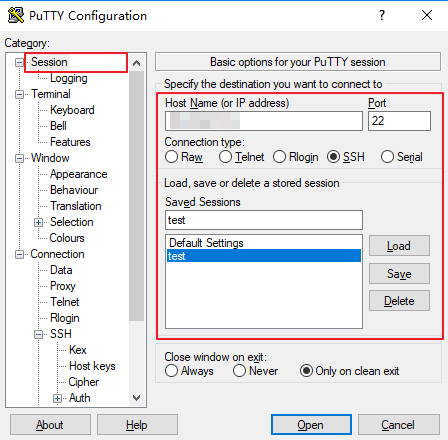
8. Switch to the Session configuration page. Configure the server IP, port, and connection type.
Host Name (IP address): The public IP of the Lighthouse instance. You can check this public IP in the Lighthouse console.
Port: The port open for remote login on the Lighthouse side. For a Linux instance, it defaults to 22.
Connection type: Select SSH.
Saved Sessions: Enter the session name, such as test.
After configuring Host Name, configure and save Saved Sessions. You can double-click the session name saved under Saved Sessions to log in to the instance.
9. Click Open to enter the PuTTY running interface. The login as: command prompt appears.
10. Enter your username after login as: and press Enter.
Note:
For all Linux images, except Ubuntu images, you can log in with the root account. For Ubuntu system, the default username is ubuntu. To log in with the root account, see How do I log in to an instance with root on Ubuntu?
If a password is set for the encrypted private key in Step 4, enter the password here and press Enter. The password is invisible by default.
Once logged in, you can see the information about the current Lighthouse instance on the left side of the command prompt.