iOS
Download
フォーカスモード
フォントサイズ
iOS Agent SDK Quick Run
Tencent Cloud Contact Center iOS Agent SDK enables agents to handle calls via PC, SIP phones, or mobile.
This guide shows how to quickly set up and run the iOS Agent SDK.
Environment Requirements
Xcode 9.0+.
A real iPhone or iPad running iOS 9.0 or later.
The project has been configured with a valid developer signature.
Integrating SDK
Solution 1: Use CocoaPods
1. Install CocoaPods.
Enter the following command in a terminal window (you need to install Ruby on your Mac first):
sudo gem install cocoapods
2. Create a Podfile.
Go to the directory of your project and enter the following command to create a Podfile in the directory.
pod init
3. Edit the Podfile
Edit the Podfile according to your project needs:
platform :ios, '11.0'target 'App' dopod 'TCCCSDK_Ios', :podspec => 'https://tccc.qcloud.com/assets/doc/Agent/CppSDKRelease/TCCCSDK_Ios.podspec'end
4. Update the local repository and install the SDK
Enter the following command in the Terminal window to update the local library file and install the SDK:
pod install
Alternatively, run the following command to update the local repository:
pod update
An XCWORKSPACE project file integrated with the SDK will be generated. Double-click to open it.
Solution 2: Download TCCC Agent SDK
1. Download latest TCCC Agent SDK.
2. Open your Xcode project, select the target to run, and click Build Phases.
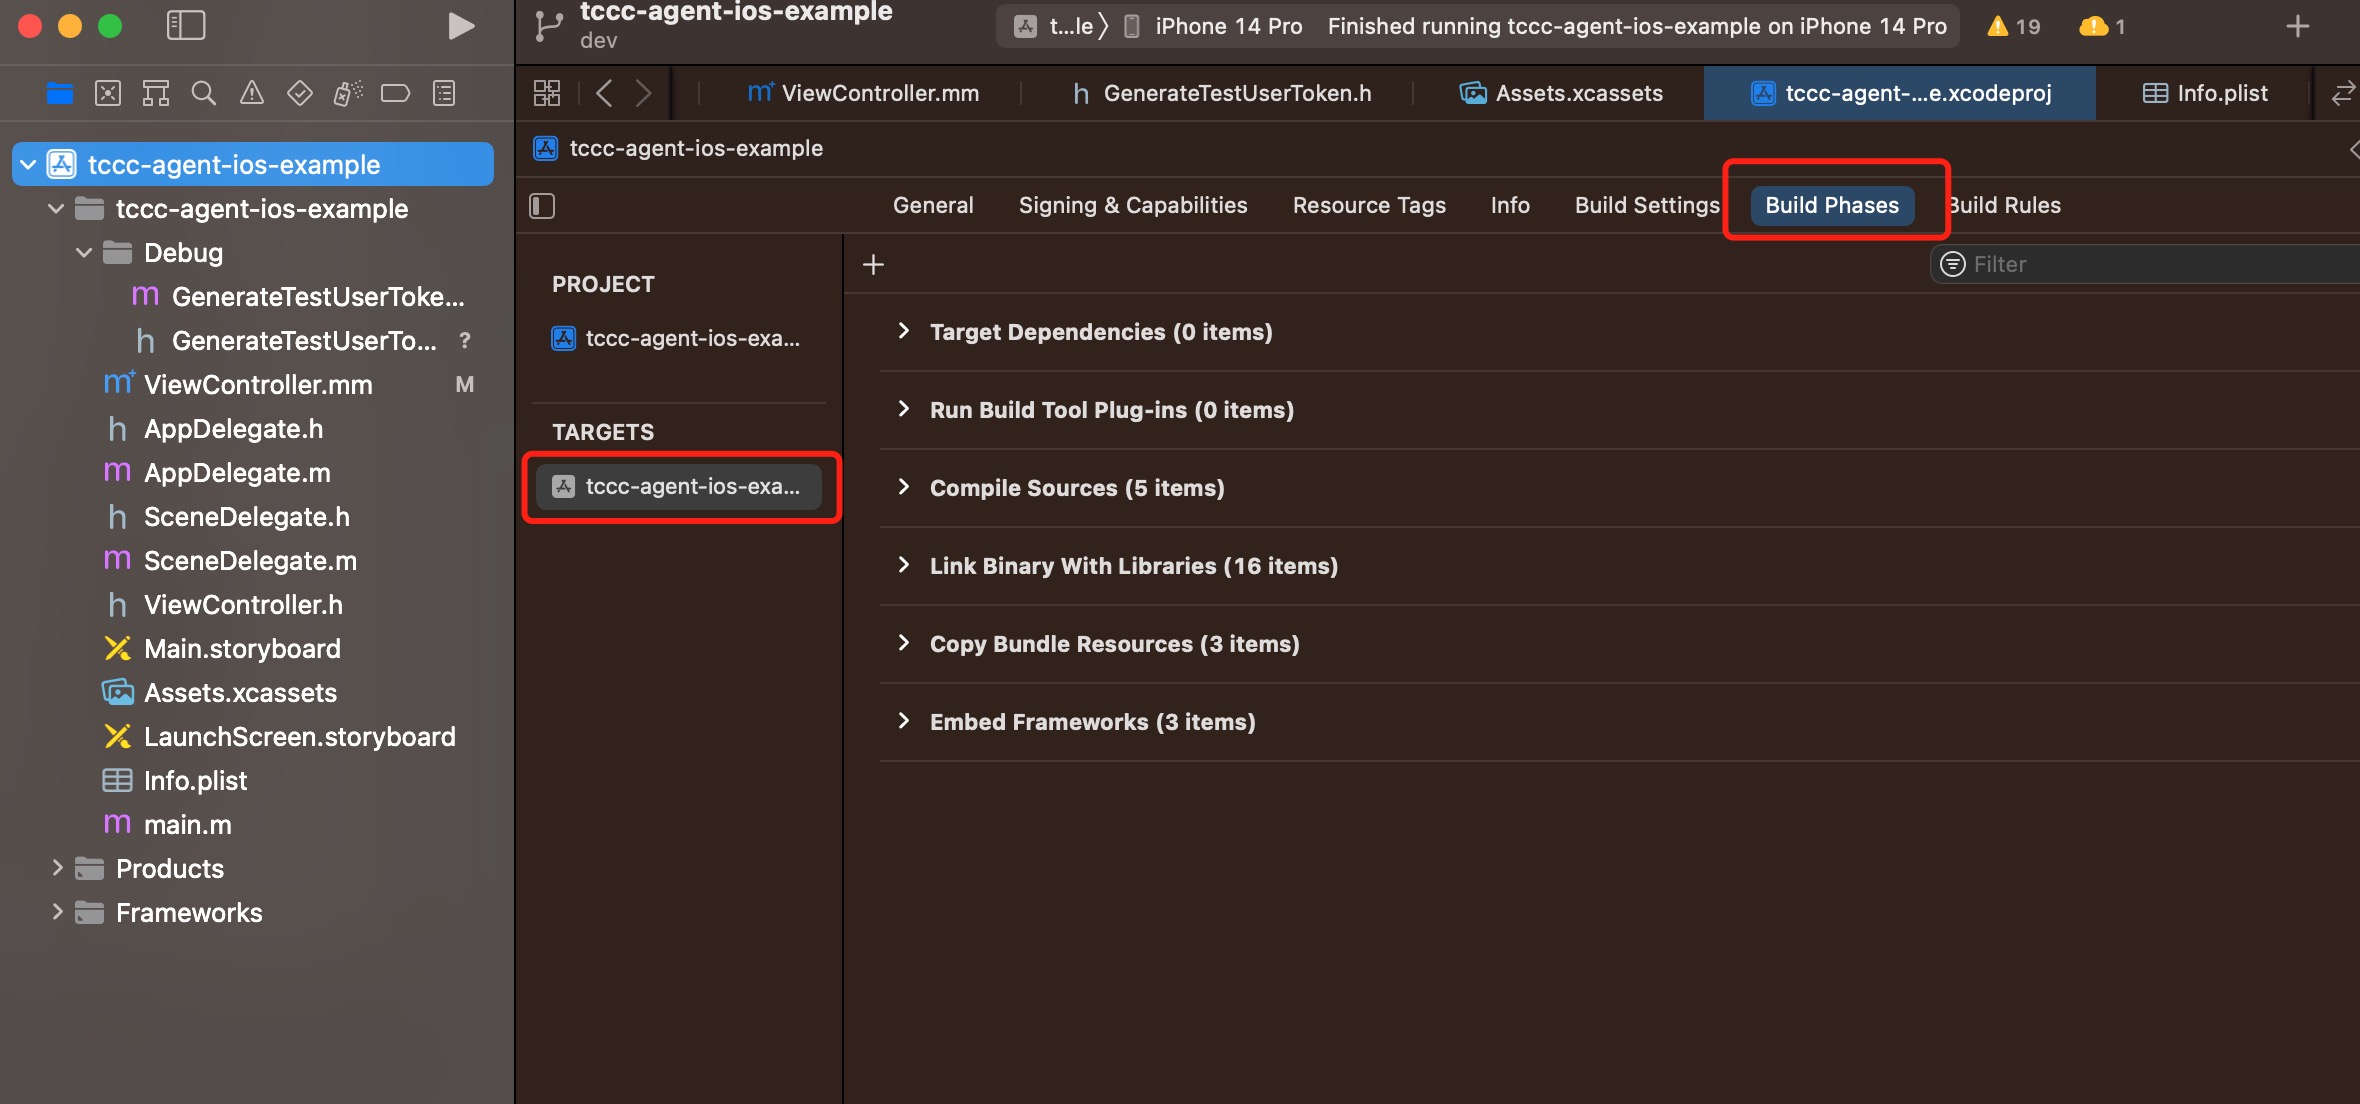
3. Click Link Binary with Libraries to expand, and click the "+" icon below to add dependency libraries.
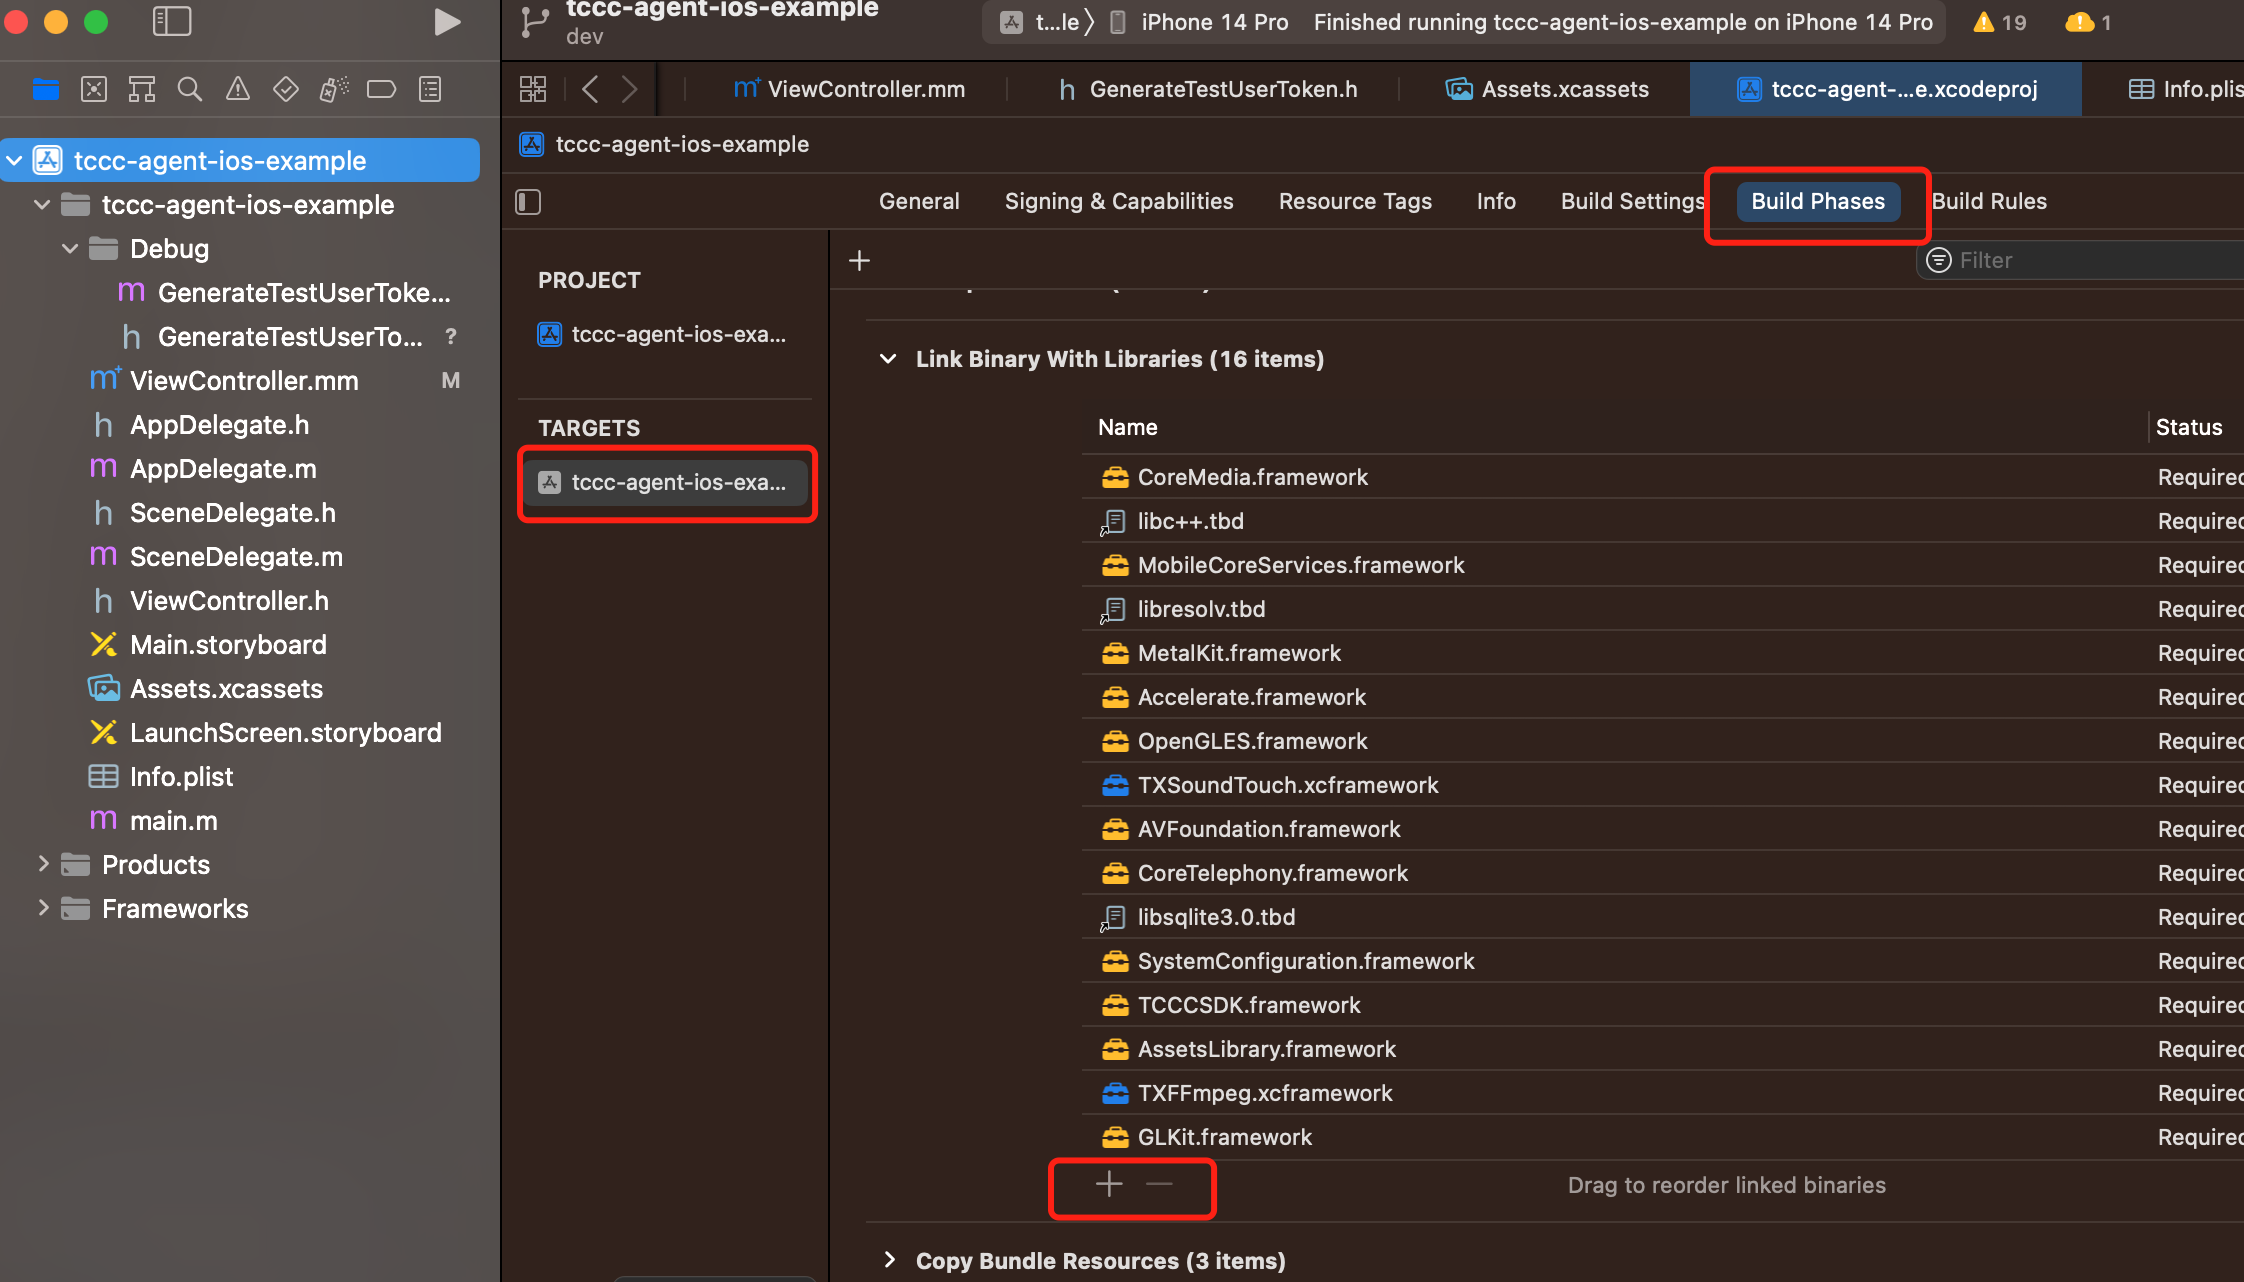
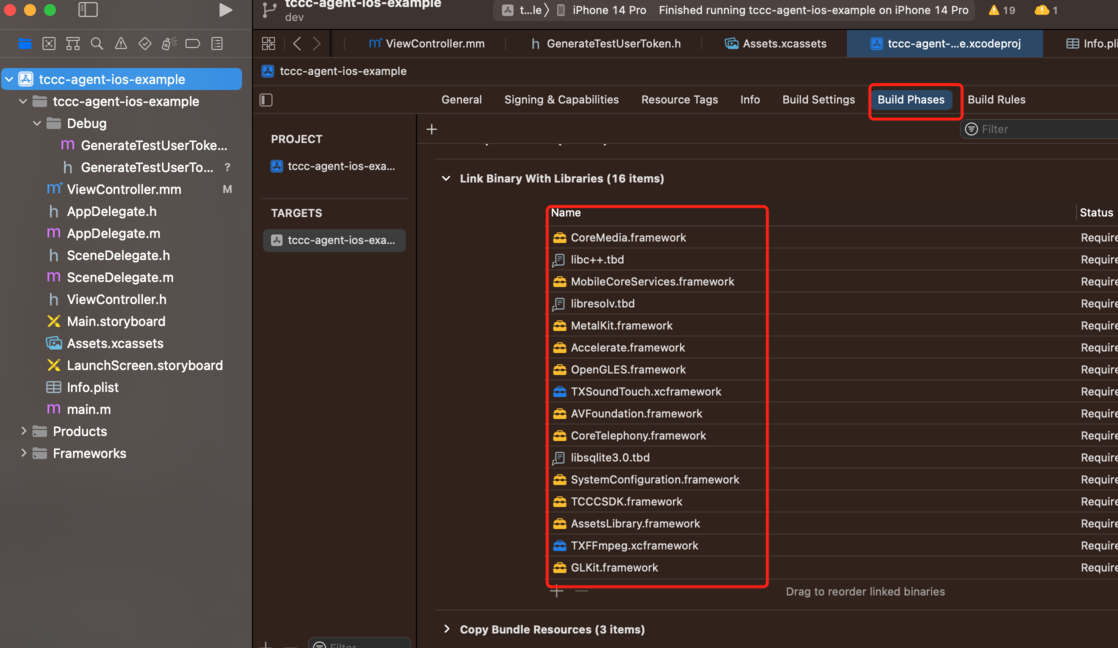
4. Add the downloaded TCCCSDK.Framework, TXFFmpeg.xcframework, and TXSoundTouch.xcframework, and the required dependency libraries GLKit.framework, AssetsLibrary.framework, SystemConfiguration.framework, libsqlite3.0.tbd, CoreTelephony.framework, AVFoundation.framework, OpenGLES.framework, Accelerate.framework, MetalKit.framework, libresolv.tbd, MobileCoreServices.framework, libc++.tbd, and CoreMedia.framework.
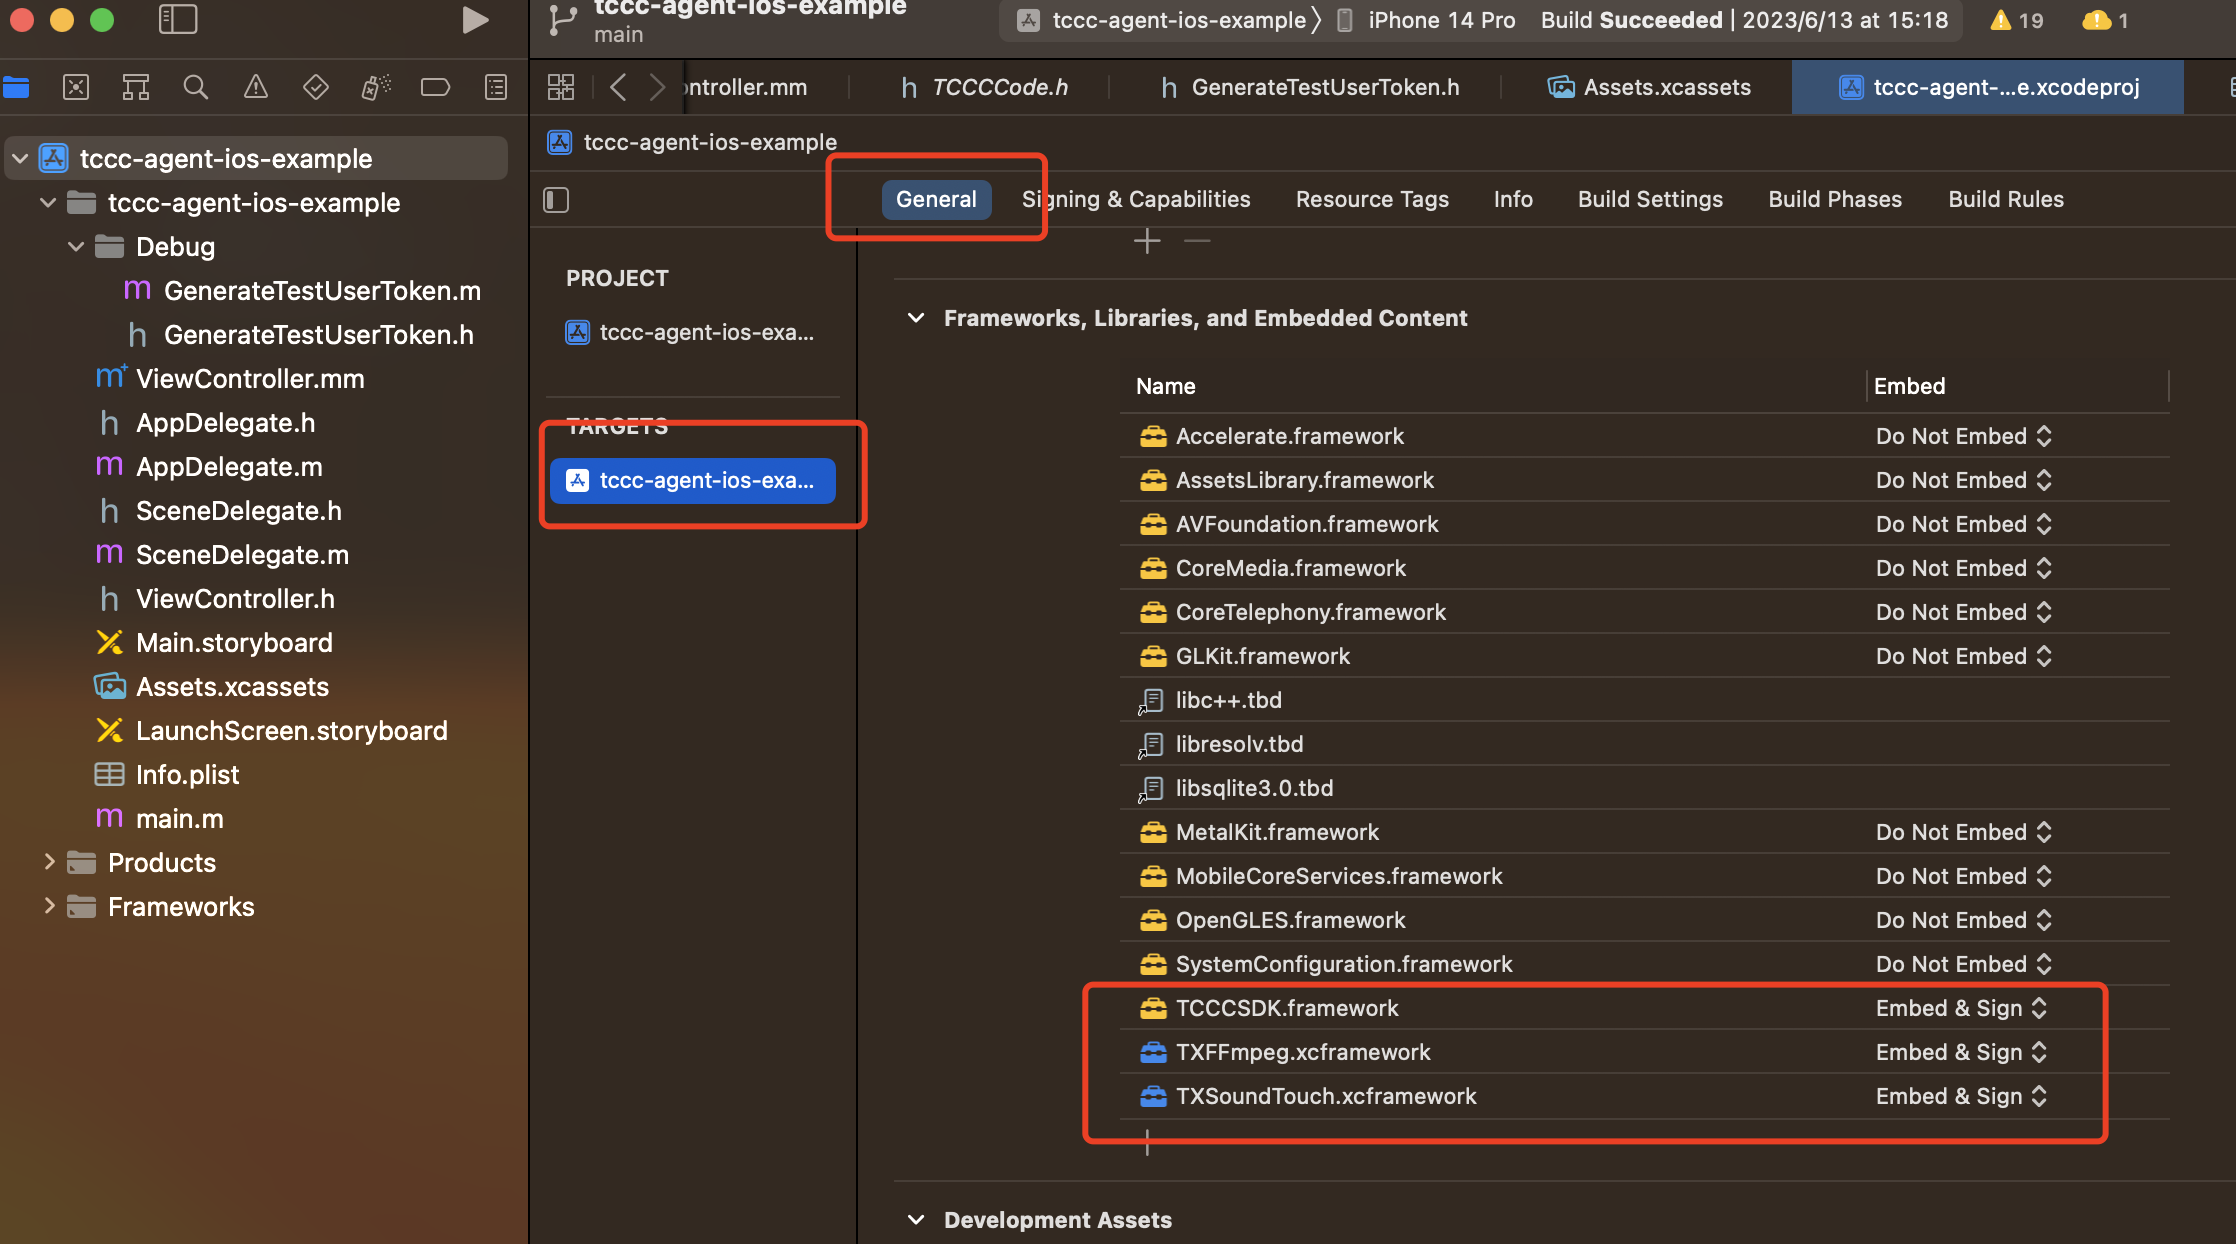
5. Click General, select Frameworks, Libraries, and Embedded Content. Check whether the dynamic libraries TCCCSDK.framework, TXFFmpeg.xcframework, and TXSoundTouch.xcframework have been added, and whether Embed & Sign is correctly selected. If not, click the "+" icon below to add them in order.
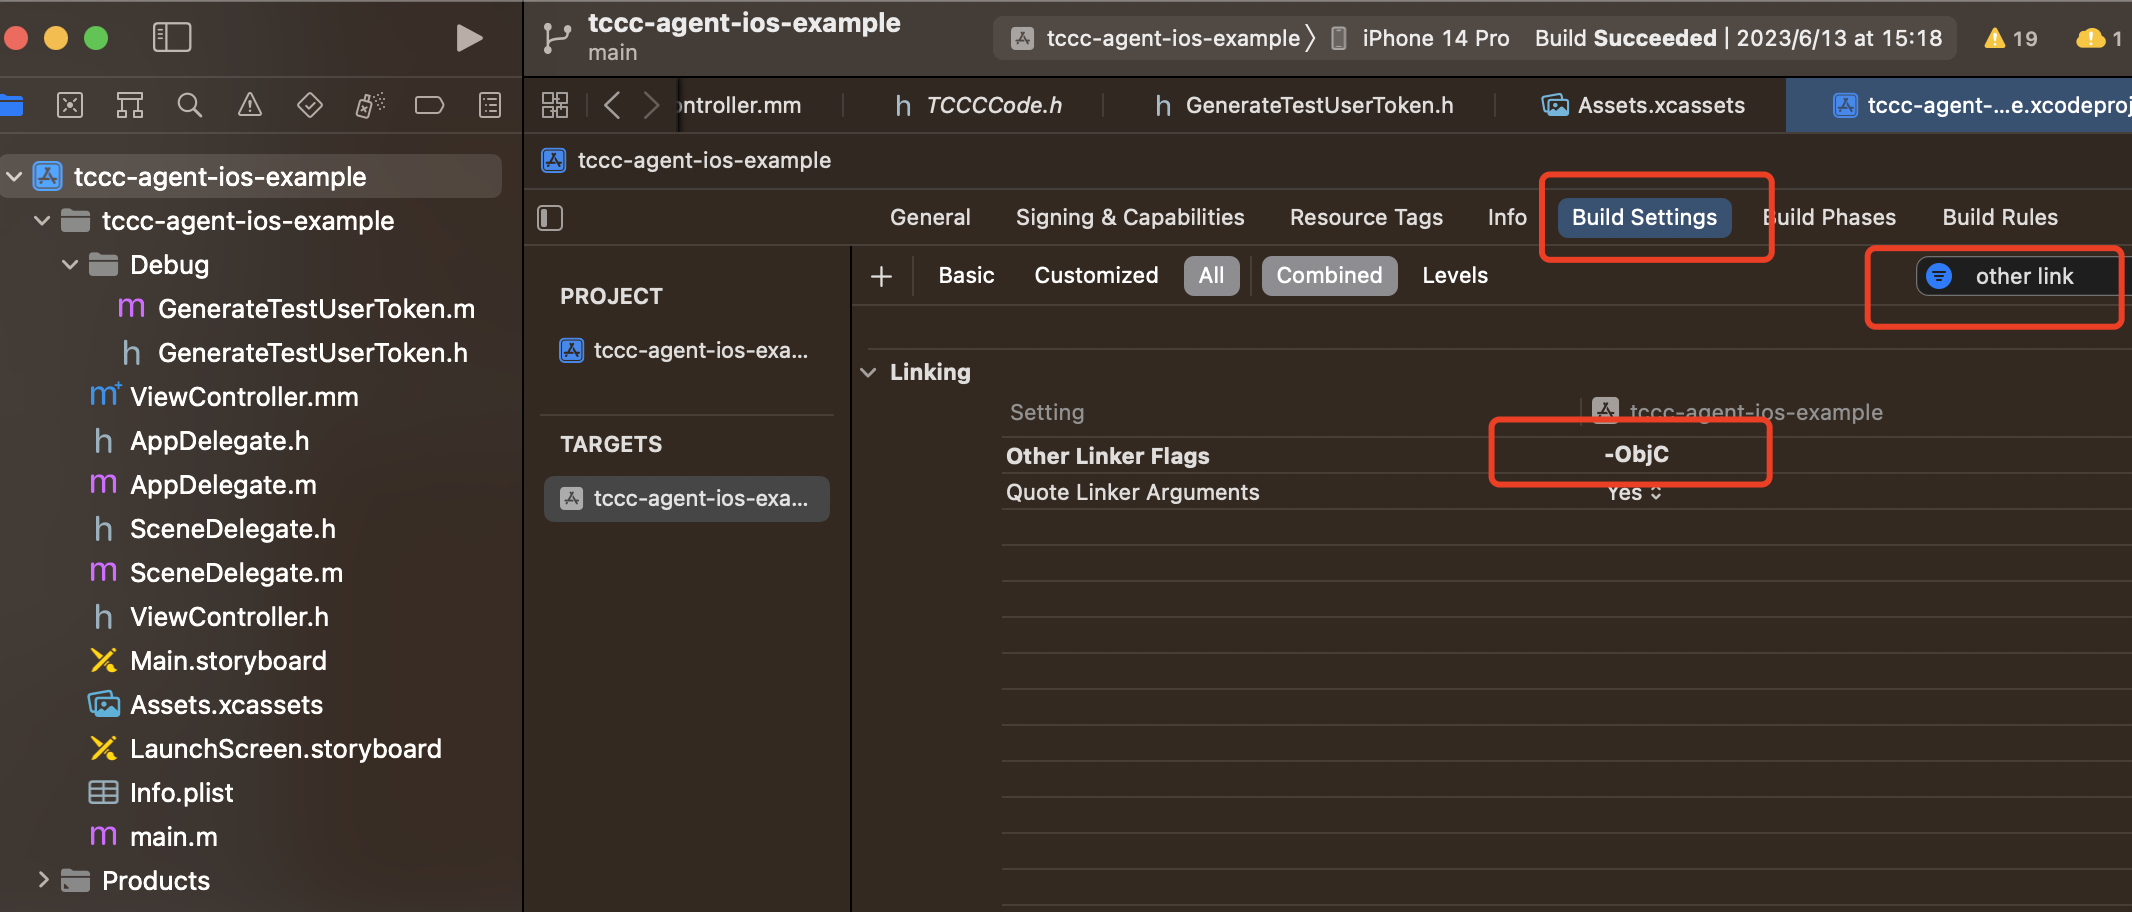
6. Add -ObjC configuration in Other Linker Flags of the project target Build Settings.
Configuring Permissions
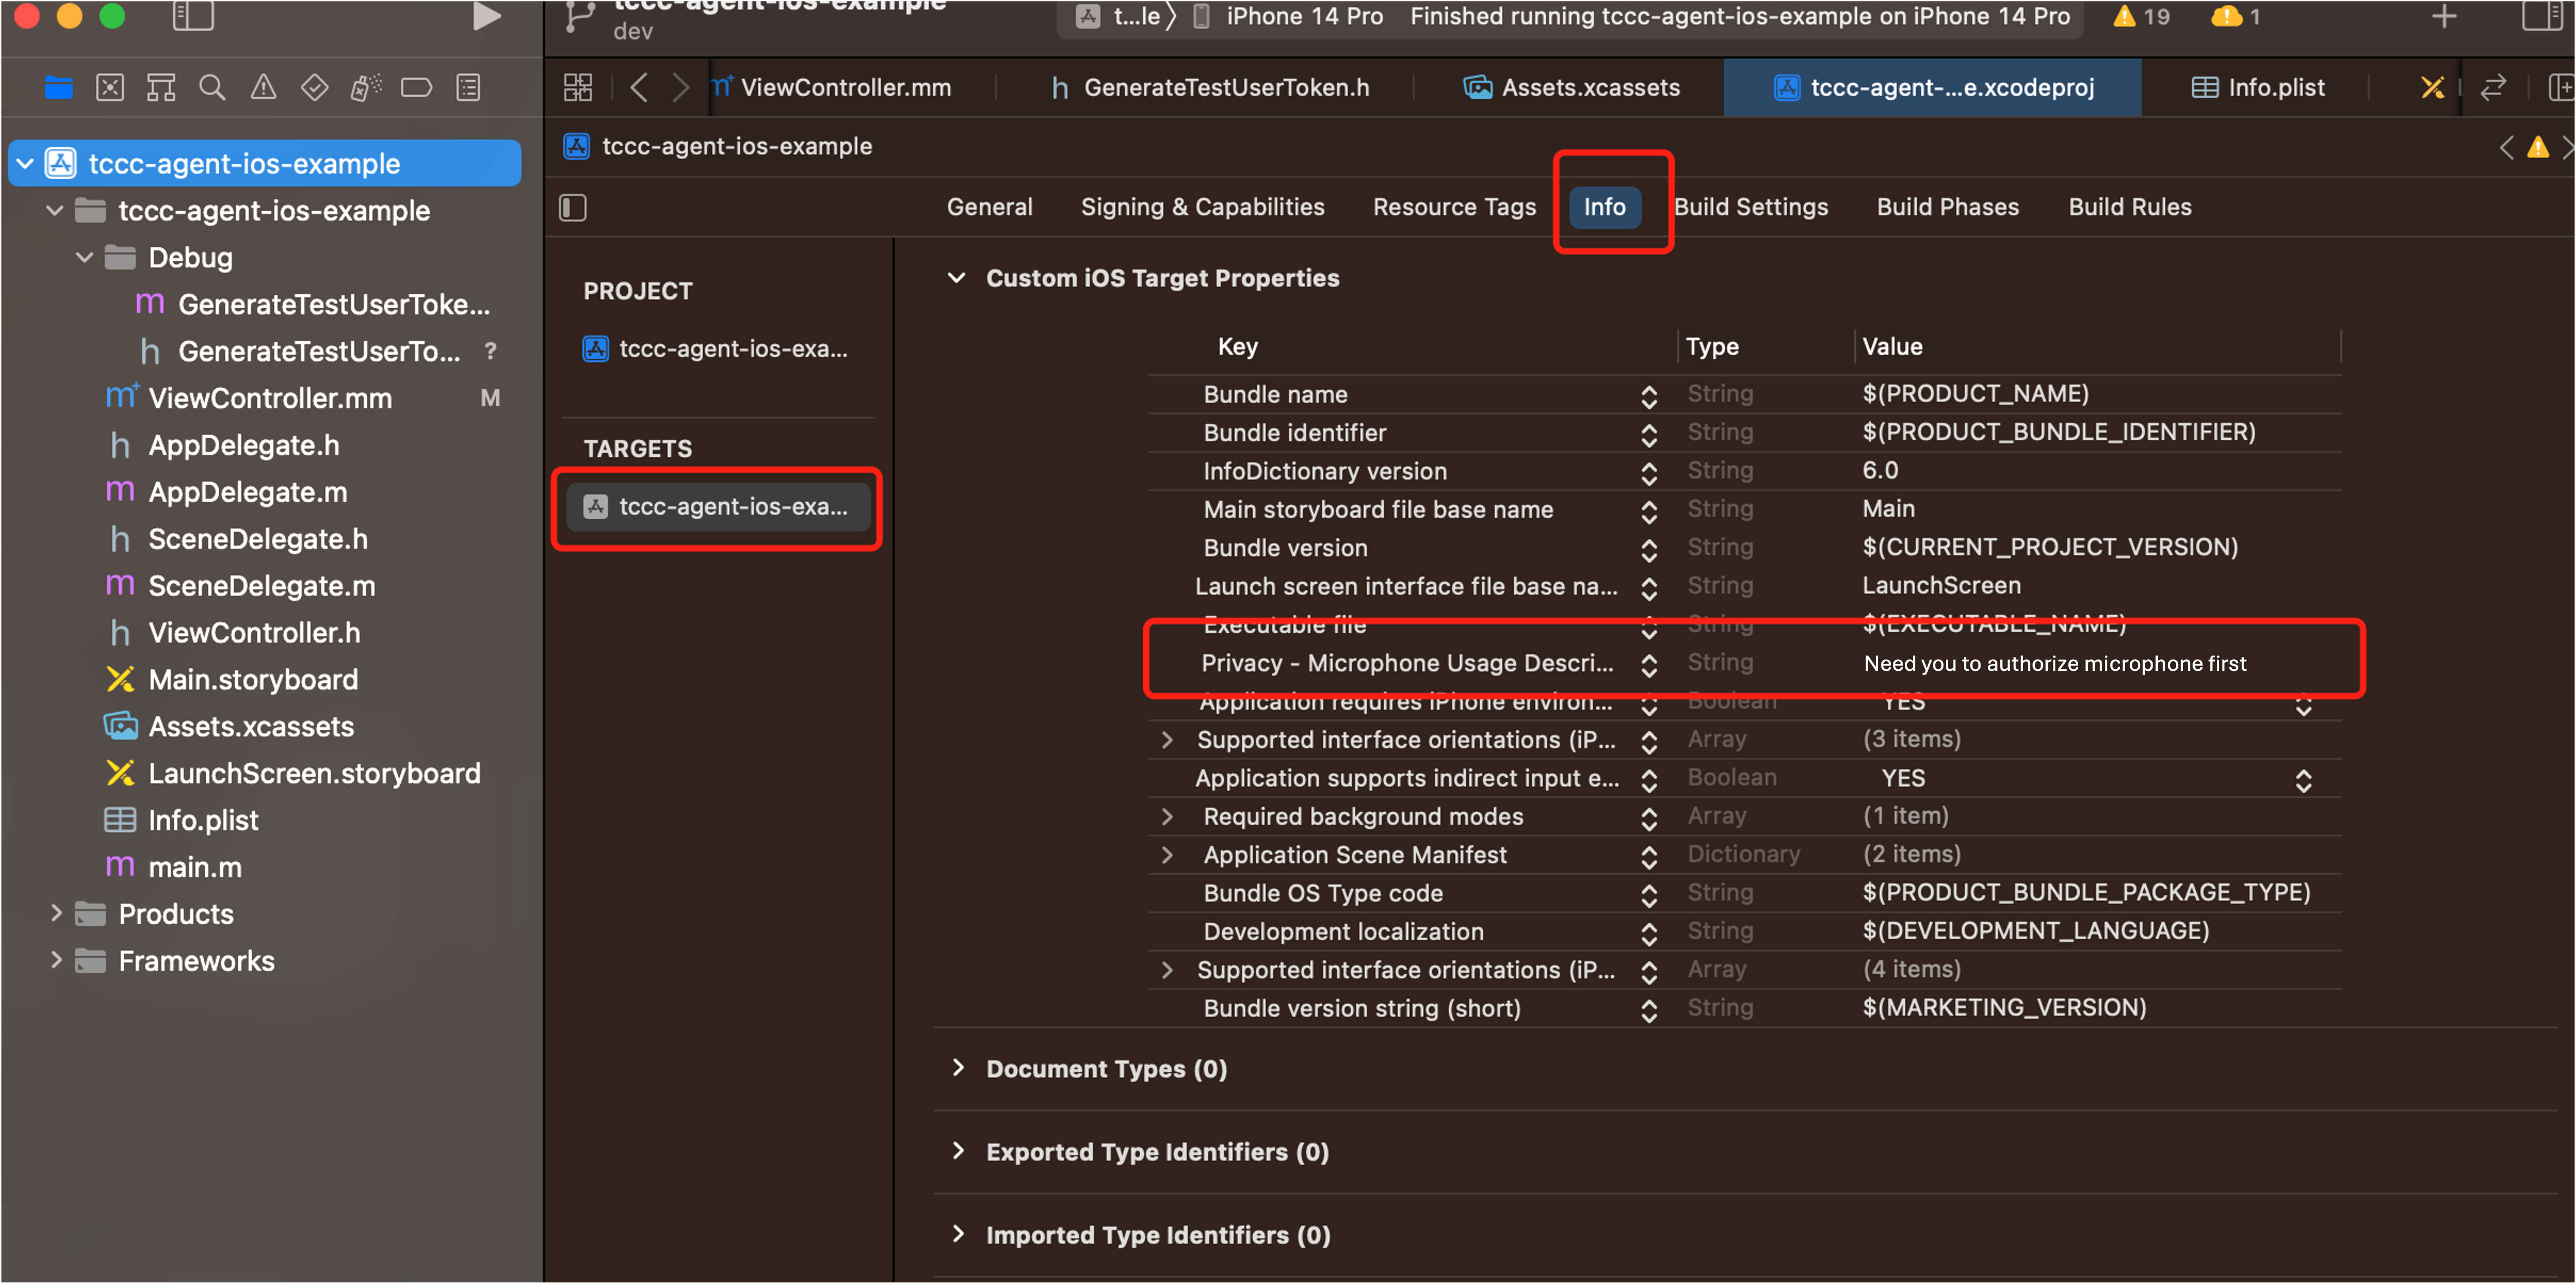
1. If you need to use the audio and video features provided by the SDK, you need to authorize the use of the microphone for the app. Add the corresponding microphone prompt information when the system pops up the authorization dialog box in the Info.plist of the app.
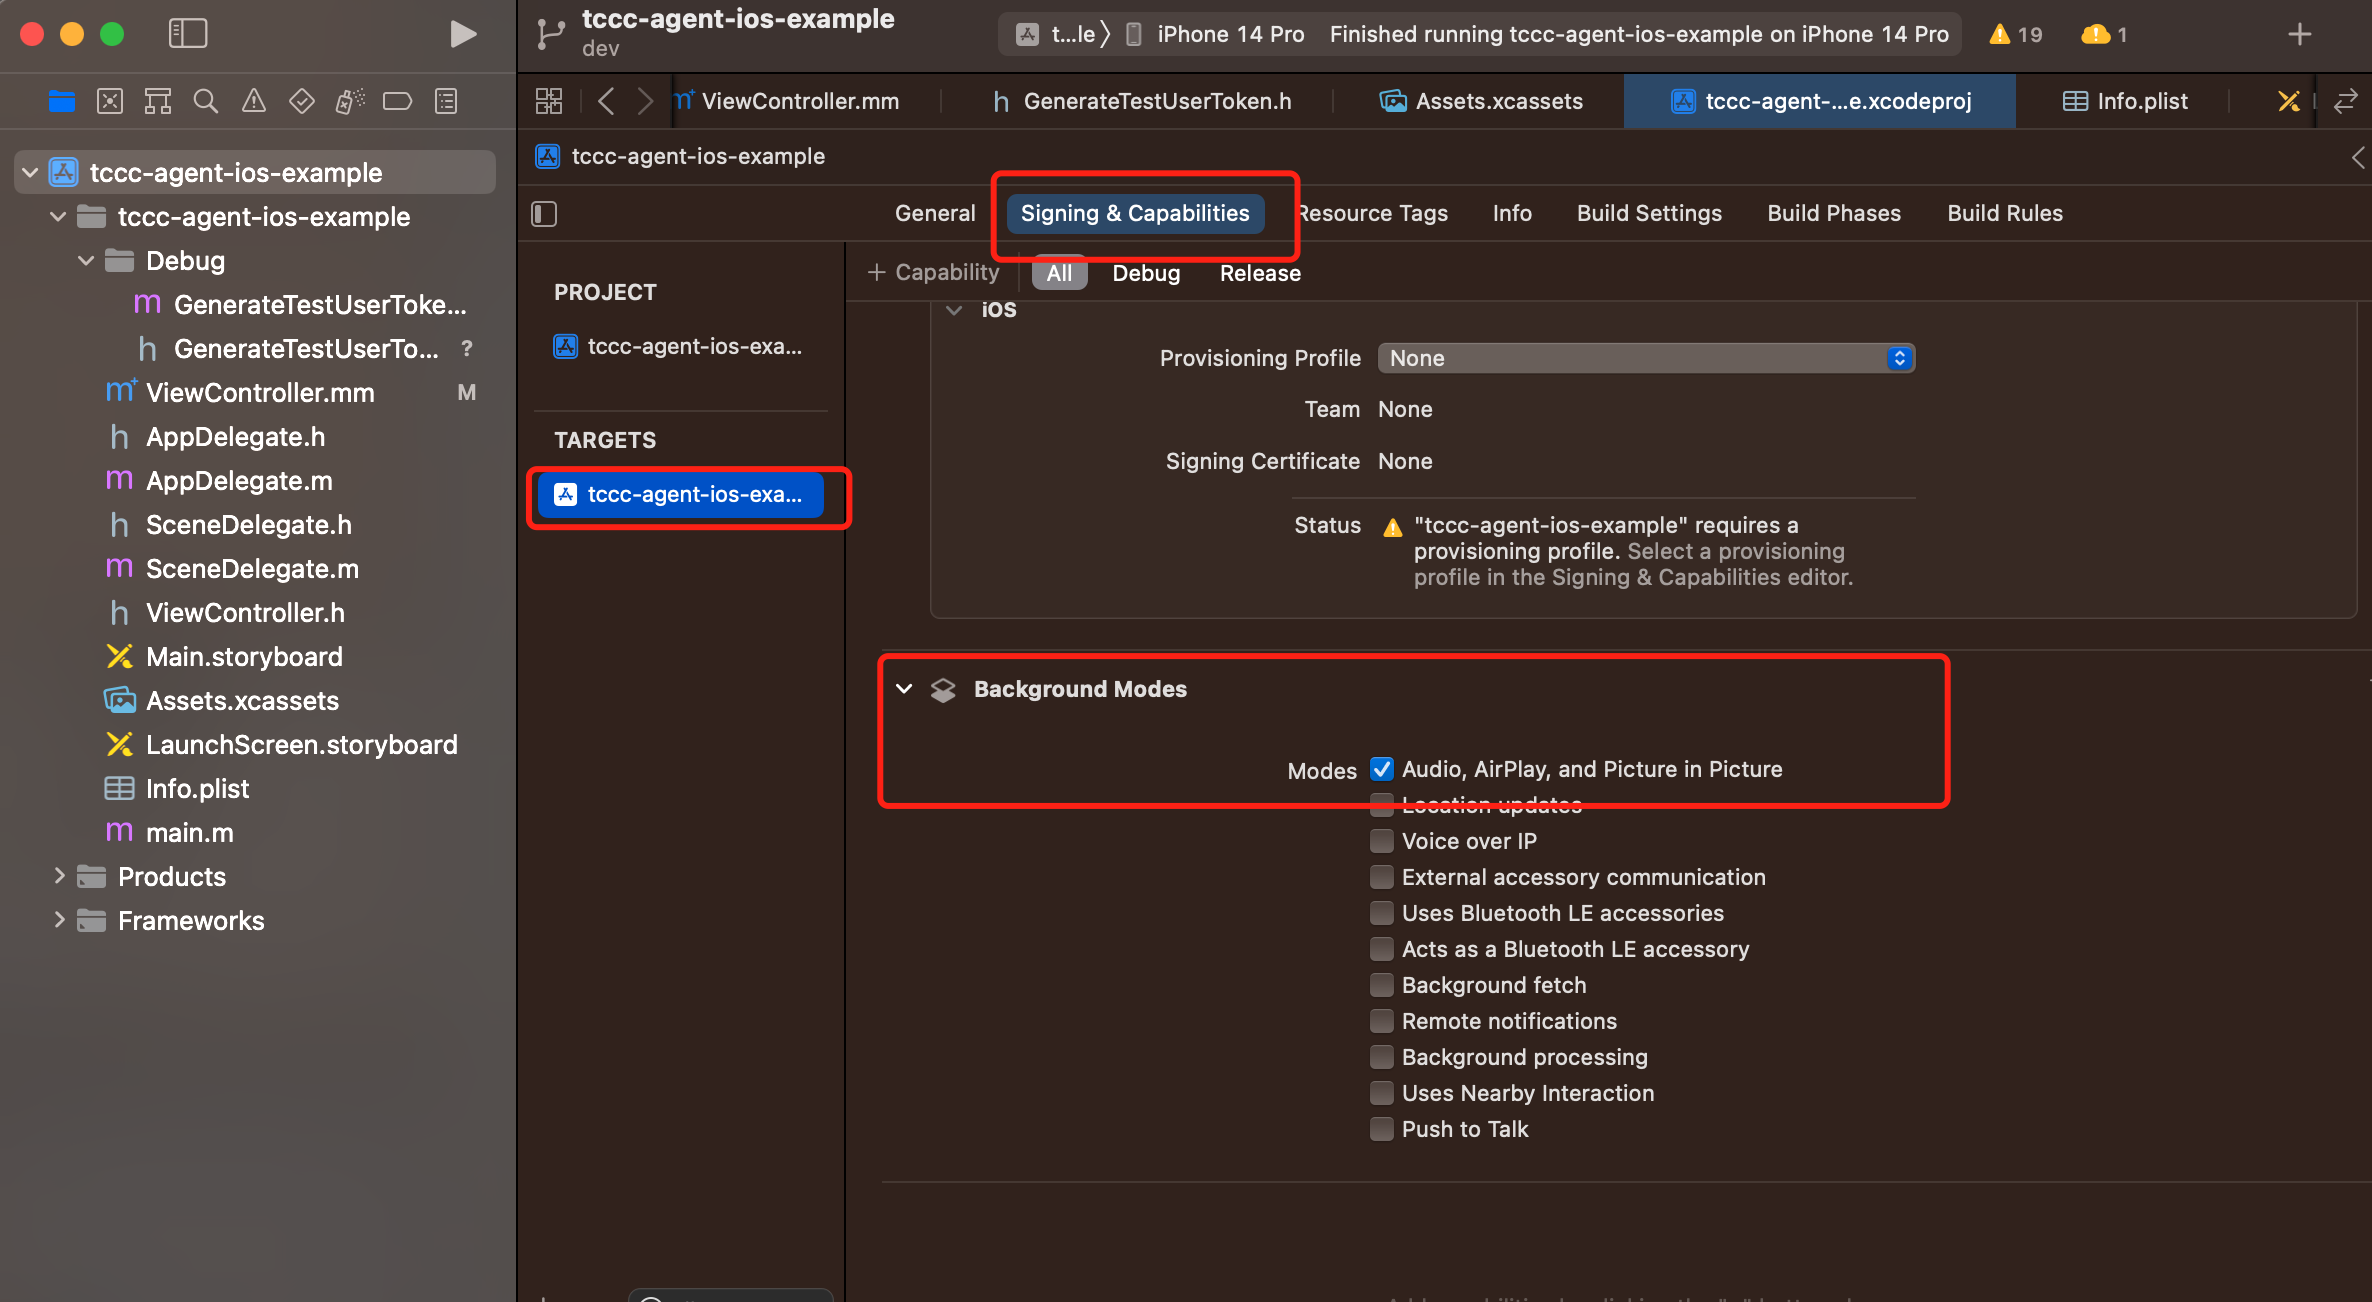
2. If you need the app to continue running related features in the background, you can select the current project in Xcode, set Background Modes in Capabilities to ON, and select Audio, AirPlay and Picture in Picture, as shown below:
Code Implementation
We currently provide Swift, OC, and C++ interfaces for developers to choose from. You can use the following code to import the header file:
import TCCCSDK// Obtain the tcccSDK singletonlet tcccSDK: TCCCWorkstation = {return TCCCWorkstation.sharedInstance()}()// Obtain SDK version numberlet version = TCCCWorkstation.getSDKVersion()
// Import the OC header file#import "TCCCSDK/tccc/platform/apple/TCCCWorkstation.h"// Obtain the tcccSDK singleton- (TCCCWorkstation*)tcccSDK {if (!_tcccSDK) {_tcccSDK = [TCCCWorkstation sharedInstance];}return _tcccSDK;}// Obtain SDK version numberNSString* version = [TCCCWorkstation getSDKVersion];
// Import the C++ header file#include "TCCCSDK/tccc/include/ITCCCWorkstation.h"// Use the tccc namespaceusing namespace tccc;// Obtain the tcccSDK singletonITCCCWorkstation* tcccSDK = getTCCCShareInstance();// Obtain SDK version numberconst char * version = tcccSDK->getSDKVersion();
FAQs
How do I view Cloud Contact Center logs?
The logs of Cloud Contact Center are compressed and encrypted by default, with suffix .log.
iOS log path:
sandbox/Documents/tcccAre the callbacks on iOS all on the main thread?
All callbacks in the Swift and OC interfaces are on the main thread, so developers do not need to handle them specially. However, callbacks in c++ are not on the main thread and need to be assessed by the business layer and then switched to the main thread:
if ([NSThread isMainThread]) {// On the main thread, you can directly processreturn;}dispatch_async(dispatch_get_main_queue(), ^{// Callbacks are made from a non-main thread.});
フィードバック