tencent cloud

Cloud Contact Center

Announcement
What's New
Cloud Contact Center Terminology Update
What is Tencent Cloud Contact Center
Overview
Feature List
Terms Introduction
Handling Firewall Restrictions
AI Voicebot
Billing Guide
Voice Call Billing Overview
Desk Billing Overview
View Billing
Refund Policy
New User Guide
Voice Guide
Desk Guide
Use Case
Inbound: Customer Experience
Outbound: Telemarketing
Auto Dialer: Voice Notification
Integration Use Case (SDK)
Administrator Guide
Voice Guide
Desk Guide
Member Guide
Voice Guide
Desk Guide
AI Voice Agent Guide
Introducing AI Voice Agent
AI Voice Agent Practical Tutorial
Set Up Your AI Voice Agent
Activate AI Voice Agent Call
AI Voice Agent Call Logs
Developer Guide
SDK Development Guide
Data Push
Voice API Reference
History
Introduction
API Category
Making API Requests
Agent APIs
Skill Group APIs
Number APIs
Dual Call APIs
Predictive Outbound Call APIs
SIP Phone APIs
Call Service Record APIs
Billing APIs
Other APIs
Outbound Call APIs
Speech Intelligent Agent APIs
Data Types
Error Codes
Desk API Reference
API Reference
Callback Configuration
FAQs
Data Deletion Guide
Legal
Privacy Policy
Data Processing And Security Agreement
Service Level Agreements
TENCENT CLOUD CONTACT CENTRE TERMS OF USE
Glossary
Contact Us

iOS

PDF
フォーカスモード
フォントサイズ
最終更新日: 2025-07-29 15:55:41

Introduction

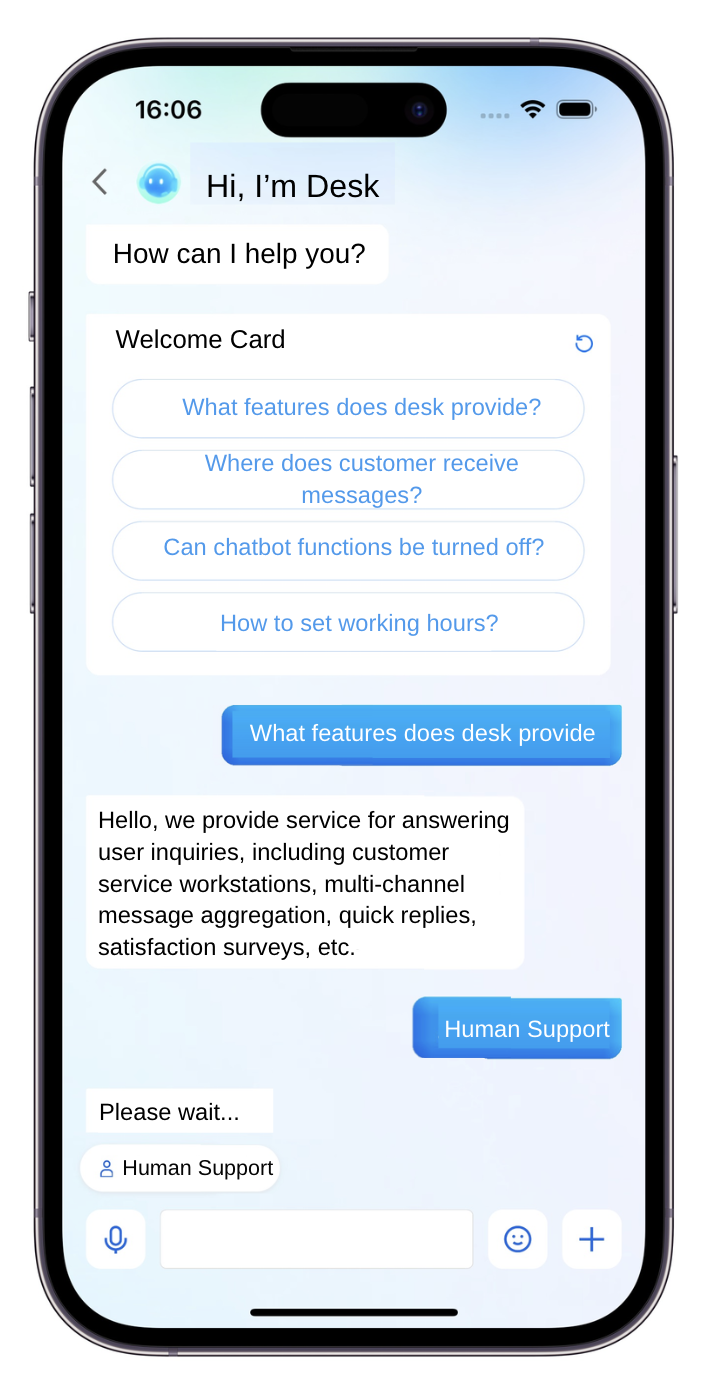
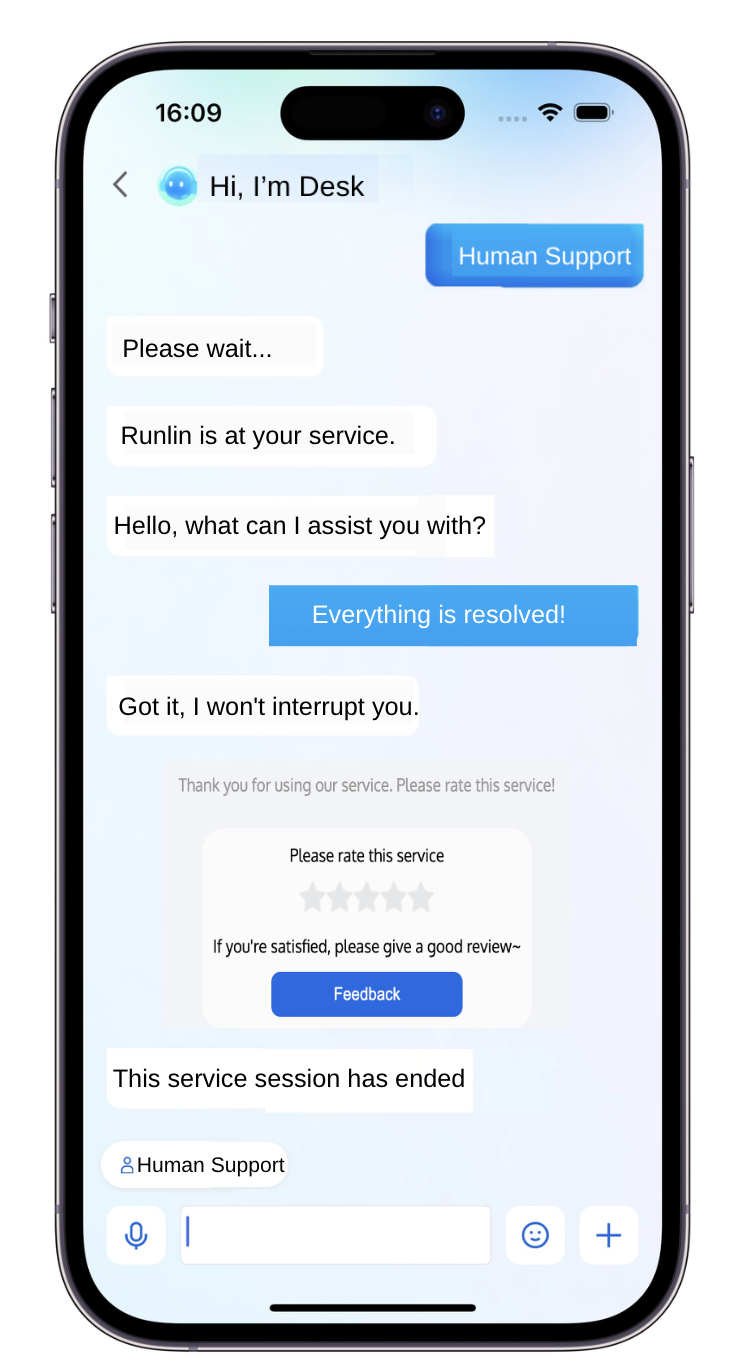
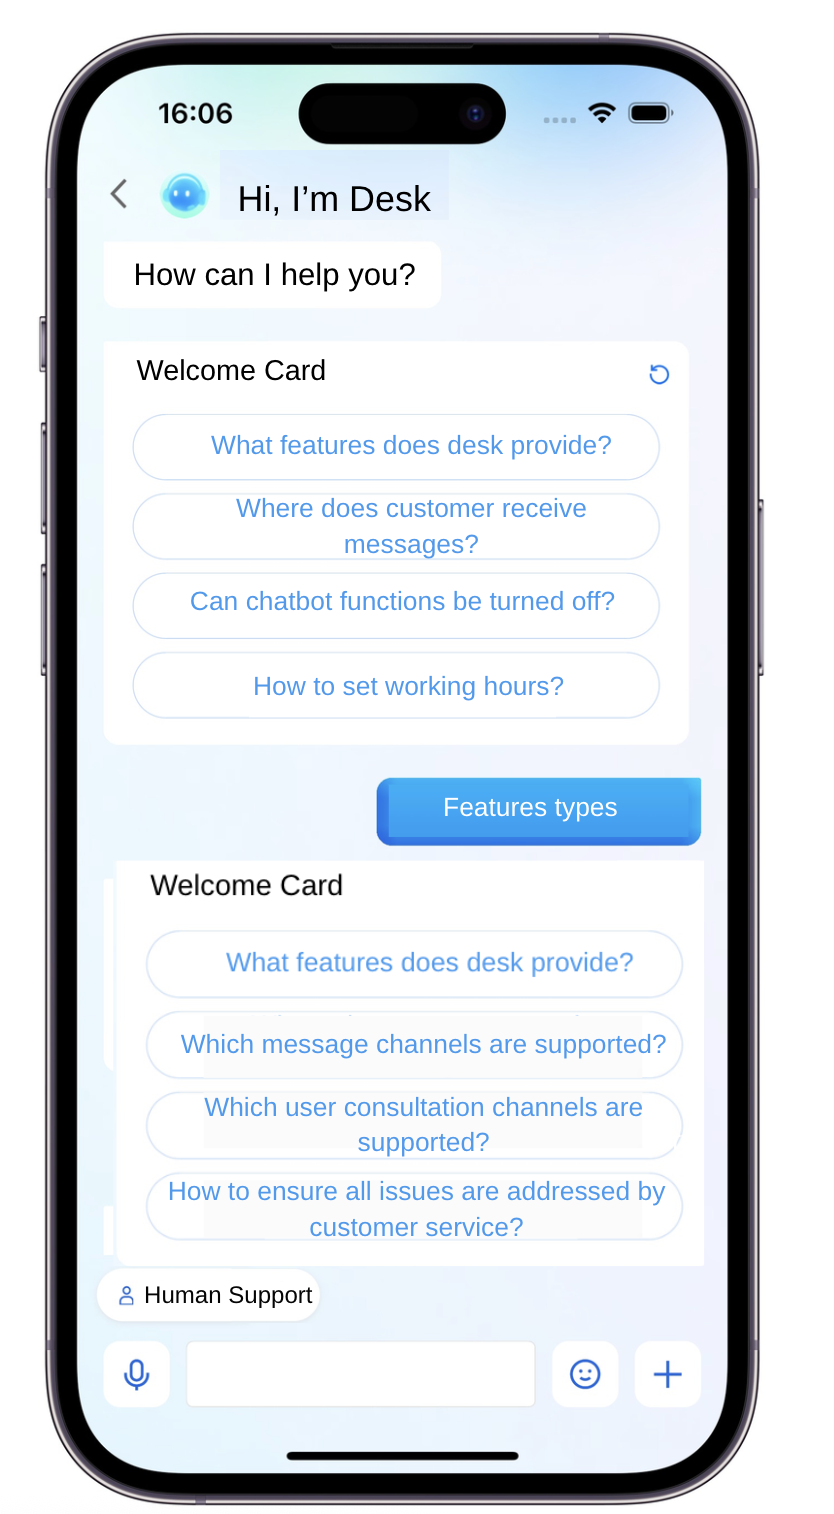
Customer UIKit customized for customer service scenarios provides a specialized user-side customer service session interface to meet scenario requirements. The UI, interaction, and feature experience are all designed for Desk scenarios.
In addition, Customer UIKit eliminates the need for IM integration, requiring only a few lines of code to develop.
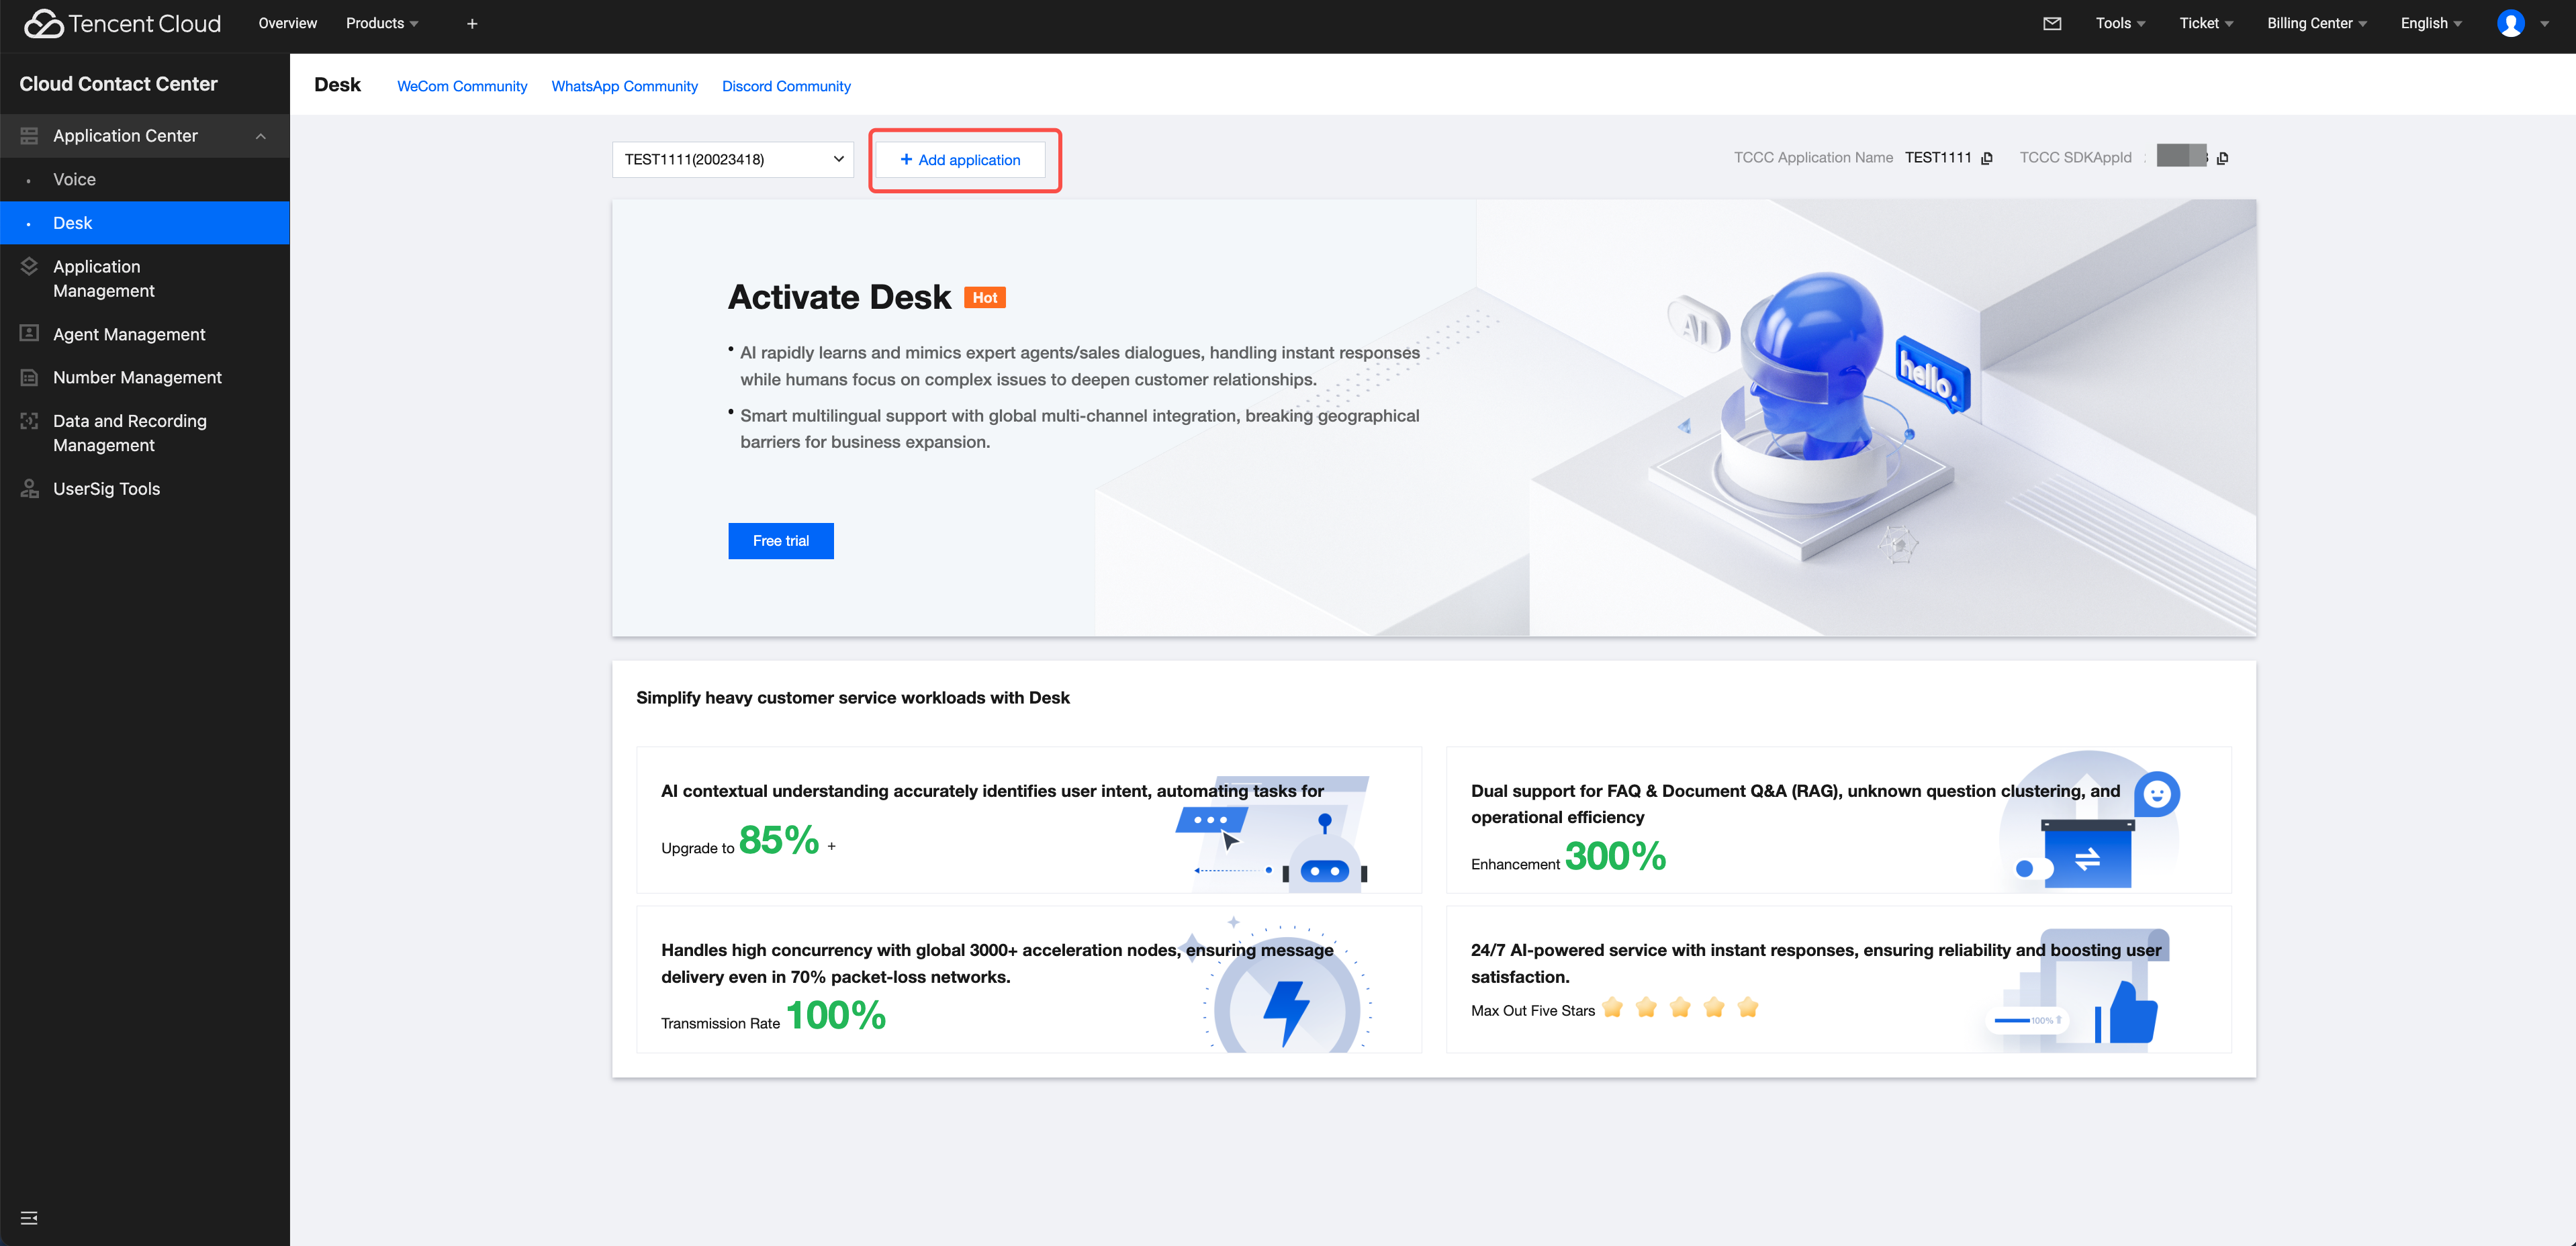
Prerequisite

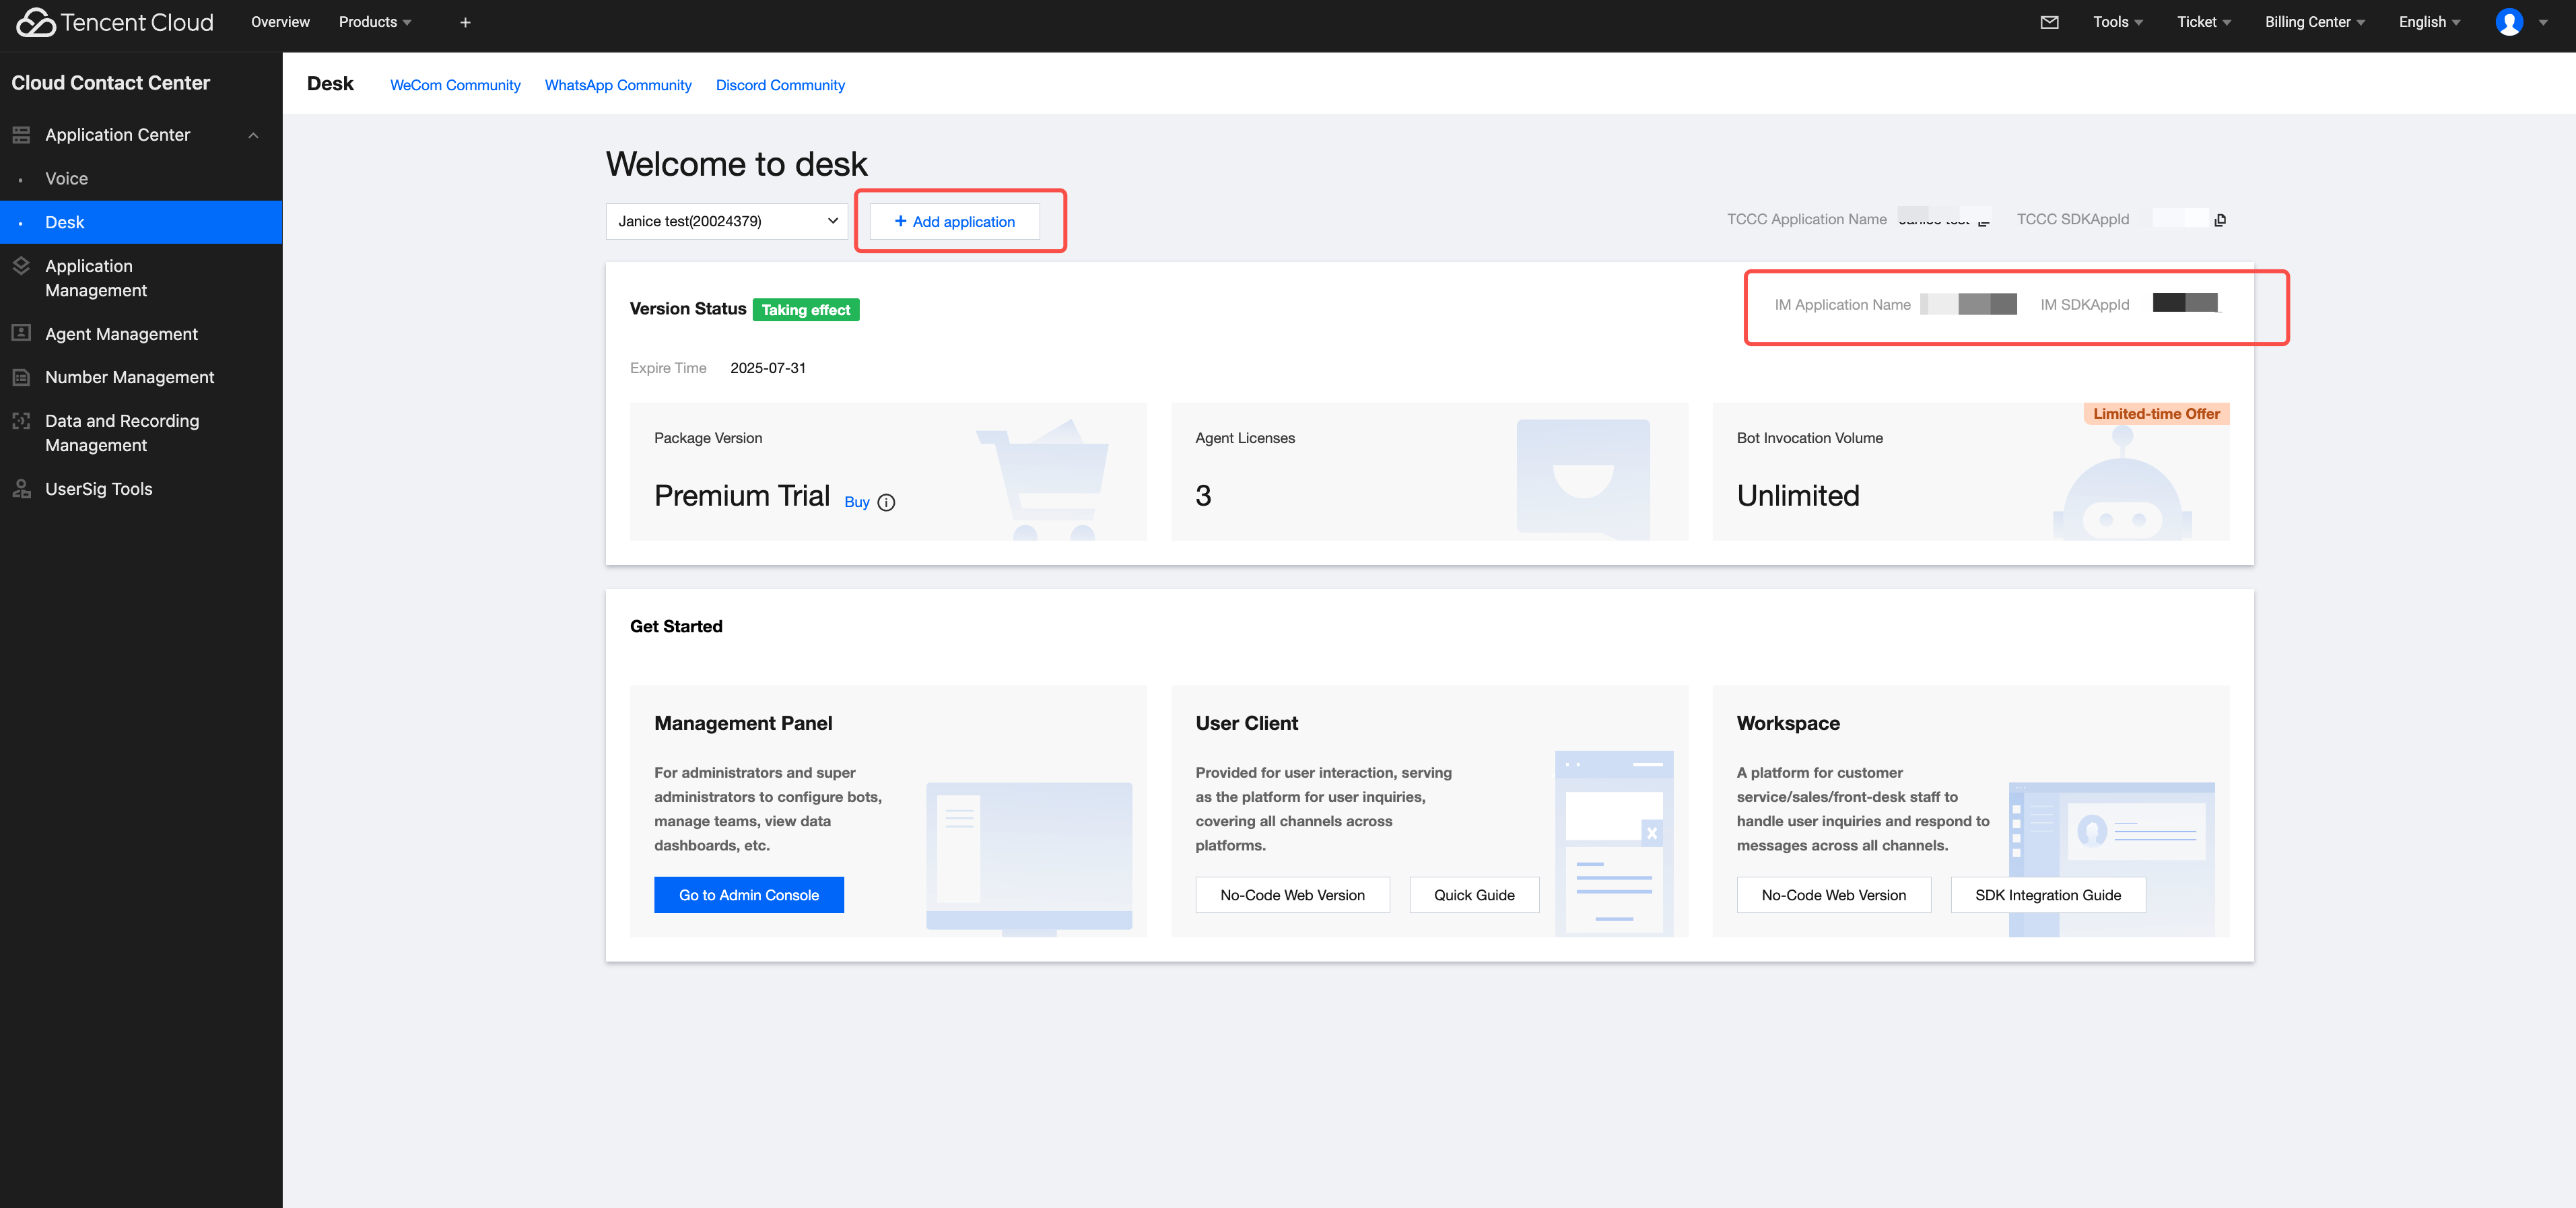
Understand relevant terminology and configuration details for online customer service, and complete the following steps: create a Tencent Cloud IM application, enable Desk, log in to the customer service management console, and obtain the customer service account ID. For details, see Quick Start.

Feature Demonstration


Quick Integration

Environment and Version

iOS version: iOS 13 or later.
Supports simulator debugging and real-device operation.

Demo Example

It is recommended to download and refer to the demo and its source code for the following steps, in conjunction with reading, so that access is better.

CocoaPods Integration

Method 1: Pull Remote CocoaPods Integration

In the XCode project, integrate TencentCloudAIDeskCustomer via Cocoapods.
In the Podfile, add the following example code:
target 'MyApp' do
pod 'TencentCloudAIDeskCustomer'
end

Method 2: DevelopPods Source Code Integration (Recommended for Source Code Modification)

Download TencentCloudAIDeskCustomer-iOS, TDeskCustomerServicePlugin, TDeskChat, TDeskCommon, and TDeskCore from GitHub. Drag them directly into your project directory: TDesk.
target 'MyApp' do
pod 'TencentCloudAIDeskCustomer', :path => "../TDesk/TencentCloudAIDeskCustomer-iOS"
pod 'TDeskCustomerServicePlugin', :path => "../TDesk/TDeskCustomerServicePlugin"
pod 'TDeskChat', :path => "../TDesk/TDeskChat"
pod 'TDeskCommon', :path => "../TDesk/TDeskCommon"
pod 'TDeskCore', :path => "../TDesk/TDeskCore"
end

Logging in and Initialization

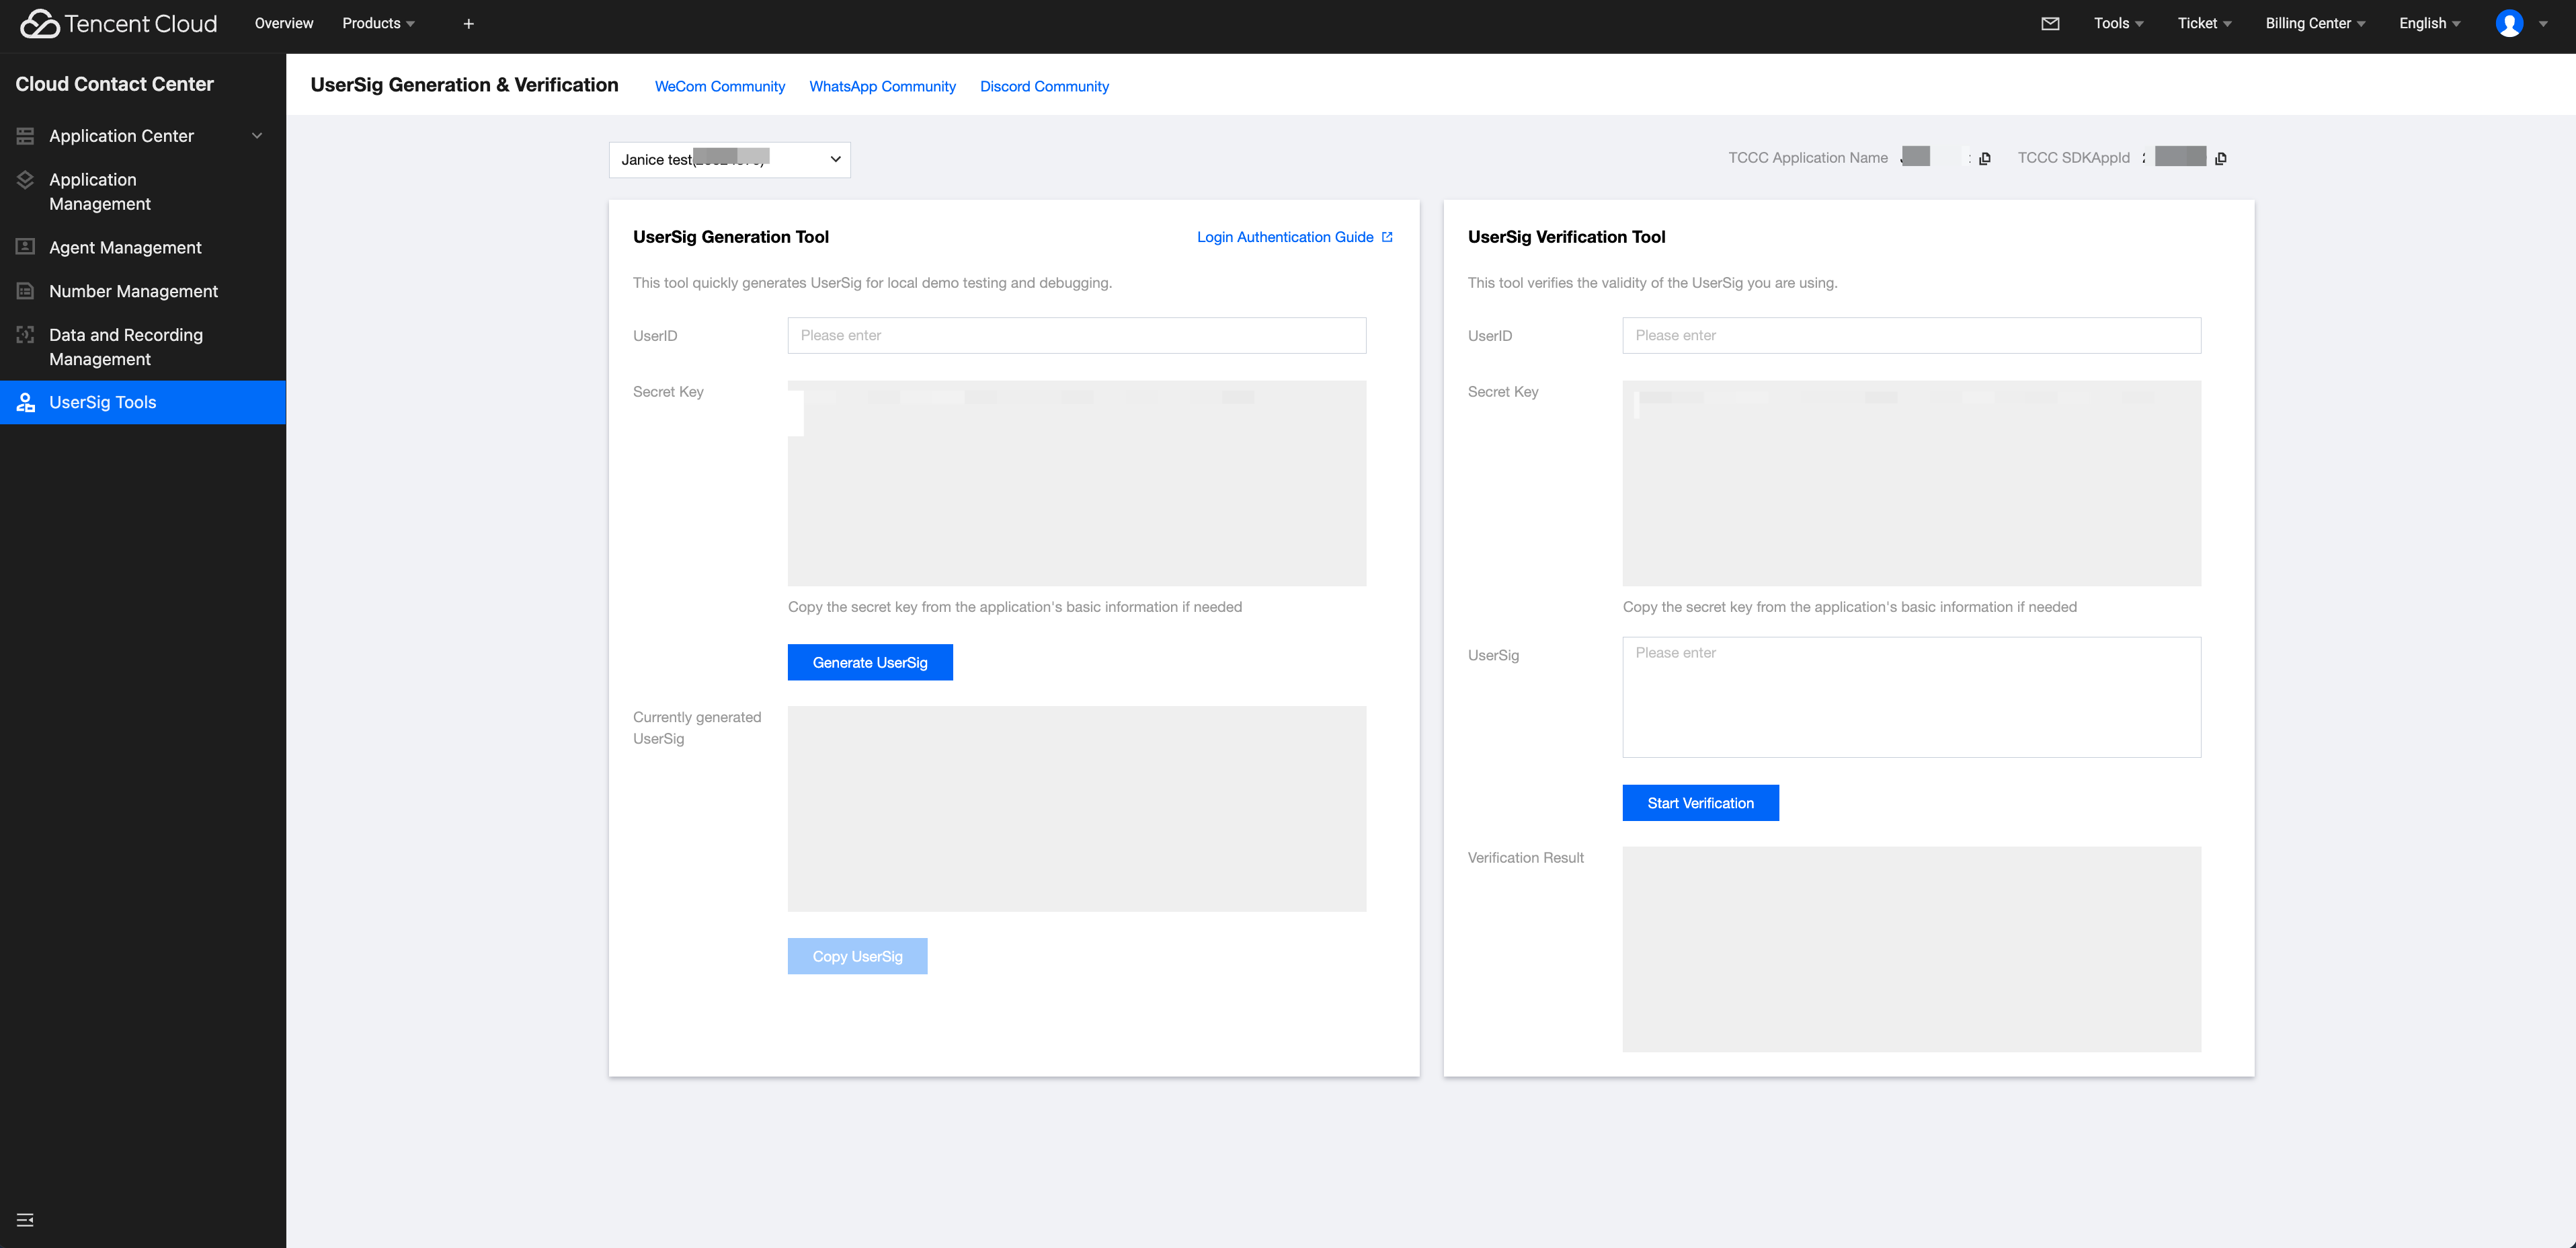
Call the loginWithSdkAppID method to complete UIKit login, then call setCustomerServiceUserID to set the UserID for online customer service. Sample code:
#import "TencentCloudAIDeskCustomer/TencentCloudCustomerManager.h"

- (void)login:(NSString *)userID userSig:(NSString *)sig {
[[TencentCloudCustomerManager sharedManager] loginWithSdkAppID:"SDKAppID of the app" userID:"UserID of the current logged-in user" userSig:"UserSig of the current logged-in user" completion:^(NSError *error) {
if (error.code == 0) {
// If the default customer service account ID is not modified, there is no need to call the function. It can be obtained from the Desk homepage: https://desk.qcloud.com/
// [[TencentCloudCustomerManager sharedManager] setCustomerServiceUserID: "@customer_service_account"];
} else {
NSLog(@"login failed");
}
}];
}
SDKAppID information can be obtained in the IM console by clicking Application Management > Create New Application, and choosing Customer Service Desk > Smart Customer Service, then enable smart customer service.


userID information. A random string can be locally generated, such as test-1234.
userSig info. Click IM console > UserSig generation & verification, fill in the created userID to generate userSig.


Opening the Customer Service Chat Page

Call the pushToCustomerServiceViewControllerFromController method to navigate to the customer service chat page.
#import <TencentCloudAIDeskCustomer/TencentCloudCustomerManager.h>
// Make sure login succeeded, otherwise direct jump will show blank
[[TencentCloudCustomerManager sharedManager] pushToCustomerServiceViewControllerFromController:self];
The online customer service function is now integrated on iOS.

Advanced Usage

If more advanced capabilities are needed, refer to the following advanced API capability.

Setting Quick Phrases

Set quick phrases above the input box.
[[TencentCloudCustomerManager sharedManager] setQuickMessages:<#(NSArray<TUICustomerServicePluginMenuCellData *> *)#>];


ヘルプとサポート

この記事はお役に立ちましたか?

フィードバック