tencent cloud

Tencent Cloud Distributed Cache (Redis OSS-Compatible)

Release Notes and Announcements
Release Notes
Announcements
User Tutorial
Product Introduction
Overview
Product Strengths
Use Cases
Storage Engine
Product Series
Product Versions
Specifications and Performance
Read/Write Separation
Multi-AZ Deployment
Regions and AZs
Terms
Service Regions and Service Providers
Purchase Guide
Billing Overview
Pricing Center
Instance Purchasing
Renewal (Yearly/Monthly Subscription)
Refund (Yearly/Monthly Subscription)
Overdue Payments
Switching from Pay-as-You-Go to Yearly/Monthly Subscription
Getting Started
Quickly Creating an Instance
Connecting to Redis Instance
Operation Guide
Operation Overview
Connecting to a Database Instance
Managing Instances
Upgrade Instance
Management Node (Redis/ValKey Edition)
Multi-AZ Deployment Management
Backup and Restoration
Managing Accounts
Parameter Configuration
Slow Query
Access Management
Network and Security
Monitoring and Alarms
Event Management (Redis/ValKey Edition)
Data Migration
Global Replication for Redis Edition
Database Audit
Performance Optimization
Sentinel Mode
Development Guidelines
Naming Rules
Basic Usage Guidelines
Design Principles of Key and Value
Command Usage Guidelines
Design Principles of Client Programs
Connection Pool Configuration
Command Reference
Command Reference Overview
Redis Edition and Valkey Edition Command Compatibility
Version Command Usage Differences
Differences Between the Proxy Architecture and Direct Connection Mode
More Command Operations (Redis/Valkey Edition)
Memcached Edition Command Compatibility
Practical Tutorial
Building TencentDB for Redis® Client Monitoring Based on Spring Boot
Redis Client Connection Configuration Policy and Practice
Global SCAN Guide for Cluster Architecture
Eliminating Instances Securely
Hot Key and Big Key
AZ Migration Scheme
Troubleshooting
Connection Exception
Exception Analysis and Solution of Redisson Client Timeout Reconnection
Performance Troubleshooting and Fine-Tuning
API Documentation
History
Introduction
API Category
Making API Requests
Instance APIs
Parameter Management APIs
Other APIs
Backup and Restoration APIs
Region APIs
Monitoring and Management APIs
Log APIs
Data Types
Error Codes
FAQs
General
Connection and Login
Purchase
Service Agreement
Service Level Agreement
Terms of Service
Glossary
Contact Us

AZ Migration Scheme

PDF
フォーカスモード
フォントサイズ
最終更新日: 2026-03-18 10:24:49

Overview

When adjusting database resources at the AZ level, you may consider deactivating all AZs with a low resource utilization. In this case, you need to migrate the data in these AZs to other AZs without affecting the normal operations of the current business.

Solution

For convenience considerations, we recommend that you migrate data with the following solutions.
If the current instance is deployed in one single AZ, and all resources in the AZ are to be deactivated, you can use the following data migration scheme:

If the current instance is deployed in multiple AZs, and its master or replica AZ is to be deactivated:
If the master AZ is to be deactivated, manually promote the replica AZ to master AZ, add a new replica for the instance and specify another AZ for it, and delete the replica node in the original master AZ.
If the replica AZ is to be deactivated, change the AZ of the replica as instructed in Adding Replicas to Multi-AZ Deployed Instance.

Directions

Single-AZ deployment

If the AZ of the current instance is to be changed, data needs to be migrated as detailed below. We recommend that you perform the migration during the maintenance time. For more information, see Setting Maintenance Time.
1. Upgrade the current single-AZ deployed instance to a multi-AZ deployed instance as instructed in Upgrading to Multi-AZ Deployment.
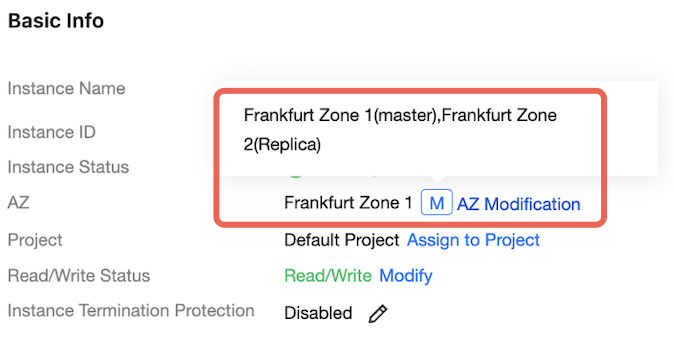
After upgrading to multi-AZ deployment, you can see the

icon next to the AZ of the instance in the AZ column in the instance list or in the Basic Info section on the Instance Details page.
Hover over

and you can see that the AZ information of the master and replica nodes of the current instance has not changed.

2. Promote the AZ of the new replica to master AZ.
In the instance list, find the target instance, and click Instance ID.
Enter the Instance Details page, select Node Management tab, and click Promote Replica to Master to set the AZ of replica node as the master AZ. For more information, see Manually Promoting to Master Node (Group).
3. Delete all nodes in the original master AZ to clear resources.
Notes:
On the Node Management tab in the console, you can see that the original master AZ has been automatically switched to the replica AZ, and all nodes in it have been changed to replica nodes.
On the instance management page, click More > Delete Replica.
On the Configure page, select replicas to be deleted for standard architecture and the replica group for cluster architecture, and click OK.

Multi-AZ deployment

If the master AZ is to be deactivated, data needs to be migrated as detailed below. We recommend that you perform the migration during the maintenance time. For more information, see Setting Maintenance Time.
1. Manually promote a replica AZ to master AZ. For more information, see step3 in single-AZ deployment inAZ Migration Scheme > Directions.
2. Add a new replica for the instance as instructed in Adding Replicas to Multi-AZ Deployed Instance.
3. Delete the replica node in the original master AZ. For more information, see step4 in single-AZ deployment in AZ Migration Scheme > Directions.

ヘルプとサポート

この記事はお役に立ちましたか?

フィードバック