tencent cloud

Serverless Cloud Function

Release Notes and Announcements
Release Notes
Announcements
User Guide
Product Introduction
Overview
Related Concepts
How It Works
Strengths
Scenarios
Related Products
Purchase Guide
Billing Overview
Billing Mode
Billable Items and Billing Modes
Function Computing Power Support
Free Tier
SCF Pricing
Billing Example
Payment Overdue
Getting Started
Creating Event Function in Console
User Guide
Quota Management
Managing Functions
Web Function Management
Log Management
Concurrence Management
Trigger Management
Function URL
A Custom Domain Name
Version Management
Alias Management
Permission Management
Running Instance Management
Plugin Management
Managing Monitors and Alarms
Network Configuration
Layer Management
Execution Configuration
Extended Storage Management
DNS Caching Configuration
Resource Managed Mode Management
Near-Offline Resource Hosting Model
Workflow
Triggers
Trigger Overview
Trigger Event Message Structure Summary
API Gateway Trigger
COS Trigger
CLS Trigger
Timer Trigger
CKafka Trigger
Apache Kafka Trigger
MQTT Trigger
Trigger Configuration Description
MPS Trigger
CLB Trigger Description
TencentCloud API Trigger
Development Guide
Basic Concepts
Testing a Function
Environment Variables
Dependency Installation
Using Container Image
Error Types and Retry Policies
Dead Letter Queue
Connecting SCF to Database
Automated Deployment
Cloud Function Status Code
Common Errors and Solutions
Developer Tools
Serverless Web IDE
Calling SDK Across Functions
Third-Party Tools
Code Development
Python
Node.js
Golang
PHP
Java
Custom Runtime
Deploying Image as Function
Web Framework Development
Deploying Framework on Command Line
Quickly Deploying Egg Framework
Quickly Deploying Express Framework
Quickly Deploying Flask Framework
Quickly Deploying Koa Framework
Quickly Deploying Laravel Framework
Quickly Deploying Nest.js Framework
Quickly Deploying Next.js Framework
Quickly Deploying Nuxt.js Framework
Quickly Deploying Django Framework
Use Cases
Overview
Solutions with Tencent Cloud Services
Business Development
TRTC Practices
COS Practices
CKafka Practice
CLS
CLB Practice
MPS
CDN
CDWPG
VOD
SMS
ES
Scheduled Task
Video Processing
Success Stories
Tencent Online Education
Online Video Industry
Tencent Online Education
Best Practice of Tencent IEG Going Global
API Documentation
History
Introduction
API Category
Making API Requests
Other APIs
Namespace APIs
Layer Management APIs
Async Event Management APIs
Trigger APIs
Function APIs
Function and Layer Status Description
Data Types
Error Codes
SDK Documentation
FAQs
General
Web Function
Billing FAQs
Network FAQs
Log FAQs
SCF utility class
Event Handling FAQs
API Gateway Trigger FAQs
Related Agreement
Service Level Agreement
Contact Us
Glossary

Configuring Access Permissions

PDF
フォーカスモード
フォントサイズ
最終更新日: 2025-12-15 10:54:59
This document describes how to configure access permissions for workflows in the Serverless Cloud Function (SCF) console.
Note:
Cloud Access Management (CAM) allows you to grant workflow access permissions to sub-users. It is recommended to authorize only the administrator role to use the Access Management page. The administrator can then grant permissions to other users.

Operation Steps

Console Entry

1. Log in to the Serverless Cloud Function (SCF) console. In the left sidebar, choose Data Engineering > Workflow.
2. On the Workflow page, click the workflow name to go to the target workflow details page. Then, select Access Management.


User Access Permissions

The platform provides three built-in roles: administrator, developer, and read-only user.
Role Name
Namespace Permission
Read/Write Permission
Administrator
All namespaces under the service
Read permissions
Write permissions
Developer
The specific namespace allocated during authorization
Read permissions
Write permissions
Read-only user
The specific namespace allocated during authorization
Read permissions
You can configure user access permissions by performing the following steps:
1. Click Add User.
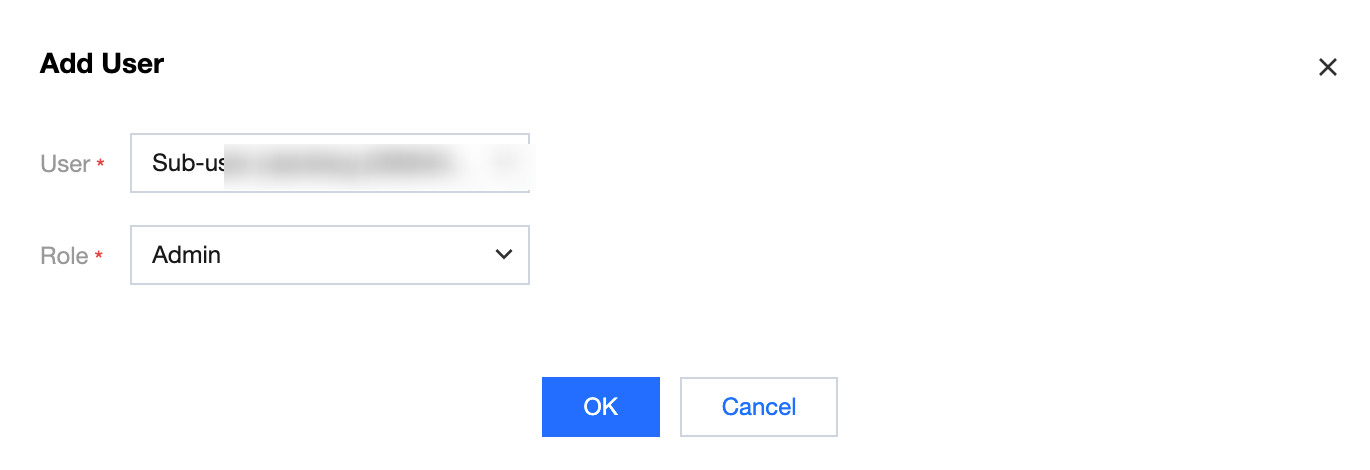
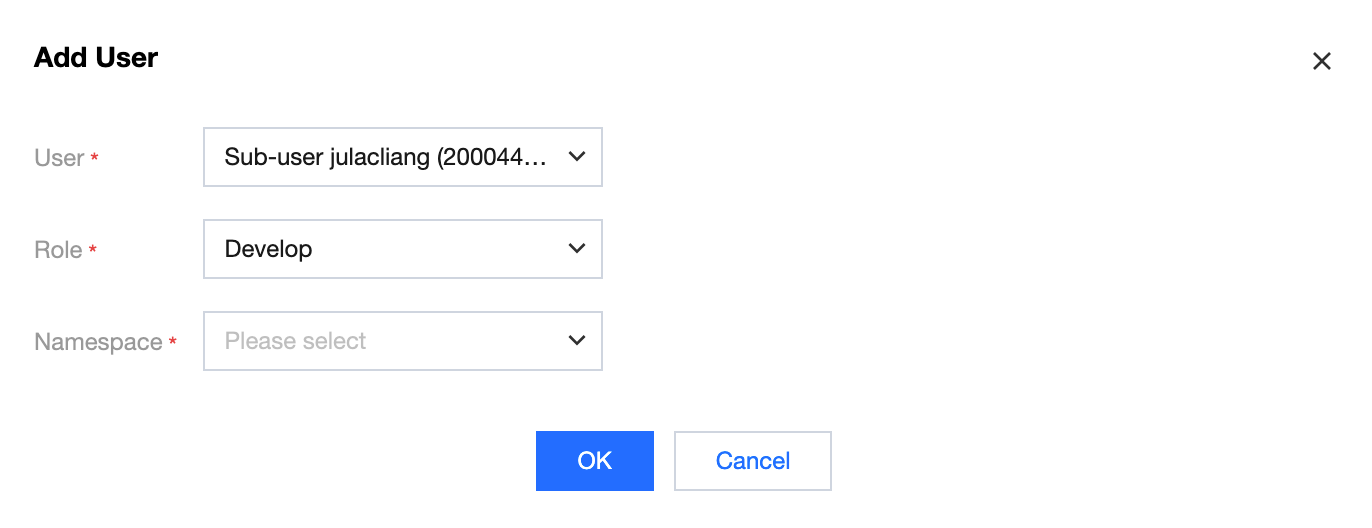
2. In the Add User pop-up window, select the Tencent Cloud sub-user to be authorized from the drop-down list, and then select the role and namespace for authorization. The administrator role has permissions on all namespaces by default and does not require specification. Developers and read-only users should be granted at least one namespace permission. The following figures show the configurations:
Administrator role

Developers and read-only users

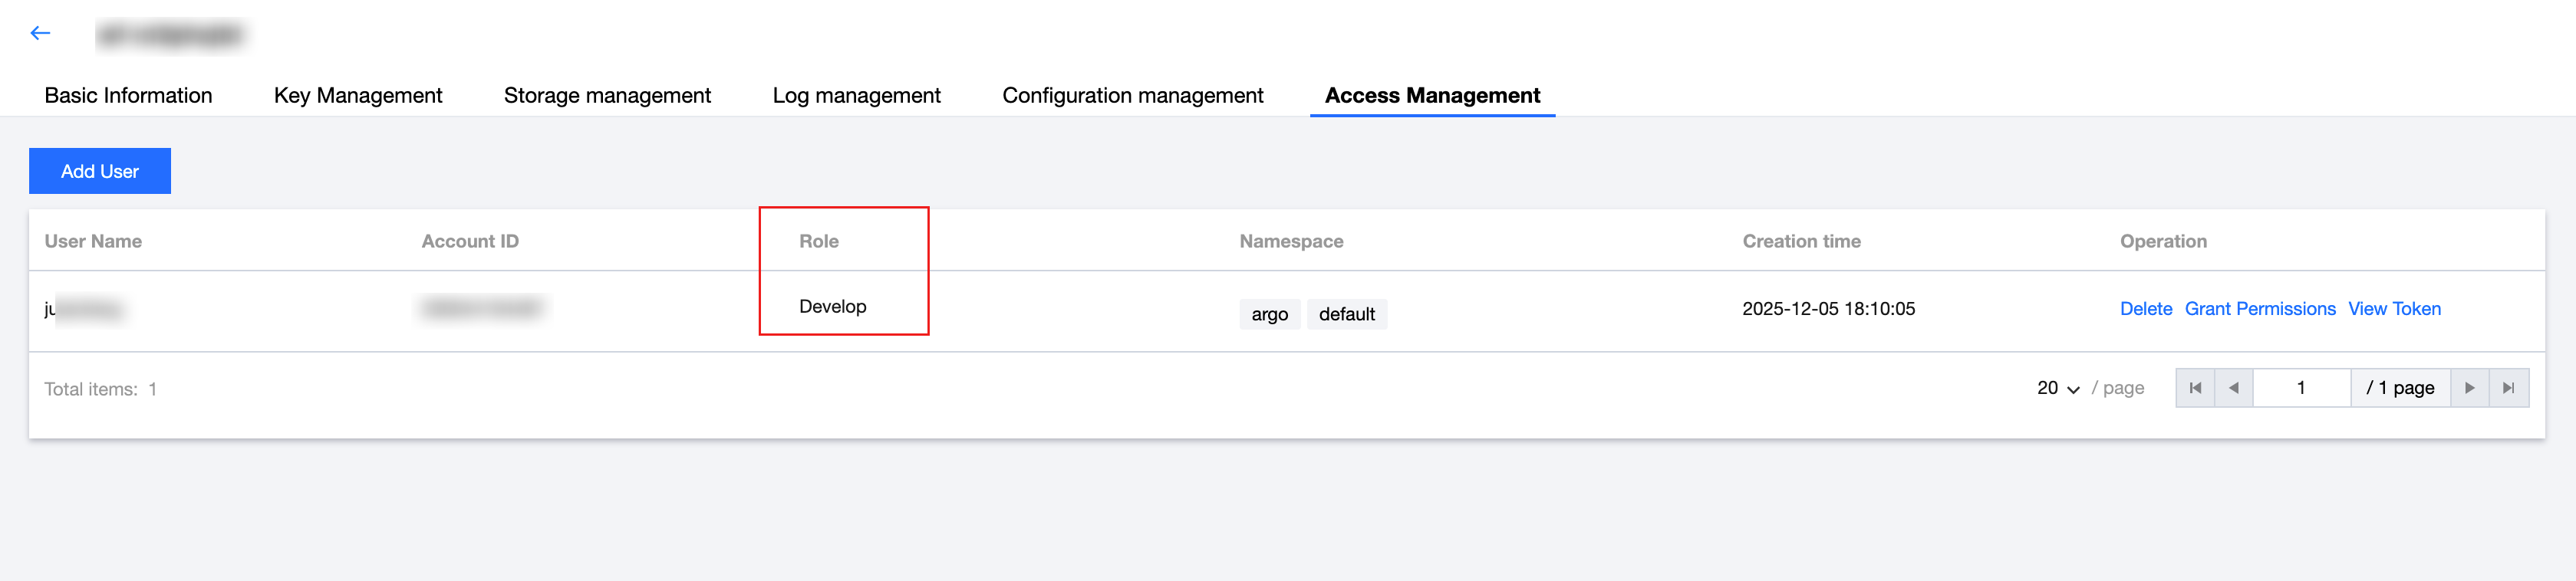
3. Click OK. After creation, the user list displays all authorized users for the service and their corresponding permissions, as shown in the following figure:

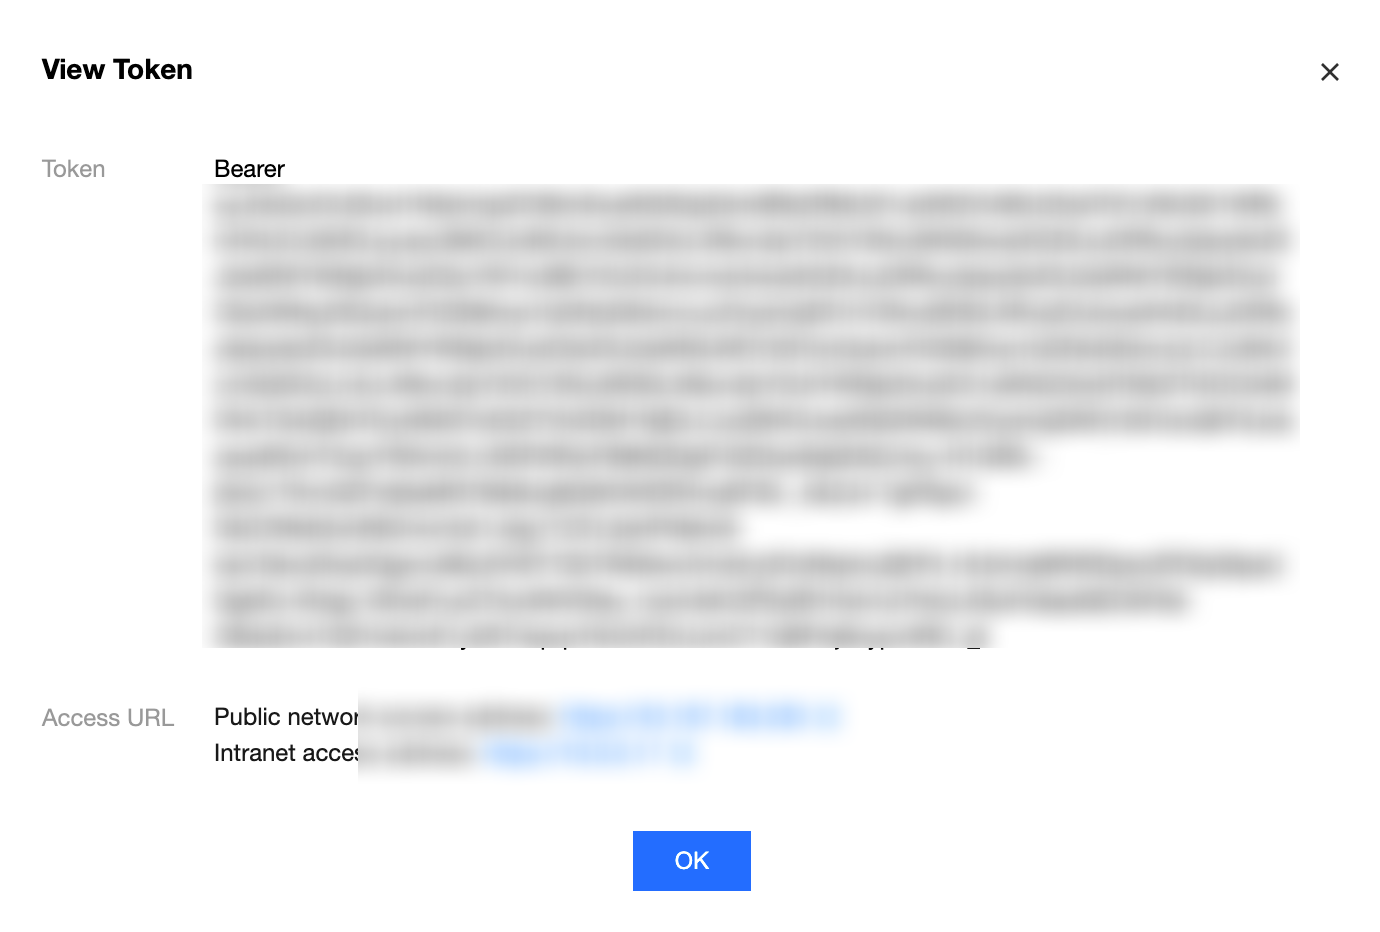
4. Click View Token, obtain the access address and login token information, and then send the information to the corresponding sub-account, as shown in the following figure:


User Permission Management

For an authorized user, click Grant Permissions to modify its role and namespace permissions, as shown in the following figure:

For an authorized user, click Delete to directly remove the user and revoke all permissions granted to the user, as shown in the following figure:


ヘルプとサポート

この記事はお役に立ちましたか?

フィードバック