Android
Download
포커스 모드
폰트 크기
Introduction
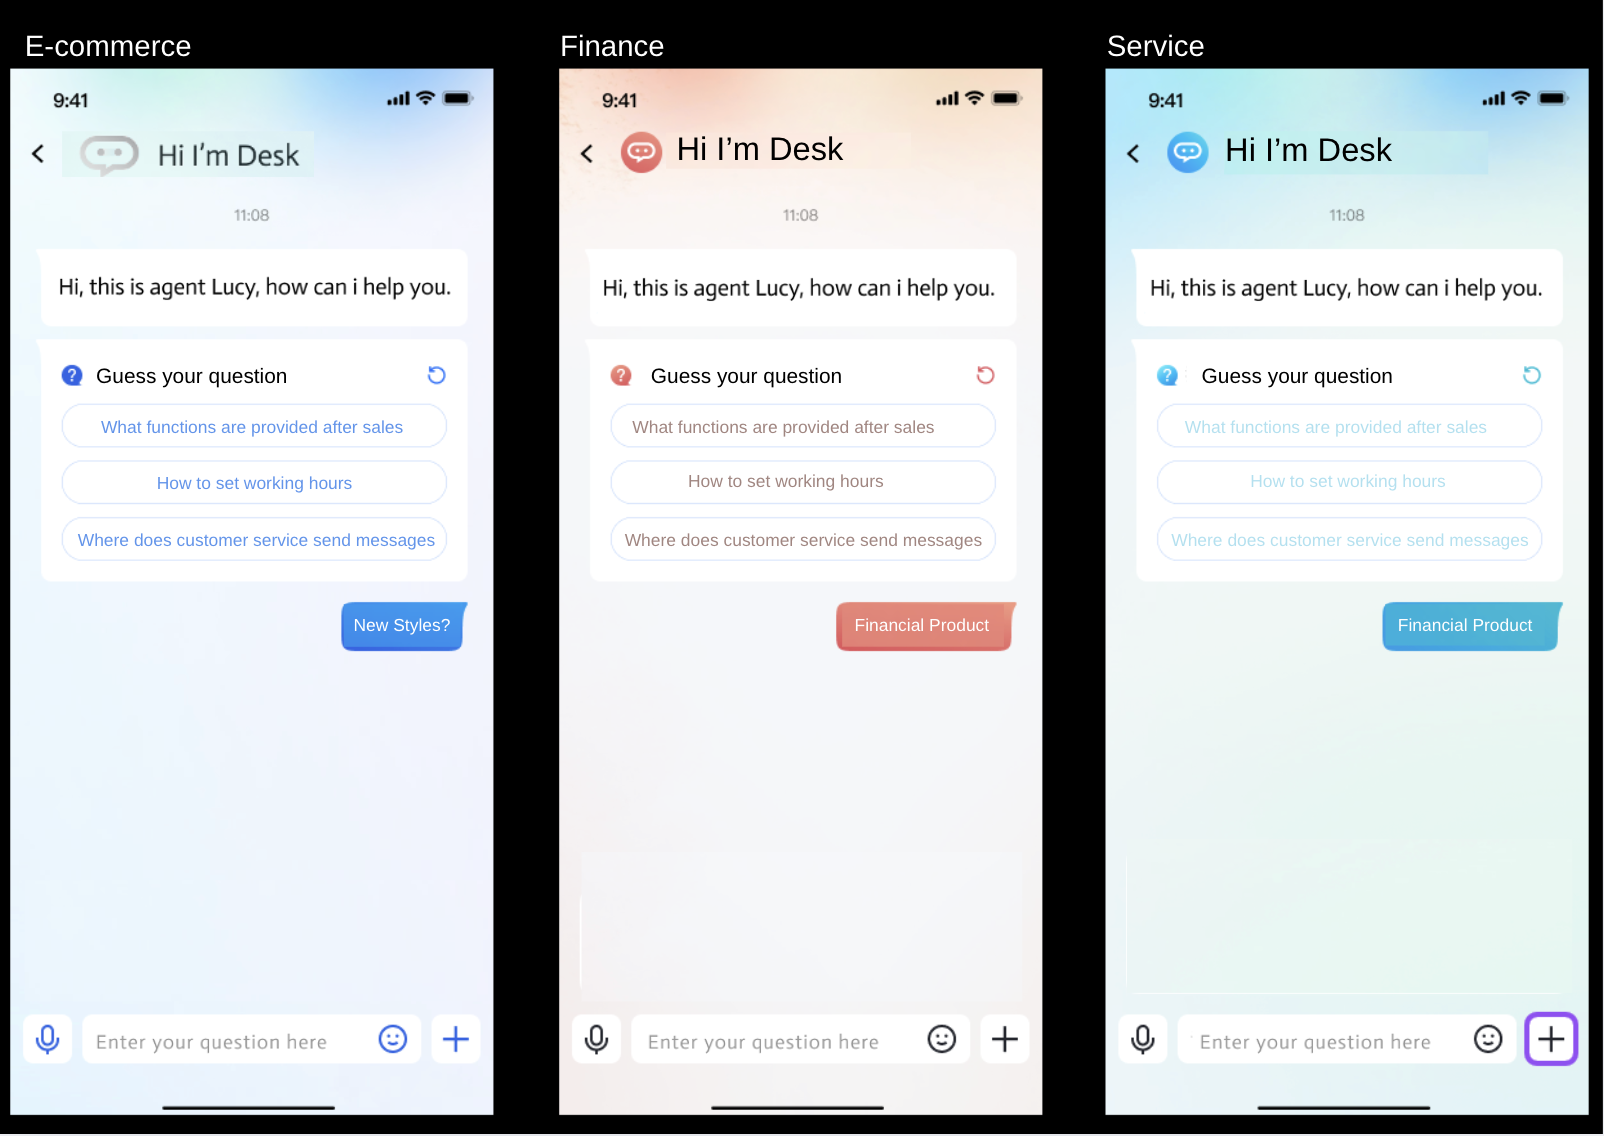
Customer UIKit, customized for customer service scenarios, offers a specialized user-side interface for customer service sessions to meet scenario requirements. The UI, interaction, and feature experience are all designed for intelligent customer service scenarios.
In addition, Customer UIKit simplifies integration by eliminating the need for IM integration, requiring only a few lines of code to develop.
Prerequisites
Learn about online customer service terminology and configuration details, and complete the following steps: create a Tencent Cloud IM application, enable Desk, log in to the customer service management console, and obtain the customer service account ID. For details, see Quick Start.
Environment and Version
Android Studio
Gradle-7.4.1
Android Gradle Plugin Version-7.0.1
Feature Demonstration
Quick Integration
Step 1: Maven Mirror Settings
In the project's
setting.gradle, add the following content to dependencyResolutionManagement:repositories {google()mavenCentral()maven {url 'https://mirrors.tencent.com/repository/maven/thirdparty/'}gradlePluginPortal()}
Step 2: Introducing the AI Desk Package
We provide two methods to introduce. If no modification required, you can use the Maven mirror directly. If modifications are needed, source code integration is available.
Find the build.gradle file of the app, then add the dependency of AI TDesk SDK in dependencies.
implementation "com.tencentcloud.desk:aideskcustomer:$version"// The latest version can be viewed at https://central.sonatype.com/artifact/com.tencentcloud.desk/aideskcustomer/versions
1. Download AI TDesk SDK source code, then copy the aideskcustomer, deskchat, deskcommon, deskcontact, deskcore, and deskcustomerserviceplugin folders to your project's root directory.
2. Modify the
settings.gradle file in your project to introduce the AI TDesk SDK related code.// Integrate smart customer service related codeinclude ':deskcore'include ':deskcommon'include ':deskchat'include ':deskcontact'include ':deskcustomerserviceplugin'include ':aideskcustomer'
3. Find the build.gradle file of the app, then add the dependency of AI TDesk SDK in dependencies.
implementation project(':aideskcustomer')
Step 3: User Login
TencentAiDeskCustomerLoginConfig config = new TencentAiDeskCustomerLoginConfig(); // config is optionalTencentAiDeskCustomer.getInstance().login(context, sdkAppID, userID, userSign, config, new TencentAiDeskCustomerLoginCallback() {@Overridepublic void onSuccess() {System.out.println("login success");}@Overridepublic void onError(int code, String desc) {System.out.println("login failed"+code+","+desc);}});
Step 4: Open a New Customer Service Chat Page
startActivity(TencentAiDeskCustomer.getInstance().getTencentCloudCustomerChatIntent(context));
Advanced Usage
Setting a Topic
TencentAiDeskCustomer.setTheme(TencentAiDeskCustomerThemeConfig.DARK);
Setting Display Manual Service Button
// When set to true, it will only display if not in manual service status and will auto-hide after manual service.// When set to true, never show the manual service status buttonTencentAiDeskCustomer.getInstance().setShowHumanService(true);
Setting Quick Phrases
LinkedList<TencentAiDeskCustomerQuickMessageInfo> quickMessages = new LinkedList<TencentAiDeskCustomerQuickMessageInfo>();// for details, see Quick Phrases classTencentAiDeskCustomer.getInstance().setQuickMessages(quickMessages);
Setting Product Information
TencentAiDeskCustomerProductInfo info = new TencentAiDeskCustomerProductInfo(); // for details, see Product Information classTencentAiDeskCustomer.getInstance().setProductInfo(info);
Set Language
If your Desk package supports multilingual, UIKit can automatically adapt to the system language or use your specified language. Currently, it supports Chinese, English, and Arabic by default. For other languages, contact us.
If no language is specified, the system defaults to the system language. If the system language is unsupported, it uses Simplified Chinese by default (applicable to the Chinese site). The supported languages are as follows.
// Set to English, TencentAiDeskCustomerLanguageConfig.zh is Chinese.TencentAiDeskCustomer.getInstance().setLanguage(v.getContext(), TencentAiDeskCustomerLanguageConfig.en);
Others
피드백