tencent cloud

Serverless Cloud Function

Release Notes and Announcements
Release Notes
Announcements
User Guide
Product Introduction
Overview
Related Concepts
How It Works
Strengths
Scenarios
Related Products
Purchase Guide
Billing Overview
Billing Mode
Billable Items and Billing Modes
Function Computing Power Support
Free Tier
SCF Pricing
Billing Example
Payment Overdue
Getting Started
Creating Event Function in Console
User Guide
Quota Management
Managing Functions
Web Function Management
Log Management
Concurrence Management
Trigger Management
Function URL
A Custom Domain Name
Version Management
Alias Management
Permission Management
Running Instance Management
Plugin Management
Managing Monitors and Alarms
Network Configuration
Layer Management
Execution Configuration
Extended Storage Management
DNS Caching Configuration
Resource Managed Mode Management
Near-Offline Resource Hosting Model
Workflow
Triggers
Trigger Overview
Trigger Event Message Structure Summary
API Gateway Trigger
COS Trigger
CLS Trigger
Timer Trigger
CKafka Trigger
Apache Kafka Trigger
MQTT Trigger
Trigger Configuration Description
MPS Trigger
CLB Trigger Description
TencentCloud API Trigger
Development Guide
Basic Concepts
Testing a Function
Environment Variables
Dependency Installation
Using Container Image
Error Types and Retry Policies
Dead Letter Queue
Connecting SCF to Database
Automated Deployment
Cloud Function Status Code
Common Errors and Solutions
Developer Tools
Serverless Web IDE
Calling SDK Across Functions
Third-Party Tools
Code Development
Python
Node.js
Golang
PHP
Java
Custom Runtime
Deploying Image as Function
Web Framework Development
Deploying Framework on Command Line
Quickly Deploying Egg Framework
Quickly Deploying Express Framework
Quickly Deploying Flask Framework
Quickly Deploying Koa Framework
Quickly Deploying Laravel Framework
Quickly Deploying Nest.js Framework
Quickly Deploying Next.js Framework
Quickly Deploying Nuxt.js Framework
Quickly Deploying Django Framework
Use Cases
Overview
Solutions with Tencent Cloud Services
Business Development
TRTC Practices
COS Practices
CKafka Practice
CLS
CLB Practice
MPS
CDN
CDWPG
VOD
SMS
ES
Scheduled Task
Video Processing
Success Stories
Tencent Online Education
Online Video Industry
Tencent Online Education
Best Practice of Tencent IEG Going Global
API Documentation
History
Introduction
API Category
Making API Requests
Other APIs
Namespace APIs
Layer Management APIs
Async Event Management APIs
Trigger APIs
Function APIs
Function and Layer Status Description
Data Types
Error Codes
SDK Documentation
FAQs
General
Web Function
Billing FAQs
Network FAQs
Log FAQs
SCF utility class
Event Handling FAQs
API Gateway Trigger FAQs
Related Agreement
Service Level Agreement
Contact Us
Glossary
문서Serverless Cloud FunctionUser GuideNetwork ConfigurationGranting a Function in VPC Access to Public Network

Granting a Function in VPC Access to Public Network

PDF
포커스 모드
폰트 크기
마지막 업데이트 시간: 2025-10-24 17:32:08

Operation Scenarios

A function deployed in a VPC is isolated from the public network by default. If you want the function to have access to both private network and public network, you can add a NAT gateway to the VPC.

Prerequisites

Directions

Creating NAT Gateway

NAT Gateway is a network cloud service that supports IP address translation and enables high-performance internet access for resources in Tencent Cloud. It can translate the private IP address in a VPC to a public IP address if the private and public networks are isolated from each other, enabling the VPC to access the internet. For more information, please see NAT Gateway Overview.
1. Log in to the NAT Gateway Console and click + Create.
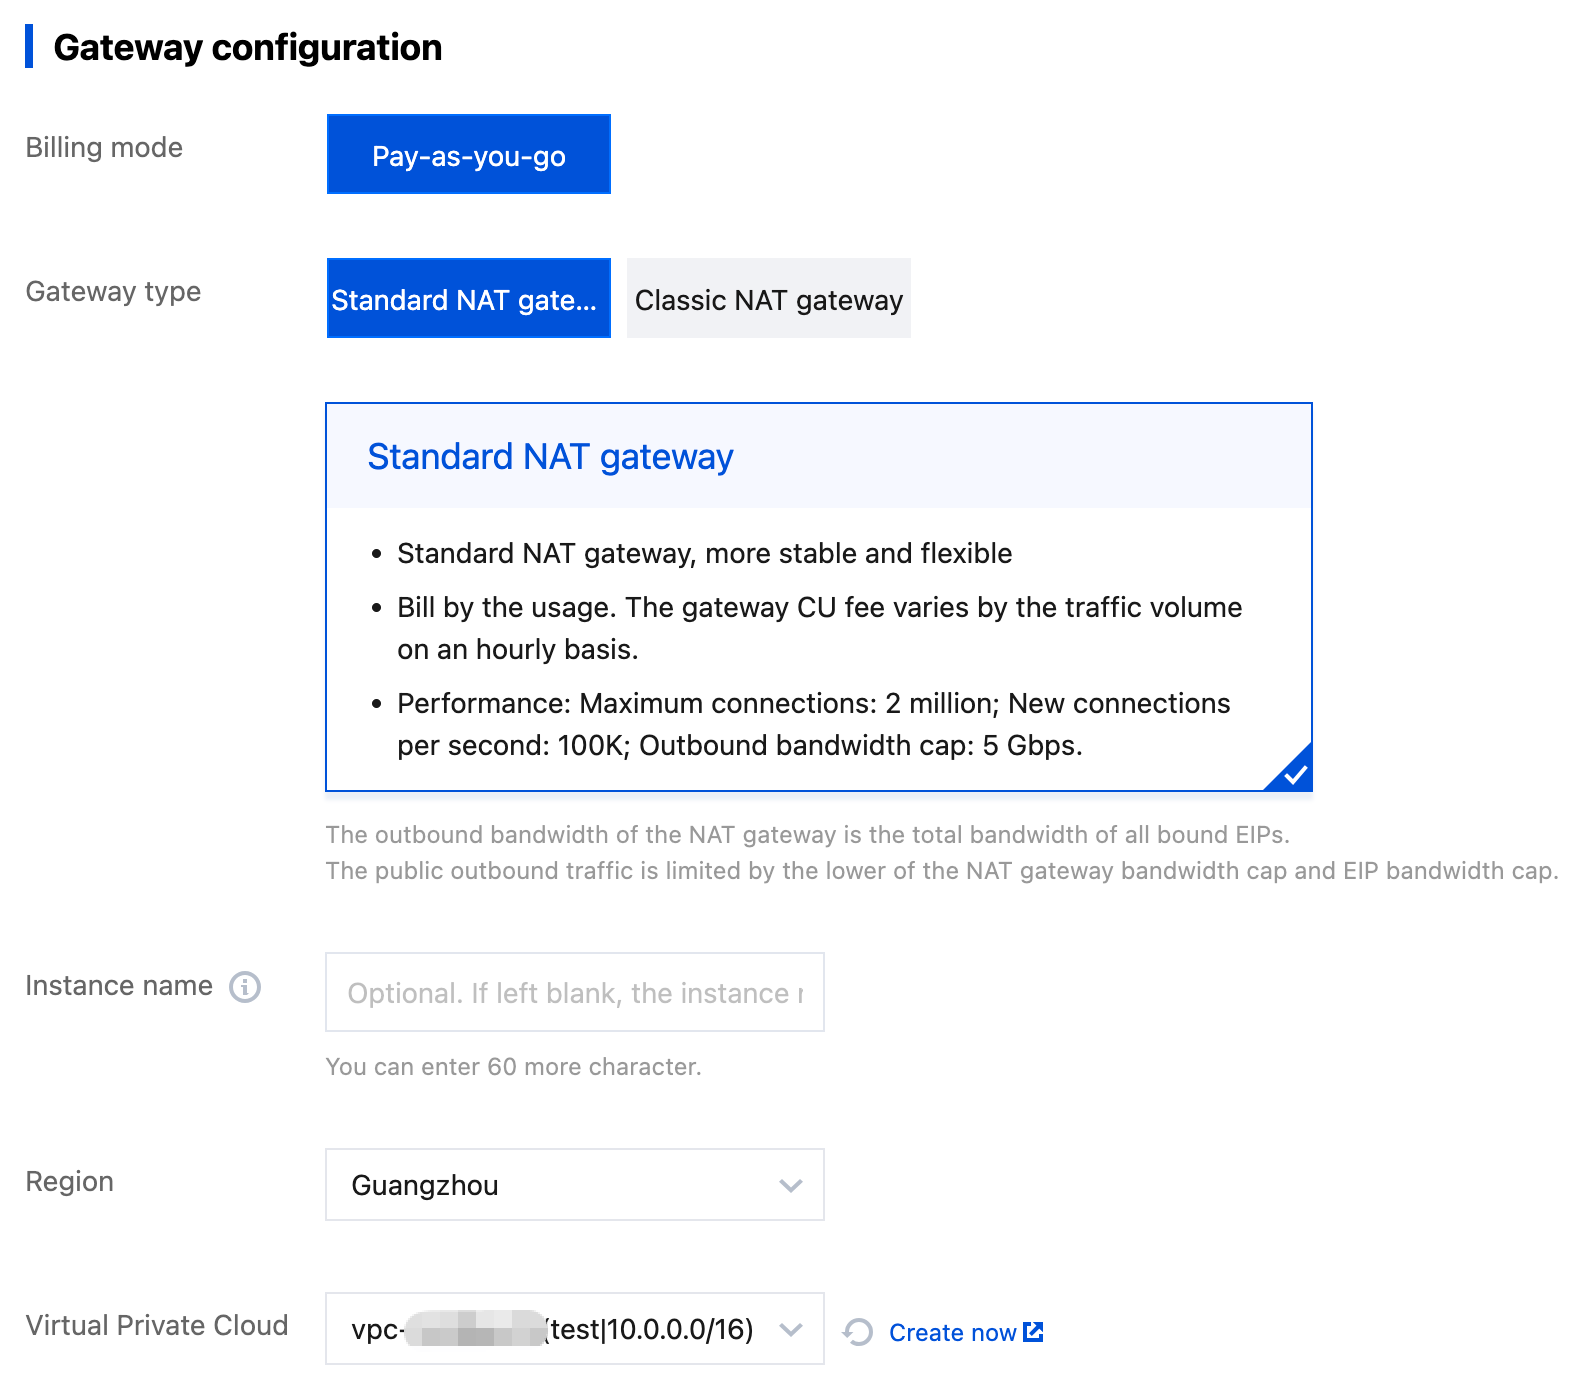
2. Enter relevant information on the pop-up page. This document creates a NAT gateway as shown below:
Note:
The NAT gateway should be deployed in the same region as the function and VPC.
The network to which the NAT gateway belongs should be the VPC where the function is located.


Creating Routing Policy

Select Route Table on the left sidebar in the VPC Console, select the region where the route table is located, and click + Create as shown below:

On the pop-up page, you can choose the corresponding configuration in the following two setting methods to manage the SCF access to the public network.

Enabling SCF to access all public IP addresses

If you want SCF to have access to all public IP addresses, you can configure IP 0.0.0.0/0 in the destination in the routing table and associate the routing table with the created NAT gateway and SCF subnet as shown below:


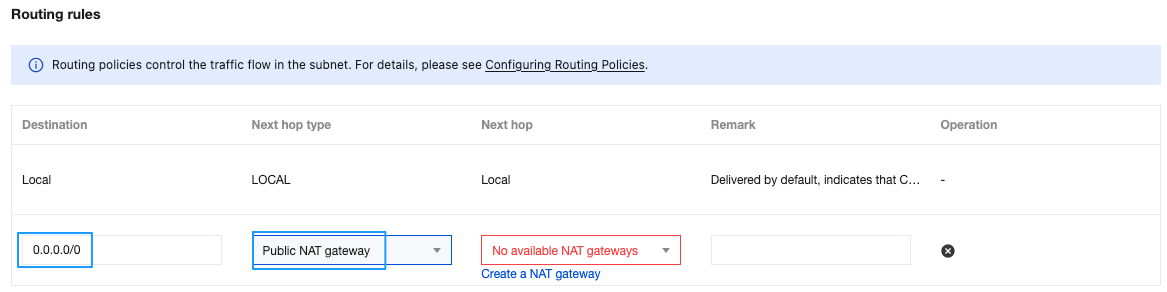
Enabling SCF to access certain public IP addresses

If you want SCF to have access to certain public IP addresses, you need to add the accessible IP addresses to the routing table and associate the routing table with the created NAT gateway and SCF subnet as shown below:

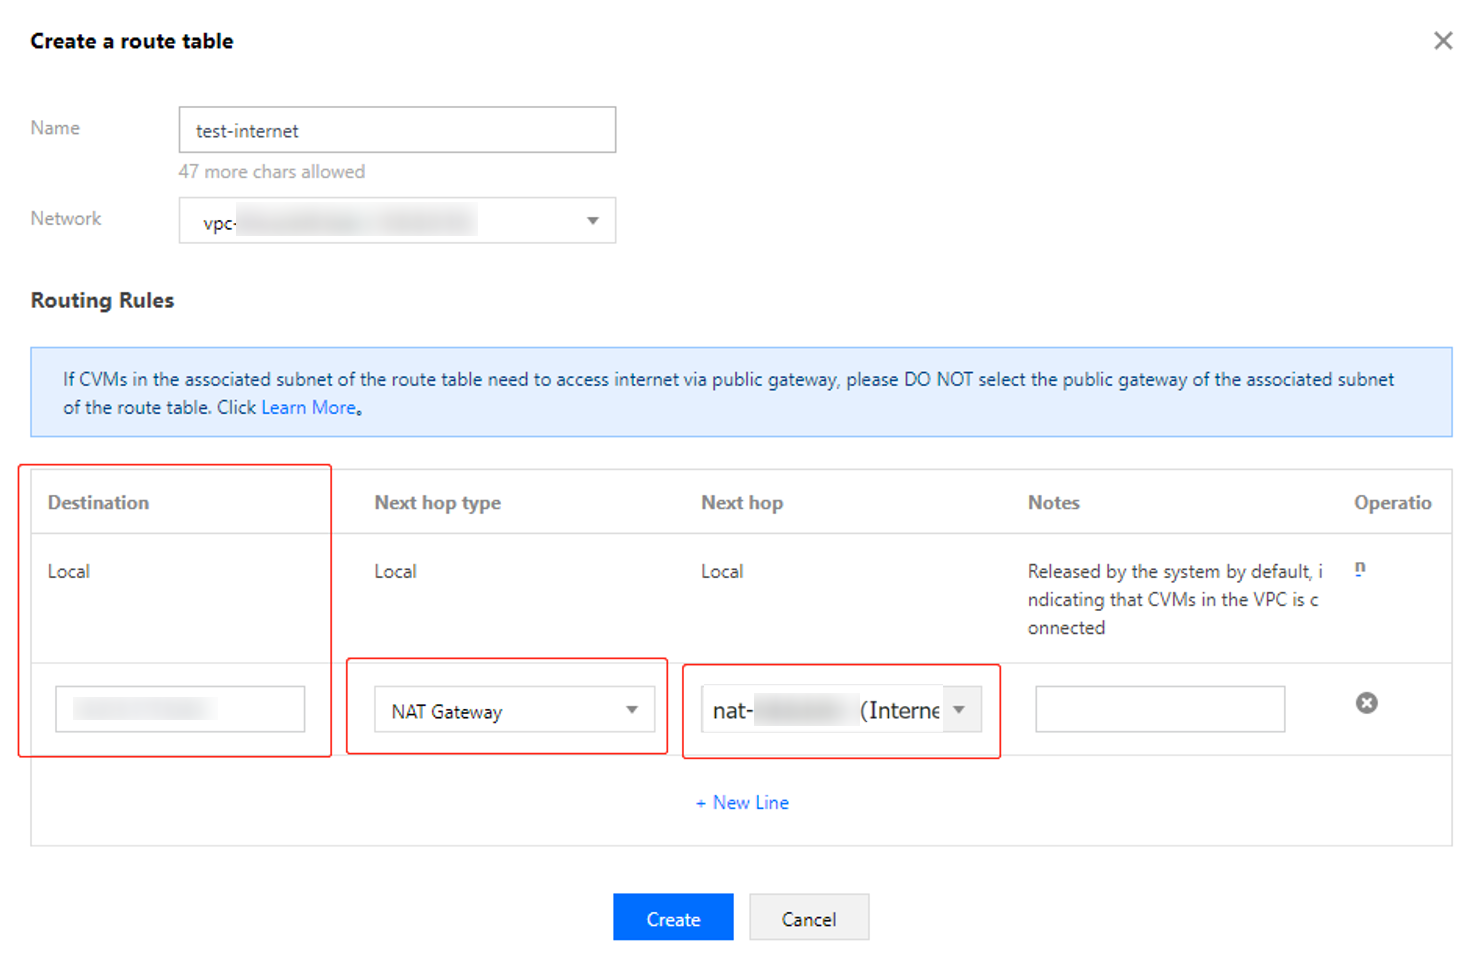
After completing the selection, click Create.

도움말 및 지원

문제 해결에 도움이 되었나요?

피드백