This document describes the information leakage protection feature of WAF. It can filter and then replace, mask, and block sensitive information (e.g., identity card/mobile/bank card numbers), keywords, and response codes returned by websites. This helps meet the requirements of data security protection and cybersecurity classified protection by setting leakage protection rules as needed.
Overview
With the leakage protection feature, you can add protection rules to filter the content returned by websites as needed, such as identity card/mobile/bank card numbers. You can also customize keywords (regex is supported) to filter order numbers and addresses and completely or partially replace them. Moreover, you can block or trigger alarms for status codes other than 200 returned by websites to meet compliance requirements.
Note:
CLB WAF doesn't support the data leakage protection feature. For more information on detailed specifications, see Billing Overview.
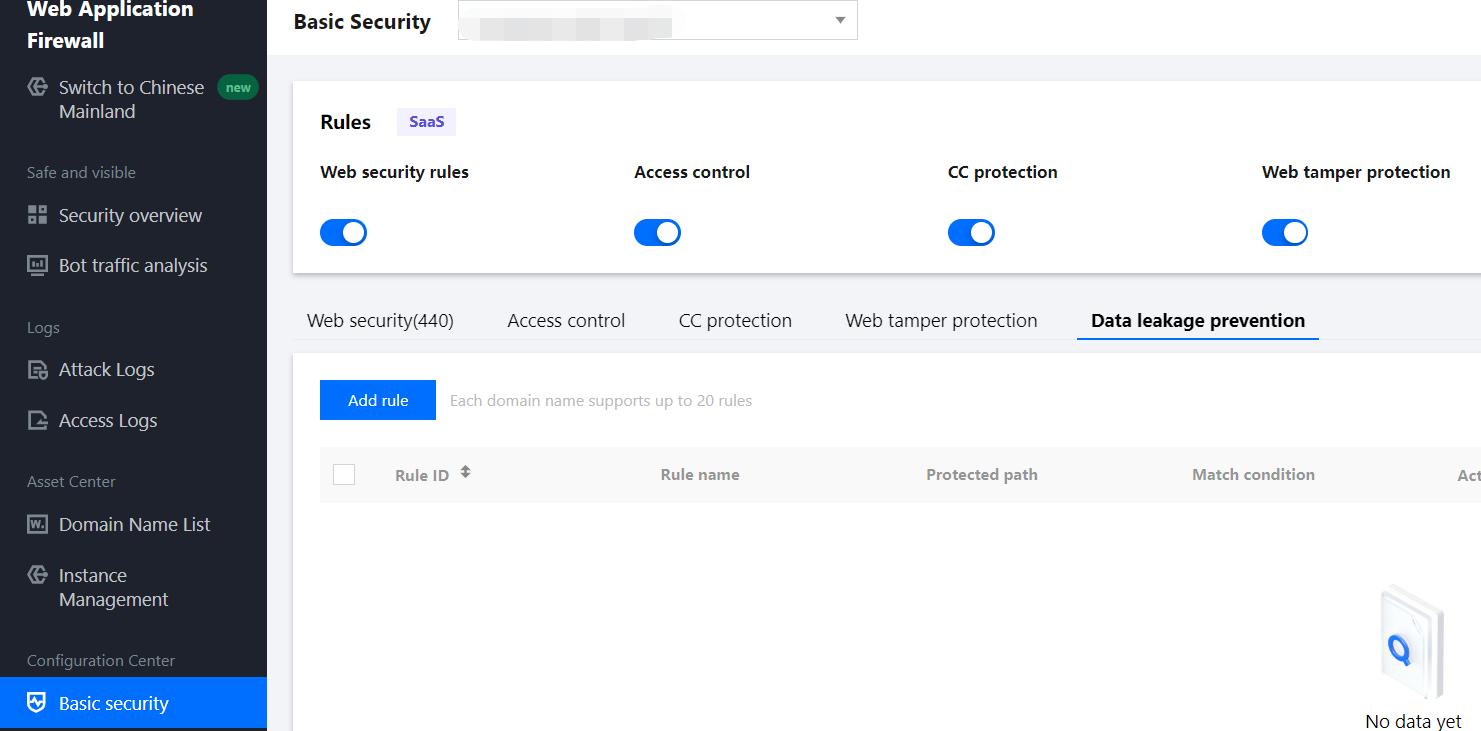
1. Log in to the WAF console and select Configuration Center > Basic Security on the left sidebar.
2. On the basic security page, select the target domain name in the top-left corner and click Data leakage prevention.
3. On the page displayed, click Add rule, and the rule adding window will pop up.
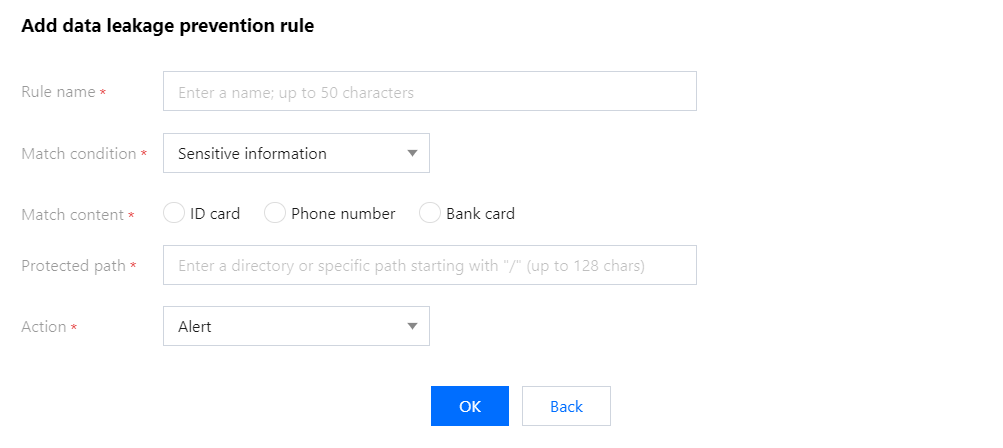
4. In the pop-up window, configure relevant fields and click OK.
Field description:
Rule name: Leakage protection rule name of up to 50 characters. You can search for rules by name in attack logs.
Condition: Match condition for leakage protection. You can select sensitive information, keyword, or response code, and the match content and action type vary by the condition as follows:
Condition
Content
Action
Sensitive information
Identity card/mobile/bank card numbers
Alert, Replace all, Show the last 4 digits, Show the first 4 digits, and Block
Keyword
Keyword and regex
Alert, Replace all, and Blcok
Response code
400, 403, 404, other 4XX codes, 500, 501, 502, 504, and other 5XX codes
Alert and Block
Content: The match content varies by match condition.
Protected path: Specific path where the information needs to be protected from leakage. It supports configuration of the root directory to detect sensitive information across the entire business website, which can be entered as needed.
Action: Action to be executed after the match condition is hit. You can view the relevant hit information in attack logs.
5. Once the rule takes effect, it will begin protecting the sensitive information returned in your web pages as shown in the following example that performs the Replace action (demo content):
Before protection is enabled:
After protection is enabled:
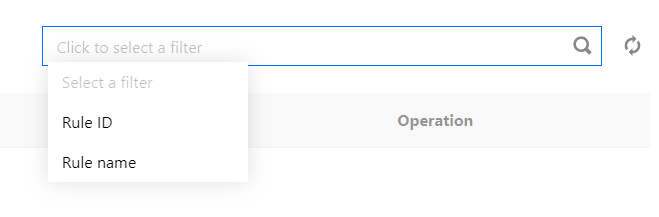
Search rules
1. On the basic security page, select the target domain name in the top-left corner and click Data leakage prevention.
2. On the page displayed, click the search box to filter rules by keywords in a rule ID, rule name, and protected path.
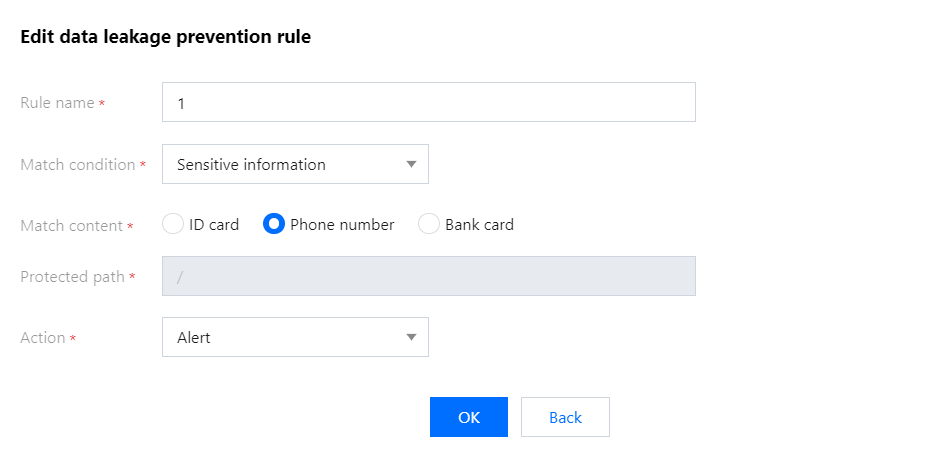
Editing a Rule
1. On the basic security page, select the target domain name in the top-left corner and click Data leakage prevention.
2. On the page displayed, select the target rule, click Edit in the Operation column, and the rule editing window will pop up.
3. In the pop-up window, modify relevant parameters and click OK.
Deleting a Rule
1. On the basic security page, select the target domain name in the top-left corner and click Data leakage prevention.
2. On the page displayed, select the target rule, click Delete in the Operation column, and the deletion confirmation window will pop up.