제품 업데이트
Tencent Cloud 오디오/비디오 단말 SDK 재생 업그레이드 및 권한 부여 인증 추가
TRTC 월간 구독 패키지 출시 관련 안내
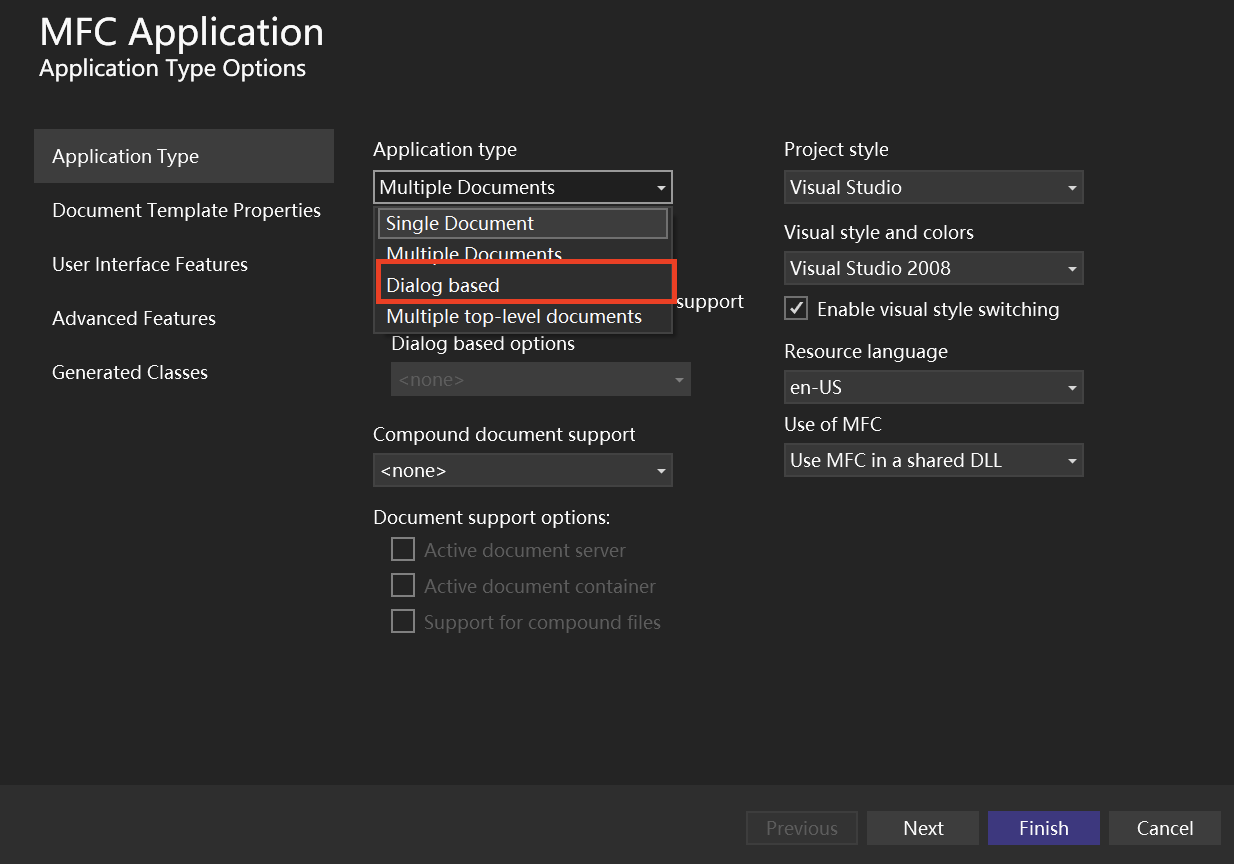
.vcxproj file resides.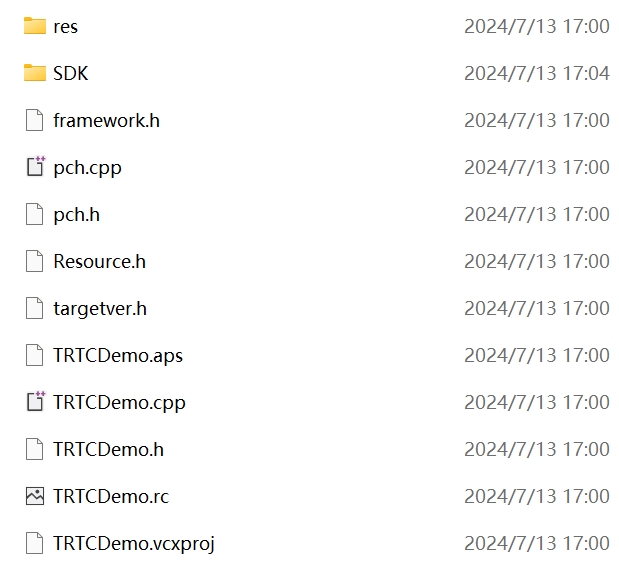
.sln project file, Solution Explorer in the right toolbar > Right-click menu for the project > Properties, and perform the following configurations:$(ProjectDir)SDK\\CPlusPlus\\Win64\\include and $(ProjectDir)SDK\\CPlusPlus\\Win64\\include\\TRTC.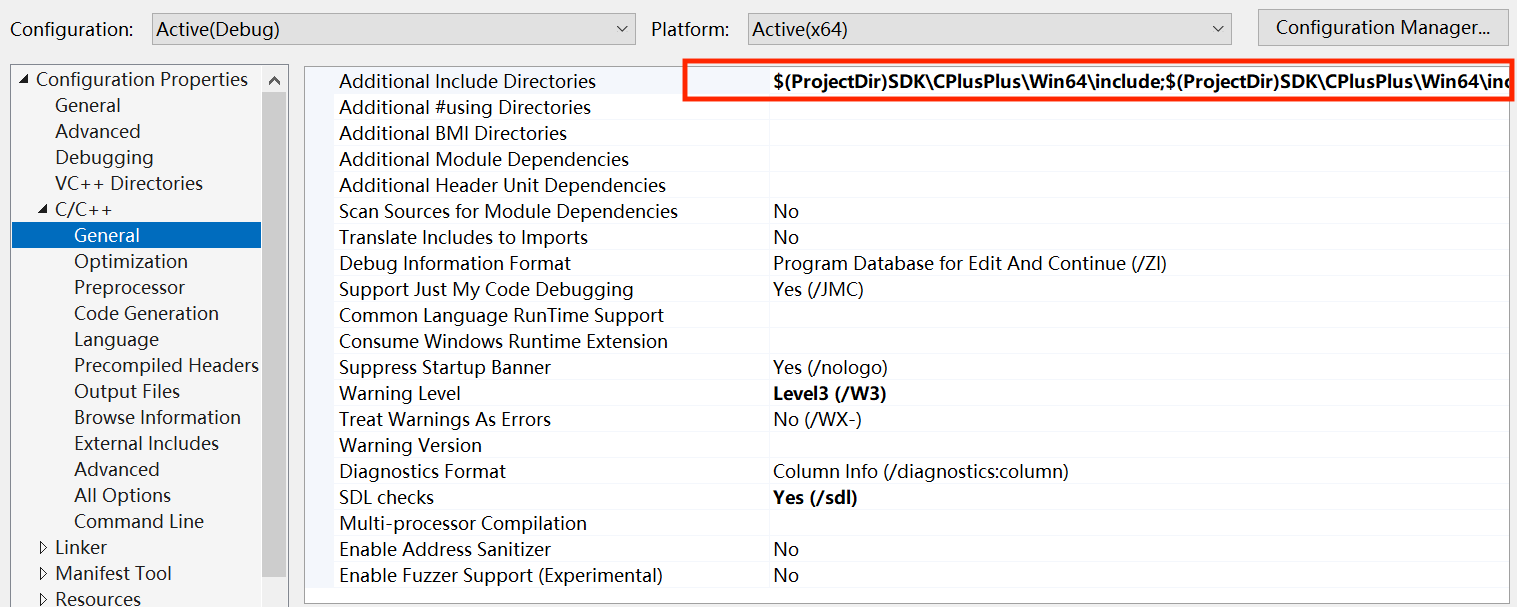
$(ProjectDir)SDK\\CPlusPlus\\Win64\\lib.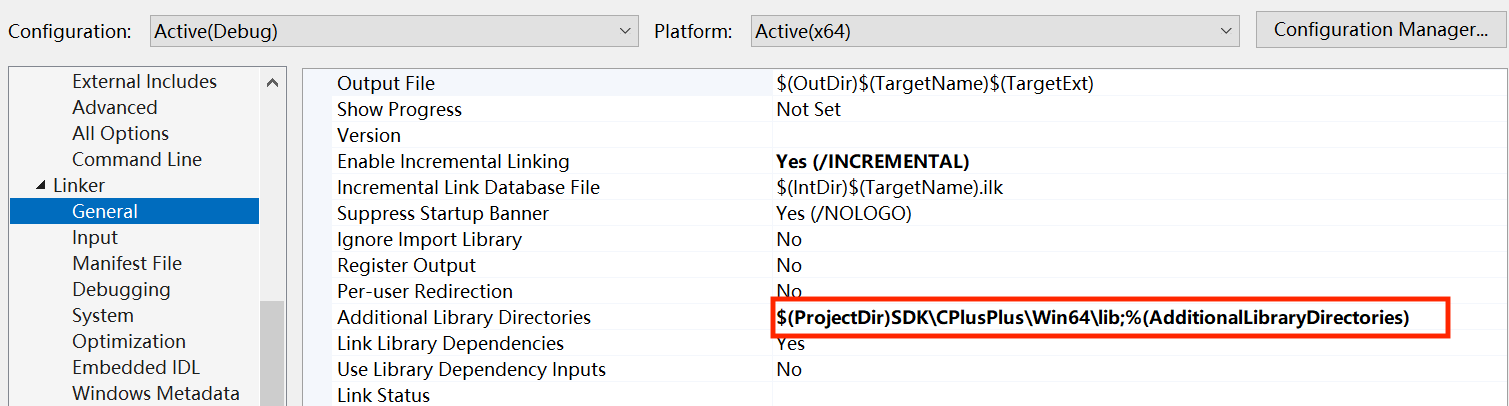
liteav.lib.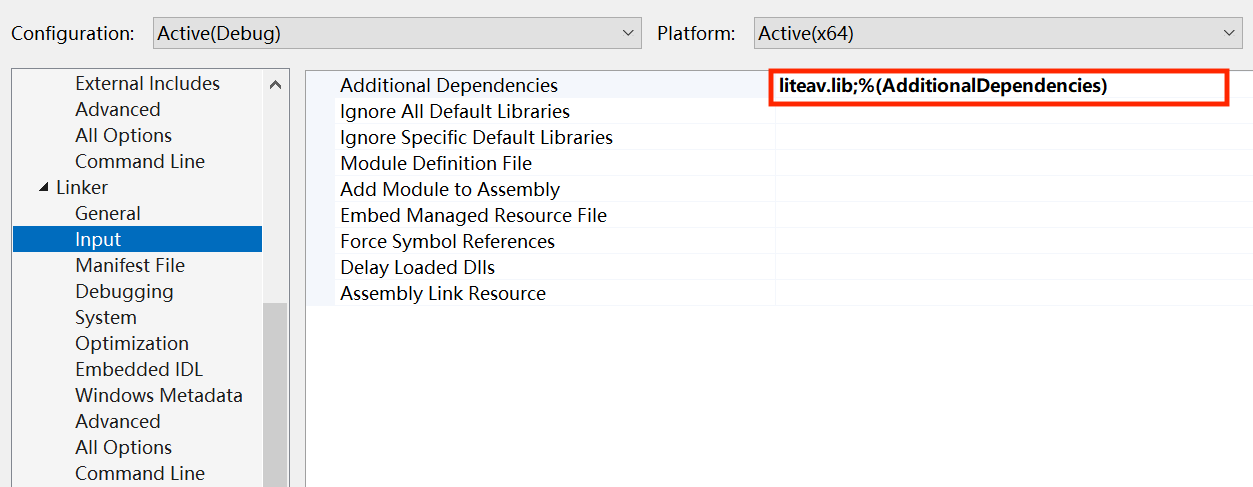
copy /Y $(ProjectDir)SDK\\CPlusPlus\\Win64\\lib\\*.dll $(OutDir).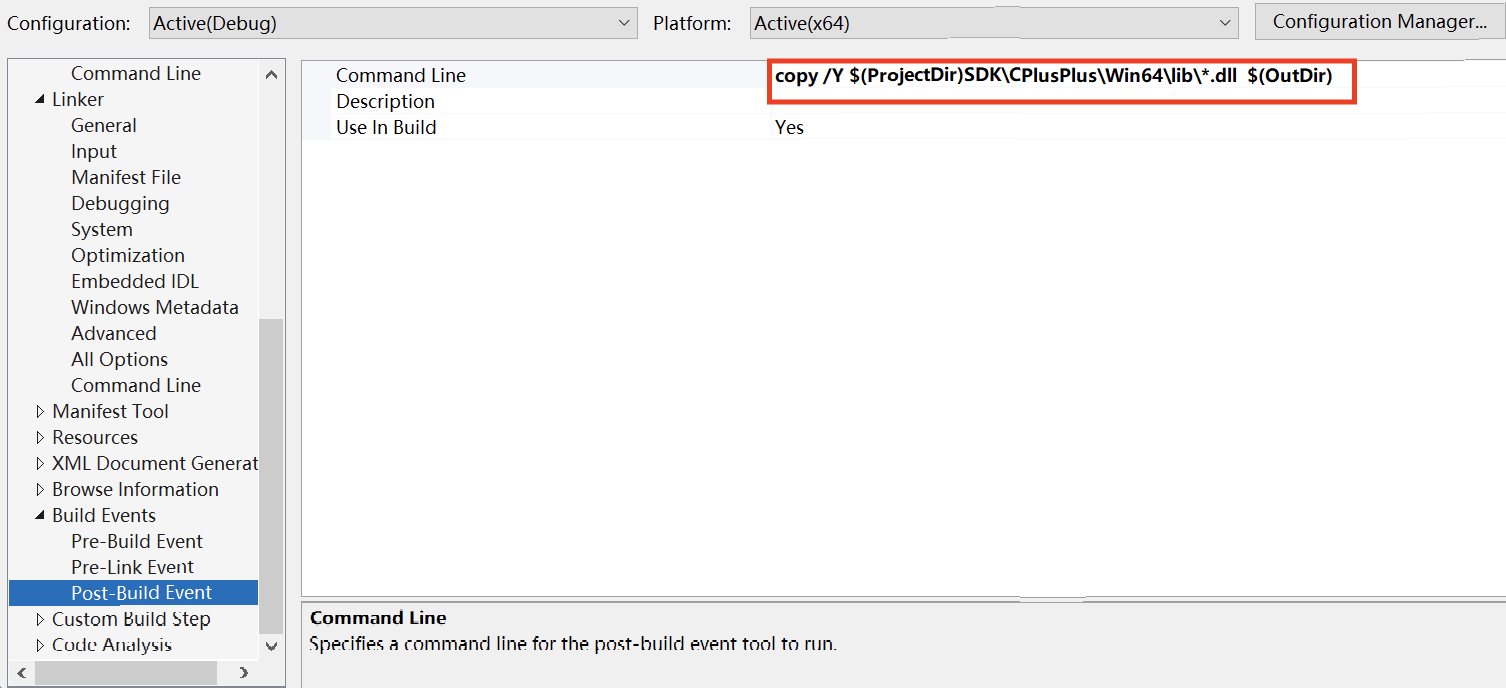
#include "ITRTCCloud.h"
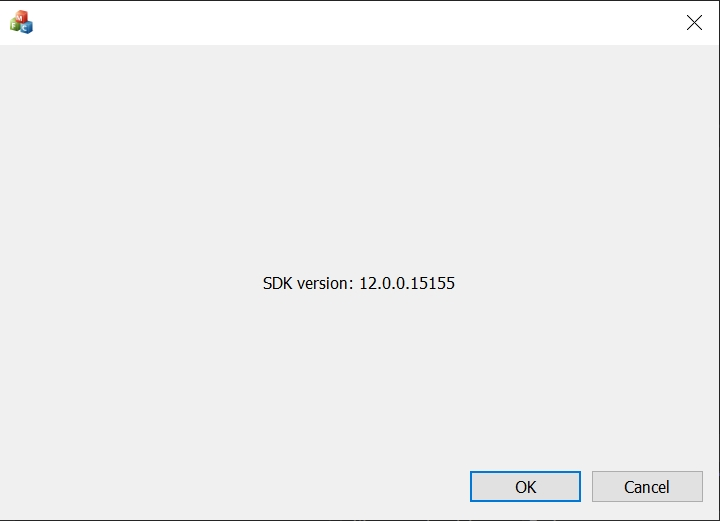
ITRTCCloud: undefined identifier.OnInitDialog function:ITRTCCloud * pTRTCCloud = getTRTCShareInstance();CString szText;szText.Format(L"SDK version: %hs", pTRTCCloud->getSDKVersion());CWnd *pStatic = GetDlgItem(IDC_STATIC);pStatic->SetWindowTextW(szText);
"ITRTCCloud.h" in the 'PROJECTNAME'.h file, make the class in this file publicly inherit from CWinApp and ITRTCCloudCallback, and declare listening events and TRTCCloud member variables.#include "ITRTCCloud.h" // Include the TRTC header fileclass CRTCWindowsApp : public CWinApp, public ITRTCCloudCallback{public:CRTCWindowsApp();// Overridespublic:virtual BOOL InitInstance();virtual void onError(TXLiteAVError errCode, const char* errMsg, void* extraInfo) override; // Listen for the 'onError' eventvirtual void onWarning(TXLiteAVWarning warningCode, const char* warningMsg, void* extraInfo) override; // Listen for the 'onWarning' eventvirtual void onEnterRoom(int result) override; // Listen for the 'onEnterRoom' eventvirtual void onExitRoom(int reason) override; // Listen for the 'onExitRoom' event// Get the TRTCCloud instancestatic CRTCWindowsApp* GetInstance(){return static_cast<CRTCWindowsApp*>(AfxGetApp());}// ImplementationDECLARE_MESSAGE_MAP()public:ITRTCCloud* trtc_cloud_; // Declare the TRTCCloud member variable};
getTRTCShareInstance in the InitInstance function of the 'PROJECTNAME'.h file.// Initialize the TRTCCloud instance and add event listeningtrtc_cloud_ = getTRTCShareInstance();trtc_cloud_->addCallback(this);
SetRegistryKey(_T("Local AppWizard-Generated Applications")) method.// Handle the listening eventsvoid CRTCWindowsApp::onError(TXLiteAVError errCode, const char* errMsg, void* extraInfo) {// Listen for the "onError" event and print the corresponding information}void CRTCWindowsApp::onWarning(TXLiteAVWarning warningCode, const char* warningMsg, void* extraInfo) {// Listen for the "onWarning" event and print the corresponding information}void CRTCWindowsApp::onEnterRoom(int result) { // Listen for the "onEnterRoom" event and print the corresponding informationif (result > 0) {MessageBox(NULL, TEXT("Enter room successfully"), TEXT("Notice"), MB_OK | MB_ICONINFORMATION);}else {MessageBox(NULL, TEXT("Enter room failed"), TEXT("Notice"), MB_OK | MB_ICONINFORMATION);}}void CRTCWindowsApp::onExitRoom(int reason) { // Listen for the "onExitRoom" event and print the corresponding informationif (reason == 0) {MessageBox(NULL, TEXT("Exit current room by calling the 'exitRoom' api of sdk"), TEXT("Notice"), MB_OK | MB_ICONINFORMATION);} else if (reason == 1) {MessageBox(NULL, TEXT("Kicked out of the current room by server through the restful api"), TEXT("Notice"), MB_OK | MB_ICONINFORMATION);} else if (reason == 2) {MessageBox(NULL, TEXT("The current room is dissolved by server through the restful api"), TEXT("Notice"), MB_OK | MB_ICONINFORMATION);}}
TRTCParams and call enterRoom to successfully enter the room, which is usually called after clicking the Start Call button.Parameter | Type | Description |
sdkAppId | number | |
userId | string | User ID specified by you. |
userSig | string | |
roomId | number | Room ID specified by you, usually a unique room ID. |
void CRTCWindowsApp::OnBnClickedButton() {// Modify the following trtcParams parameters to your ownliteav::TRTCParams trtcParams;trtcParams.sdkAppId = 1400000123;trtcParams.userId = "denny";trtcParams.userSig = "xxx";trtcParams.roomId = 123321;// For multi-party video calls, `TRTC_APP_SCENE_LIVE` is recommendedtrtc_cloud_->enterRoom(trtcParams, liteav::TRTCAppSceneLIVE);}
setLocalRenderParams for local preview, then call startLocalPreview for local preview. After successfully calling enterRoom, the stream push will start.void CRTCWindowsApp::OnBnClickedButton(){// Set local preview rendering parametersliteav::TRTCRenderParams render_params;render_params.mirrorType = liteav::TRTCVideoMirrorType_Enable;render_params.fillMode = TRTCVideoFillMode_Fill;ITRTCCloud* trtcCloud = CRTCWindowsApp::GetInstance()->trtc_cloud_;trtcCloud->setLocalRenderParams(render_params);// Initialize pLocalVideoViewCWnd* pLocalVideoView = GetDlgItem(AFX_IDC_PICTURE);if (pLocalVideoView != nullptr) {auto local_view = (liteav::TXView)(pLocalVideoView->GetSafeHwnd());// Preview the collected content locallytrtcCloud->startLocalPreview(local_view);}}
stopLocalPreview to turn off the camera preview and stop pushing local video information.void CRTCWindowsApp::OnBnClickedButton(){TRTCCloud* trtcCloud = CRTCWindowsApp::GetInstance()->trtc_cloud_;trtcCloud->stopLocalPreview();}
startLocalAudio to turn on microphone capture. Select one of the following sound Quality parameters according to your requirements.// Enable microphone acquisition and set the current scene to: Voice mode// For high noise suppression capability, strong and weak network resistanceITRTCCloud* trtcCloud = CRTCWindowsApp::GetInstance()->trtc_cloud_;trtcCloud->startLocalAudio(TRTCAudioQualitySpeech);
// Enable microphone acquisition, and set the current scene to: Music mode// For high fidelity acquisition, low sound quality loss, recommended to use with professional sound cardsITRTCCloud* trtcCloud = CRTCWindowsApp::GetInstance()->trtc_cloud_;trtcCloud->startLocalAudio(TRTCAudioQualityMusic);
stopLocalAudio to turn off microphone collection and stop pushing local audio information.ITRTCCloud* trtcCloud = CRTCWindowsApp::GetInstance()->trtc_cloud_;trtcCloud->stopLocalAudio();
onUserVideoAvailable(userId, true) notification, it means that there are video frames available to play in the road screen.startRemoteView/stopRemoteView to play or stop the remote video.// Play the videoCWnd* pLocalVideoView = GetDlgItem(AFX_IDC_PICTURE);if (pLocalVideoView != nullptr) {auto local_view = (liteav::TXView)(pLocalVideoView->GetSafeHwnd());ITRTCCloud* trtcCloud = CRTCWindowsApp::GetInstance()->trtc_cloud_;trtcCloud->startRemoteView("denny", liteav::TRTCVideoStreamTypeBig, video_view); // Start playing denny's video}// Stop the videoITRTCCloud* trtcCloud = CRTCWindowsApp::GetInstance()->trtc_cloud_;trtcCloud->stopRemoteView("denny", liteav::TRTCVideoStreamTypeBig); // Stop playing denny's videotrtcCloud->stopAllRemoteView(); // Stop all videos
muteRemoteAudio to mute or unmute the remote side's sound.// MuteITRTCCloud* trtcCloud = CRTCWindowsApp::GetInstance()->trtc_cloud_;trtcCloud->muteRemoteAudio("denny", true); // Mute dennytrtcCloud->muteAllRemoteAudio(true); // Mute all remote users
// UnmuteITRTCCloud* trtcCloud = CRTCWindowsApp::GetInstance()->trtc_cloud_;trtcCloud->muteRemoteAudio("denny", false); // Unmute dennytrtcCloud->muteAllRemoteAudio(false); // Unmute all remote users
exitRoom to exit the current room, and the TRTC SDK will notify you after check-out via the onExitRoom callback event.// Exit current roomvoid CRTCWindowsApp::OnBnClickedButton(){ITRTCCloud* trtcCloud = CRTCWindowsApp::GetInstance()->trtc_cloud_;trtcCloud->exitRoom();}
info_rtc@tencent.com.피드백