Practice for Auditing COS Bucket Encryption Configuration Using Custom SCF Functions
Download
Mode fokus
Ukuran font
Terakhir diperbarui: 2026-01-14 14:11:04
Introduction
You can use custom SCF functions to configure inspection of COS bucket encryption. After successful configuration, your bucket can achieve audit and governance. To learn more, see Config.
1. Log in to the SCF console, click Function Service in the left sidebar, and go to the function list page.
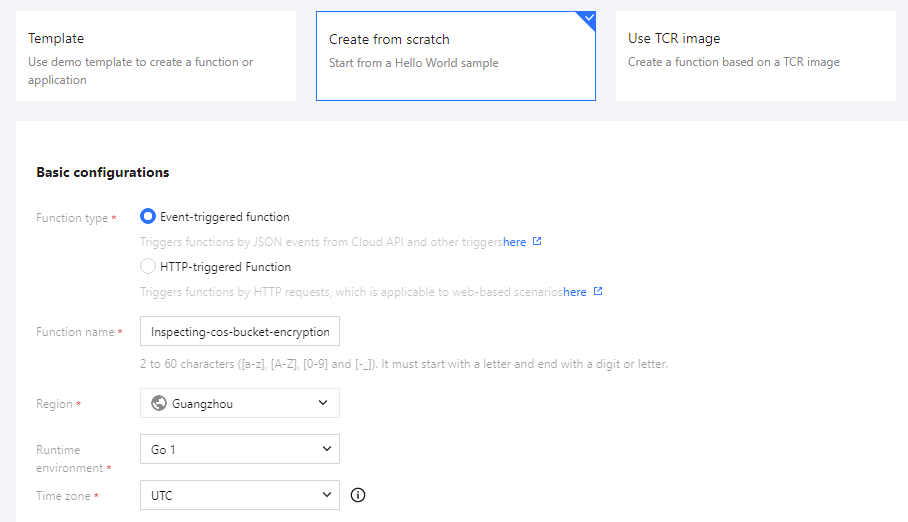
2. Create SCF. Click New to create SCF. Configure the following options:
Select template: choose the template type from scratch.
Basic Configuration:
Function type: select Event Function.
Function name: You can use the default function name or a custom function name.
Region: select the bucket region. The following uses Guangzhou as an example for explanation.
Runtime environment: select Go 1.
Timezone: Use the default setting UTC.
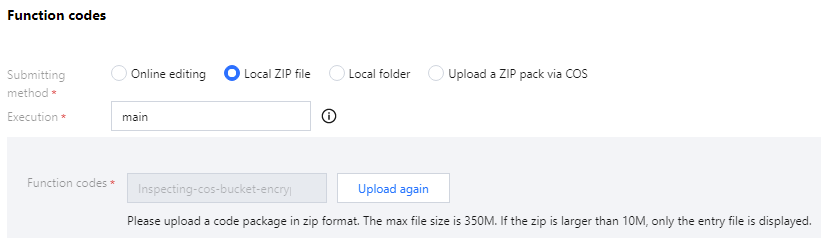
Function code:
Submission method: select local upload zip package and upload the zip package downloaded during the preparation work.
Execution method: Use the default setting main.
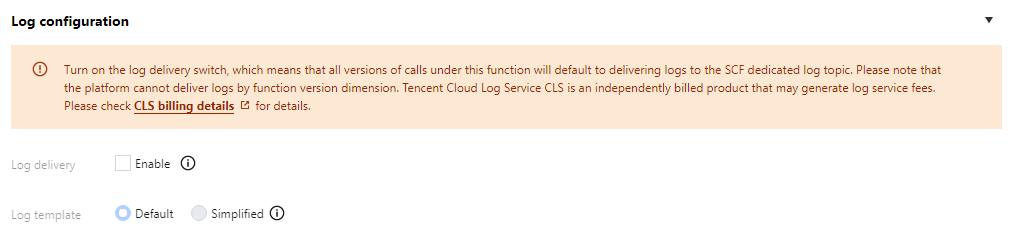
Log configuration: No setup required.
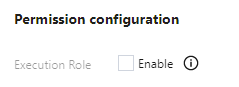
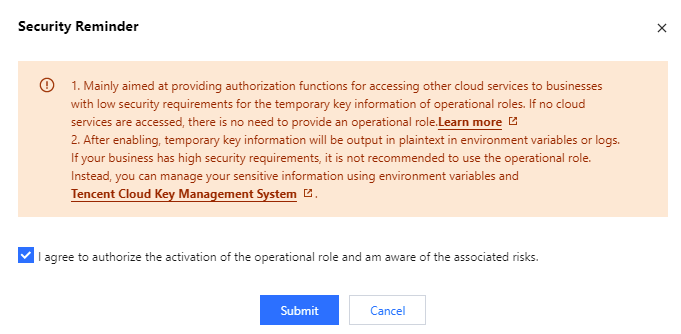
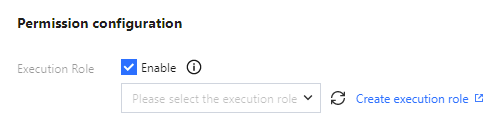
Advanced Configuration: Click the Advanced Configuration option and expand the configuration details. In the Permission Configuration, click Enable the role for runtime.
3. Agree and authorize, and Submit.
4. Click Create New Runtime Role.
Step 2: Create Custom Role
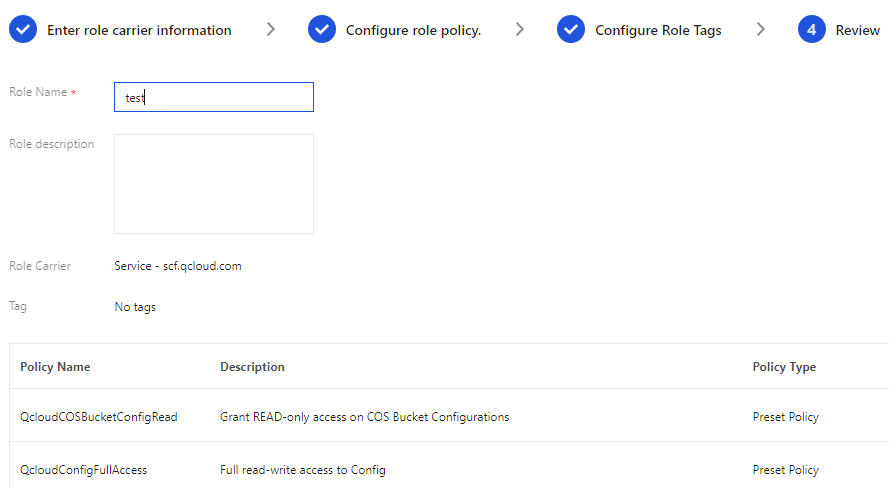
1. Log in to the CAM console, choose Role > Create Role > Tencent Cloud Product Service. On the New Custom Role page, search for and select Cloud Function (scf) in the product services, then click Next.
2. In the policy list, search for the QcloudCOSBucketConfigRead policy and the QcloudConfigFullAccess policy and select them. When done, click Next.
3. You can choose whether to configure role tags based on the actual situation. This step is optional. After completion, click Next.
4. On the Review page, set the role name and click Complete. At this point, all operations for creating a new custom role have been completed.
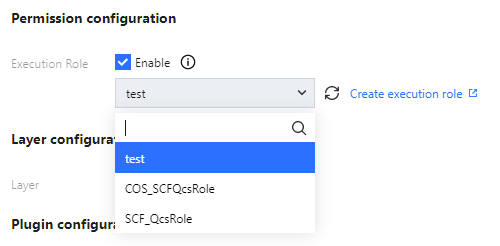
5. Return to the SCF creation page. In the runtime role section under permission configuration, refresh the runtime roles and select the previously created role.
6. Check the service agreement box. After completing the above configurations, check the agreement box. Click Complete, and the SCF has been successfully created.
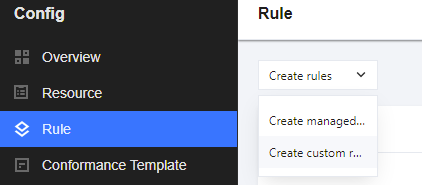
Step 3: Create a New Custom Rule
1. In the Config console, navigate to the Rules page. Choose New Rule > New Custom Rule to go to the rule configuration page.
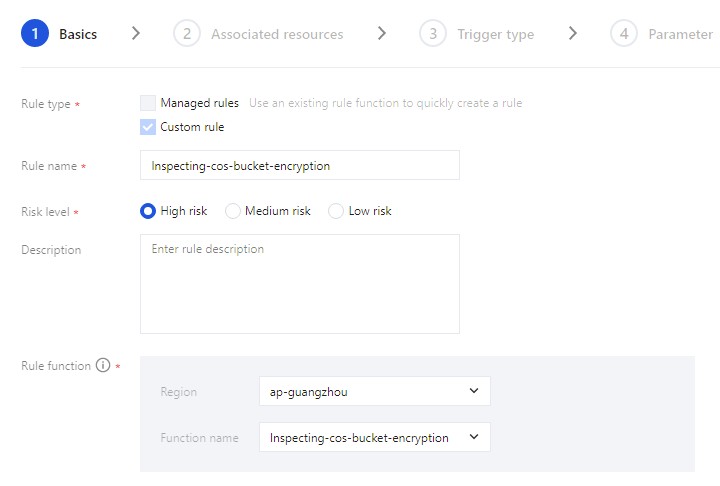
2. On the Basic Attributes page in the custom rule configuration, configure the basic information, select the newly deployed cloud function (SCF), and click Next.
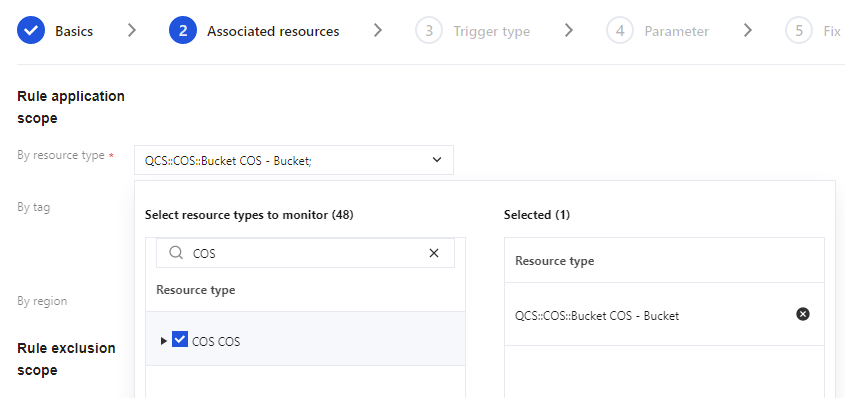
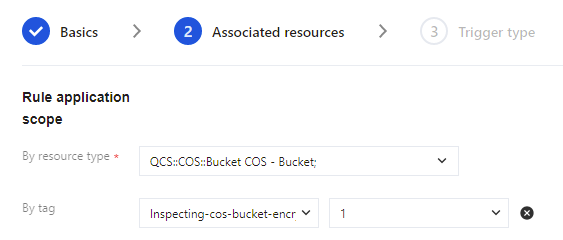
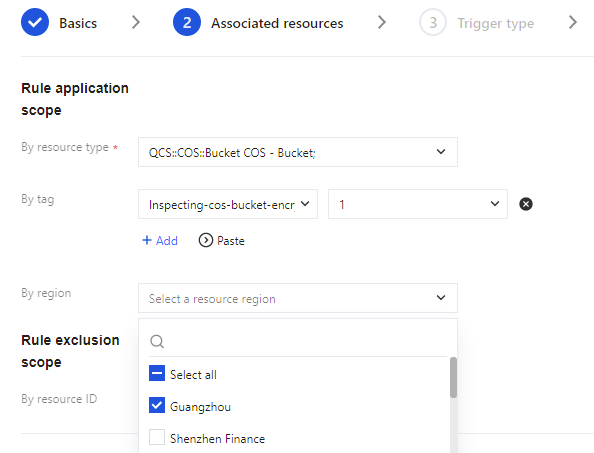
3. On the Associated Resources page, select COS Object Storage by resource type.
By Tag. If you need to inspect buckets with specific tags, you can set tags for the buckets to be inspected on the Bucket List Page in the COS console.
Go to the bucket list page.
Set the tags for the bucket.
Select the corresponding Tag to complete the operation.
By Region. If you need to inspect buckets in specific regions, configure this field. For example: to inspect buckets in the Guangzhou region, select Guangzhou from the By Region drop-down menu.
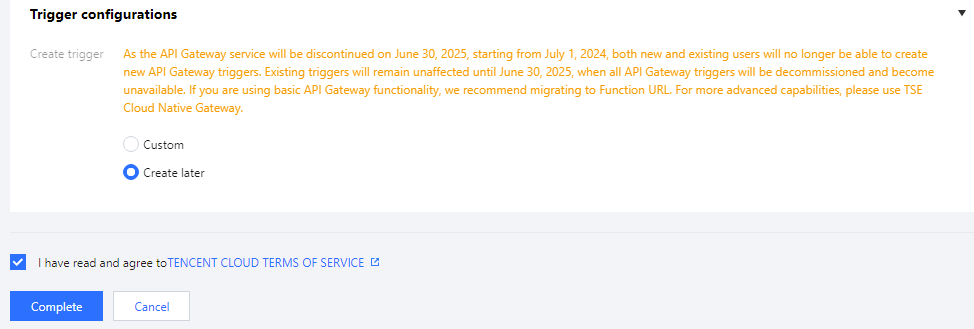
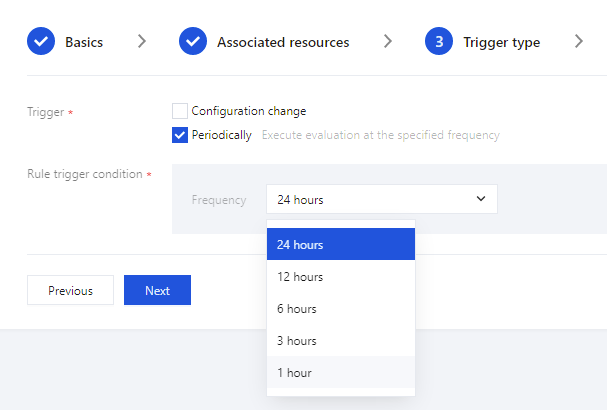
4. After completing the configuration in the previous step, click Next, to go to Trigger Mechanism: