Tencent Cloud Contact Center iOS SDK enables agents to handle calls via PC, SIP phones, or mobile.
This guide shows how to quickly set up and run the iOS demo.
Developer Environment Requirements
Xcode 9.0+.
iPhone/iPad with iOS 9.0+: Device must run iOS 9.0 or later.
Valid developer signing: Proper developer certificates and provisioning profiles must be set up for testing on a real device.
1. SdkAppId: A unique application ID created in Cloud Contact Center console. Each Tencent Cloud account can create up to 20 TCCC applications.
2. UserID: The member ID added in the Tencent Cloud Contact Center, usually an email address. For first-time setup, the admin account and password can be found in the Internal Message (sub-accounts must subscribe to TCCC product notification). Each SDKAppID supports multiple UserIDs, and additional licenses can be purchased at Agent Purchase.
3. SecretId and SecretKey: Developers need credentials to call the Cloud API. SecretId and Secretkey can be created in the Tencent Cloud console.
4. Token: A login credential obtained via CreateSDKLoginToken API. The app requests real-time tokens from your server, which stores the generation code and encryption key.
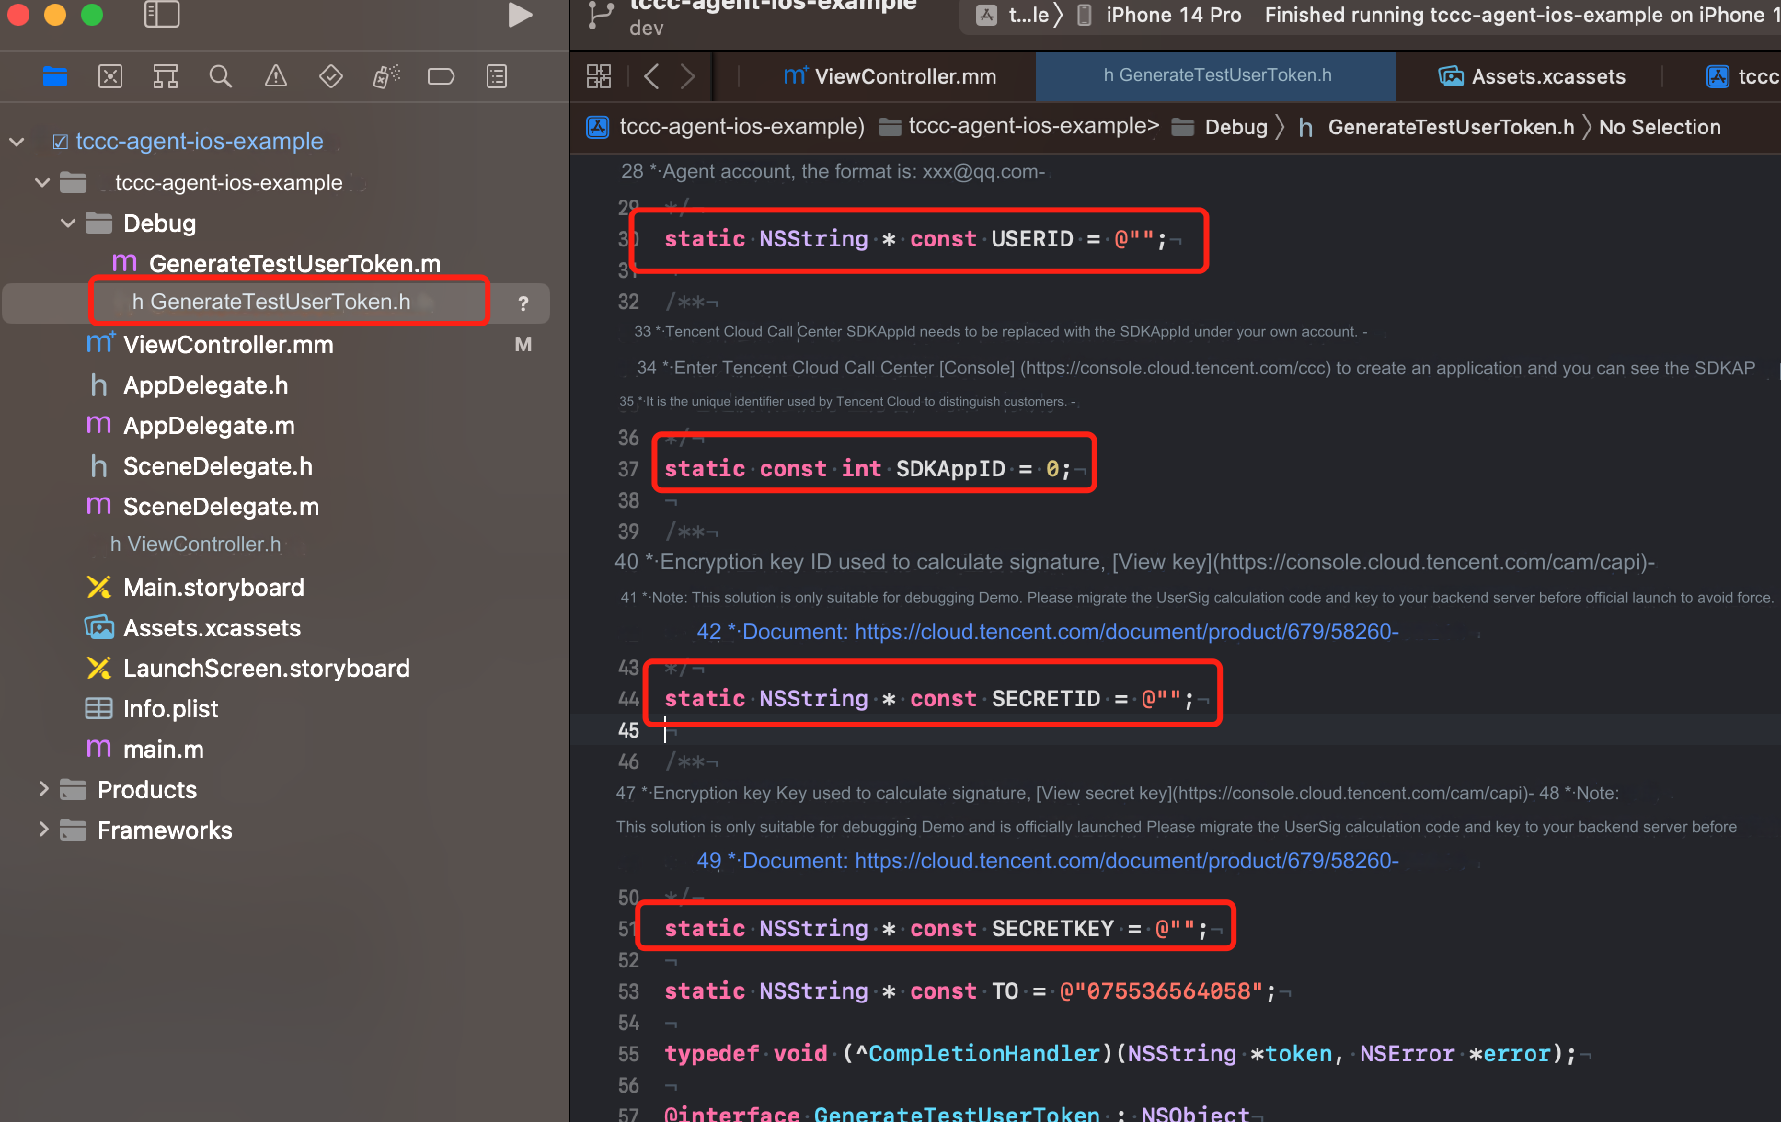
2. Set parameters in the GenerateTestUserToken.h file:
USERID: Agent account, format : xxx@qq.com
SDKAppID: Cloud Contact Center SDKAppId, which needs to be replaced with your own account's SDKAppId
SECRETID: The ID of the encryption key used to calculate the signature
SECRETKEY: The key of the encryption key used to calculate the signature
Caution:
Do not include the token generation code in your app's production version for the following reasons
The provided code is for testing basic SDK features only and is not secure for production. SECRETKEY in client-side code can be easily reverse-engineered, and web code is even more vulnerable. If your key is leaked, attackers can generate valid tokens and misuse your Tencent Cloud resources.
Safer approach is to place the token generation code and encryption key on your server. The app should request real-time tokens from your server as needed. This method is more secure, as breaching a server is significantly harder than cracking a client-side app. For more details, see Creating SDK Sign in Token
Step 3: Compile and Run the Demo
Open the source code project tccc-agent-ios-example with Xcode and click Run.