tencent cloud

SSL Certificates

Release Notes
Announcements
Notice on price adjustment of DigiCert and its affiliated brands'SSL certificates​
Price Change to DigiCert SSL Certificates
TrustAsia Root Certificate Update
Domain Validation Policy Update
SSL Certificate Service Console
Multi-Year SSL Certificate and Automatic Review
Notice on Stopping the Issuance of 2-Year SSL Certificates by CAs Starting from September 1, 2020
Announcement on Stop Using the Symantec SSL Certificate Name After 30 April 2020
Notice on Certificate Revocation Due to Private Key Compromises
Notice on Application Limits for DV SSL Certificates
Notice on Adjustment of Free SSL Certificates Policy
Let's Encrypt Root Certificate Expired on September 30, 2021
Product Introduction
Overview
Introduction to Tencent Cloud SSL Certificates
Strengths
Advantages of HTTPS
Browser Compatibility Test Report
Multi-Year SSL Certificate and Automatic Review Overview
SSL Certificate Security
Purchase Guide
Pricing
SSL Certificate Purchase Process
SSL Certificate Selection
Paid SSL Certificates Renewal
SSL Certificate Renewal Process
SSL Certificate Refund Process
Getting Started
Certificate Application
Information Submission Process for Paid SSL Certificates
Domain Ownership Validation
Domain Validation Method Selection
Automatic DNS Addition
DNS Validation
File Validation
Automatic DNS Validation
Automatic File Validation
Validation Result Troubleshooting Guide
Operation Guide
Domain Ownership Verification
Uploading Certificates
Secured Seal
CSR Management
Certificate Installation
Installing an SSL Certificate on a Tencent Cloud Service
Installation of International Standard Certificates
Selecting an Installation Type for an SSL Certificate
Certificate Management
Instructions on SSL Certificate Auto-Renewal
Certificate Hosting
Uploading (Hosting) an SSL Certificate
Reminding Reviewers to Review an SSL Certificate Application
Revoking an SSL Certificate
Deleting an SSL Certificate
Reissuing an SSL Certificate
Ignoring SSL Certificate Notifications
Customizing SSL Certificate Expiration Notifications
API Documentation
History
Introduction
API Category
Making API Requests
Certificate APIs
Certificate Renewal (Certificate ID Unchanged) APIs
CSR APIs
Data Types
Error Codes
Use Cases
Automatic Solution for Implementing and Issuing Multi-Year Certificates and Binding Resources
Apple ATS Server Configuration
Quickly Applying for a Free SSL Certificate via DNSPod
Enabling Tencent Cloud DDNS and Installing Free Certificates for Synology NAS
Batch Applying for and Downloading Free Certificates Using Python-based API Calls
Profile Management
Adding Organization Profile
Adding Administrator
Adding Domain
Troubleshooting
Domain Validation Failed
Domain Security Review Failed
Website Inaccessible After an SSL Certificate is Deployed
404 Error After the SSL Certificate is Deployed on IIS
“Your Connection is Not Secure” is Displayed After the SSL Certificate is Installed
Message Indicating Parsing Failure Is Displayed When a Certificate Is Uploaded
Automatic DNS Validation Failed for a Domain Hosted with www.west.cn
Host Name Field Cannot Be Edited in IIS Manager When Type Is Set to https
Message Indicating Intermediate Certificates Missing in Chain Is Displayed When a Free SSL Certificate Is Deployed on IIS
FAQs
SSL Certificate Selection
SSL Certificate Application
SSL Certificate Management
SSL Certificate Installation
SSL Certificate Region
SSL Certificate Review
SSL Certificate Taking Effect
SSL Certificate Billing and Purchase
SSL Certificate Validity Period
Related Agreement
SSL Service Level Agreement
Contact Us
Glossary

CSR Management

PDF
포커스 모드
폰트 크기
마지막 업데이트 시간: 2024-03-06 17:31:47

Use cases

CSR is short for Certificate Signing Request. To obtain an SSL certificate, you need to first generate a CSR file and submit it to the certificate authority (CA). A CSR file contains a public key and a distinguished name and is usually generated from a web server. A pair of public and private keys for encryption and decryption will be created at the same time. This document describes how to generate and manage CSR files.

Prerequisites

You have logged in to the SSL Certificate Service Console.

Directions

Generate a CSR

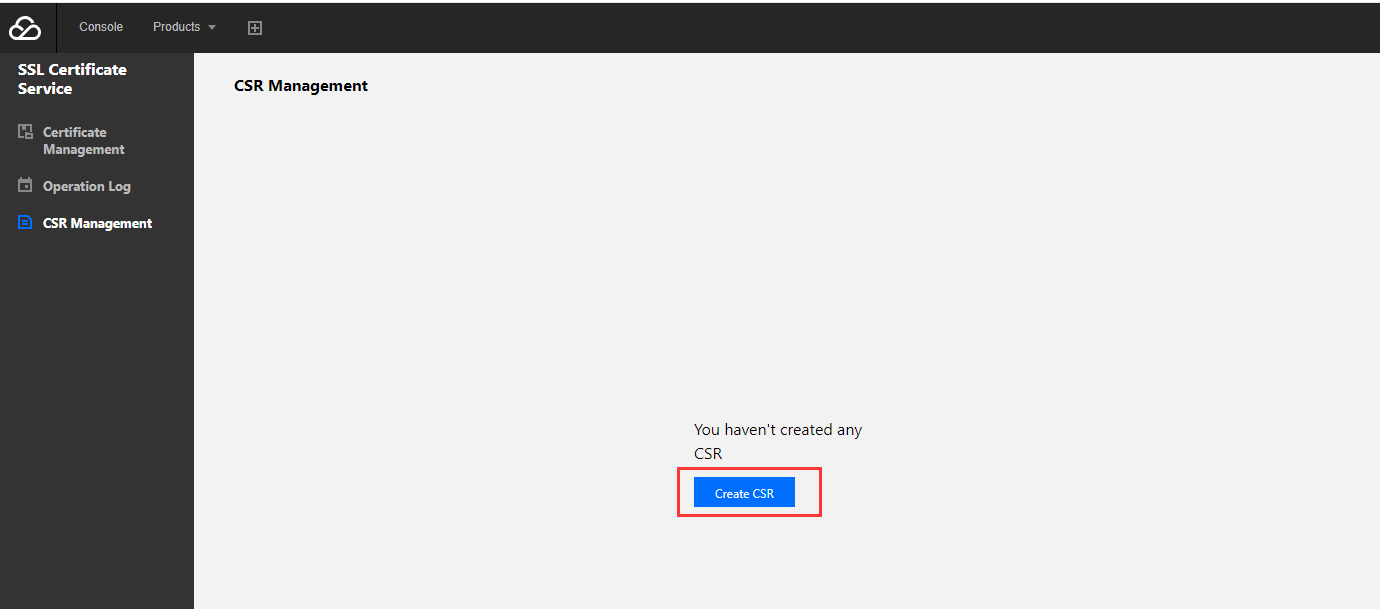
1. Select SSL Certificate Service > CSR Management and click Create CSR.


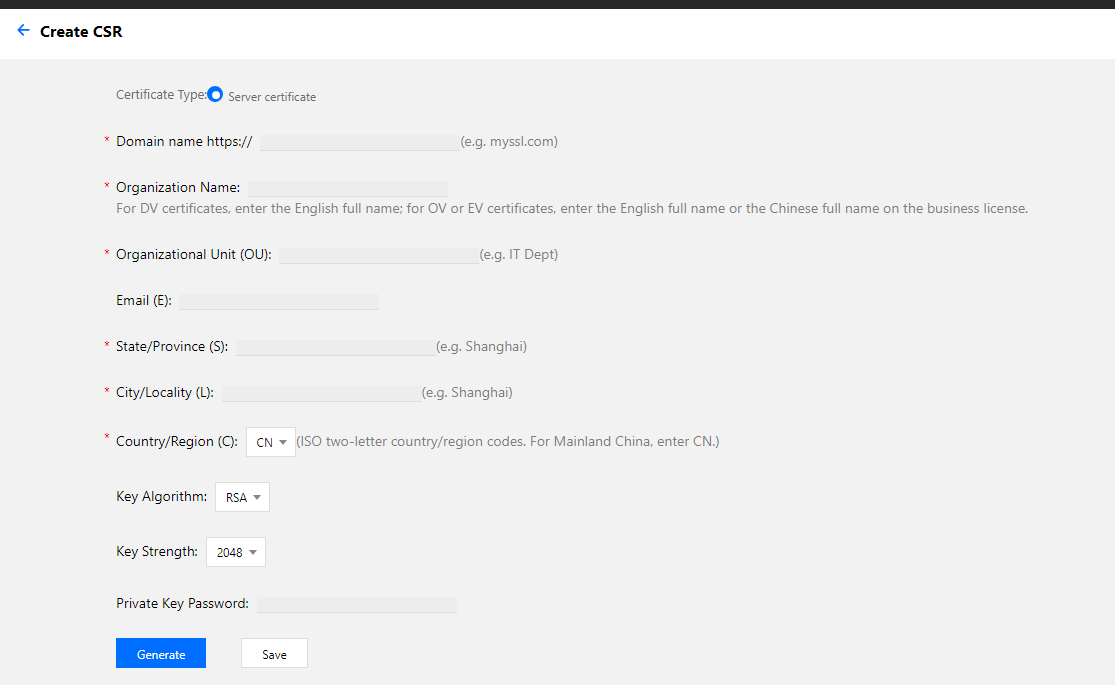
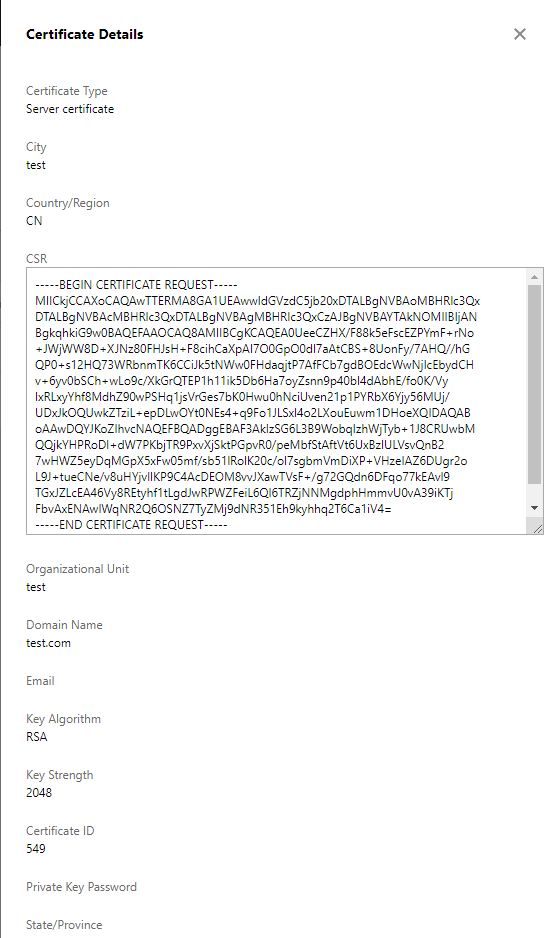
2. Enter the relevant information, as shown below:


Main parameters:
Domain name: Enter the domain name/wildcard domain name to be bound to the certificate.
Organization Name: The legally registered name of your organization. The complete English name must be entered for DV certificates. For OV and EV certificates, please enter the complete English or Chinese name as shown on the business license.
Organizational Unit: This field is used to differentiate departments within an organization, such as "Engineering Department " or "Human Resources".
Email (E): Your email address, which is optional.
State/Province (S): The state or province where your organization is located.
City/Locality (L): The city or locality where your organization is registered or located.
Country/Region (C): The code of the country/region where your organization is legally registered, in the format of two letters as defined by the International Organization for Standardization (ISO).
Key Algorithm: Optional. Value range: RSA, ECDSA.
Key Strength: Optional. Value range: 2048, 4096.
Private Key Password: Password for the private key, which is optional.
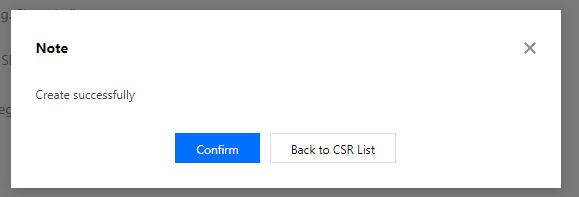
3. Click Generate. The following prompt will pop up when the CSR has been successfully created.


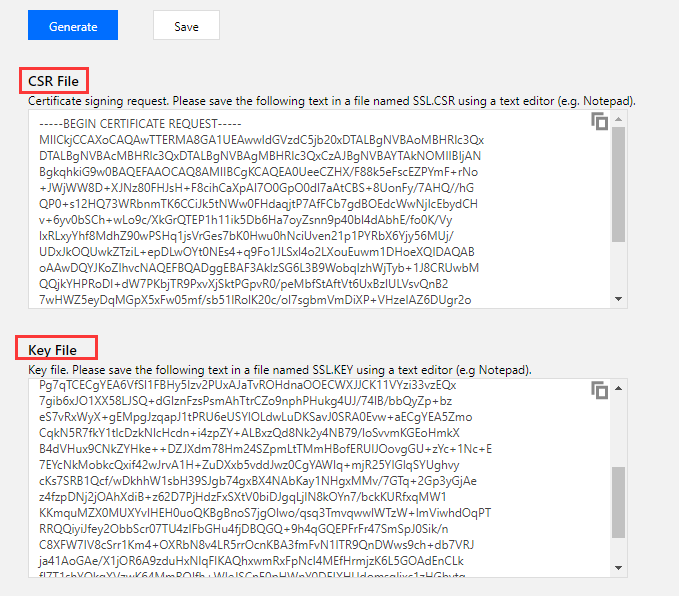
4. Click Confirm to view the CSR File and Key File.
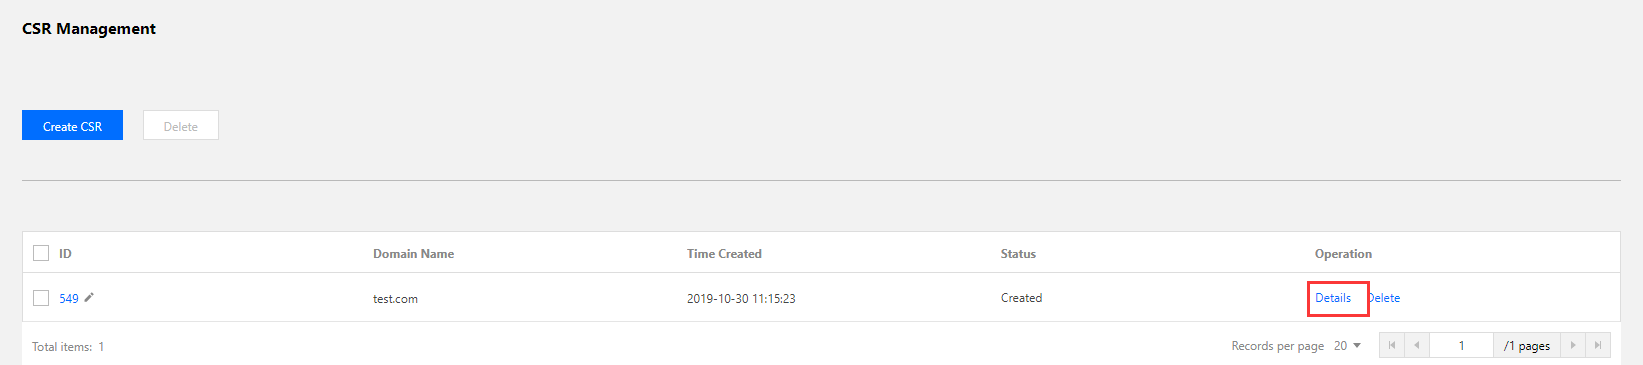


Manage a CSR

You can view, delete, or perform other operations on a CSR in CSR Management.
1. Click Details to view the CSR information.


2. Select a CSR and click Delete to delete it.


3. Add remarks to a CSR to distinguish the CSRs used for different projects.


도움말 및 지원

문제 해결에 도움이 되었나요?

피드백