tencent cloud

SSL Certificates

Release Notes
Announcements
Notice on price adjustment of DigiCert and its affiliated brands'SSL certificates​
Price Change to DigiCert SSL Certificates
TrustAsia Root Certificate Update
Domain Validation Policy Update
SSL Certificate Service Console
Multi-Year SSL Certificate and Automatic Review
Notice on Stopping the Issuance of 2-Year SSL Certificates by CAs Starting from September 1, 2020
Announcement on Stop Using the Symantec SSL Certificate Name After 30 April 2020
Notice on Certificate Revocation Due to Private Key Compromises
Notice on Application Limits for DV SSL Certificates
Notice on Adjustment of Free SSL Certificates Policy
Let's Encrypt Root Certificate Expired on September 30, 2021
Product Introduction
Overview
Introduction to Tencent Cloud SSL Certificates
Strengths
Advantages of HTTPS
Browser Compatibility Test Report
Multi-Year SSL Certificate and Automatic Review Overview
SSL Certificate Security
Purchase Guide
Pricing
SSL Certificate Purchase Process
SSL Certificate Selection
Paid SSL Certificates Renewal
SSL Certificate Renewal Process
SSL Certificate Refund Process
Getting Started
Certificate Application
Information Submission Process for Paid SSL Certificates
Domain Ownership Validation
Domain Validation Method Selection
Automatic DNS Addition
DNS Validation
File Validation
Automatic DNS Validation
Automatic File Validation
Validation Result Troubleshooting Guide
Operation Guide
Domain Ownership Verification
Uploading Certificates
Secured Seal
CSR Management
Certificate Installation
Installing an SSL Certificate on a Tencent Cloud Service
Installation of International Standard Certificates
Selecting an Installation Type for an SSL Certificate
Certificate Management
Instructions on SSL Certificate Auto-Renewal
Certificate Hosting
Uploading (Hosting) an SSL Certificate
Reminding Reviewers to Review an SSL Certificate Application
Revoking an SSL Certificate
Deleting an SSL Certificate
Reissuing an SSL Certificate
Ignoring SSL Certificate Notifications
Customizing SSL Certificate Expiration Notifications
API Documentation
History
Introduction
API Category
Making API Requests
Certificate APIs
Certificate Renewal (Certificate ID Unchanged) APIs
CSR APIs
Data Types
Error Codes
Use Cases
Automatic Solution for Implementing and Issuing Multi-Year Certificates and Binding Resources
Apple ATS Server Configuration
Quickly Applying for a Free SSL Certificate via DNSPod
Enabling Tencent Cloud DDNS and Installing Free Certificates for Synology NAS
Batch Applying for and Downloading Free Certificates Using Python-based API Calls
Profile Management
Adding Organization Profile
Adding Administrator
Adding Domain
Troubleshooting
Domain Validation Failed
Domain Security Review Failed
Website Inaccessible After an SSL Certificate is Deployed
404 Error After the SSL Certificate is Deployed on IIS
“Your Connection is Not Secure” is Displayed After the SSL Certificate is Installed
Message Indicating Parsing Failure Is Displayed When a Certificate Is Uploaded
Automatic DNS Validation Failed for a Domain Hosted with www.west.cn
Host Name Field Cannot Be Edited in IIS Manager When Type Is Set to https
Message Indicating Intermediate Certificates Missing in Chain Is Displayed When a Free SSL Certificate Is Deployed on IIS
FAQs
SSL Certificate Selection
SSL Certificate Application
SSL Certificate Management
SSL Certificate Installation
SSL Certificate Region
SSL Certificate Review
SSL Certificate Taking Effect
SSL Certificate Billing and Purchase
SSL Certificate Validity Period
Related Agreement
SSL Service Level Agreement
Contact Us
Glossary

Installing an SSL Certificate on a GlassFish Server

PDF
포커스 모드
폰트 크기
마지막 업데이트 시간: 2024-03-06 17:38:41

Overview

This document describes how to install an SSL certificate on a GlassFish server.
Description
The certificate name cloud.tencent.com is used as an example.
The glassfish-4.0 version is used as an example.
The current server OS is CentOS 7. Detailed steps vary slightly by OS.
Before you install an SSL certificate, enable port 443 on the GlassFish server so that HTTPS can be enabled after the certificate is installed. For more information, see How Do I Enable Port 443 for a VM?.
For detailed directions on how to upload SSL certificate files to a server, see Copying Local Files to CVMs.

Prerequisites

A remote file copy tool such as WinSCP has been installed. Download the latest version from the official website. We recommend that you use CVM's file upload feature for deployment to CVM.
A remote login tool such as PuTTY or Xshell has been installed. Download the latest version from the official website.
The GlassFish service has been installed and configured on the current server.
The data required to install the SSL certificate includes:
Name
Description
Server IP address
IP address of the server, which is used to connect the PC to the server.
Username
The username used to log in to the server.
Password
The password used to log in to the server.
Notes
For a CVM instance purchased on the Tencent Cloud official website, log in to the CVM console to get the server IP address, username, and password.
If you have selected the By pasting method when applying for the SSL certificate, or your certificate brand is WoTrus, the Tomcat option to download the .pfx or .jks certificate file is not provided. Instead, you need to manually convert the format to generate a keystore as follows:
Access the conversion tool.
Upload the certificate and private key files in the Nginx folder to the conversion tool, enter the keystore password, click Submit, and convert the certificate to a .jks certificate.
The GlassFish service is installed in the /usr/share directory.

Directions

1. Log in to the SSL Certificate Service console and click Download for the certificate you need to install.
2. In the pop-up window, select Apache and JKS for the server type, click Download, and decompress the cloud.tencent.com certificate file package to a local directory. After decompression, you can get the certificate files of the corresponding types, which include the cloud.tencent.com_apache and cloud.tencent.com_jks folders.
Folder: cloud.tencent.com_apache
cloud.tencent.com.crt: Certificate file
cloud.tencent.com.key: Private key file
CSR file: cloud.tencent.com.csr file
Description
You can upload the CSR file when applying for a certificate or have it generated online by the system. It is provided to the CA and irrelevant to the installation.
3. Remotely log in to the GlassFish server.
4. Go to the /usr/share/glassfish4/glassfish/bin directory, run the ./asadmin command, and run the change-master-password --savemasterpassword=true domain1 command to change the domain administrator password as shown below:
Notes
The default installation directory of the domain1 service is /usr/share/glassfish4/glassfish/domains. Enter the domain according to the actual situation.
The default password is changeit. Press Enter and enter the new password, which should be the private key password you set when applying for the certificate.
If you haven't set a private key password when applying for the certificate, enter the password in the keystorePass.txt file in the cloud.tencent.com_jks folder.
5. In the /usr/share directory, run the mkdir temp command to create the temp folder.
6. Use WinSCP (a tool for copying files between a local computer and a remote computer) to log in to the GlassFish server. Then, copy the certificate file cloud.tencent.com.crt and the private key file cloud.tencent.com.key from the local directory to the temp folder.
Description
We recommend that you use CVM's file upload feature for deployment to CVM.
7. In the temp folder, run the following command to generate the PKCS12 file. When the system prompts you for a password during the process, enter the new password, which is the private key password.
openssl pkcs12 -export -in cloud.tencent.com.crt -inkey cloud.tencent.com.key -out mycert.p12 -name s1as
8. In the temp folder, run the ls -l command to check whether the PKCS12 file contains the certificate you applied for.
9. In the temp folder, run the following command to generate the keystore.jks file:
keytool -importkeystore -destkeystore keystore.jks -srckeystore mycert.p12 -srcstoretype PKCS12 -alias s1as
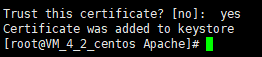
10. In the temp folder, run the following command to generate the cacert.jks file. When the system prompts you for a password during this process, enter the new password, which is the private key password.
keytool -importcert -trustcacerts -destkeystore cacerts.jks -file cloud.tencent.com.crt -alias s1as
If the system asks whether to trust the certificate, enter yes as shown in the following figure.

11. Replace the keystore.jks and cacert.jks files in the domain1/config directory with the files generated in steps 9 and 10.
12. In the /usr/share/glassfish4/glassfish/domains/domain1/config directory, change the port numbers in the domain.xml file.
<network-listeners>
<network-listener port="80" protocol="http-listener-1" transport="tcp" name="http-listener-1" thread-pool="http-thread-pool"></network-listener>
<network-listener port="443" protocol="http-listener-2" transport="tcp" name="http-listener-2" thread-pool="http-thread-pool"></network-listener>
<network-listener port="4848" protocol="admin-listener" transport="tcp" name="admin-listener" thread-pool="admin-thread-pool"></network-listener>
</network-listeners>
13. Start the GlassFish server and then you can access it through https://cloud.tencent.com.

If the security lock icon is displayed in the browser, the certificate has been installed successfully.
In case of a website access exception, troubleshoot the issue by referring to the following FAQs:
Notes
If anything goes wrong during this process, contact us.

도움말 및 지원

문제 해결에 도움이 되었나요?

피드백