This document describes how to install an SSL certificate on a WebLogic server.
Note:
The example certificate name used in this document is cloud.tencent.com. Please use the actual name of the certificate applied to your environment.
The example WebLogic version used in this document is 14.1.1.
The example operating system used in this document is Windows Server 2012 R2. The operational steps may vary slightly depending on the operating system.
Before installing an Weblogic certificate, enable port 443 on the WebLogic server so that HTTPS can be enabled after the certificate is installed. For more information, see How do I Enable Port 443 for a VM?.
The directories mentioned in the following steps are the directories of the test environment. Determine their specific paths based on your actual environment and needs.
1. Download the certificate package for the domain name cloud.tencent.com from the SSL Certificate Service console and decompress it to a local directory.
After decompression, you can obtain the certificate files of the relevant types, including the Tomcat folder and the CSR file:
Folder name: Tomcat
Folder content:
cloud.tencent.com.jks: certificate file
keystorePass.txt: password file (if you have set a private key password, this file will not be generated)
CSR file content: cloud.tencent.com.csr file
Note:
The CSR file is uploaded by you or generated online by the system when you apply for the certificate and is provided to the CA. It is irrelevant to the installation.
If you selected Paste CSR when applying for the SSL certificate or purchased the SSL certificate from Wotrus, the option to download the Tomcat certificate file is not provided. Instead, you need to manually convert the format to generate a keystore by using the conversion tool.
If the Tomcat certificate file is not provided, upload the certificate and private key files in the Nginx folder to the conversion tool, enter the keystore password, and click Submit to convert the certificate to a .jks certificate.
2. Log in to the server and create a folder. For example, temp in the C drive.
3. Decompress the certificate and password files and upload them to the temp folder.
4. Log in to the WebLogic Server Administration Console (default address: http://localhost:7001/console) by entering your username and password.
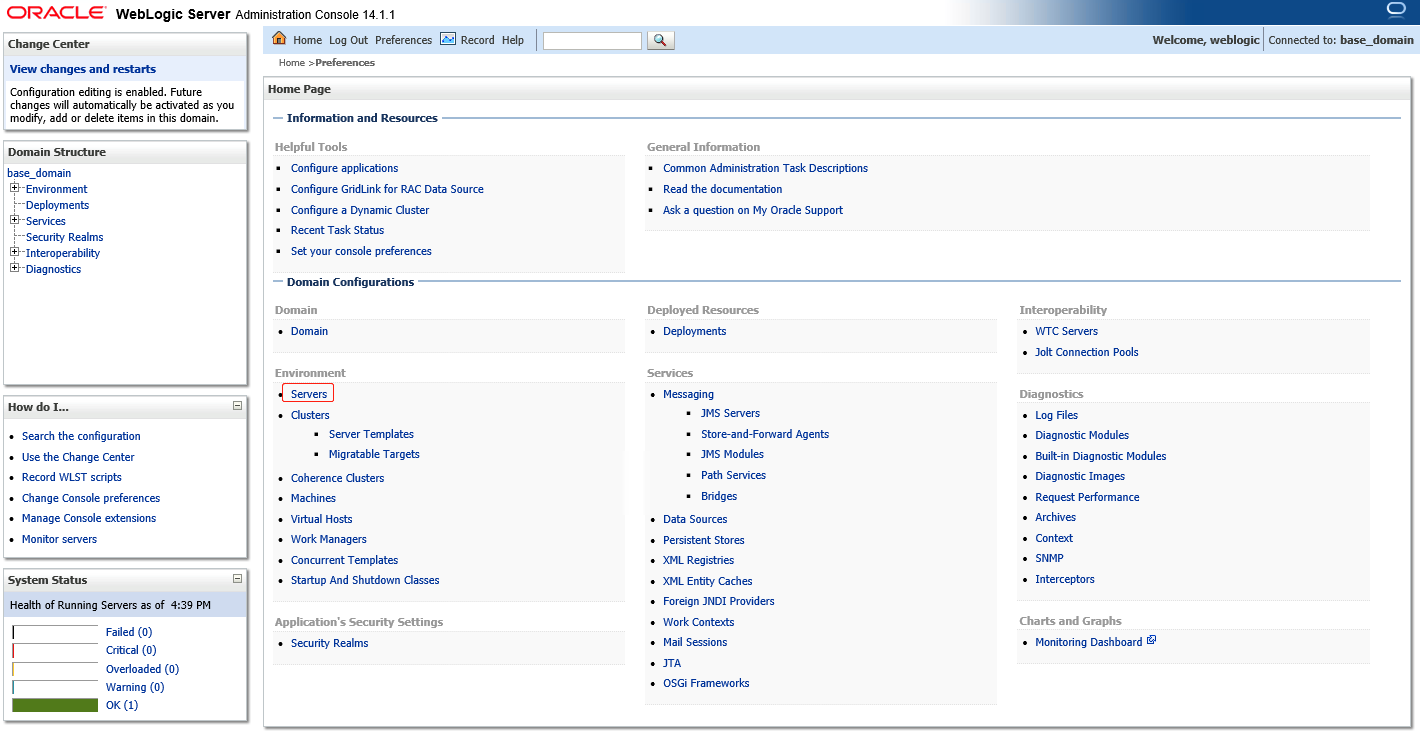
5. Choose Domain Configurations -> Servers.
6. On the Summary of Deployments page, select a target server such as AdminiServer.
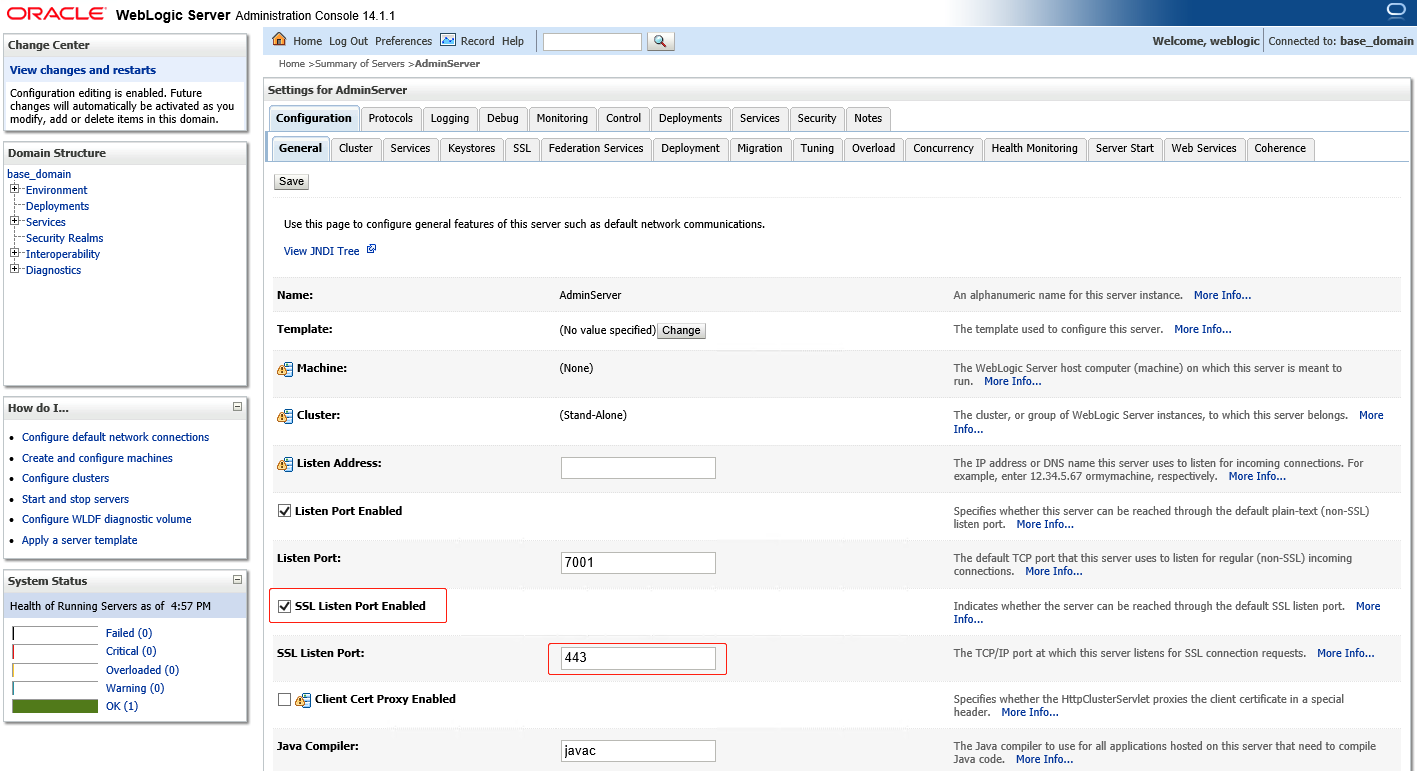
7. On the configuration management page for AdminiServer, select SSL Listening Port Enabled, set SSL Listening Port to 443, and click Save.
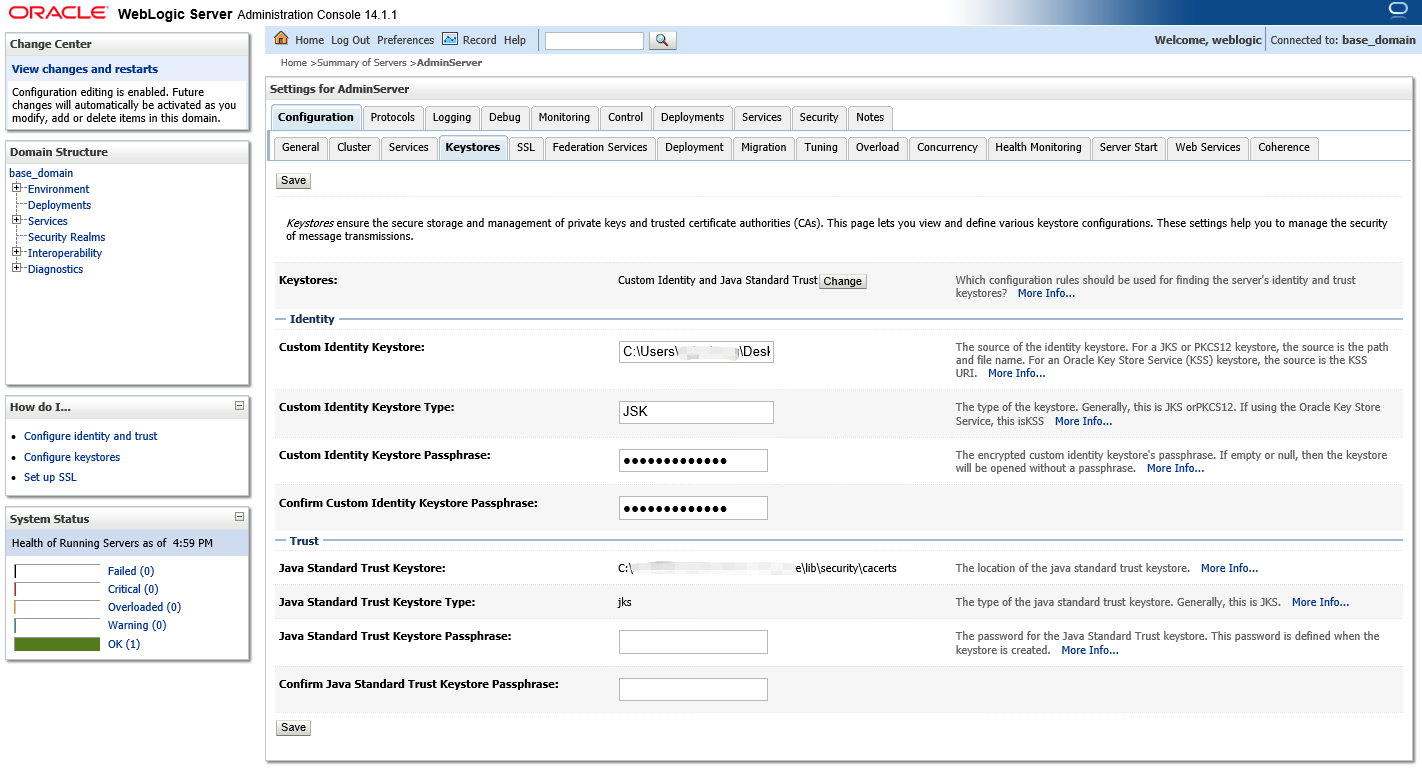
8. On the configuration management page for AdminiServer, click the Keystores tab, set the parameters, and click Save.
Set the parameters as follows:
Keystores: select Custom Identity and Java Standard Trust.
Custom Identity Keystore: enter the path to your JKS certificate file. For example, C:\\temp\\cloud.tencent.com.jks.
Custom Identity Keystore Type: enter JKS.
Custom Identity Keystore Passphrase: enter your JKS password.
Confirm Custom Identity Keystore Passphrase: re-enter your JKS password.
Note:
Custom Identity Keystore Passphrase and Confirm Custom Identity Keystore Passphrase are left empty by default and can be set to your JKS password. The settings of these 2 parameters do not affect the use of your certificate.
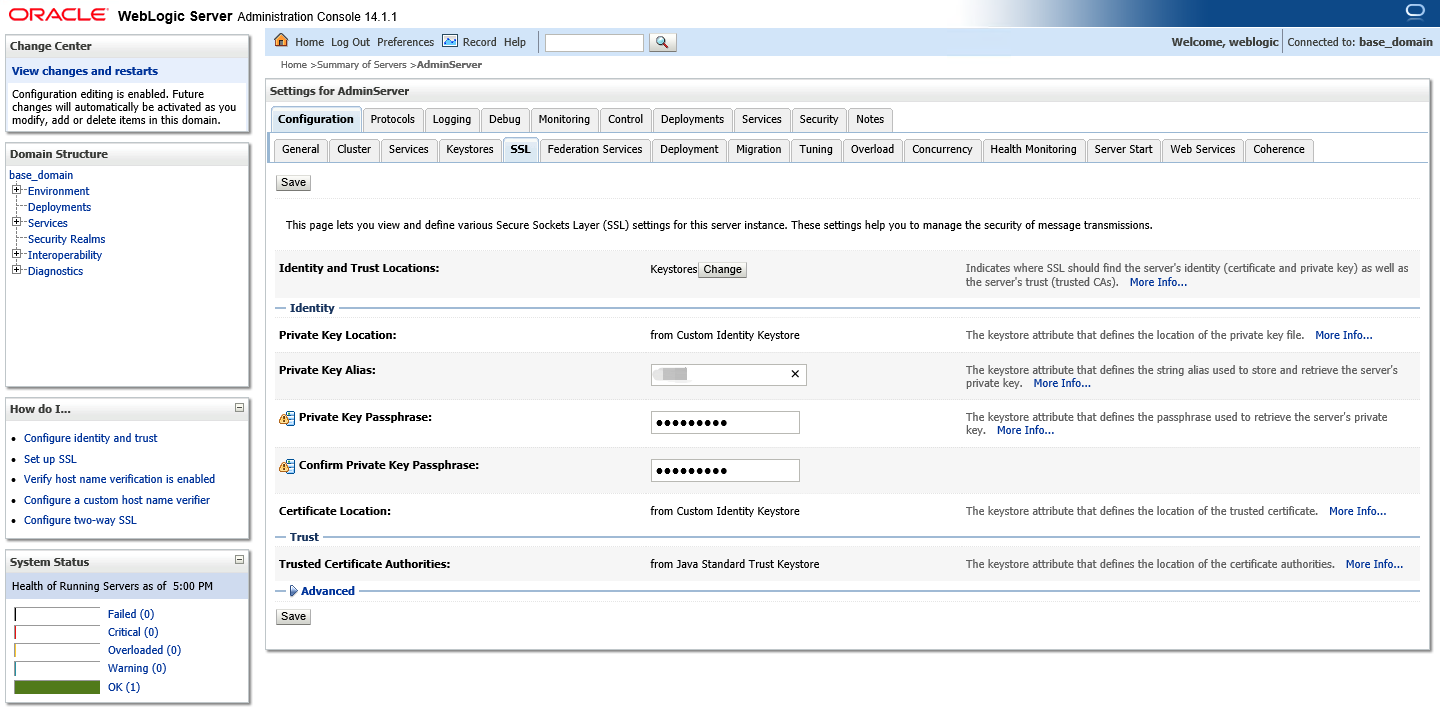
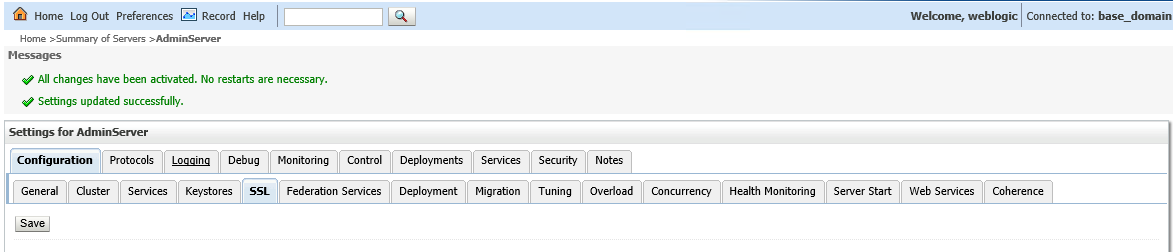
9. On the configuration management page for AdminiServer, click the SSL tab, set the parameters, and click Save.
Set the parameters as follows:
Identity and Trust Locations: set it to KEYSTORES.
Private Key Alias: enter the JKS alias.
Private Key Passphrase: if you set a private password when applying for a certificate, enter the private password. Otherwise, leave this parameter empty.
Confirm Private Key Passphrase: re-enter the private password.
Note:
For WebLogic 10.3.6-12c, select JSSE in the advanced settings area on the SSL settings page.
WebLogic versions earlier than 10.3.6 do not support SHA2 certificates. Please upgrade and try again.
10. Click Save after modifying the necessary information. The modifications are automatically activated, eliminating the need for restart.