Creating Table
Download
포커스 모드
폰트 크기
Operation Scenarios
This document describes how to create a table in the TcaplusDB Console.
Prerequisites
You have created a TcaplusDB cluster and table group.
You have prepared the table file according to the sample table description file.
Directions
1. Log in to the TcaplusDB Console, select Table List on the left sidebar, and click Create Table.
2. Configure the table on the table creation page.
Cluster and Table Group: select the target cluster and table group.
Table File: you can upload a table definition file from your local file system, select a previously uploaded one, or mix and match. However, filenames must be unique. For more information, please see the sample PB table file game_players.proto.
Remarks: enter the table remarks.
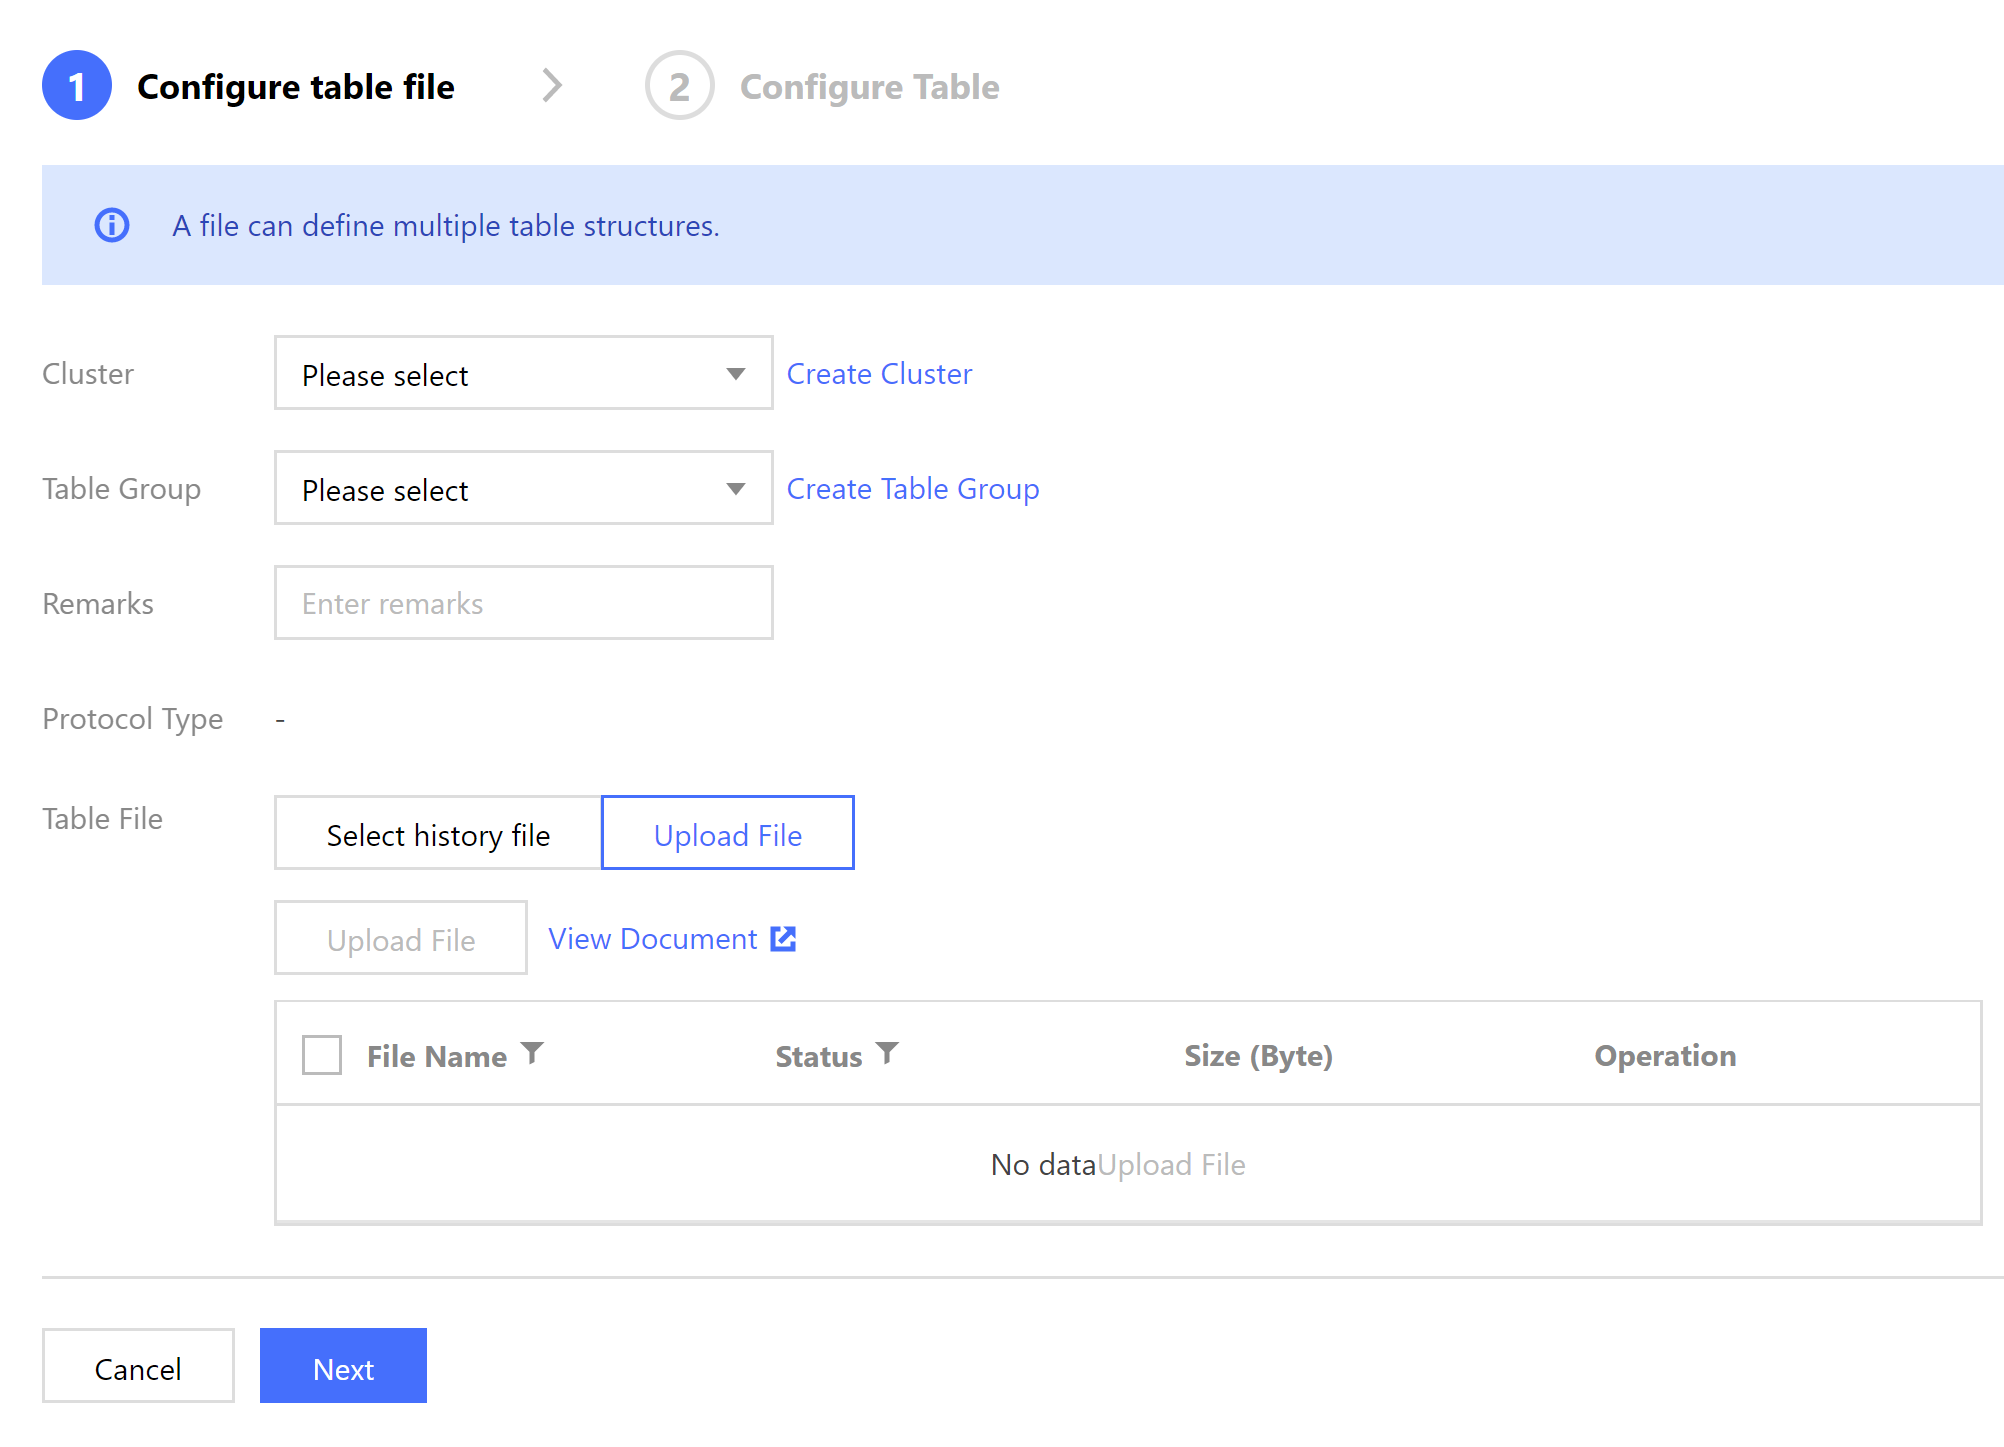
3. Click Next and the system will verify the selected table definition file.
If the verification fails, an error will be returned, and you should modify the file accordingly and upload it again.
If the verification is successful, the table metadata defined in the file will be displayed, and then you can proceed to the next step.
4. On the table configuration page, select the table to be created and enter the capacity and reserved read and write parameters. The daily fees of the table will be automatically calculated.
5. After confirming that the table information is correct, click Create and the system will prompt that the creation has been successful.
피드백