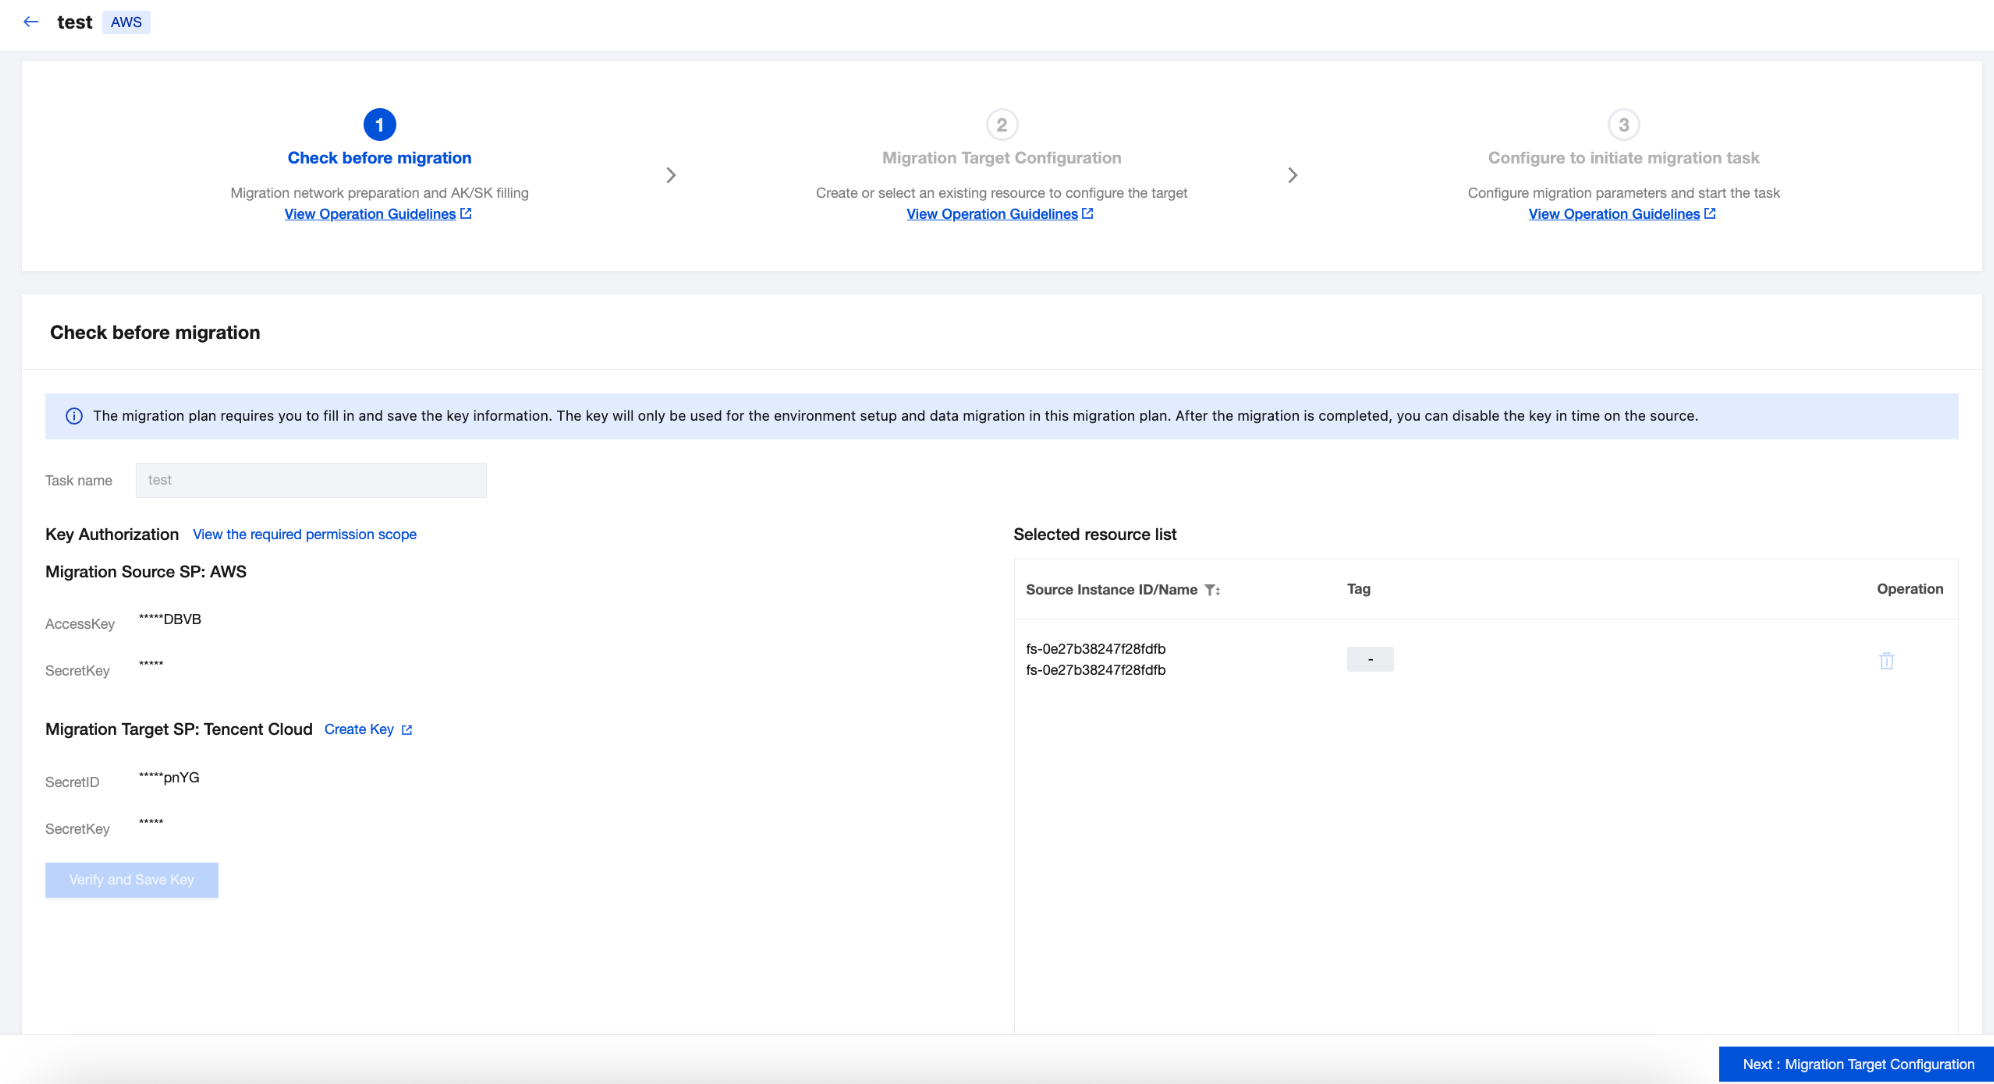
2. Step 1 is Check before migration. Input the migration Task name. Fill in the AWS and Tencent Cloud key information respectively. Then click Verify and Save Key.
3. After the key verification passes, click Next:Migration Target Configuration.
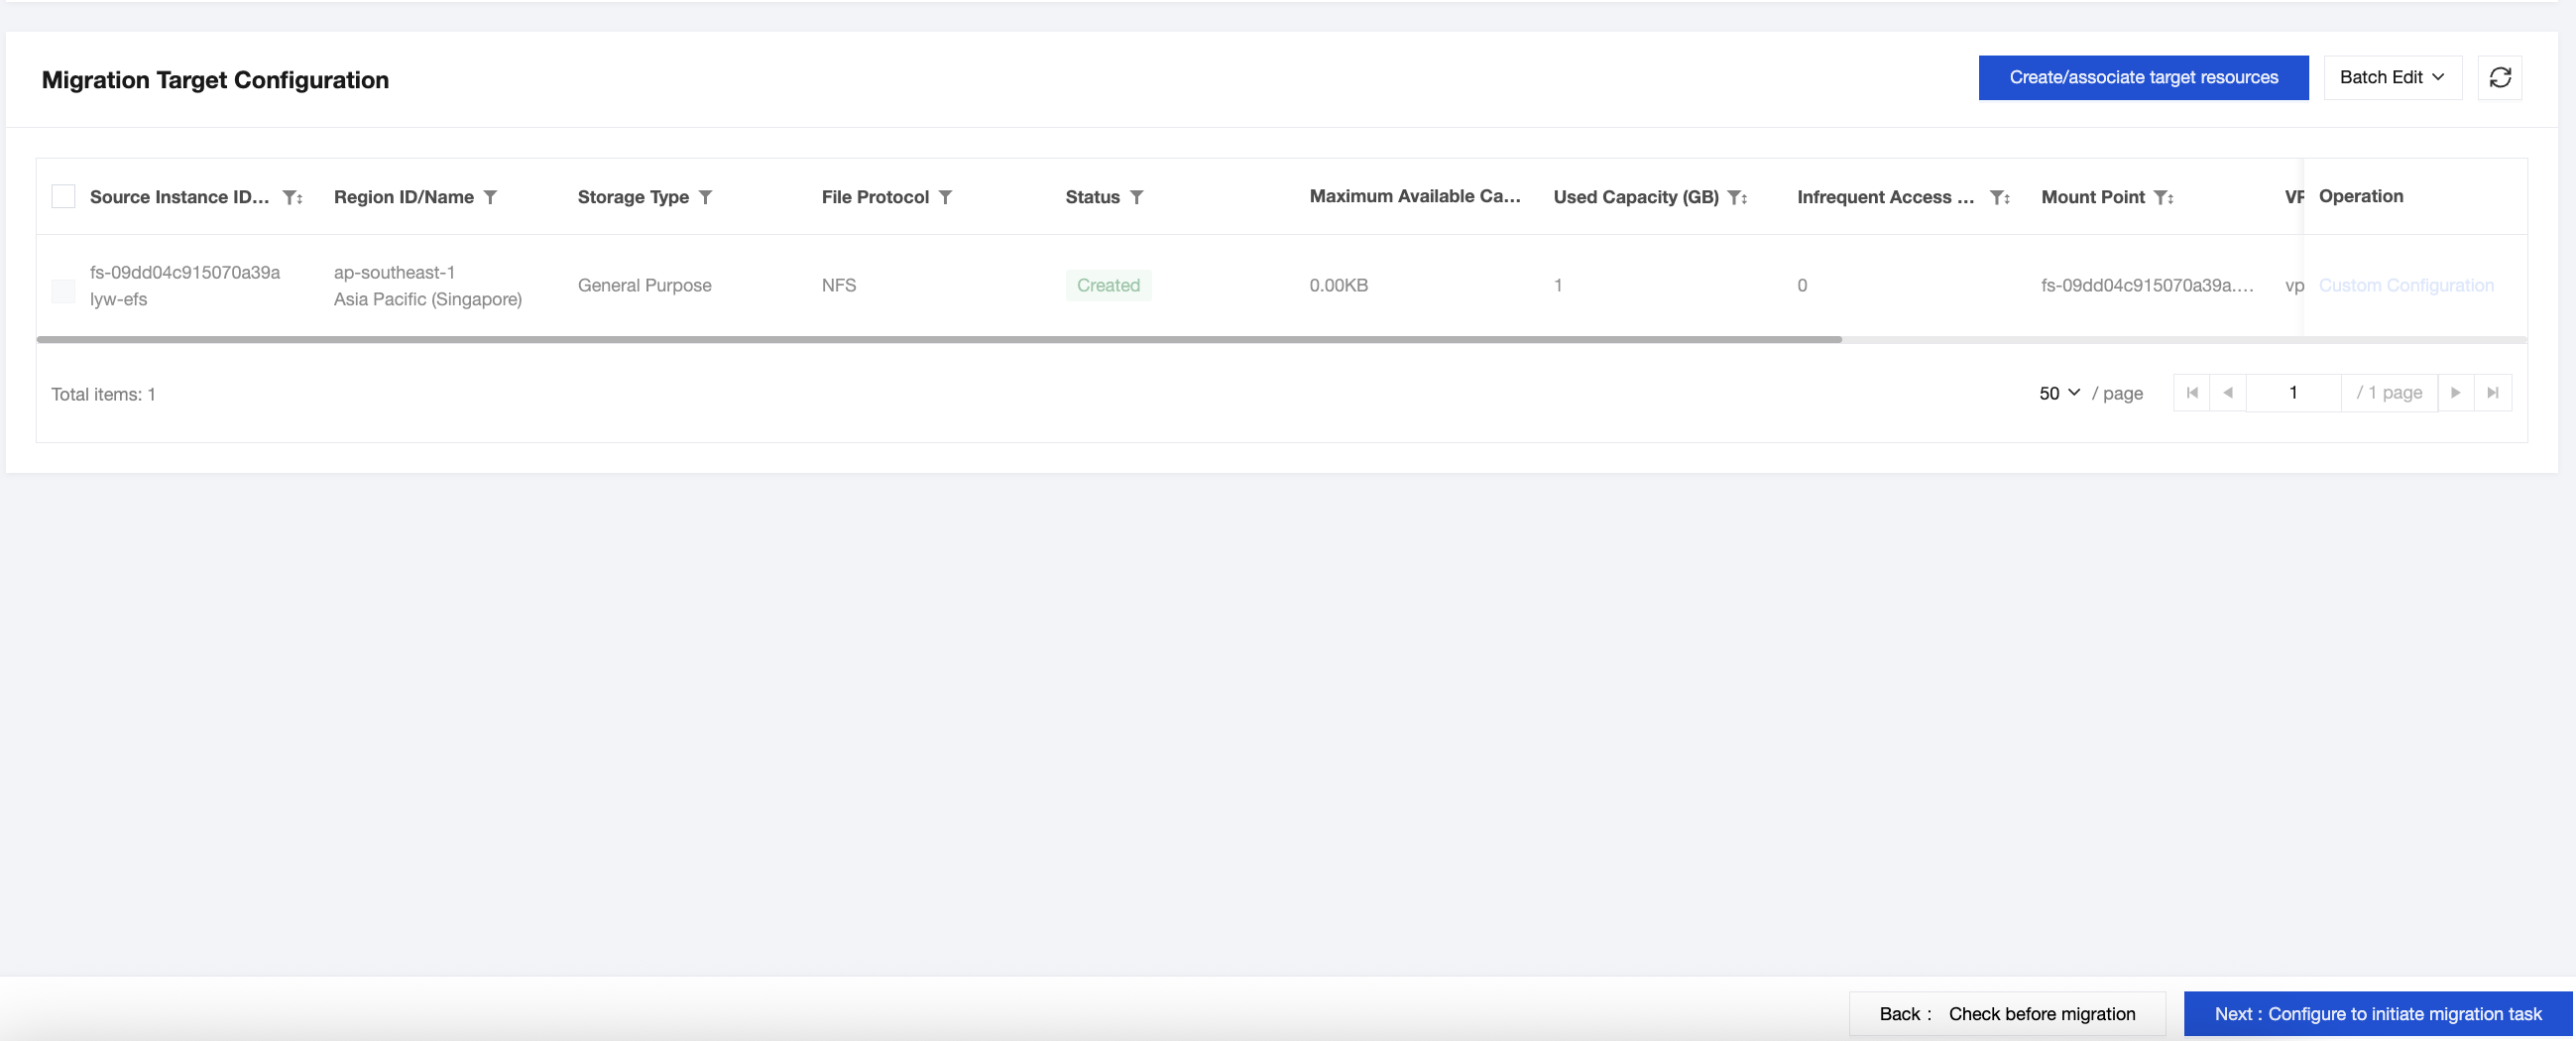
4. In the operation column of the resources to be migrated, click Custom Configuration. In the custom configuration, you can choose Created by Recommended Resources or select to migrate to Existing Resources, and then click Confirm.
5. Check the resources to be migrated, click Create/associate target resources, click Confirm in the pop-up to complete the association or creation of the target bucket for migration, and then click Next:Configure to initiate migration task.
6. Select the file storage to be migrated, and click Advanced Configuration.
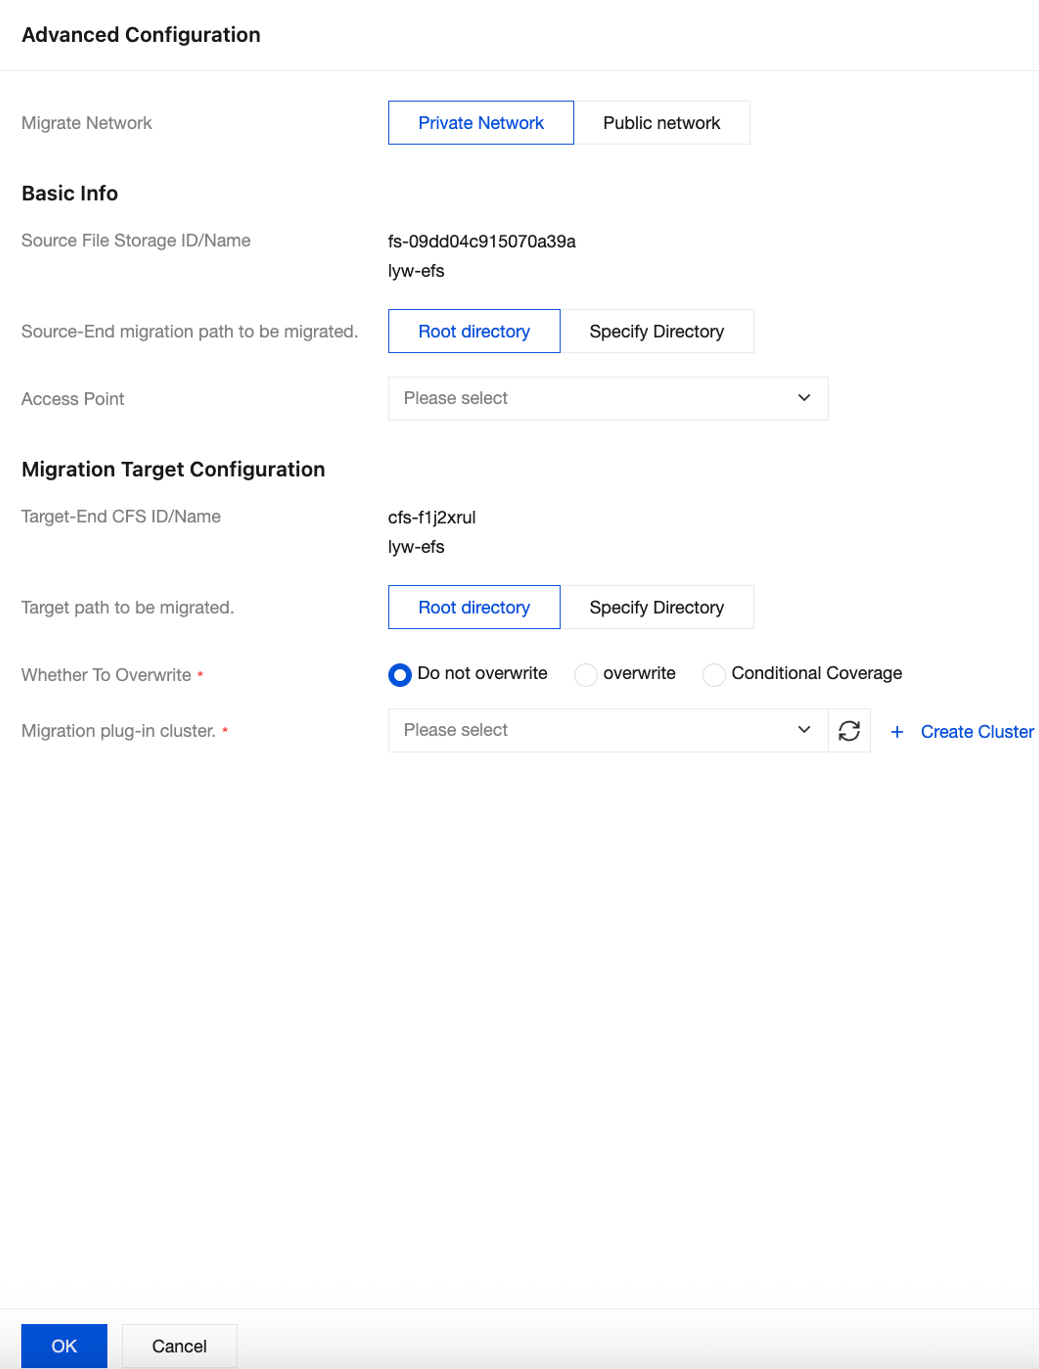
When the source is AWS, if using private network migration, select Private Network in the Migrate Network.
Source-End migration path to be migrated: Select the root directory or a specified directory. The specified directory is the path for source file storage, excluding the path of the mounted server.
Access Point: The access point in AWS file storage mount information.
Target path to migrated: Select the root directory or a specified directory. The specified directory is the path of the source file storage, excluding the path of the mounted server.
Whether To Overwrite: You can choose to overwrite, not overwrite, or conditionally overwrite.
Note:
Conditional coverage refers to overwriting files where the last modification time of the source file is later than that of the target file.
Migration plug-in cluster: Select an online and idle migration cluster. If you need to create a new migration cluster, please see Migration Cluster Management.
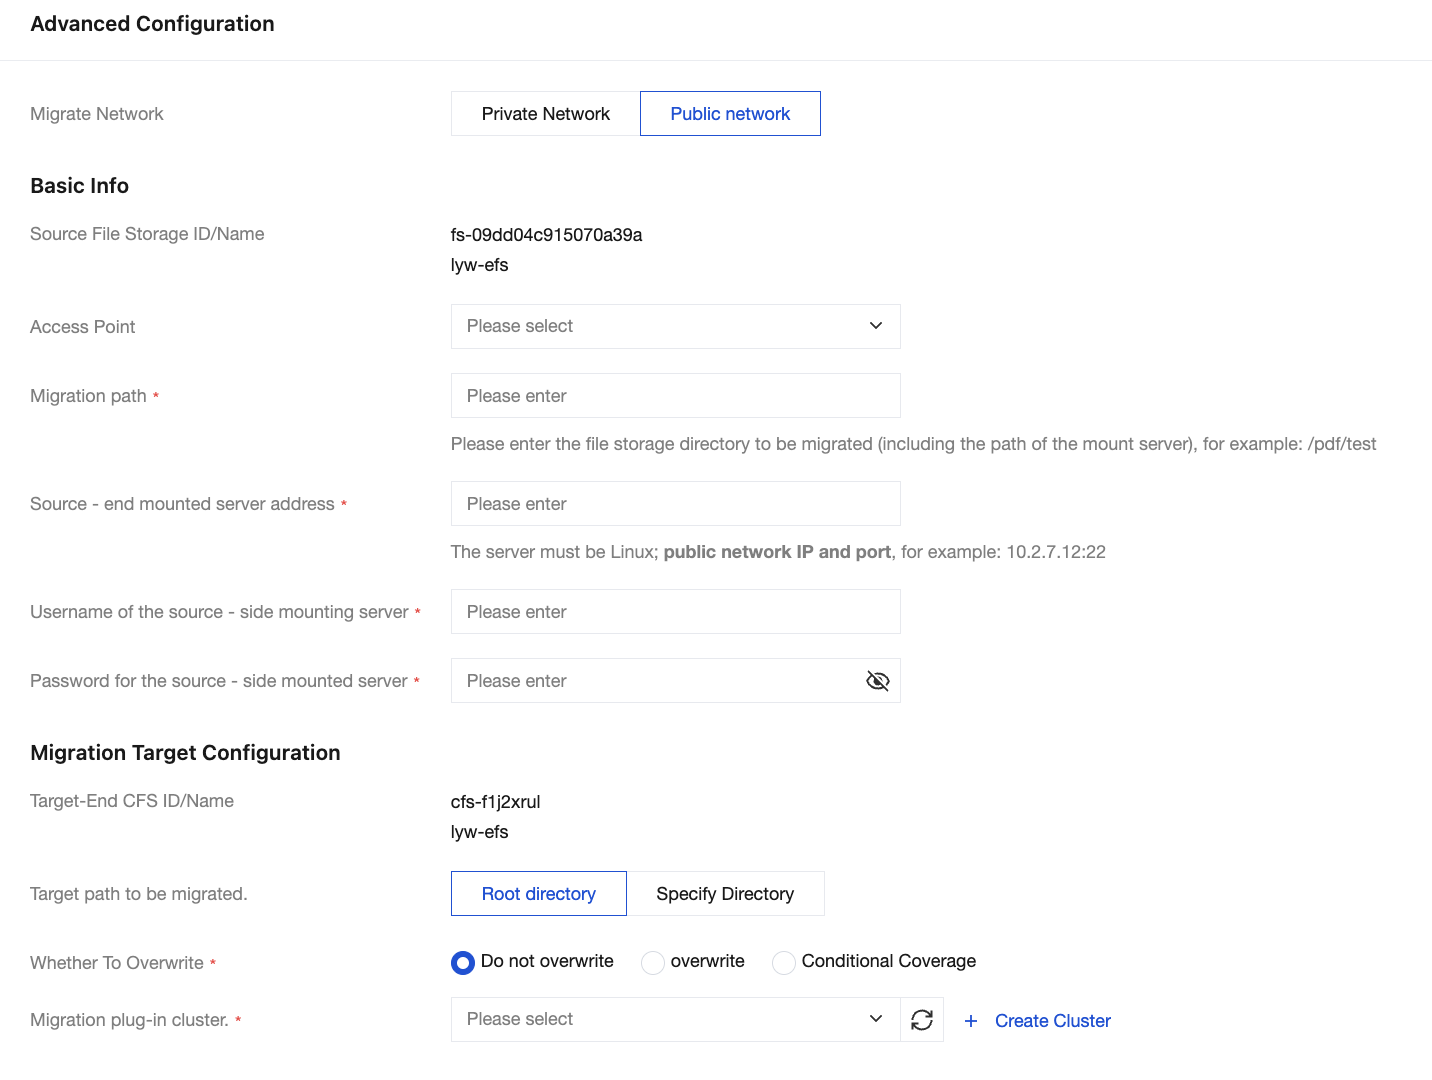
When the source is AWS, if using public network migration, select the Public Network in the Migrate Network.
Access Point: The access point in AWS file storage mount information.
Migration path: Enter the file storage path of the source to be migrated.
Source mount server address: Enter the server address where the source file storage is mounted.
Username of the source - side mounting server: Enter the username of the source server for mounting (the source server requires a login method with username and password settings).
Password of the source - side mounting server: Enter the password of the source server to be mounted.
Target path to be migrated: Select the root directory or a specified directory. The specified directory is the path of the source file storage, excluding the path of the mounted server.
Whether To Overwrite: You can choose to overwrite, not overwrite, or conditionally overwrite.
Note:
Condition override refers to overwriting files where the last modification time of the source file is later than that of the target.
Migration plug-in cluster: Select an online and idle migration cluster. If you need to create a new migration cluster, please see Migration Cluster Management.
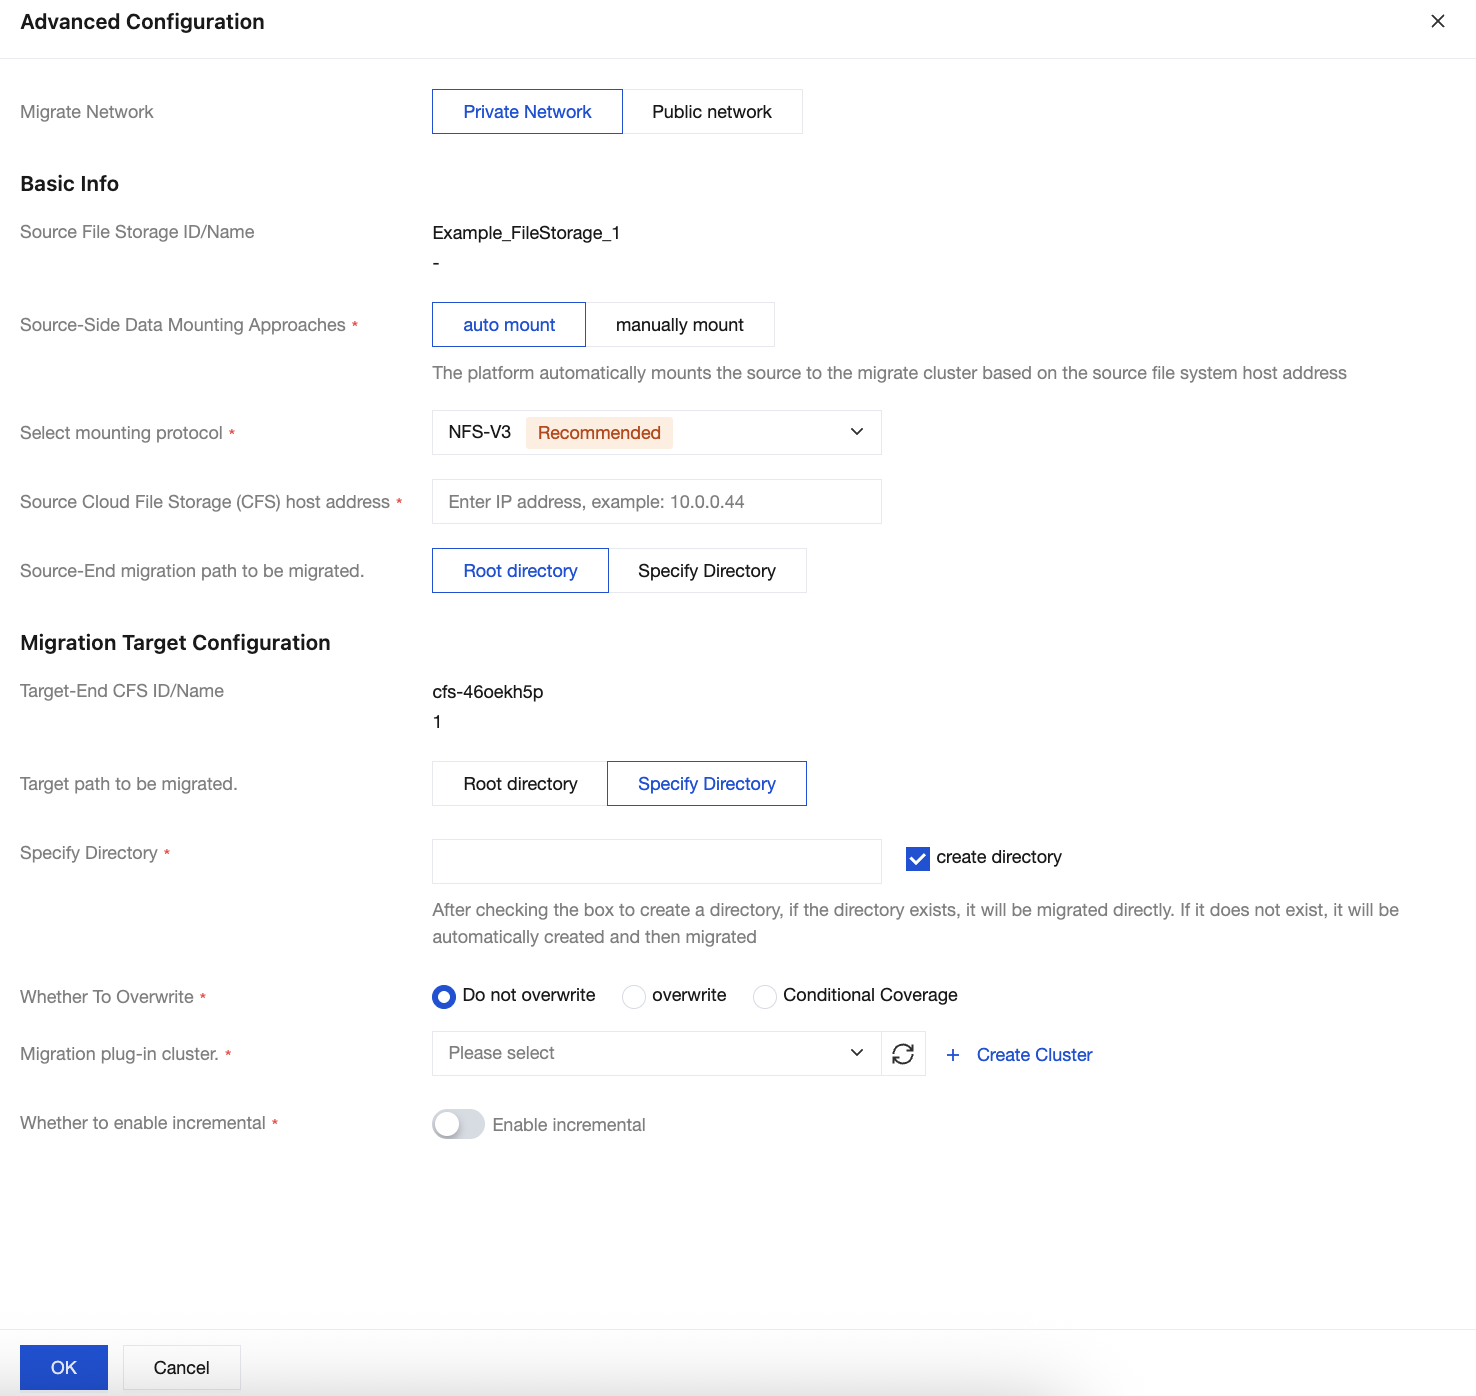
When the source is IDC, if using private network migration, select Private Network from the Migrate network.
Source-Side Date Mounting Approaches: Select auto mount or manual mount.
auto mount: The platform will auto mount based on the source CFS host address and protocol without logging in to the migrate cluster.
manually mount: Requires manually logging in to the migrate cluster and mounting the source CFS to the cluster nodes.
Select mounting protocol: Select the protocol for the source file storage.
Source Cloud File Storage(CFS) host address: Enter the server address of the source file storage.
Source-End migration path to be migrated: Select root directory or specified directory. The specified directory is the path of the source file storage, excluding the server mount path.
Target path to be migrated: Select root directory or specified directory. The specified directory is the path of the source file storage, excluding the server mount path.
Whether To Overwrite: You can choose to overwrite, not overwrite, or selectively overwrite.
Note:
Condition coverage refers to files where the source file last modification time is later than the target last modification time.
Migration plug-in cluster: Select an online and idle migration cluster. If needed, create a new migration cluster. Please refer to cluster management.
Select mount node IP: Select the cluster node where the source file storage is mounted.
Whether to enable incremental: Once enabled, after a full migration is completed, incremental migration will be performed according to the parameters set by the user, such as every 24 hours.
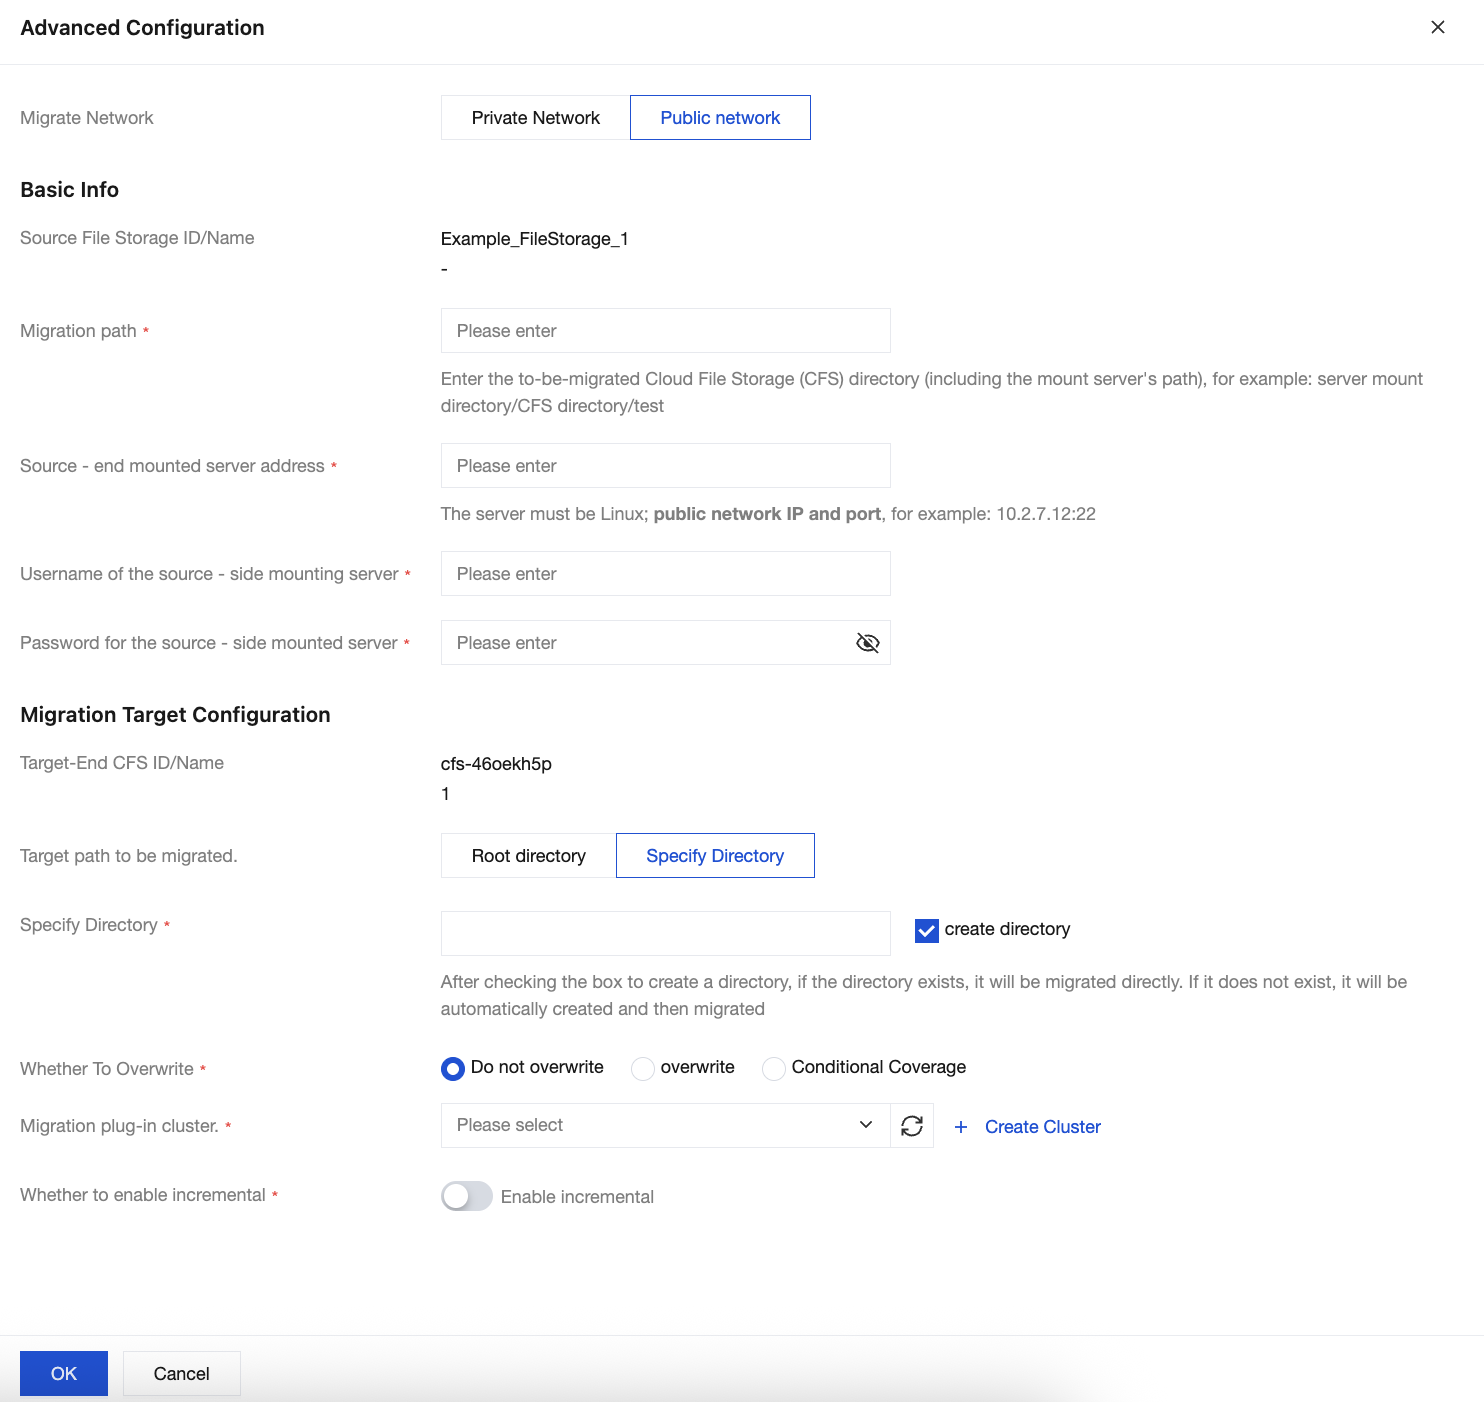
When the source is IDC, if using public network migration, select public network from the Migrate network.
Migration Path: Enter the storage path of the source files to be migrated.
Source-end mounted server address: Enter the server address where the source file storage is mounted.
Username of the source-side mounting server: Enter the username of the source mount server (the source server requires setting username and password as the login method).
Password for the source-side mounted server: Enter the password of the source mount server.
Target path to be migrated: Select root directory or specified directory. The specified directory is the path of the source file storage, excluding the server mount path.
Whether To Overwrite: You can choose to overwrite, not overwrite, or selectively overwrite.
Note:
Condition coverage refers to files where the source file last modification time is later than the target last modification time.
Migration plug-in cluster: Select an online and idle migration cluster. If needed, create a new migration cluster. Please refer to cluster management.
Select mount node IP: Select the cluster node where the source file storage is mounted.
Whether to enable incremental: Once enabled, after a full migration is completed, incremental migration will be performed according to the parameters set by the user, such as every 24 hours
7. After configuring the task parameters, click OK to complete.
8. Select the file storage to be migrated, and click Start Migration Task to initiate file storage migration tasks individually or in batches.