A security group is a stateful virtual firewall capable of filtering. As an important means for network security isolation provided by Tencent Cloud, it can be used to set network access controls for one or more TencentDB instances. Instances with the same network security isolation demands in one region can be put into the same security group, which is a logical group. TencentDB and CVM share the security group list and are matched with each other within the security group based on rules. For specific rules and limitations, see Security Groups Overview. You can bind a security group directly during instance purchase or bind one in the console after instance purchase.
Note:
Tencent Cloud Distributed Cachesecurity groups currently only support network access control for VPCs and public networks but not the classic network.
As Tencent Cloud Distributed Cache doesn't have any active outbound traffic, outbound rules don't apply to it.
Tencent Cloud Distributed Cache security groups support master instances, read-only instances, and disaster recovery instances.
When an instance is purchased, it must be bound to at least one security group. After purchase, you can edit or adjust the bound security groups in the console.
2. Select Security Group on the left sidebar, select a region above the instance list on the right, and click Create.
3. In the pop-up window, set the following configuration items, confirm that everything is correct, and click OK.
Template: Select a security group template in the drop-down list.
Open all ports: All ports are opened to the public and private networks. This may present security issues. Security group rules are added by default. You can click a security group template below to view its Outbound Rules* and Inbound Rules**.
- Open ports 22, 80, 443, and 3389 and the ICMP protocol: Ports 22, 80, 443, and 3389 and the ICMP protocol are opened to the internet. All ports are opened to the private network. Security group rules are added by default.
Custom: You can create a security group and then add custom rules.
Name: Custom name of the security group.
Project: Select a project for easier management. By default, Default Project is selected.
Notes: A short description of the security group for easier management.
Advanced Configuration: You can add tags for the security group.
4. If you select Custom for Template, click Set Now in the Note window and perform the following steps.
Step 2. Set inbound rules in the security group
Note:
After public network access is enabled, it will be controlled by the security group network access policy. Configure the source information for database access in the security group inbound rules, and open the protocol ports (both private and public network ports must be opened; the default private network port is 6379).
1. On the Inbound Rule tab of the Security Group Rules page, click Add Rules.
2. In the Add Inbound Rules window, set the rules.
Type: Select Custom as the default type.
Source: Set the source for database access, i.e., the inbound source, in the following formats:
Source Format
Format description
CIDR notation
Represented in CIDR notation (IPv4: for example, 203.0.113.0, 203.0.113.0/24, or 0.0.0.0/0, where 0.0.0.0/0 represents all IPv4 addresses. IPv6: for example, FF05::B5, FF05:B5::/60, ::/0, or 0::0/0, where ::/0 or 0::0/0 represents all IPv6 addresses).
Security group ID
Reference a security group ID to match the IP address of the server associated with the security group.
The current security group: Refers to the security group ID associated with the Cloud Virtual Machine.
Other security groups: Refers to another security group ID within the same region and same project.
Note:
Referencing a security group ID is an advanced feature that you can choose to use. The rules of the referenced security group will not be added to the current security group.
When configuring the security group rules, if you enter a security group ID in source/destination, it means that only the private network IP address of the Cloud Virtual Machine instance and Elastic Network Interface bound to this security group ID is used as the source/destination, excluding the public network IP address.
Parameter template
Reference an IP address object or IP address group object in a parameter template.
The public IP address currently logged-in to the console.
Protocol Port: Enter the protocol type and port for the client to access Tencent Cloud Distributed Cache. You can view the port information in the Private IPv4 Address in the Network Info section on the Instance Details page. The default port is 6379. If the access protocol is TCP, you can enter TCP:6379.
Policy: Allow or Reject. Allow is selected by default.
Allow: Access requests of this port are allowed.
Reject: Data packets will be discarded without any response.
Notes: A short description of the rule for easier management.
3. Click Complete.
Step 3. Configure the security group for a database instance
Note:
When purchasing an instance, you can directly select the security group to be associated with the instance from the Security Group drop-down list on the purchase page. For more information, see Creating Tencent Cloud Distributed Cache Instance.
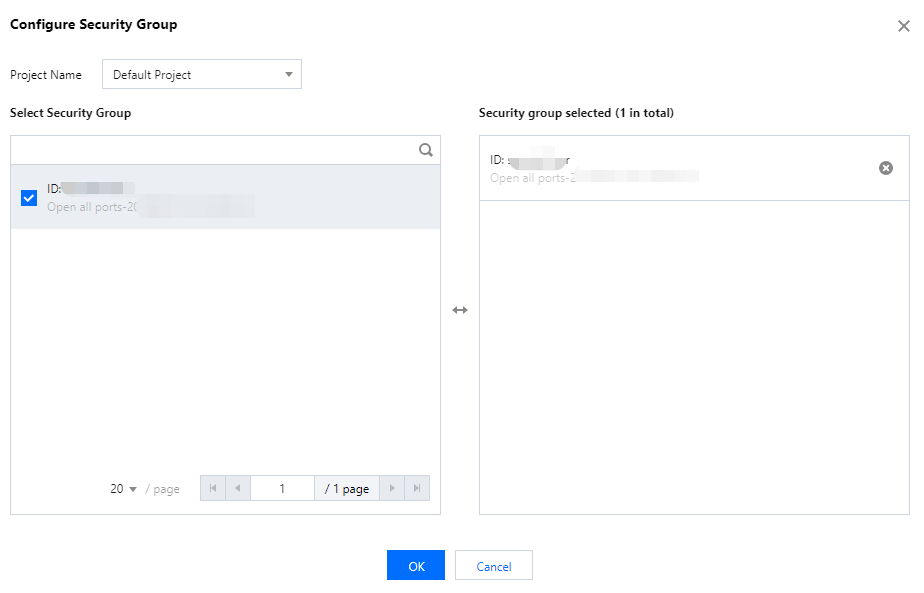
After purchase, you can change or add a security group for an instance based on the following steps.
In the Priority column, you can view the priorities of security groups. When two or more security groups are selected, click Edit above the security group list, click
or
to adjust the priorities of security groups.
Configure two or more security groups and click
to delete the bound security groups.
On the Preview Rules page, you can view the inbound source information of the security group on the Inbound Rules tab.