Link Messenger to Desk
Download
Modo Foco
Tamanho da Fonte
Desk supports Facebook Messenger integration, allowing system-level management of user messages from Messenger.
Note:
When your business has multiple channels for user inquiries, it is recommended that you choose this method to unify the hosting of user inquiries from multiple channels (such as in-APP customer service, WhatsApp, Facebook) to our workspace. Agents can handle inquiries from multiple channels within a single workspace, significantly improving response efficiency.
Prerequisite
Step 1: Logging in to Meta Developer Platform and Setting Up Your Messenger API
Procedure 2: Meta App Settings
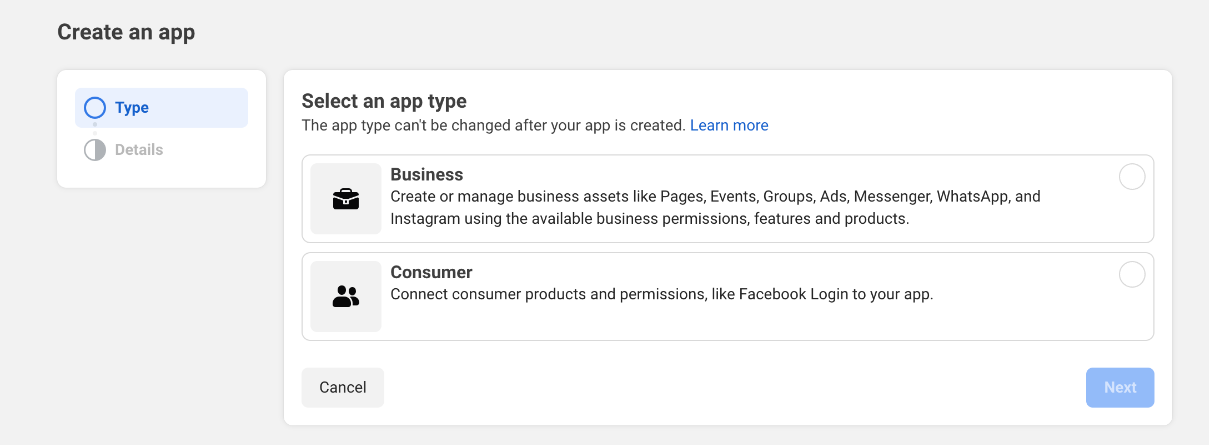
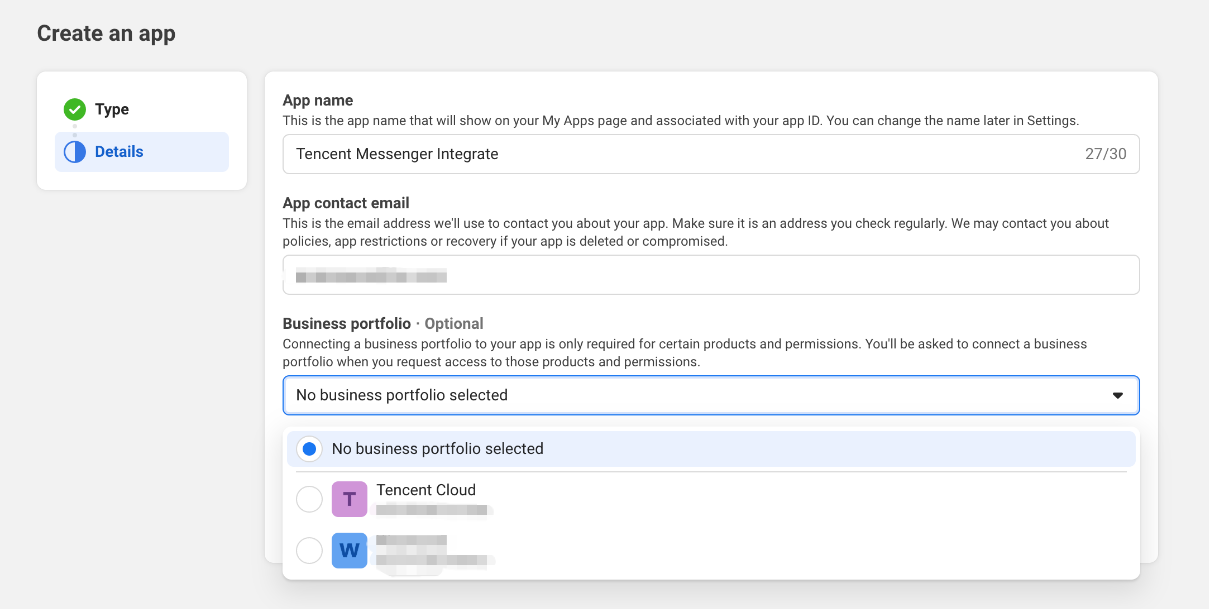
1. Set up your Meta App
1.1 Click the Create App button
1.2 Refine App Details

1.3 Select the Other option

1.4 Select the Business option, optimize your merchant account and submit.
Step 3: Generate Permanent Messenger Access Token
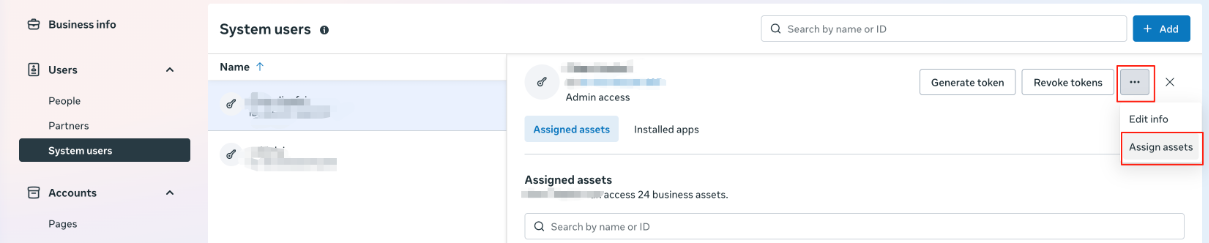
1. Log in to Meta Business Suite, select Settings > click System User, and create a new system user with admin role.

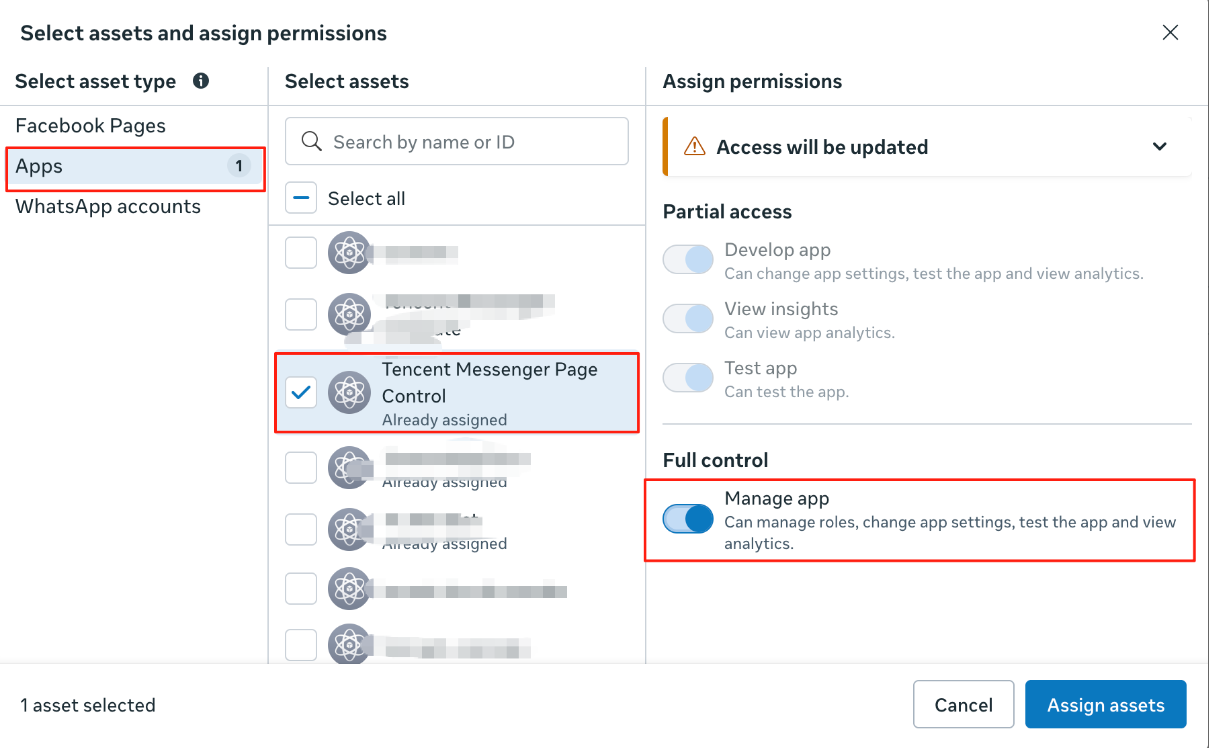
2. Click the Add Asset button > select your application. Click Manage App > Assign Assets.
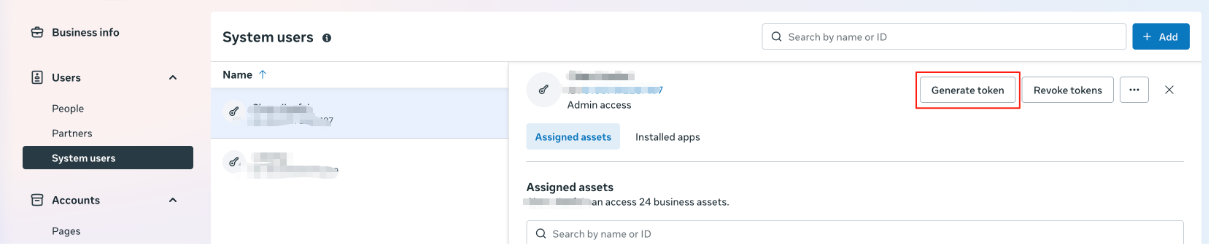
3. System user page, click the Get token button
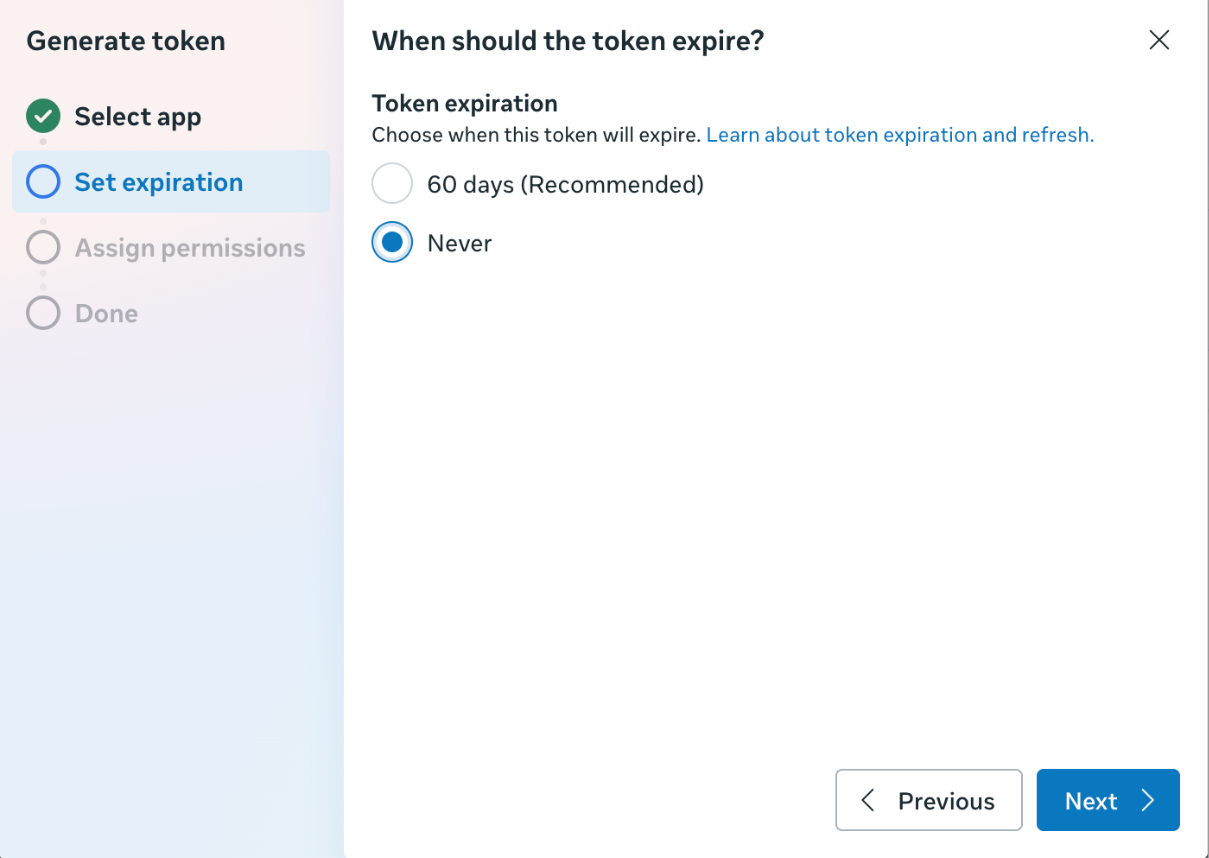
3.1 Select your application

3.2 Choose 'Never' expire.
3.3 Select the following permissions, click Get and copy the token.
pages_read_engagement
business_management
pages_messaging
pages_show_list
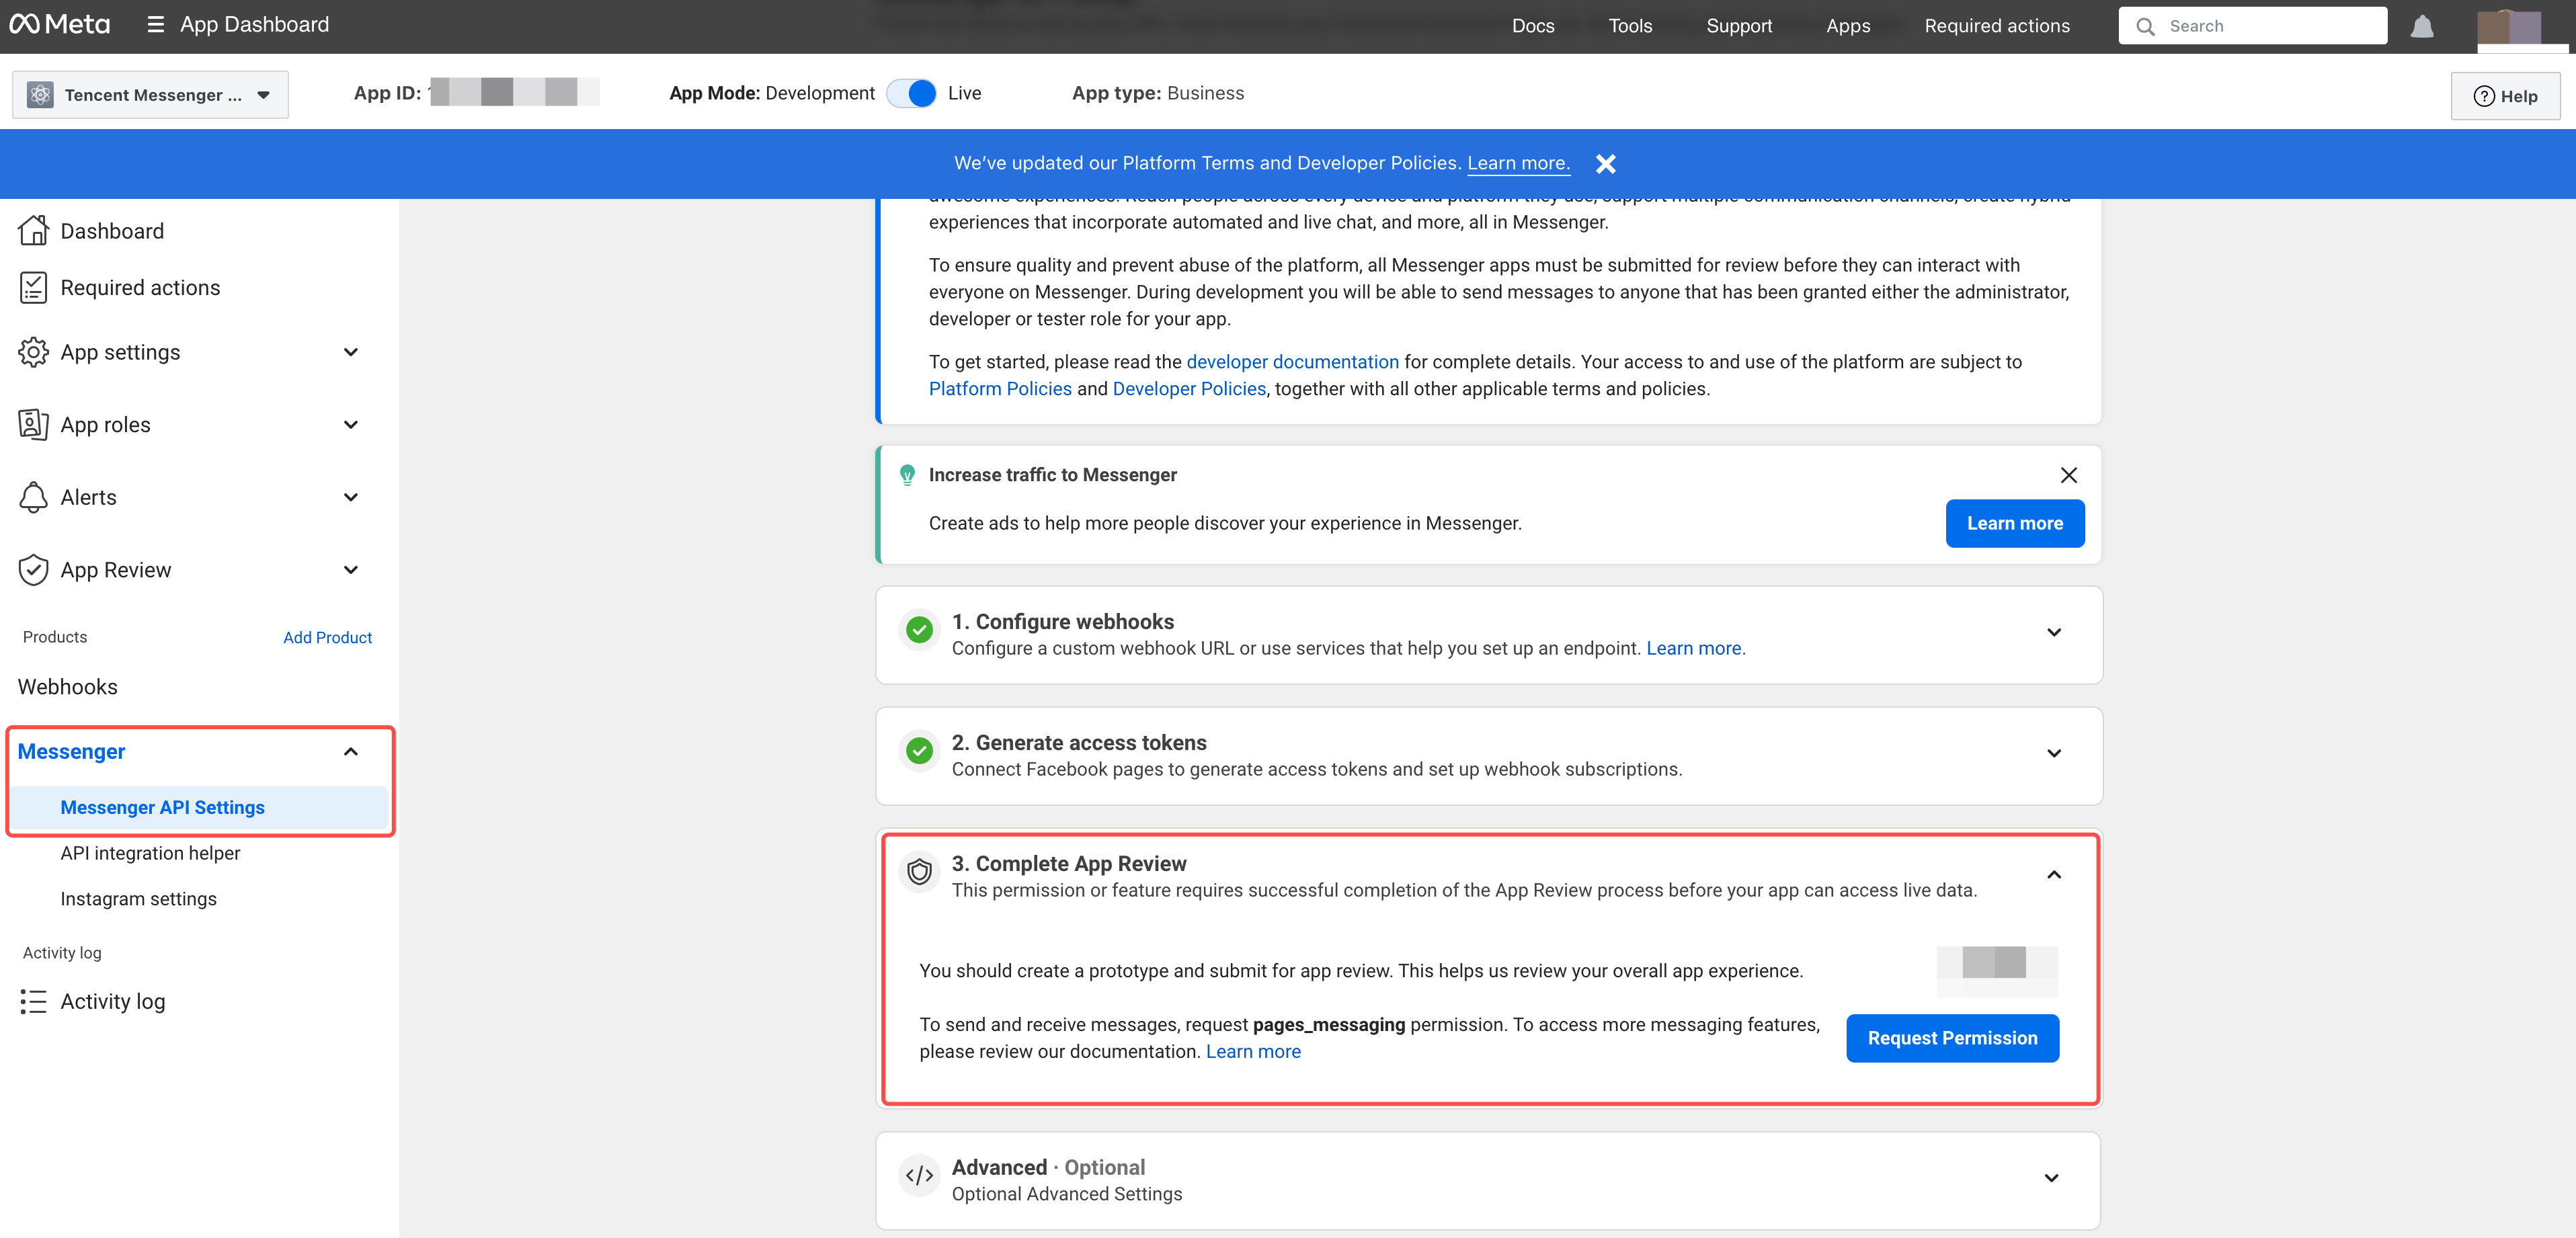
Step 4: Complete Application Review
1. Meta Developer Platform Select your application, go to Messenger API Settings > App Review. Only after completing the pages_messaging permission review that Desk can access your message data.
2. Complete the following application review on your Facebook page
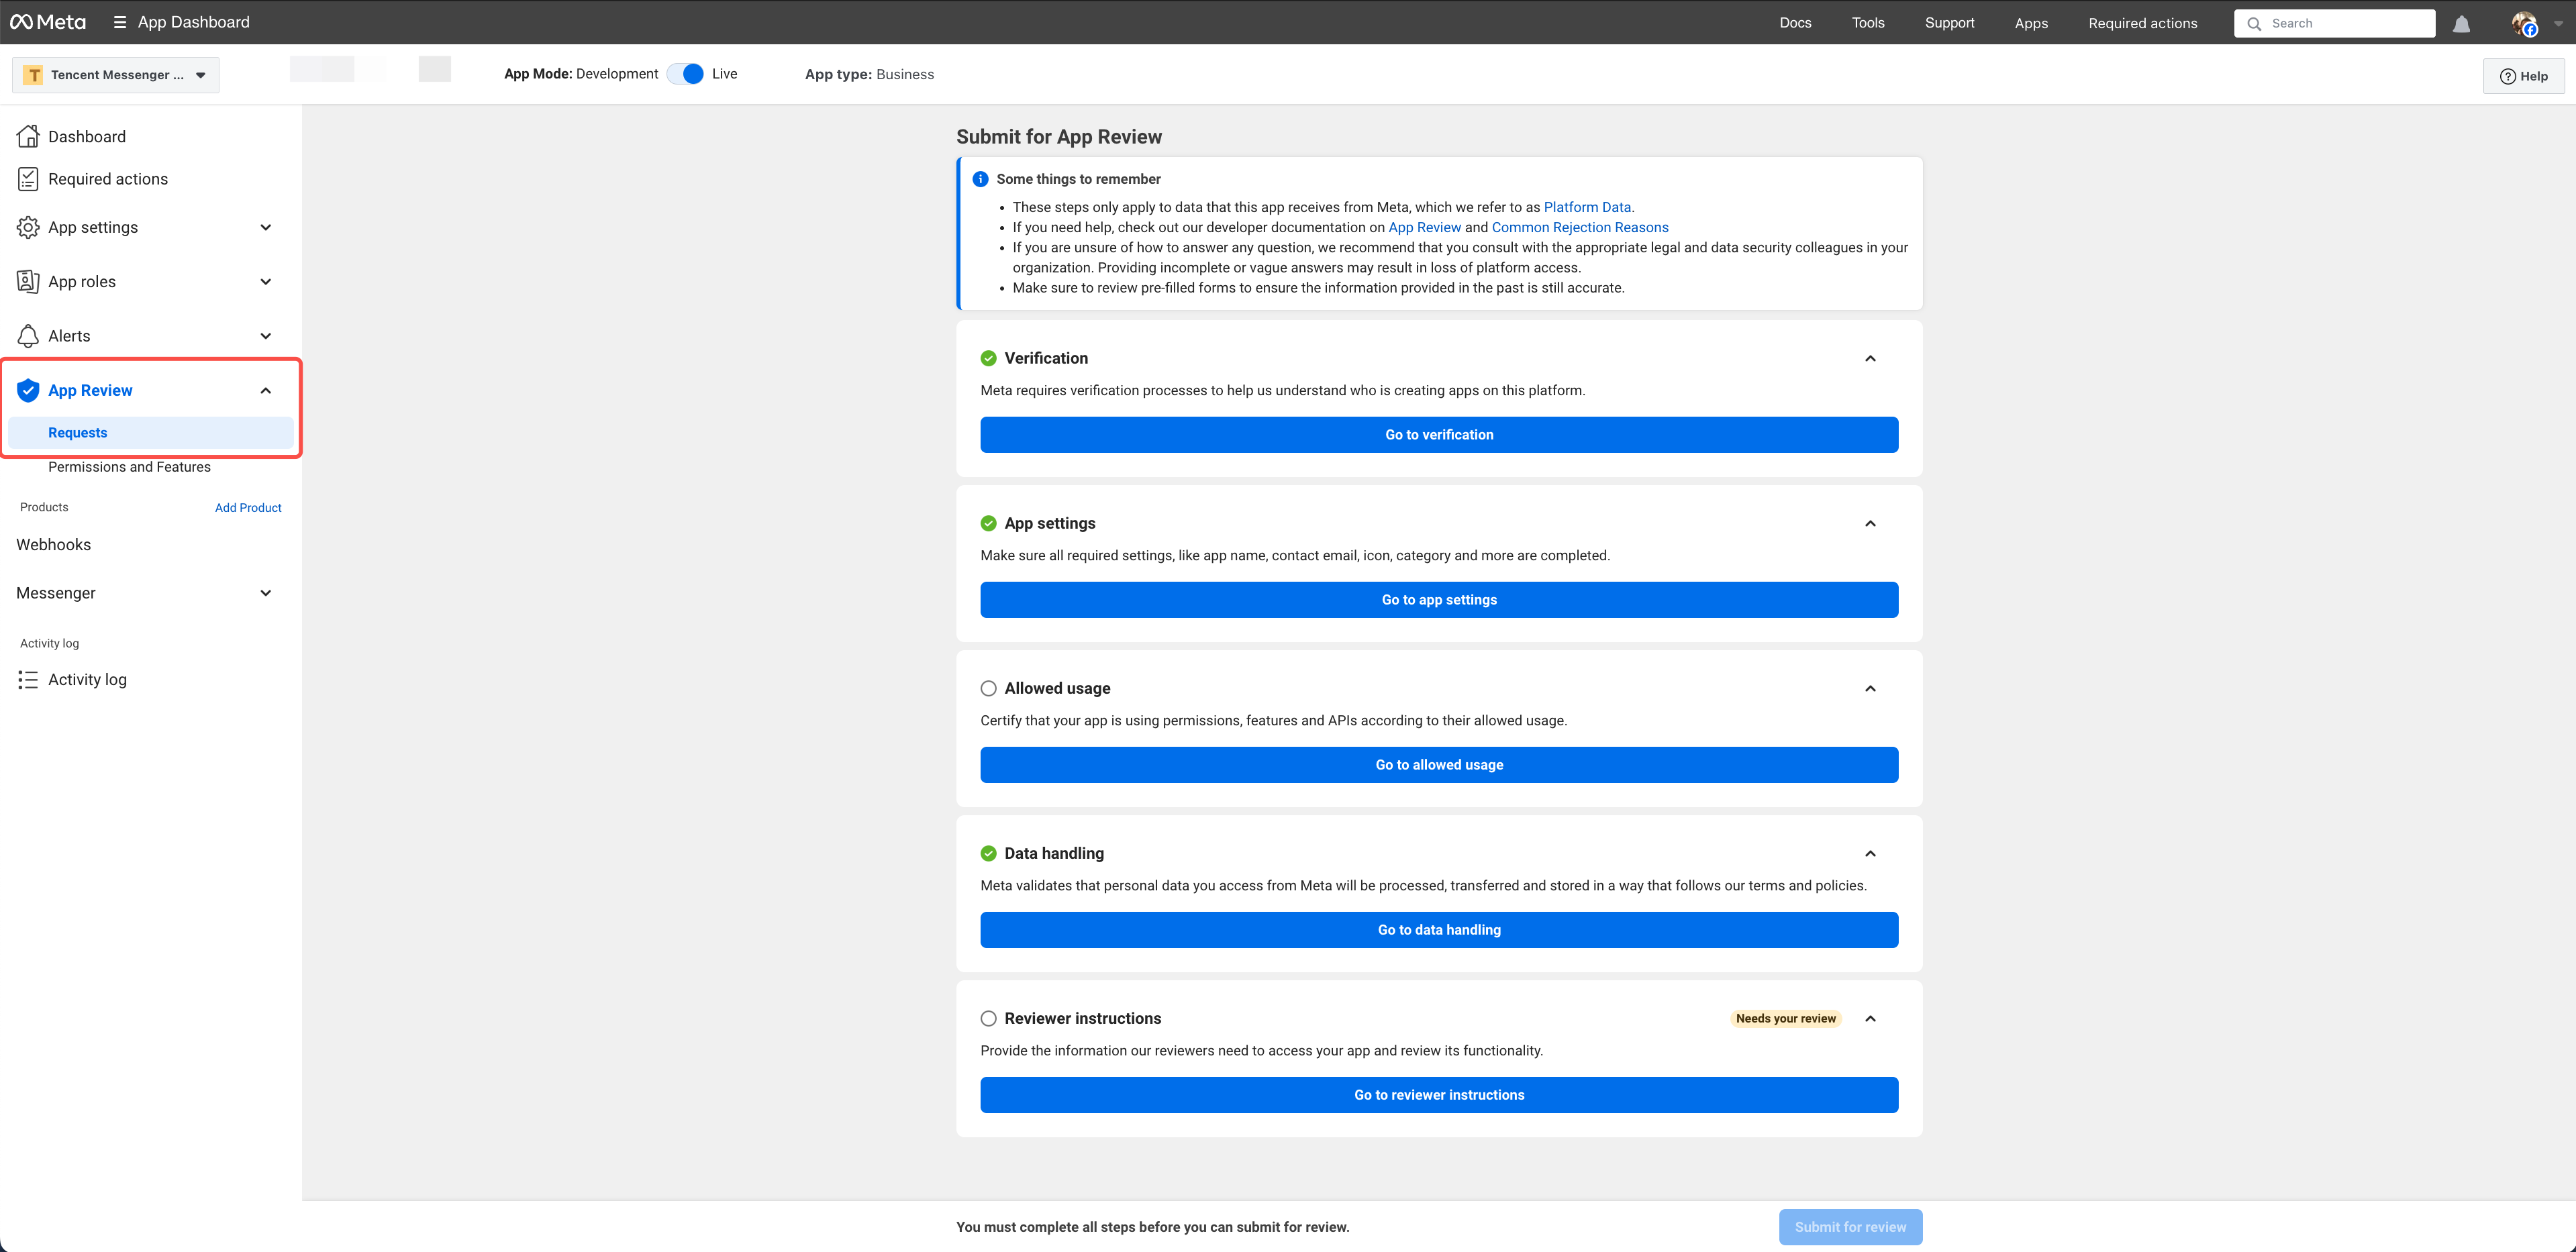
3. Once review completed, messages sent by your users on Messenger will be synchronized to Desk, and agents can perform services on the Agent Workspace.
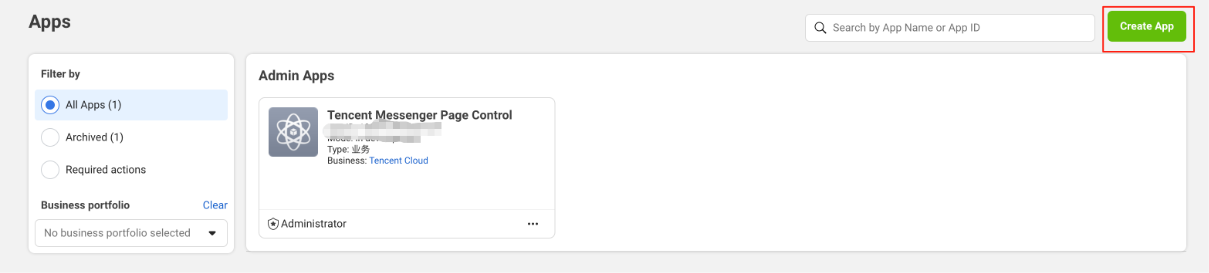
Desk Operation Guide
Step 1: Adding Messenger Message Channel to Desk Management Console
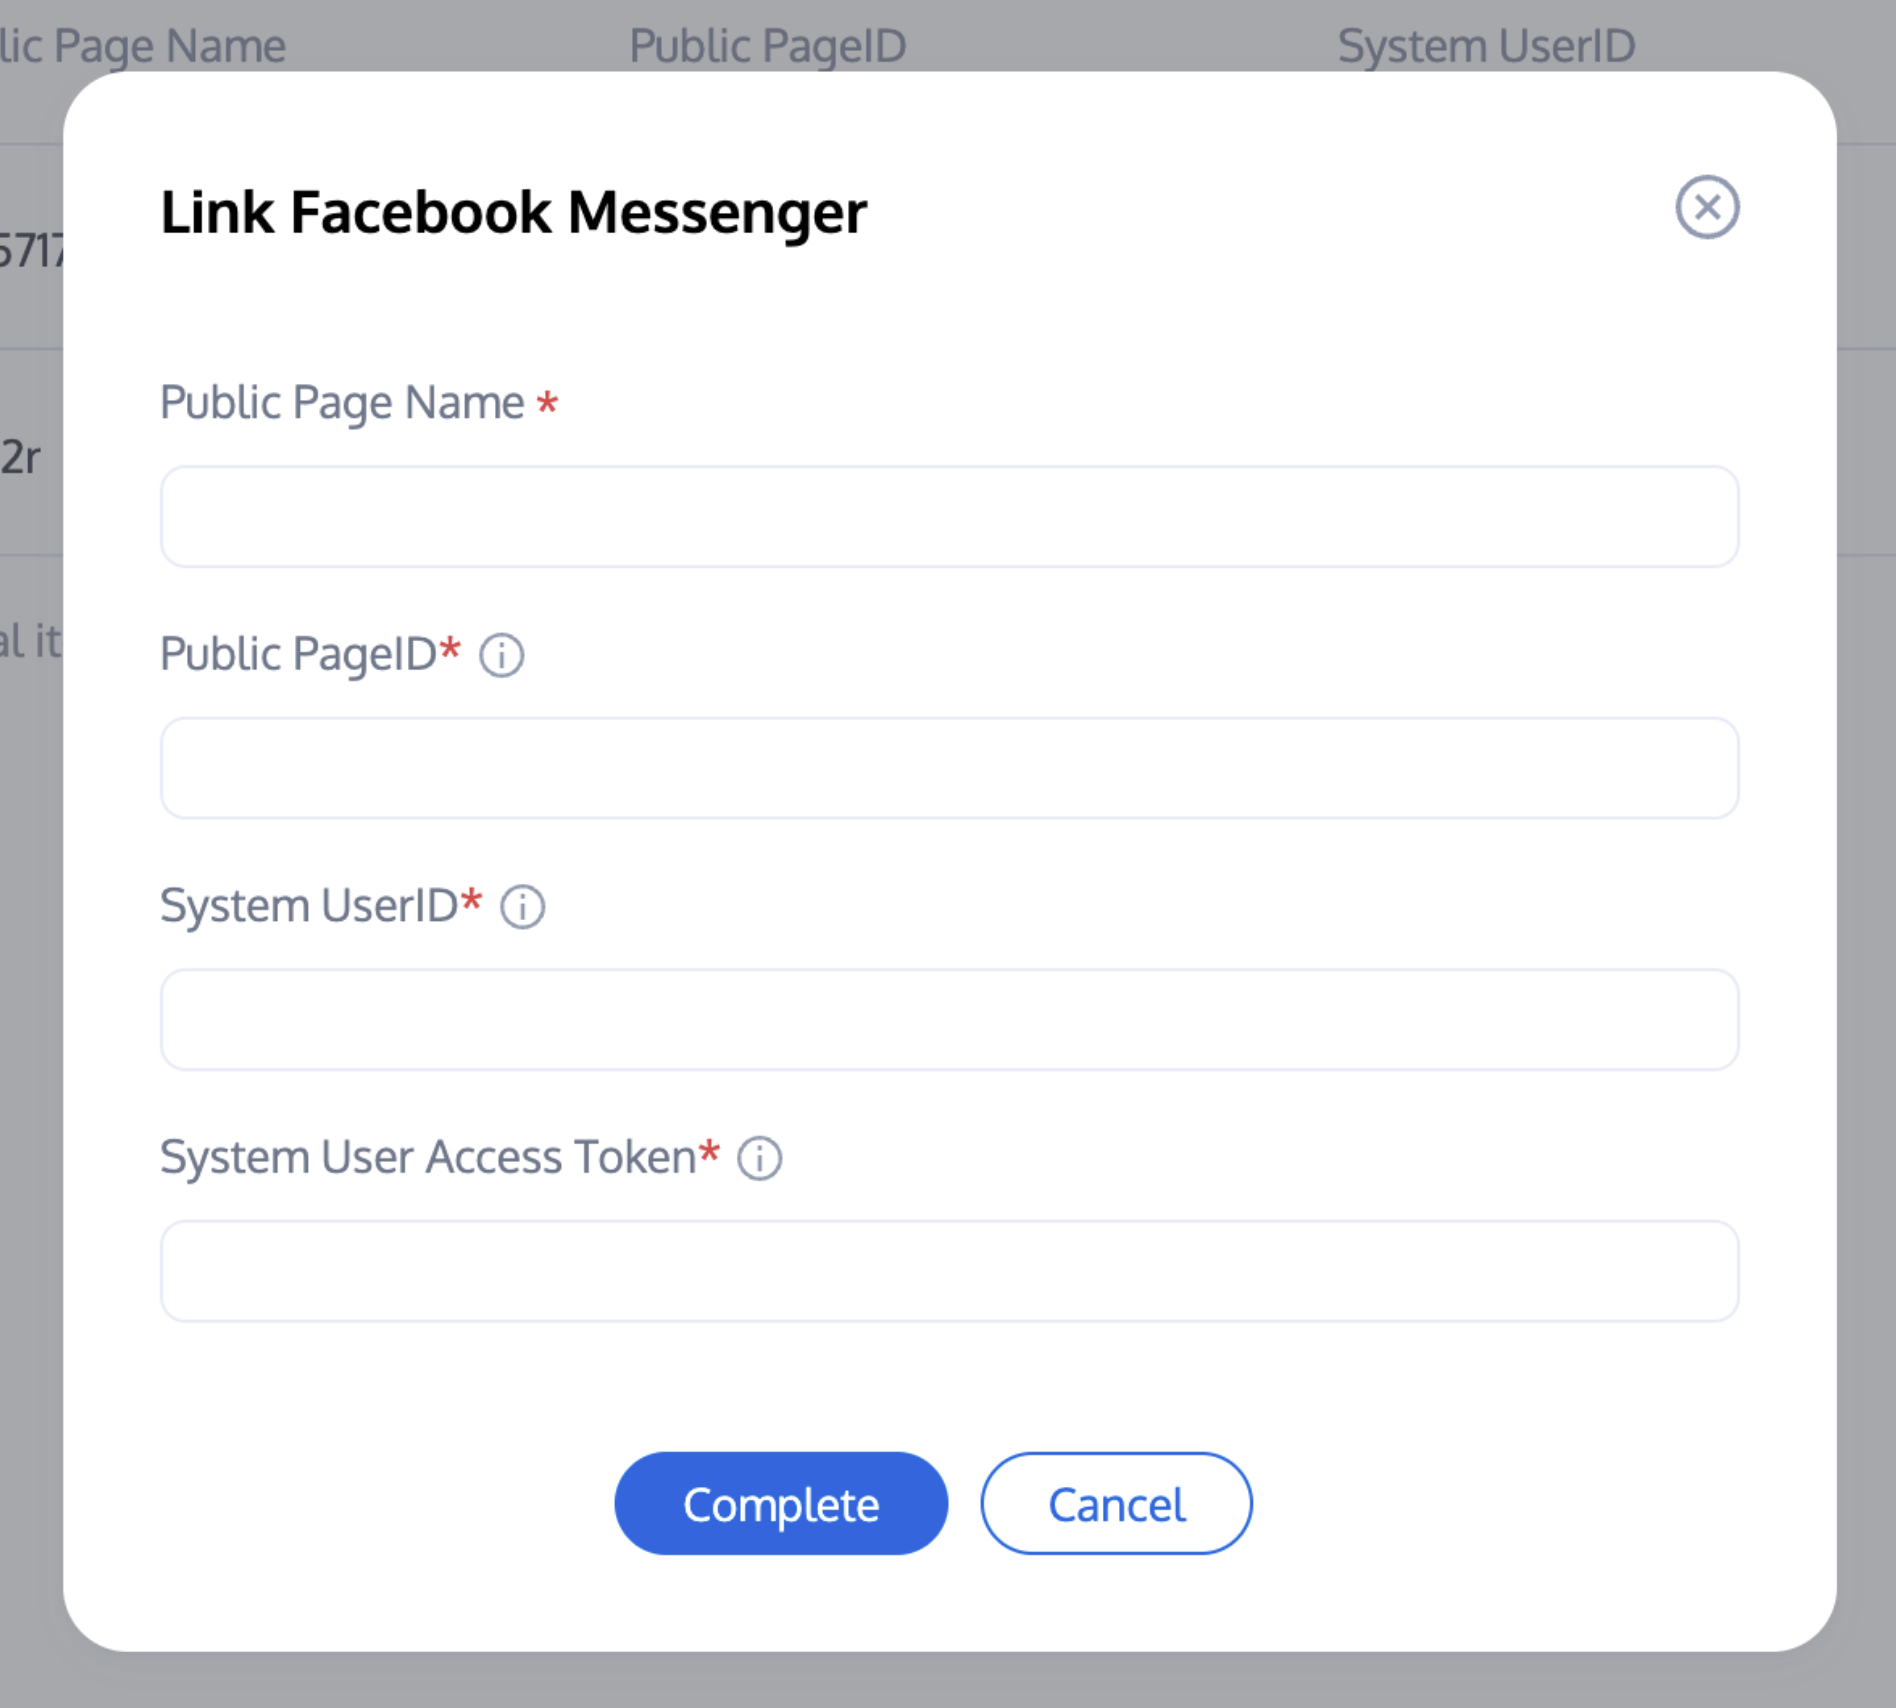
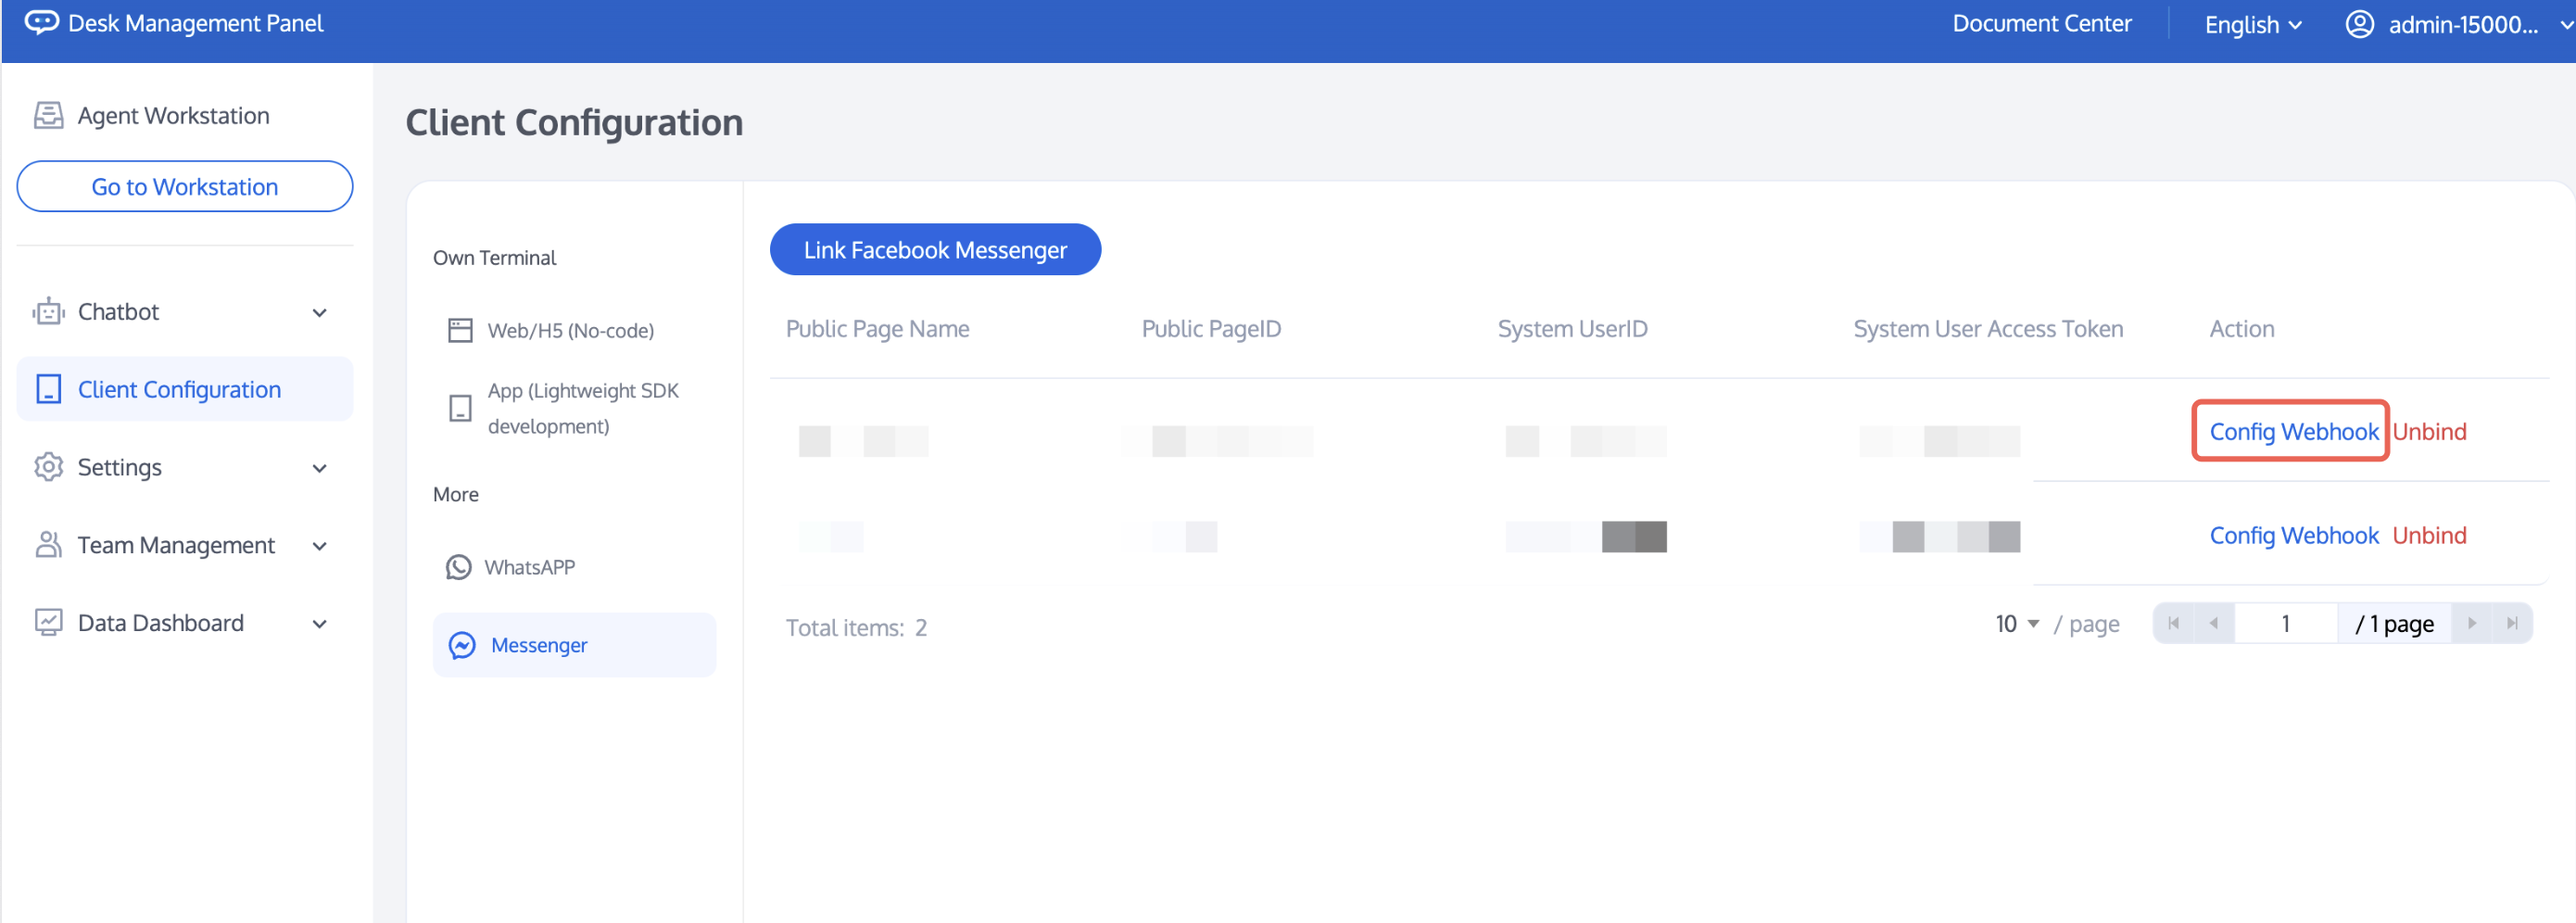
1. Log in to Desk management console > Client Configuration.
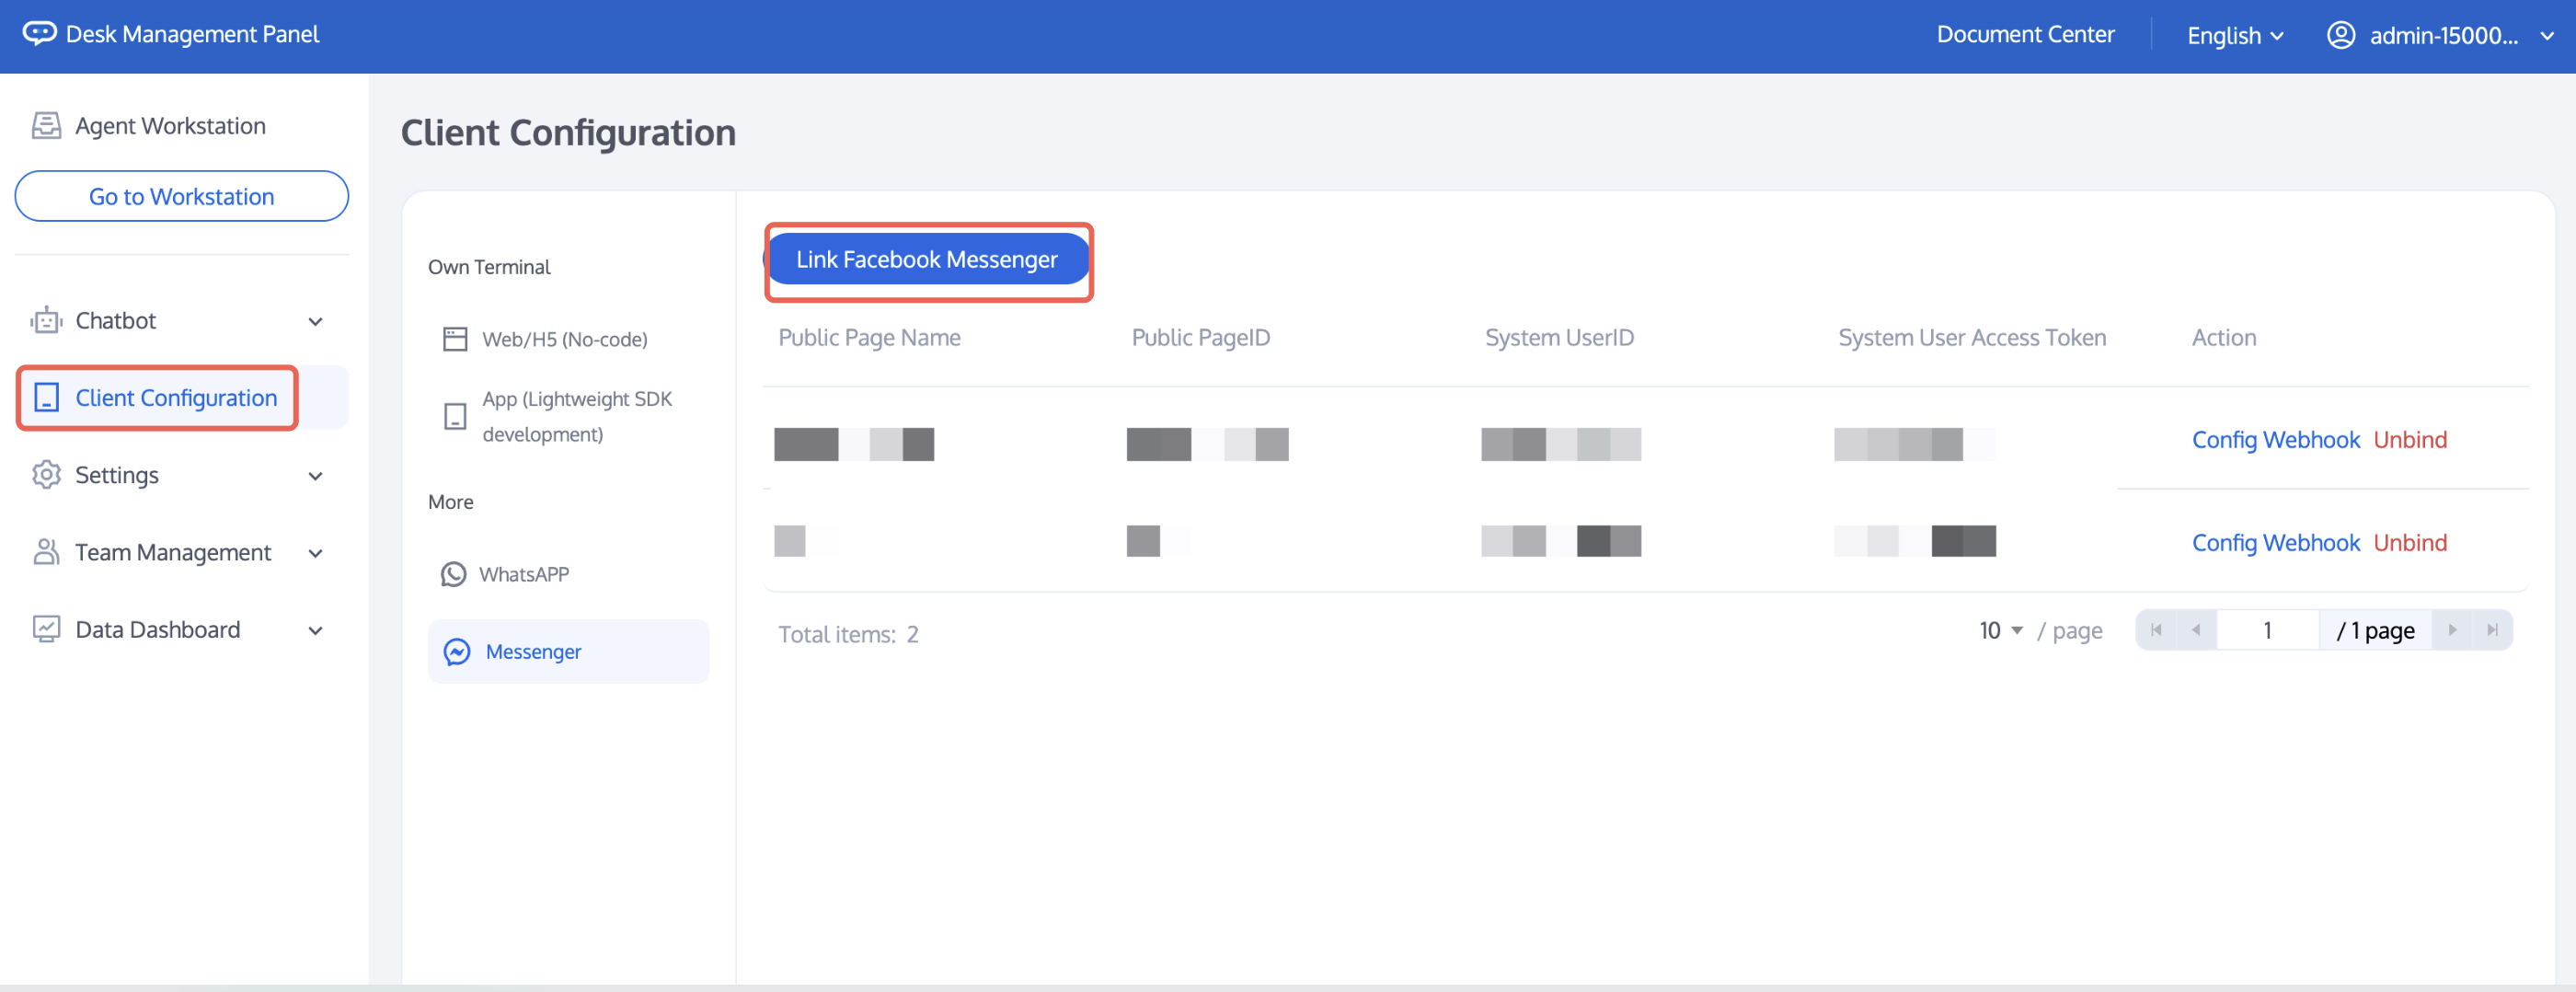
2. Click Add Messenger Account (the following fields can be queried from the Facebook webpage).
3. Copy the URL and token of Desk to the Facebook Webhook Configuration Page.
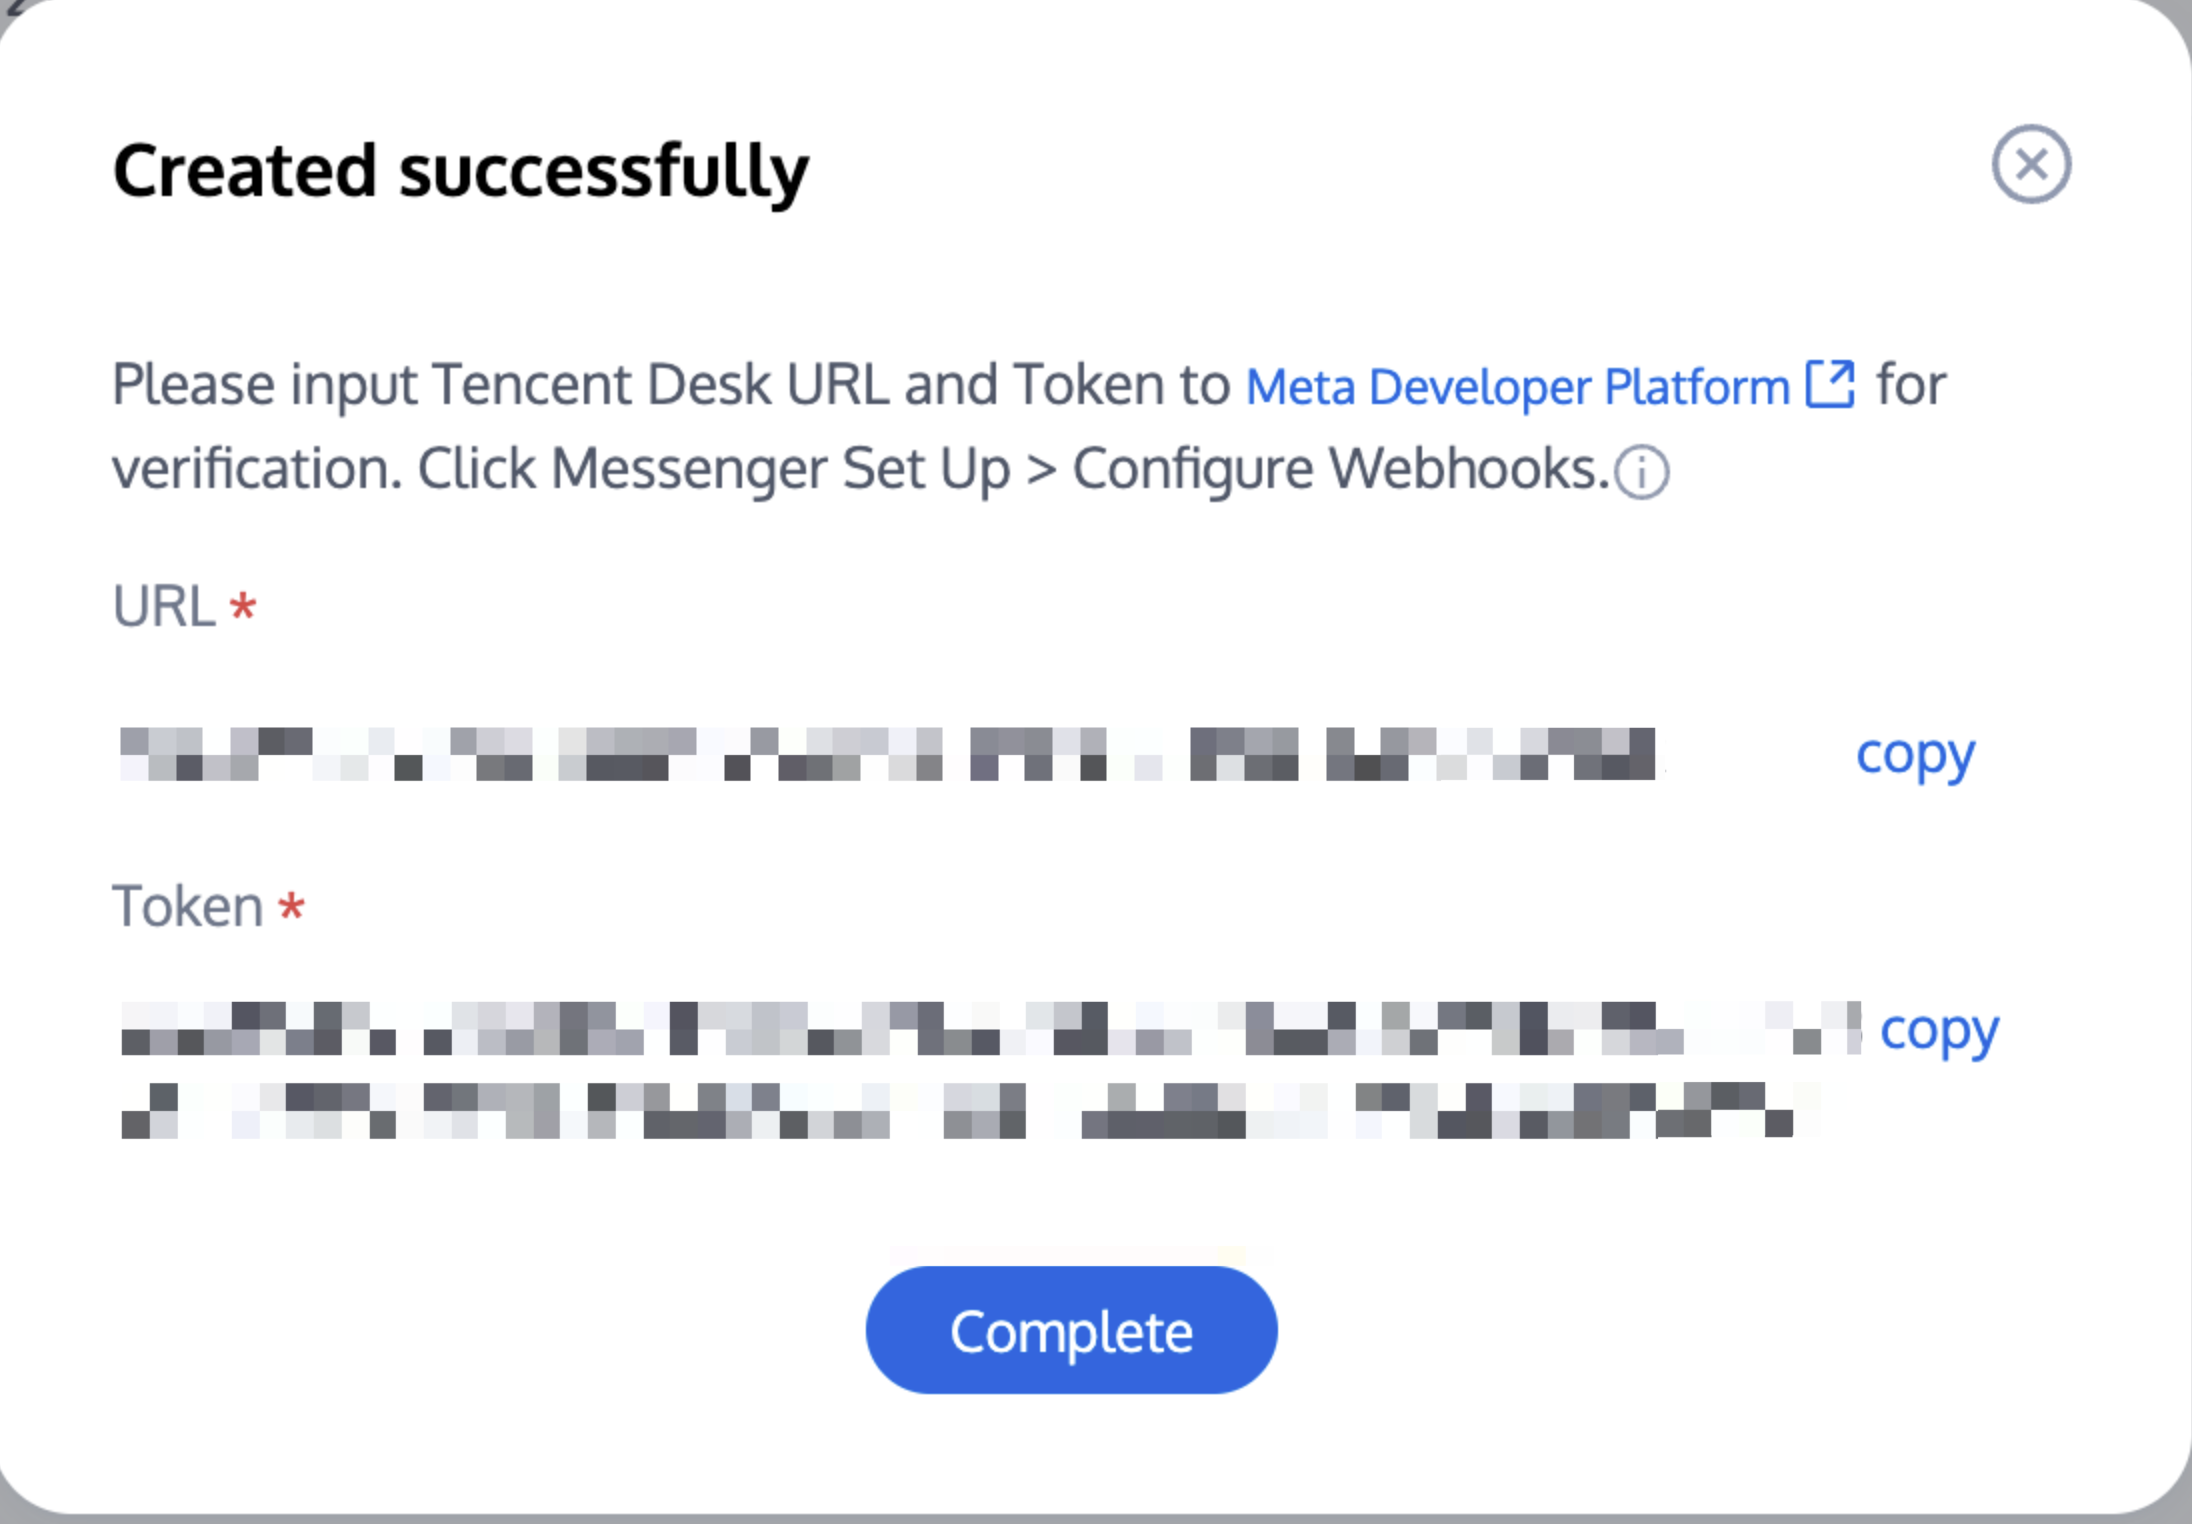
4. If you forget the URL and Token, you can view them in Operations > Configuration Callback.
Step 2: Adding Callback to Messenger
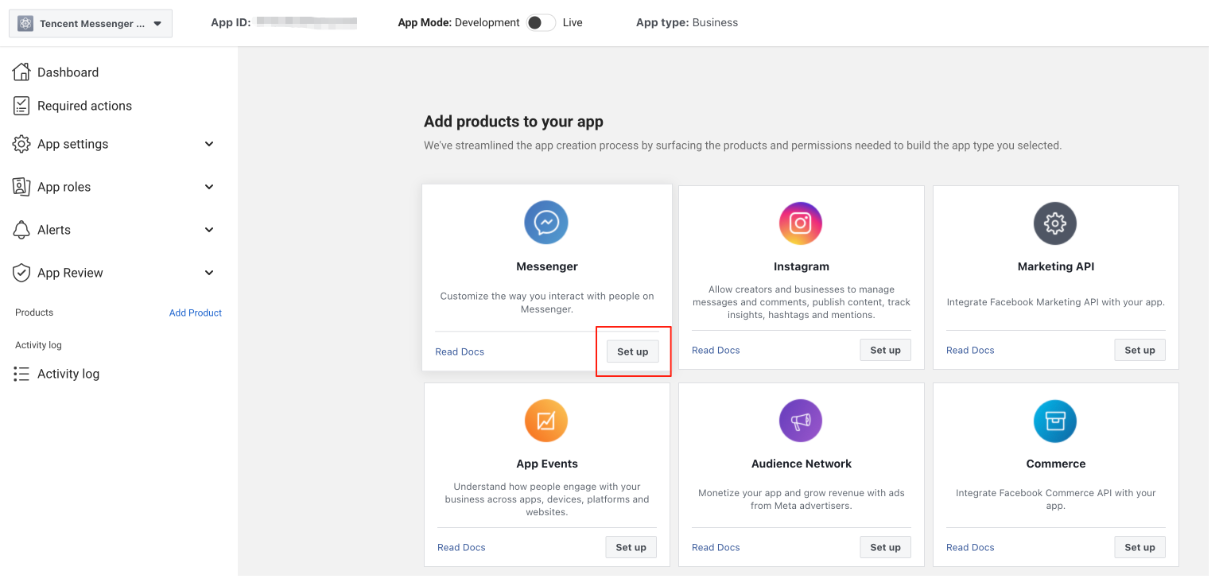
1. Back to Meta Developer Platform, select Messenger, and click the Settings button.
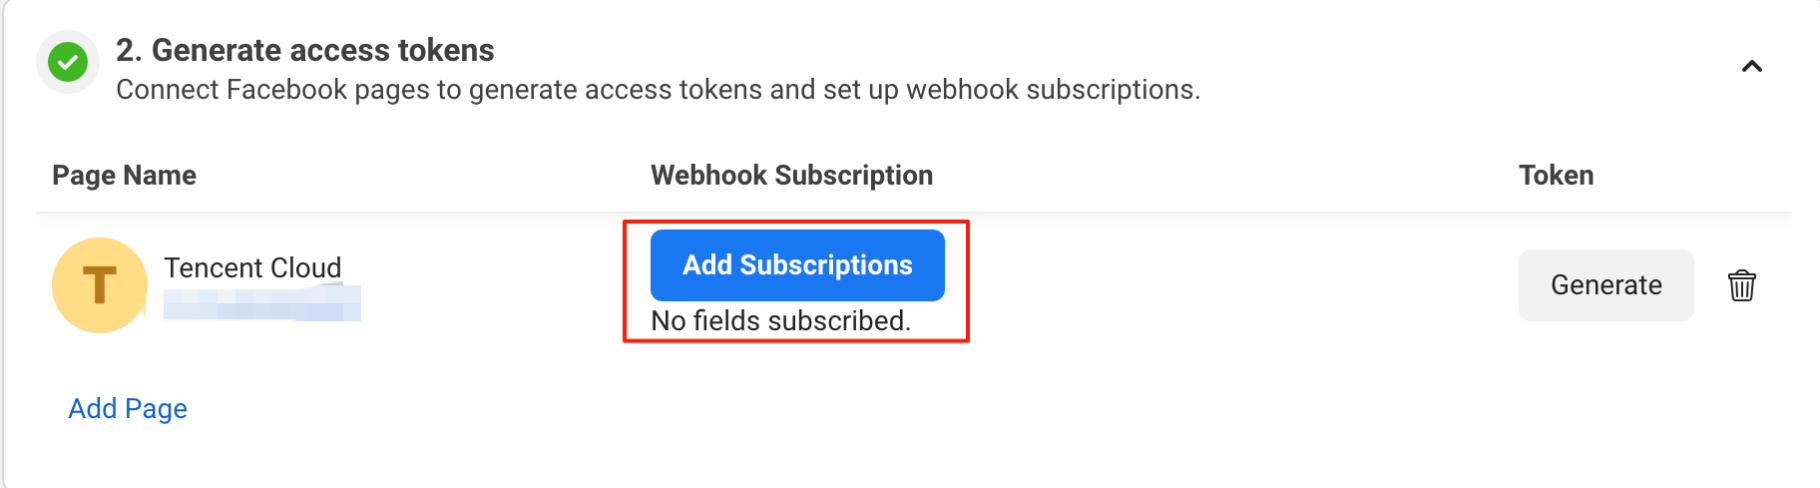
2. Configure callback: Fill in the URL and Token of Desk to Facebook.

3. After associating your Facebook business page, click the Add Subscription button.
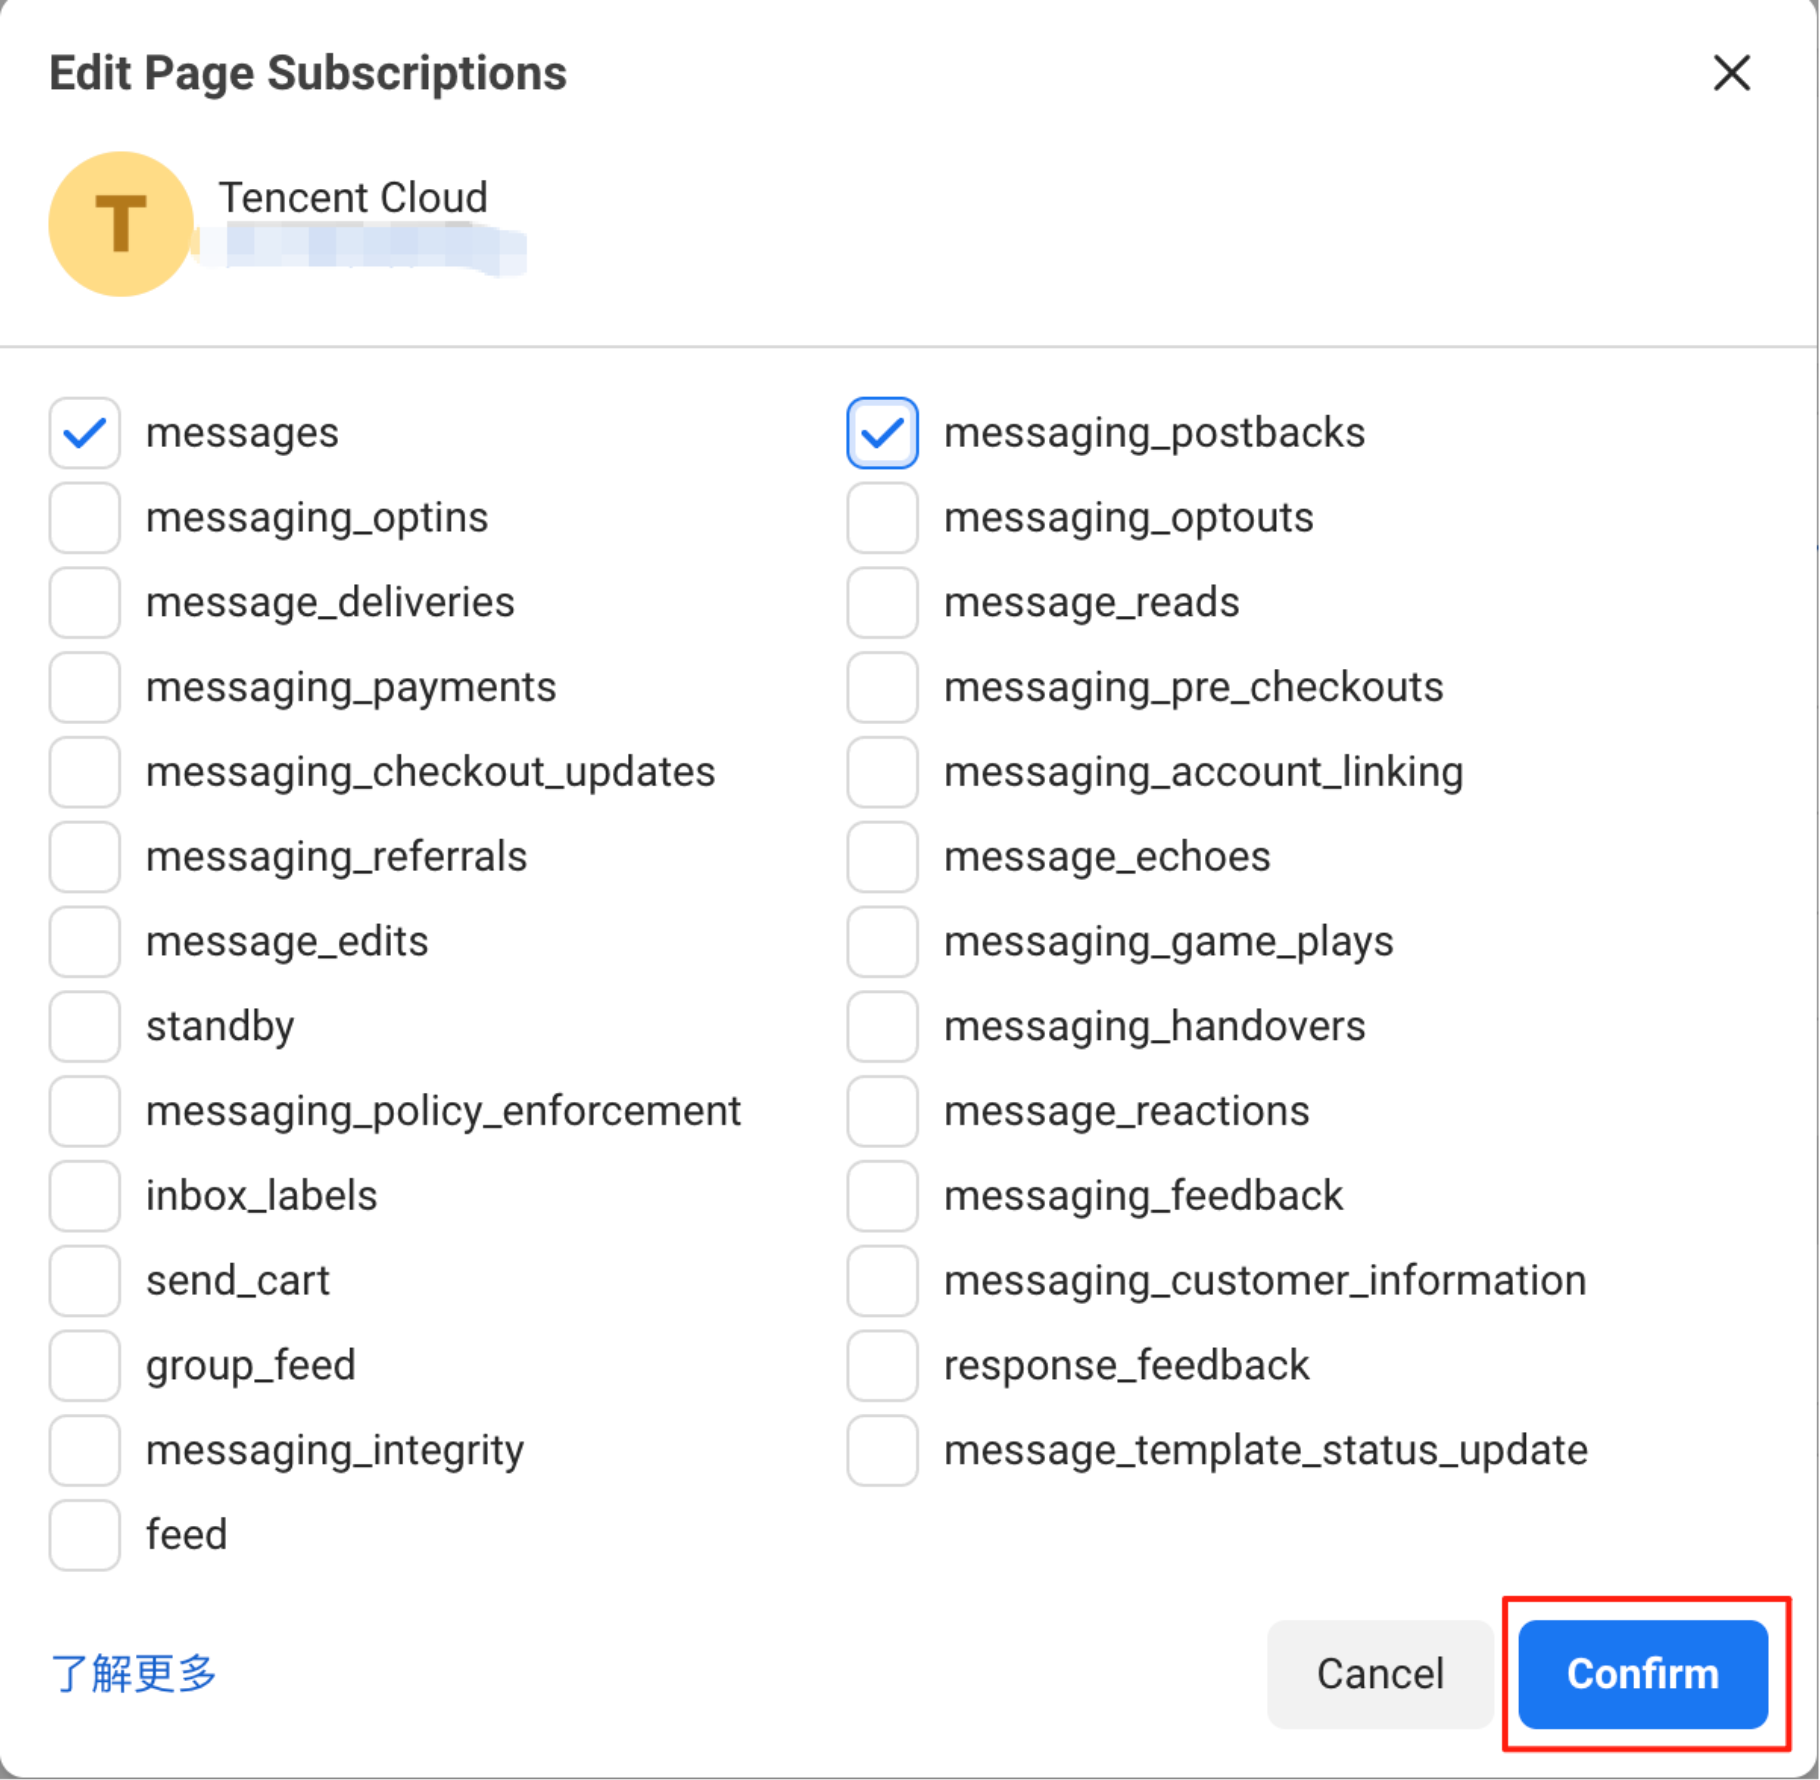
3.1 Choose to subscribe to "messages" and "messaging_postbacks", then click Confirm for smooth channel access.
Ajuda e Suporte
Esta página foi útil?
Você também pode entrar em contato com a Equipe de vendas ou Enviar um tíquete em caso de ajuda.
comentários