This document primarily introduces the custom capabilities supported by the iOS SDK, including customizing multilingual support and customizing the UI.
Note:
Supported version: v1.0.1.5 and above.
Starting from v1.0.1.5, the Bundle configuration field has been changed from "Bundle Name" to "Bundle Absolute Path". If you are migrating from an older version, see the migration instructions at the end of this document.
Custom Multilingual
SDK built-in languages
The SDK supports the following three languages by default, configured via VerificationConfig.languageType:
Enumeration Value
Meaning
HY_EKYC_DEFAULT
Following system settings
HY_EKYC_ZH_HANS
Simplified Chinese
HY_EKYC_ZH_HANT
Traditional Chinese
HY_EKYC_EN
English (Default)
HY_EKYC_CUSTOMIZE_LANGUAGE
Custom language
Using built-in languages requires no additional configuration, for example, specifying Simplified Chinese:
If the built-in languages do not meet your requirements, you can provide a custom language Bundle. This Bundle contains all multilingual fields within the SDK, as follows.
Step 1: Build UserLanguageBundle
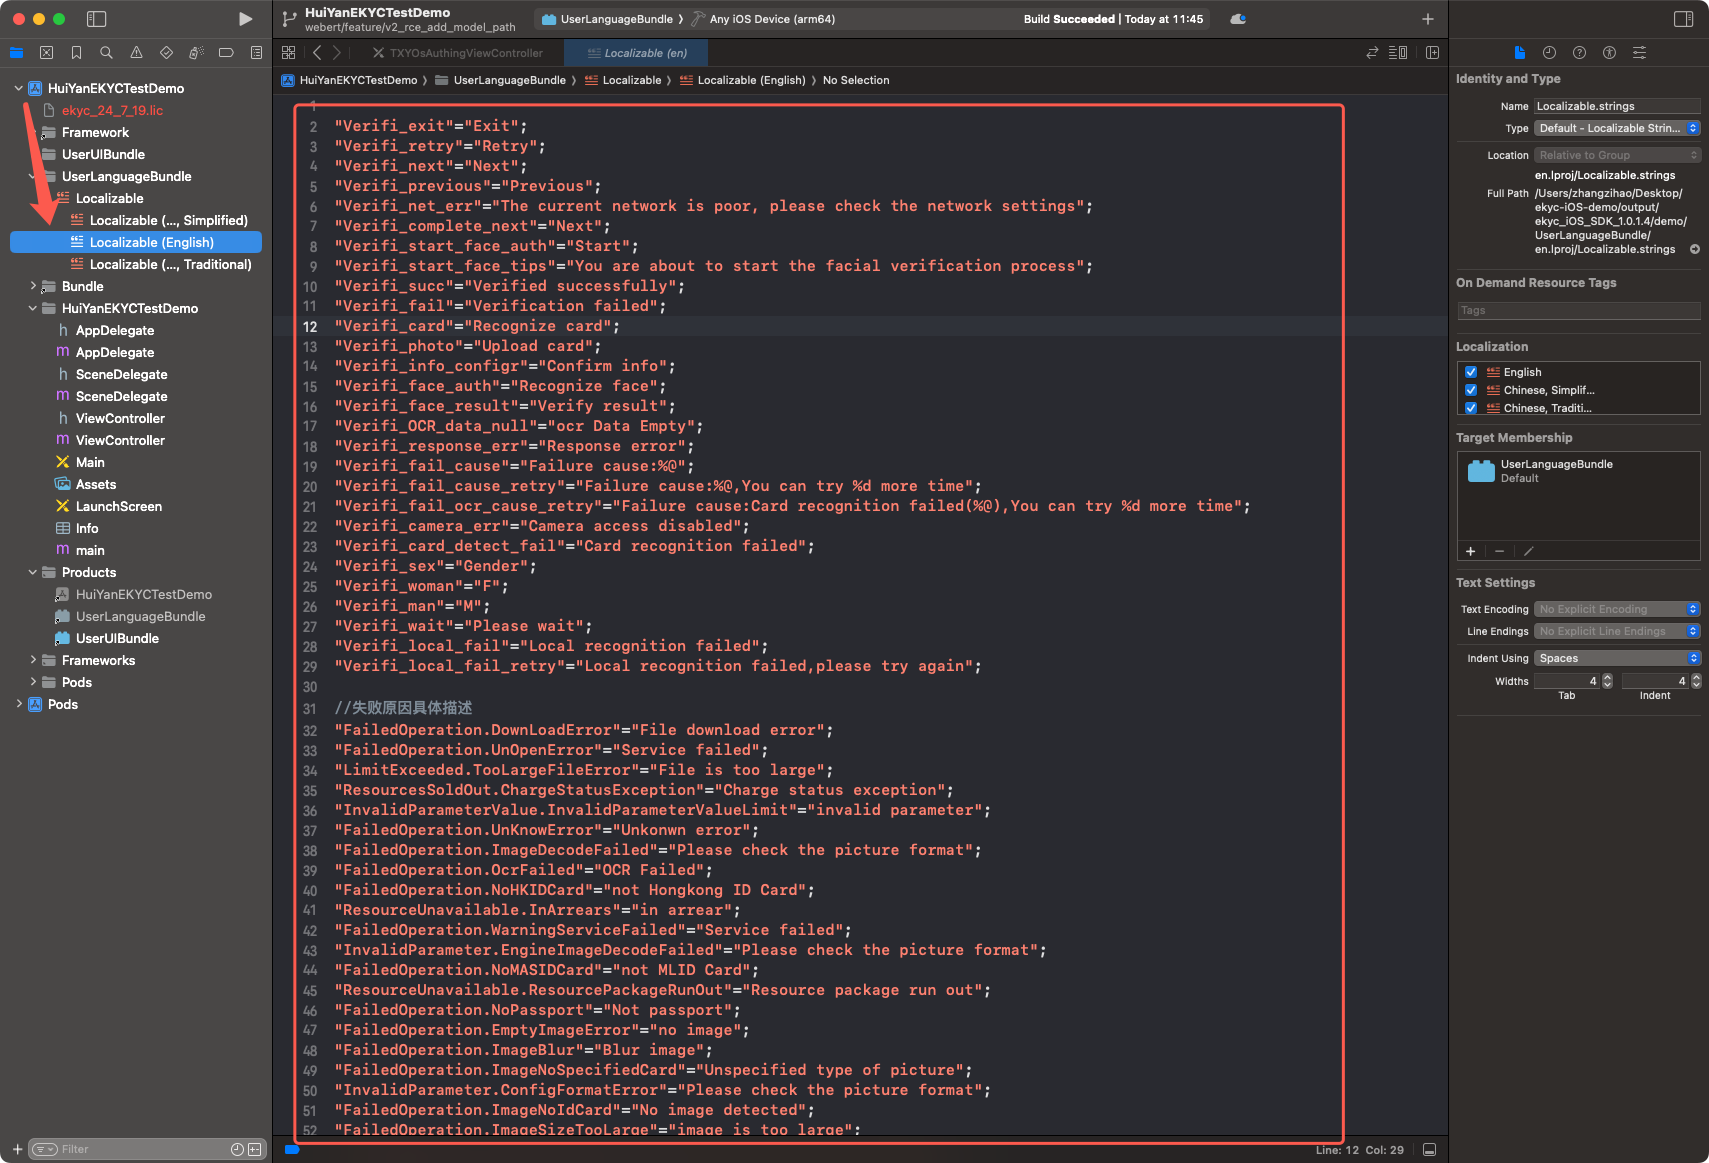
1. Open the delivery package demo/ directory to find the project files, then locate the Localizable under the UserLanguageBundle directory; this part serves as the translation source file.
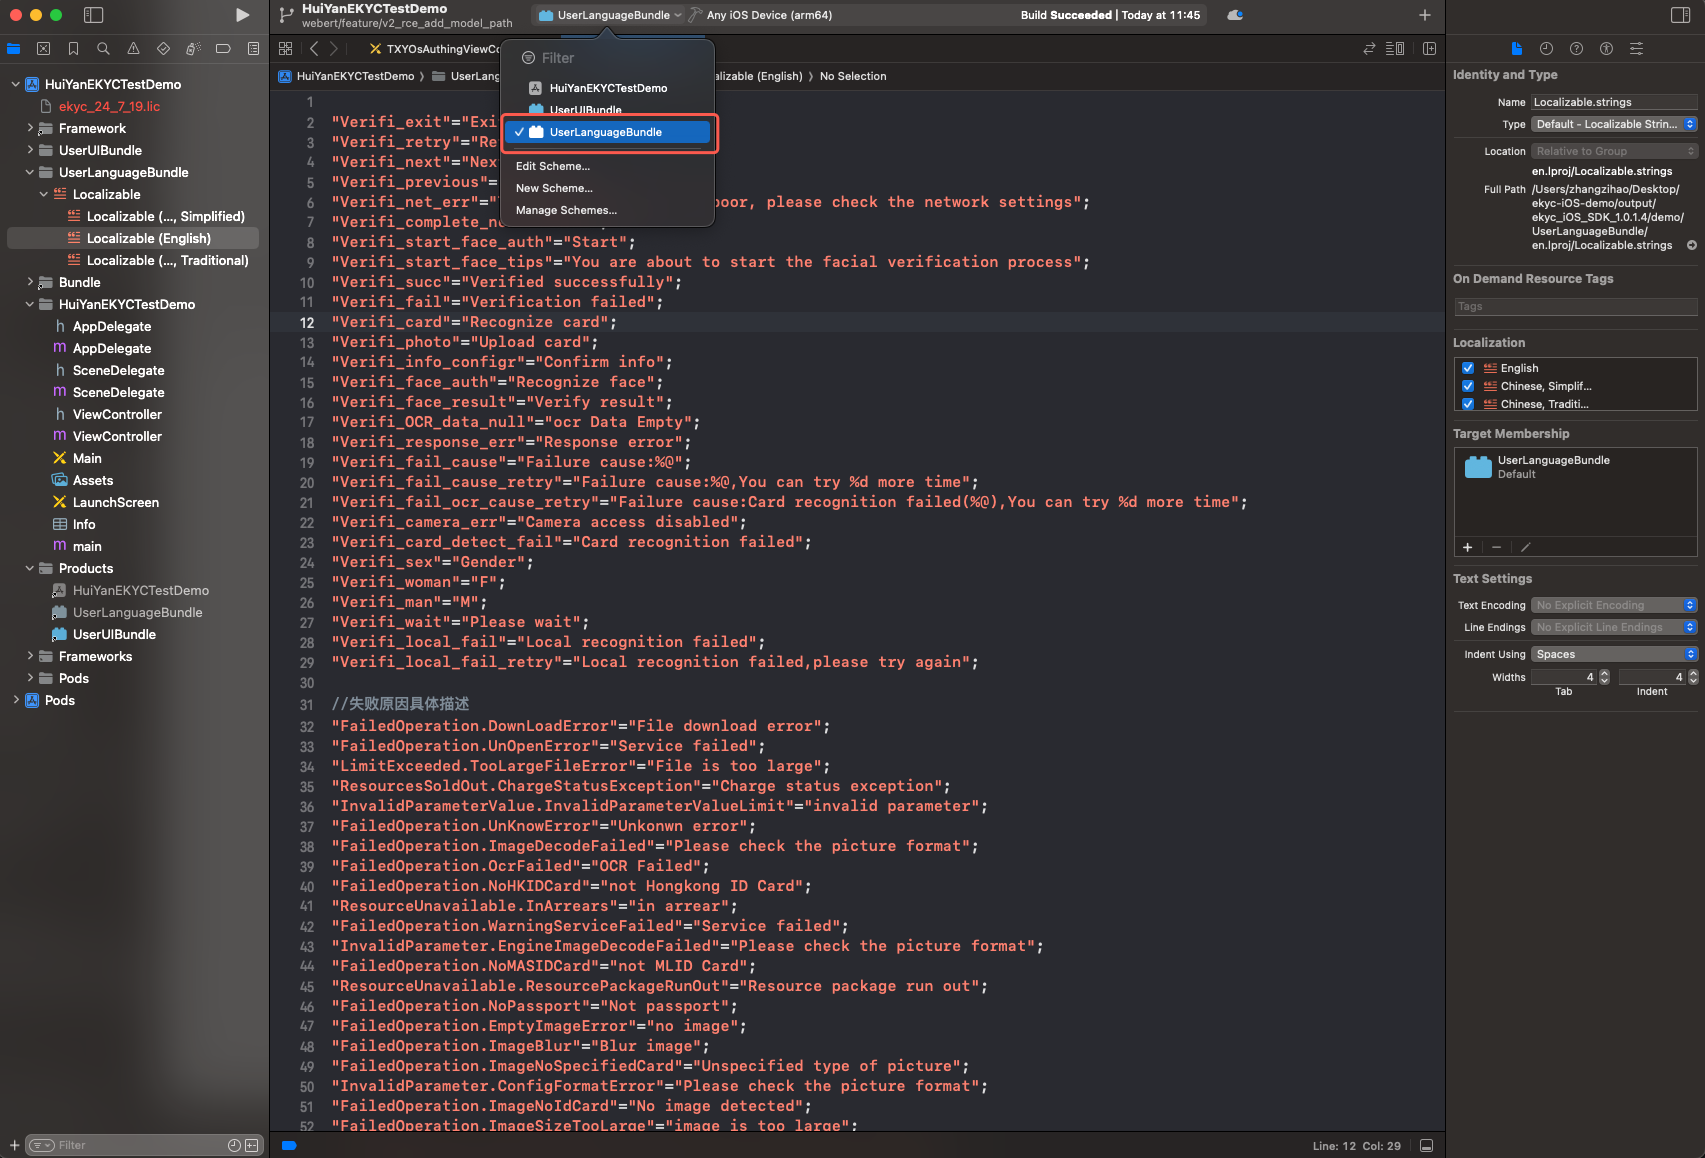
2. Locate the UserLanguageBundle (Build Target) in the project.
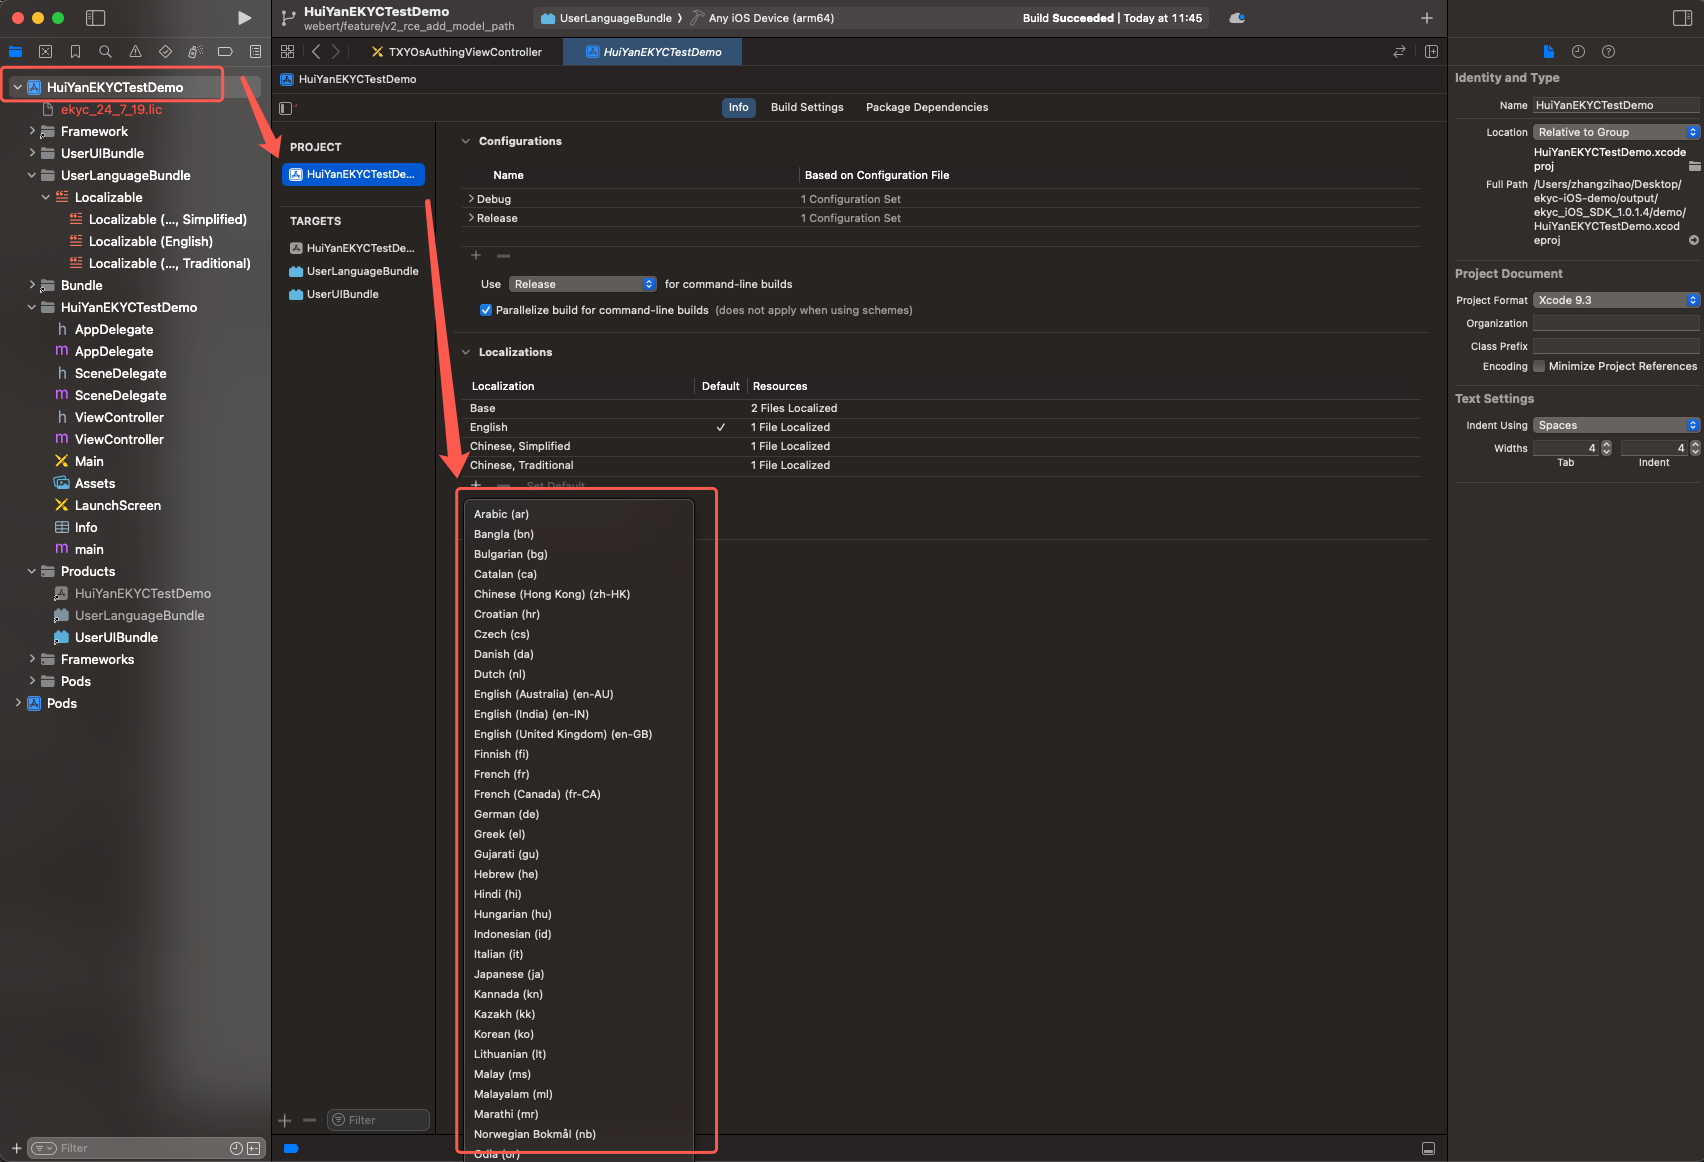
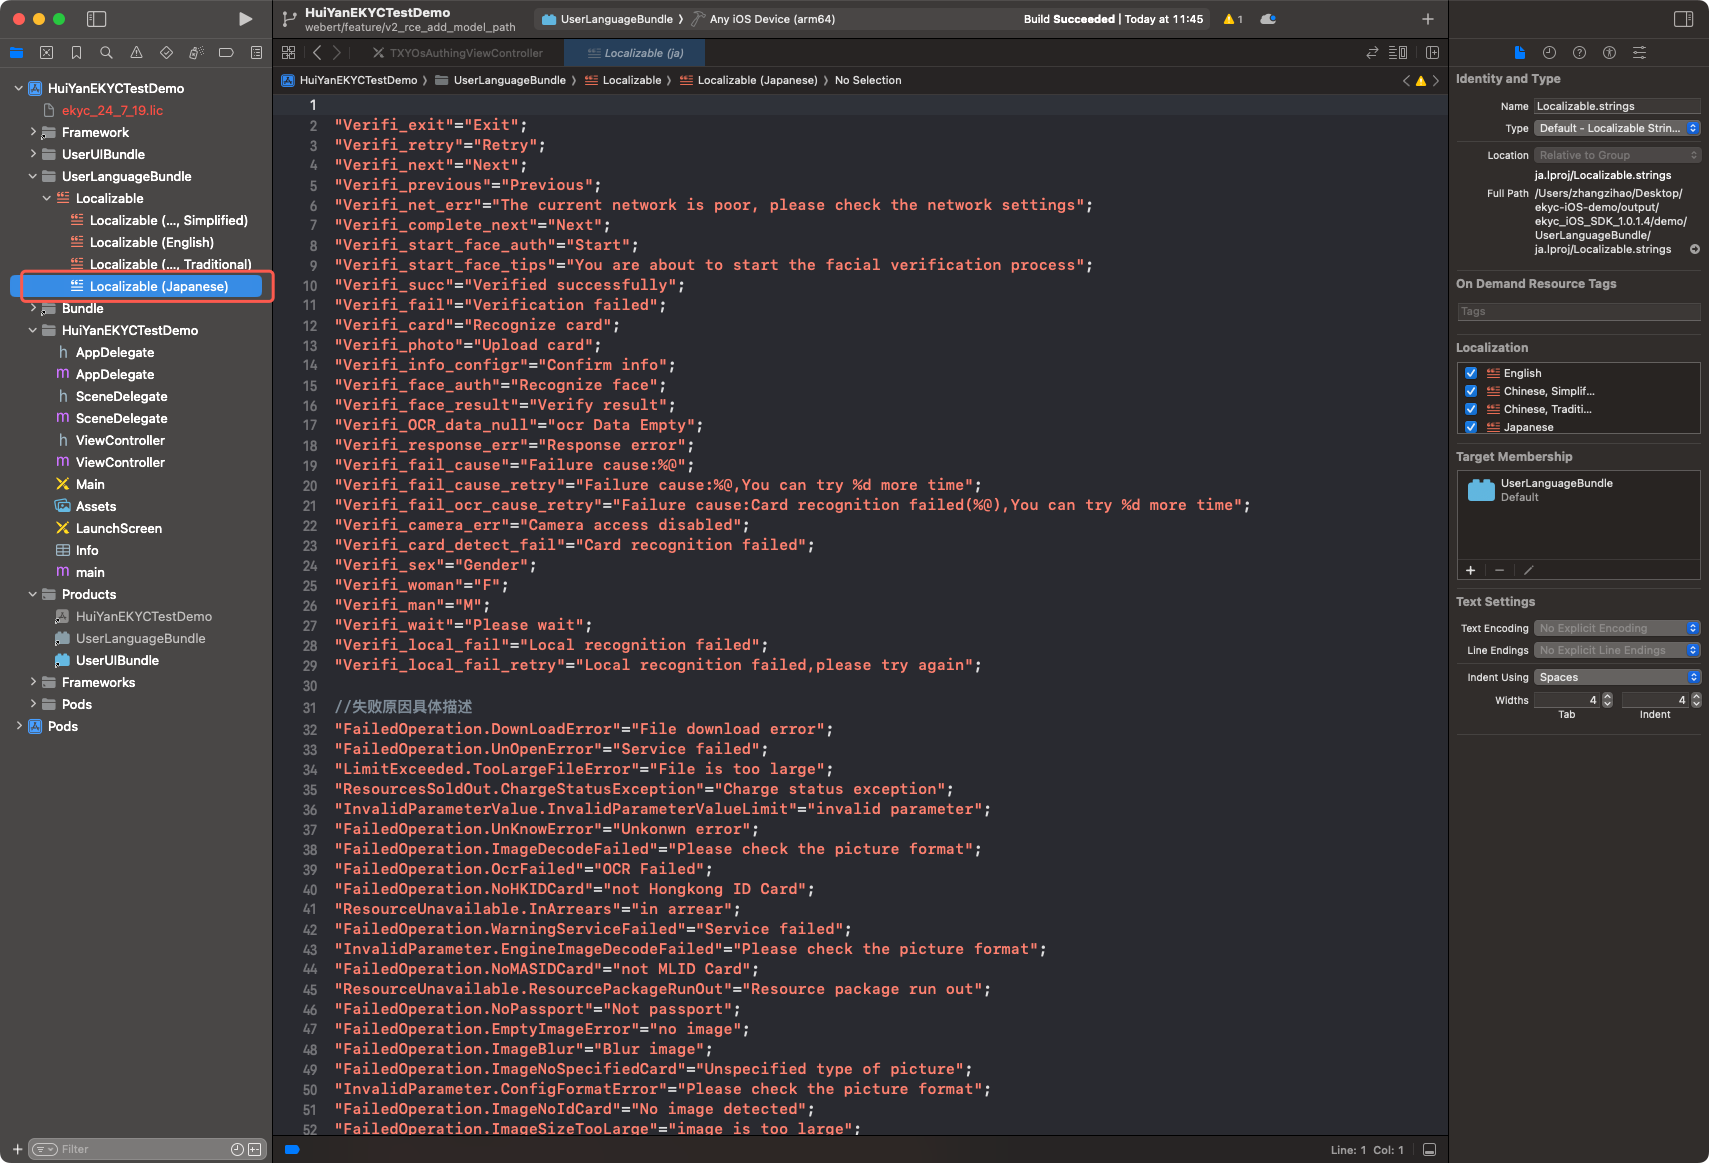
3. Add language files as needed (such as ja.lproj).
4. Add the new multilingual content to Localizable.strings.
5. Locate the newly added multilingual files in Localizable and translate their content.
// The left side is the Key used by the SDK, and the right side is the translation content in the target language.
"Verifi_OK"="OK";
"Verifi_exit"="Exit";
// ... For the remaining Keys, refer to the Key reference table below.
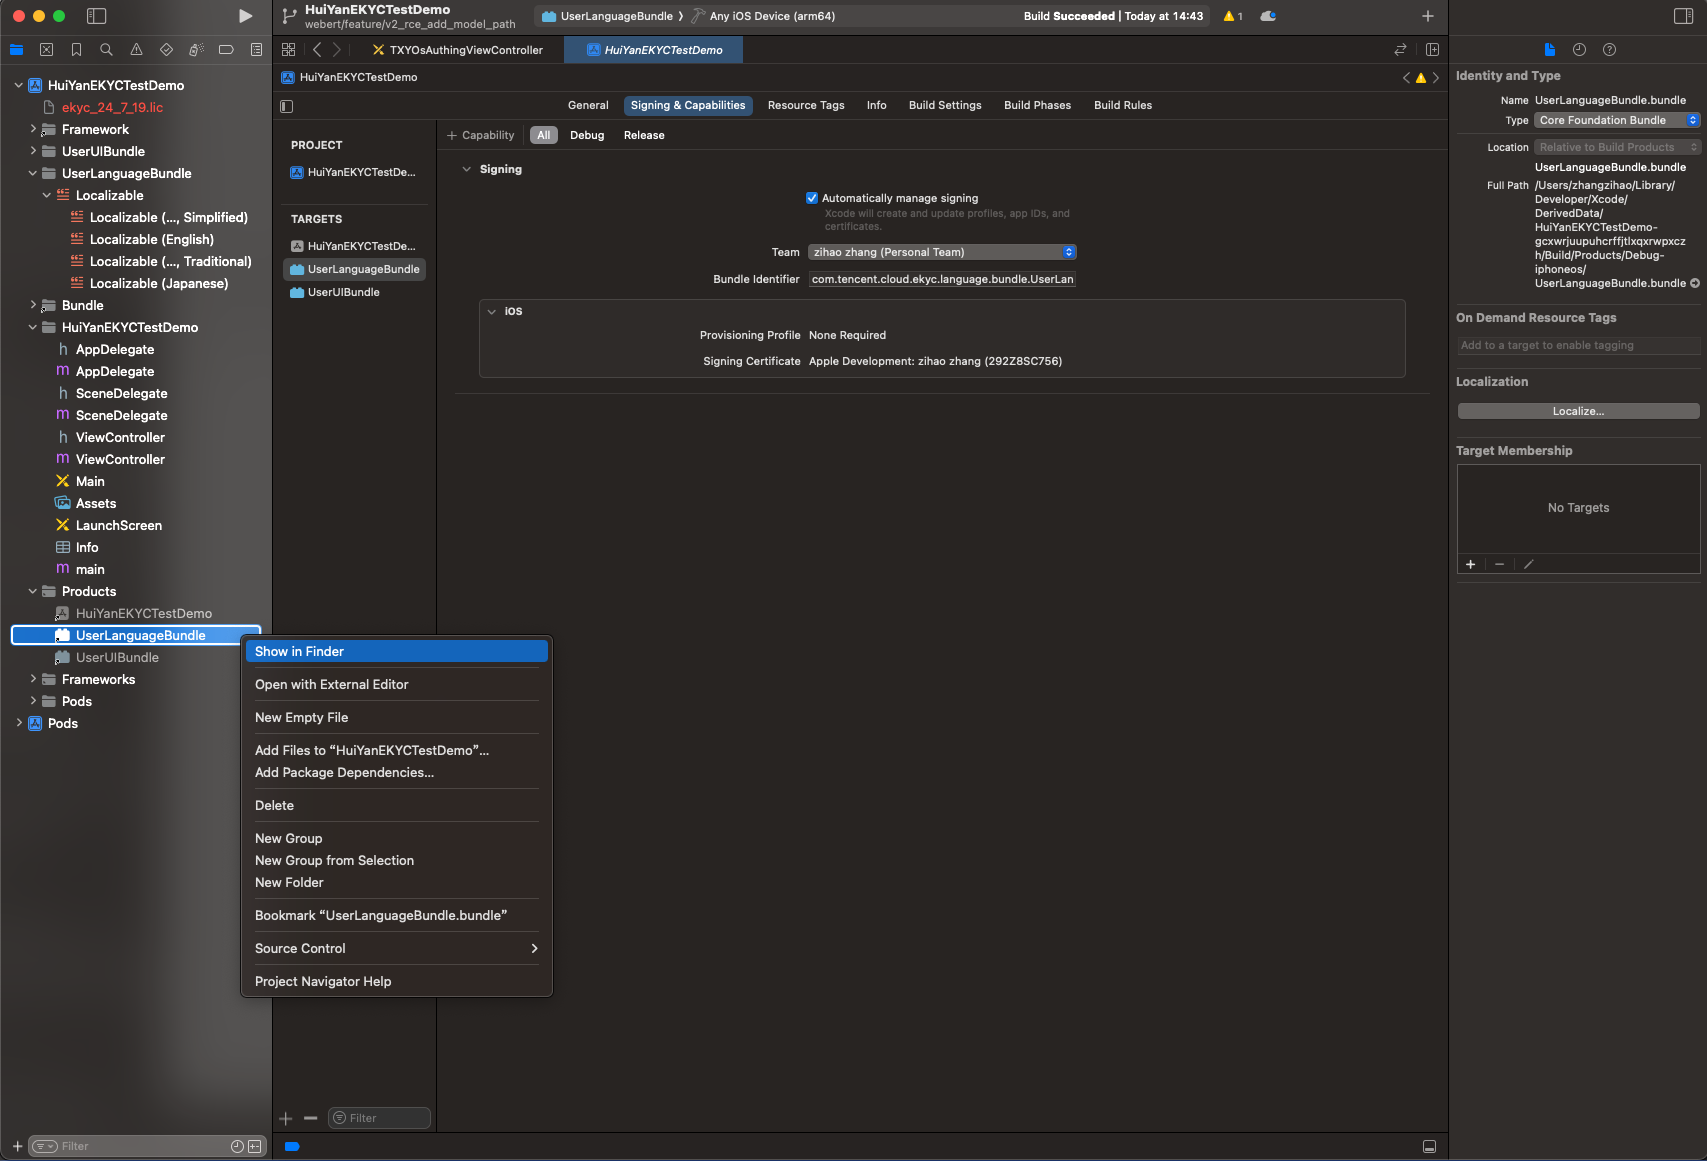
6. Compile to produce UserLanguageBundle.bundle.
7. If a signature error occurs during compilation, please configure the signature and recompile. After successful compilation, delete the Info.plist and _CodeSignature folders within the Bundle.
8. Import the UserLanguageBundle.bundle into the host project.
Set to HY_EKYC_CUSTOMIZE_LANGUAGE to enable customization
userLanguageBundlePath
NSString *
Required when custom languages are used.
The absolute path of UserLanguageBundle
userLanguageFileName
NSString *
Required when custom languages are used
Target .lproj folder name, such as ja.lproj
Note:
If userLanguageBundlePath is nil, the SDK will look up multilingual resources from the huiyan_verification.bundle in the mainBundle (the default behavior).
Custom UI
Code-level UI customization (no XIB required)
If you only need to adjust styles such as colors and fonts, the SDK provides a lighter-weight configuration class without requiring recompilation of the Bundle.
By using VerificationConfig.delegate, you can monitor the creation and destruction events of the SDK interface, for example, inserting custom logic when the OCR or selfie verification interface is displayed:
Through the faceMainViewCreate: callback, after the selfie verification page is created, you can directly obtain the controls in the table above via viewWithTag: and modify them.
Example: Modify the styles of various controls on the liveness page.
// Callback upon creation of the selfie verification interface
-(void)faceMainViewCreate:(UIView *)authView {
// Modify the text color and font of the Cancel button
Before changes are made, it is recommended to use if (view) { ... } to perform a null check, to prevent crashes when the control does not exist in certain modes.
If you need to simultaneously adjust color parameters (via FaceCustomConfig) and control styles (via callbacks), both can coexist. FaceCustomConfig controls the base styles, and modifications in the callbacks will override the final effect of the corresponding controls.
Using XIB to customize the page
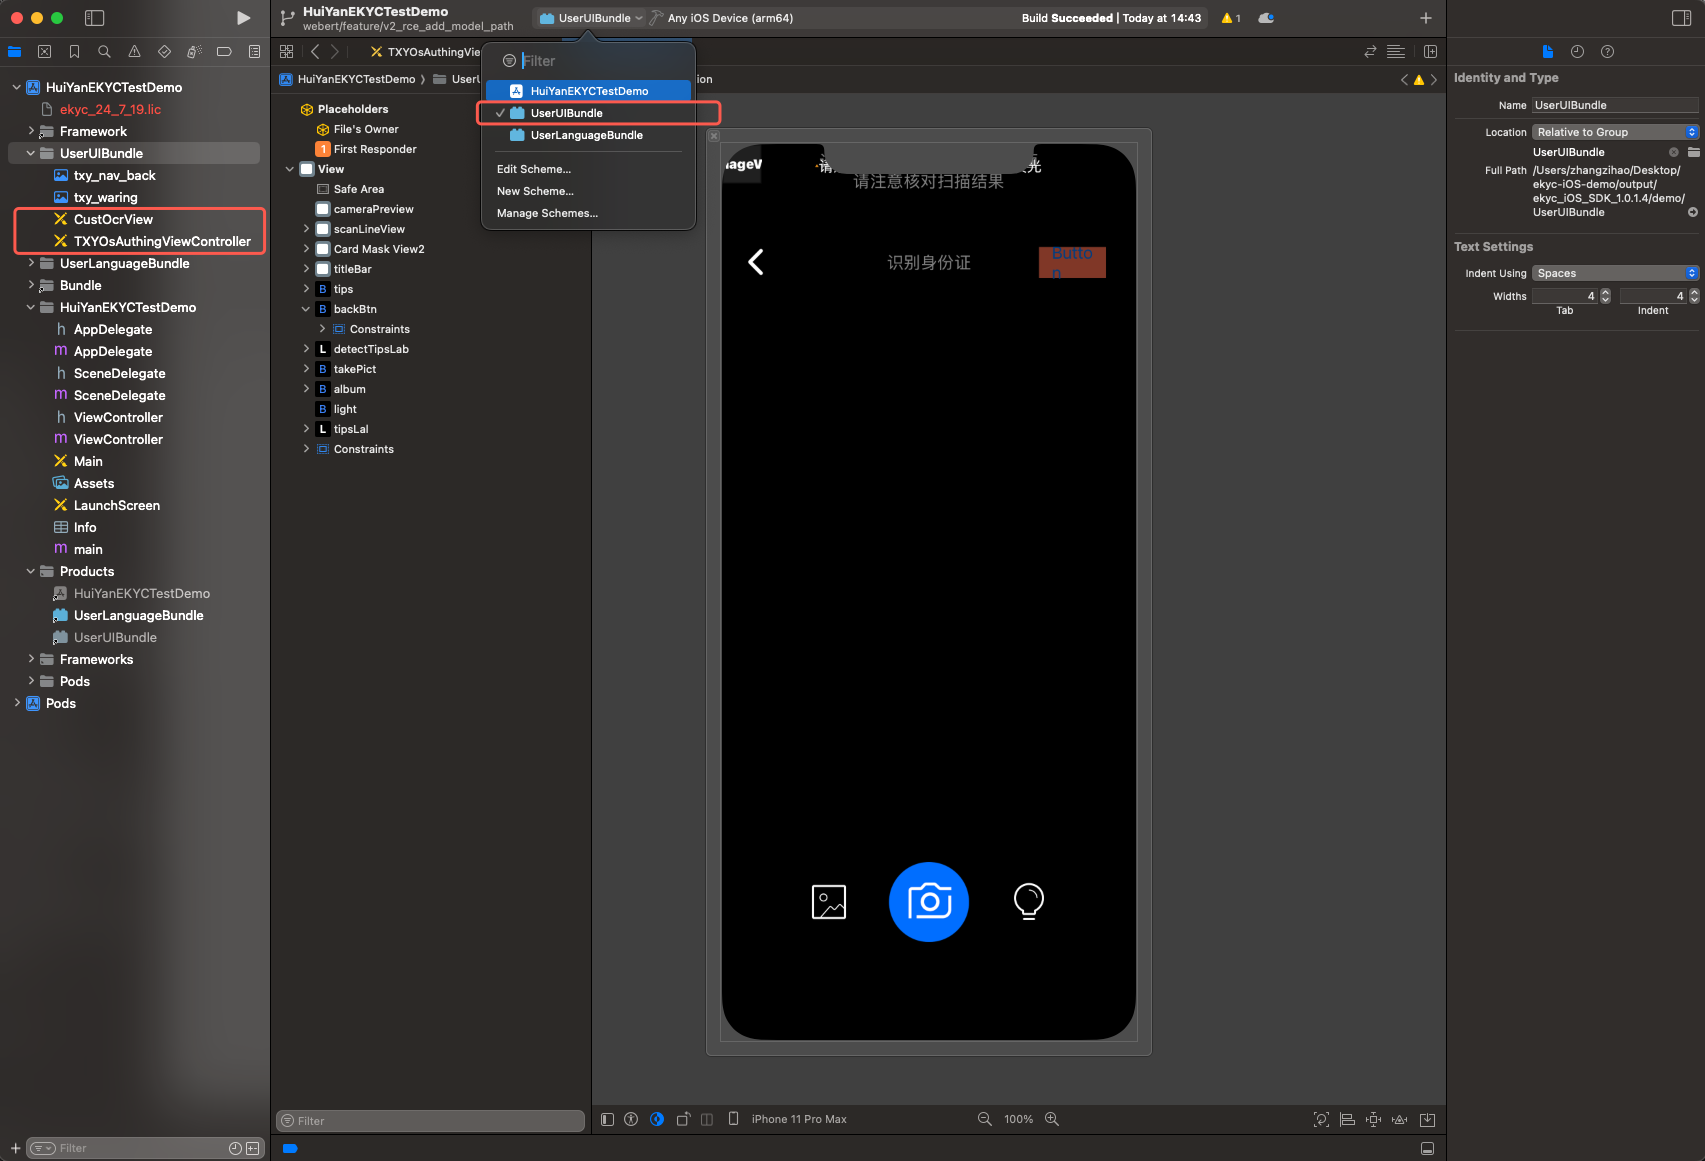
The SDK provides two XIB files for the host App to customize the UI, both located under the UserUIBundle build target of the project:
demo/
└── UserUIBundle/
├── TXYOsAuthingViewController.xib # liveness face comparison page
└── CustOcrView.xib # ID document recognition page
XIB file name
Corresponding page
Description
TXYOsAuthingViewController
Selfie verification page
Liveness Detection and Face Comparison main page
CustOcrView
Identity document recognition page
OCR Capture and Recognition main interface
Warning:
You can modify the layout constraints of controls and add new controls, but do not delete existing controls and constraints in the XIB, otherwise it may crash at runtime.
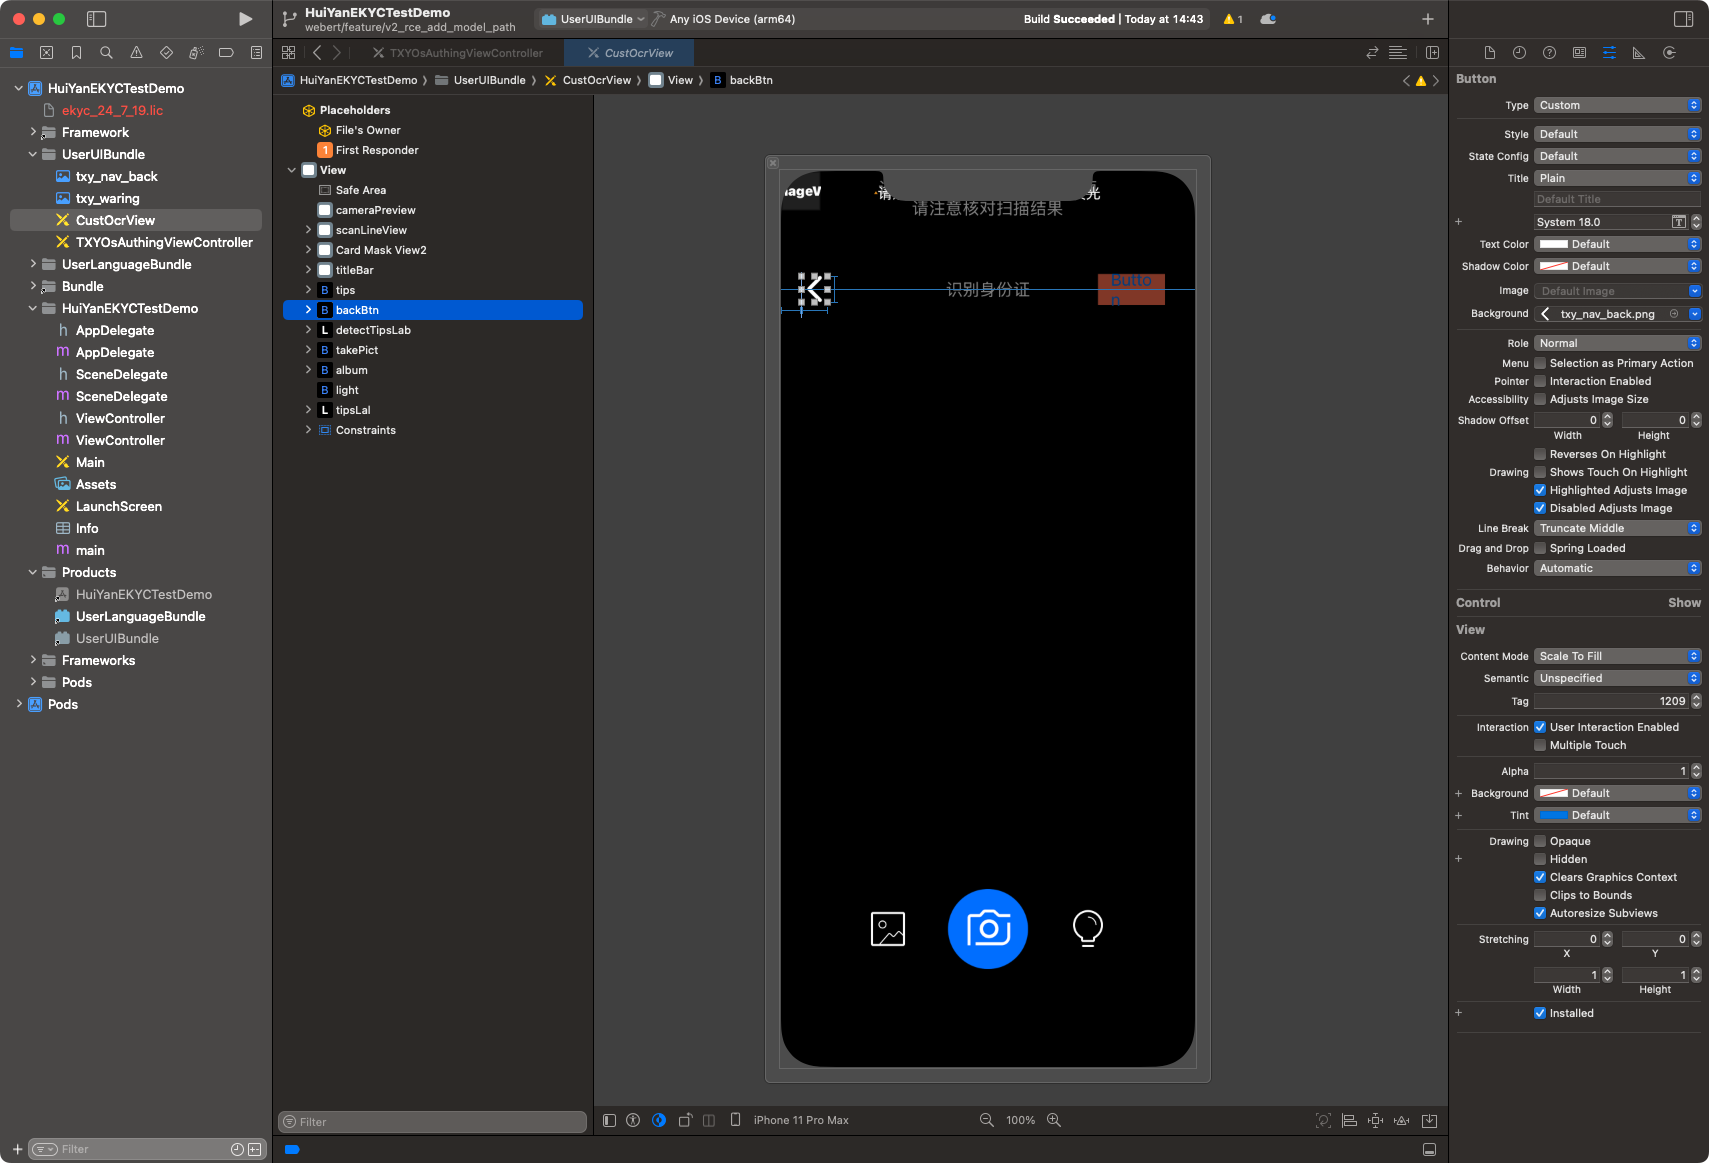
1. Identity Document Recognition stage
This page allows you to modify component constraints in the XIB file, such as the cancel button and hint messages. It also supports replacing the back button icon (txy_nav_back).
Note:
Do not modify the constraints of the camera, album, and flashlight controls in the XIB.
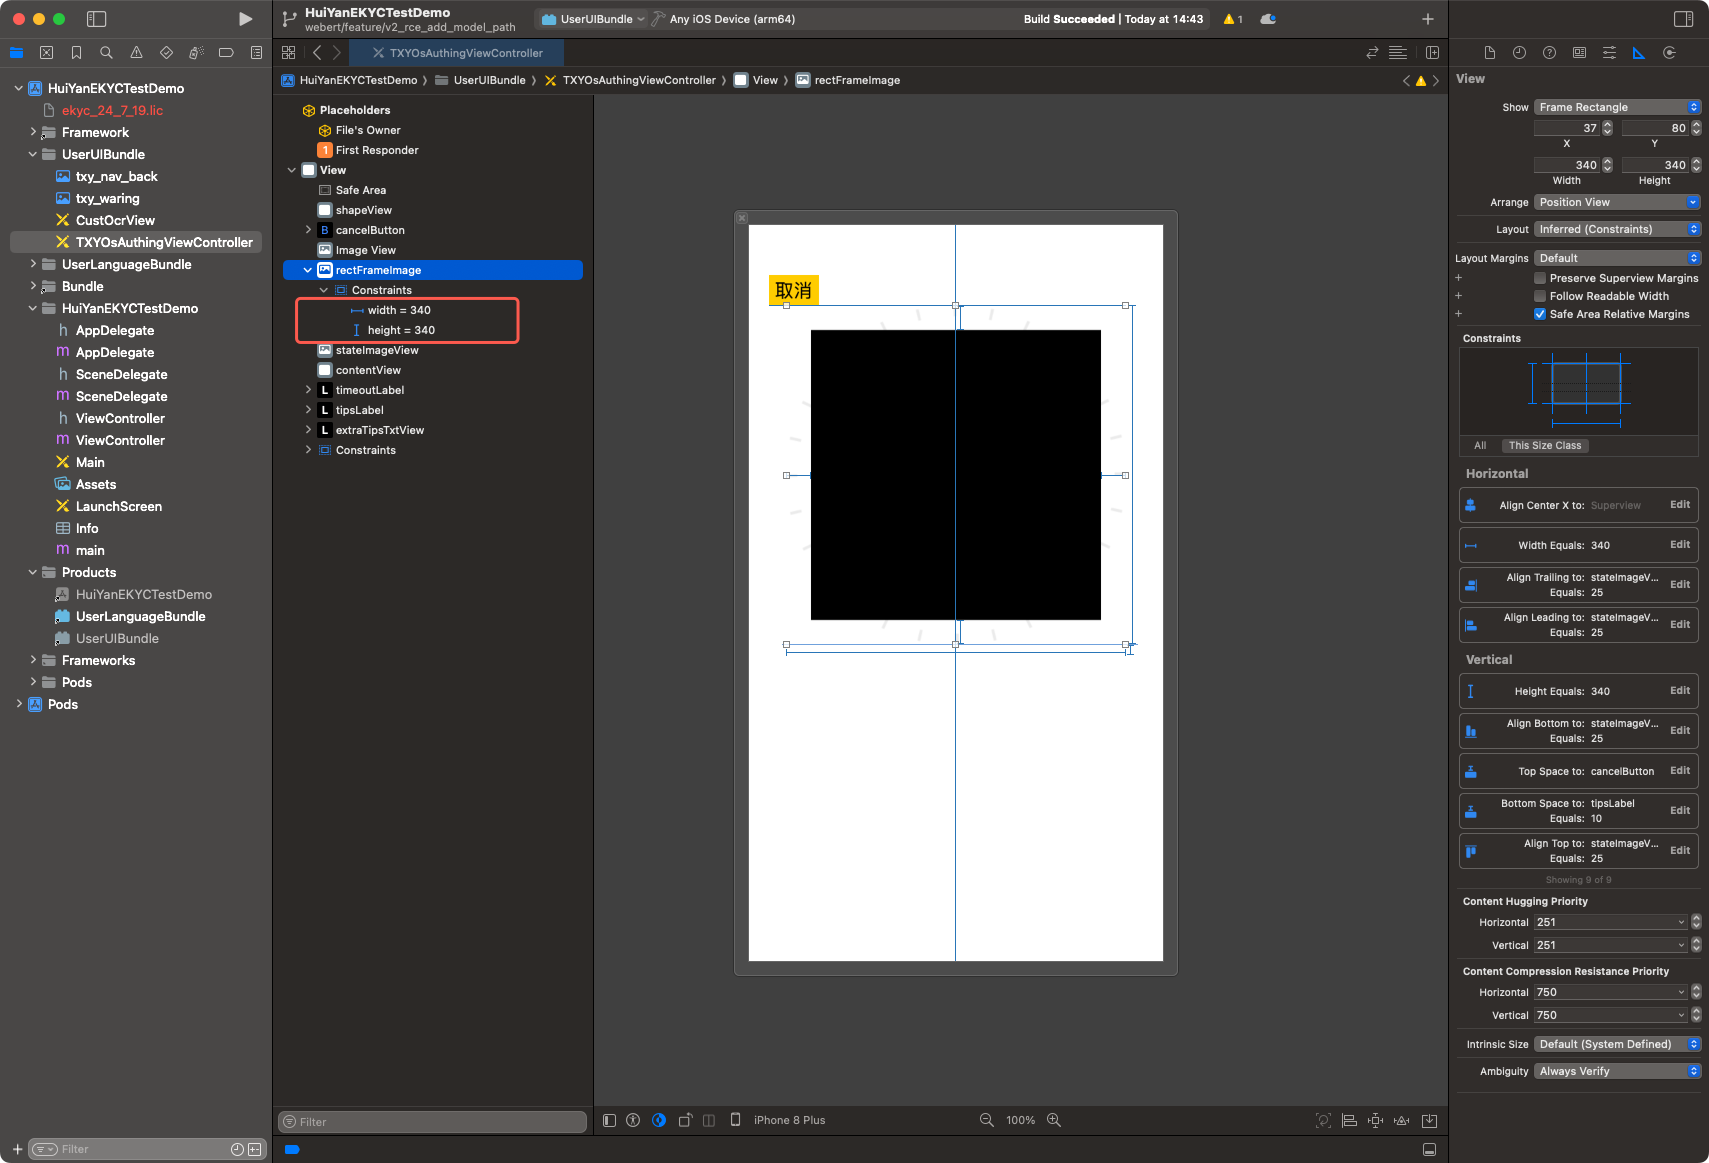
2. Selfie Verification stage
This page allows you to modify the size and position of components such as the viewfinder, tooltip messages, and countdown label in the XIB file.
2.1 Modify the constraints of rectFrameImage to control the size and position of the viewfinder.
2.2 Modify the constraints of tipsLabel to control the position of the tooltip box.
2.3 Modify the constraints of timeoutLabel to control the position of the countdown. You can also configure the font and size.
2.4 Modify the constraints of cancelButton to control the position of the back button. You can also configure the font and size.
3. Build UserUIBundle
3.1 Open the project file in the delivery package demo/ directory.
3.2 Locate the UserUIBundle (Build Target) in the project.
3.3 Modify the layout constraints of TXYOsAuthingViewController.xib or CustOcrView.xib as needed, or add new controls.
3.4 Compile to produce UserUIBundle.bundle.
3.5 If a signature error occurs during compilation, configure the signature and recompile; after successful compilation, delete the Info.plist and _CodeSignature folders within the Bundle.
3.6 Import the UserUIBundle.bundle into the host project.
5. Recommendations for Managing Custom XIB Source Code
It is recommended to copy the entire directory of demo/UserUIBundle/ to the code repository of the host project as the source code directory for custom UI after custom modifications are made. All subsequent modifications will be based on this directory.
Complete configuration example
The following example enables both custom UI and custom multilingual:
[kit startVerifiWithConfig:config withSuccCallback:^(int errorCode, id resultInfo, id reserved) {
// Verification successful
} withFailCallback:^(int errorCode, NSString *errorMsg, id reserved) {
// Verification failed. Error code 311 indicates an exception in the Bundle path configuration.
}];
Error Handling
When Bundle path validation fails, the SDK returns the following error codes via failCallback:
Error Code
Enumeration
Trigger Condition
311
HY_EKYC_BUNDLE_CONFIGURATION_EXCEPTION
The specified Bundle path either does not exist or is not a directory.
Error message (errorMsg) is in the format of "<field name> not found", for example:
"userUIBundle not found": The path specified by userUIBundlePath does not exist.
"userLanguageBundle not found": The path specified by userLanguageBundlePath does not exist.
Migration Instructions
Note:
Applicable to users upgrading from v1.0.1.4 and below.
Starting from v1.0.1.5, breaking changes have been made to the Bundle configuration field. The old field has been completely removed. Please update your code according to the following comparison table:
If the path field is nil, the SDK maintains the same default behavior as the old version (searching for the corresponding Bundle from mainBundle), which does not affect integrators who do not use custom features.