Multi-Device Login
Download
フォーカスモード
フォントサイズ
Feature Introduction
By default, each user ID (UserID) can only receive incoming calls on one device at a time. For example, if a user first logs in on a PC client and then logs in on a mobile client, only the mobile device will receive subsequent incoming call notifications.
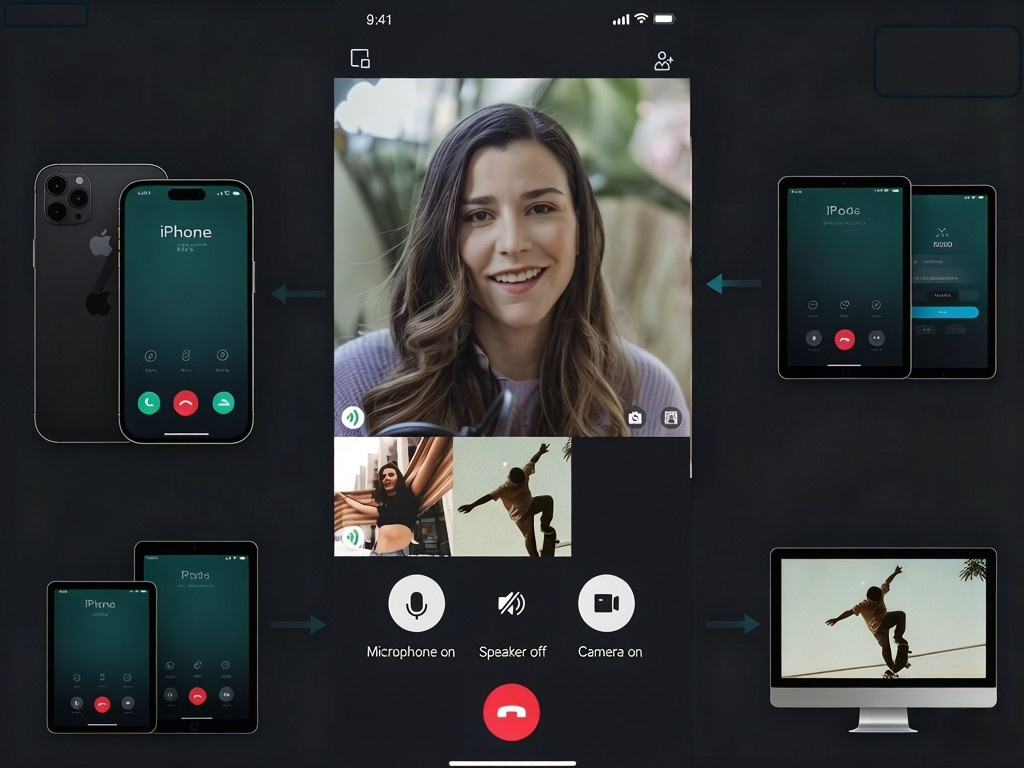
Typically, a user ID (UserID) is restricted to a single device login at any given time. However, in environments like offices or healthcare facilities, users often need to switch between phones and computers to chat or make calls without interruption. To address this need, TUICallKit provides a multi-device login feature. When enabled, users can log in to multiple clients simultaneously using the same UserID—for example, an iPhone, an iPad, and a Windows PC. When an incoming call arrives, all logged-in devices will receive the call invitation and ring at the same time. Once the user answers the call on any device, the incoming call screen will automatically disappear from the other devices, and the call will connect on the device that answered.
Note:
Multi-device login is a premium feature. To use it, you must purchase or claim a group call edition package for TUICallKit's audio and video call capability. Alternatively, you can activate the trial edition for free. For details on editions and activation instructions, see Audio and Video Call Capability Editions.
Getting Started
1. Complete the steps in the Quick Access guide to integrate TUICallKit into your project. You should be able to initiate and answer basic audio and video calls.
2. To enable multi-device login, call the enableMultiDeviceAbility API after successfully logging in to TUICallKit. See the following examples:
// Take Kotlin as an example// true: enable multi-device login false: disable multi-device login (default)TUICallEngine.createInstance(context).enableMultiDeviceAbility(true, null)
// Take Swift as an example// true: enable multi-device login false: disable multi-device login (default)TUICallEngine.createInstance().enableMultiDeviceAbility(enable: true) {} fail: { code, message in}
// true: enable multi-device login false: disable multi-device login (default)final result = await TUICallEngine.instance.enableMultiDeviceAbility(true);
// true: enable multi-device login false: disable multi-device login (default)TUICallKitServer?.getTUICallEngineInstance()?.enableMultiDeviceAbility(true);
// true: enable multi-device login false: disable multi-device login (default)TUICallKitServer?.getTUICallEngineInstance()?.enableMultiDeviceAbility(true);
// true: enable multi-device login false: disable multi-device login (default)TUICallKitServer?.getTUICallEngineInstance()?.enableMultiDeviceAbility(true);
3. After completing these steps, your application will support multi-device login. No additional configuration is required.
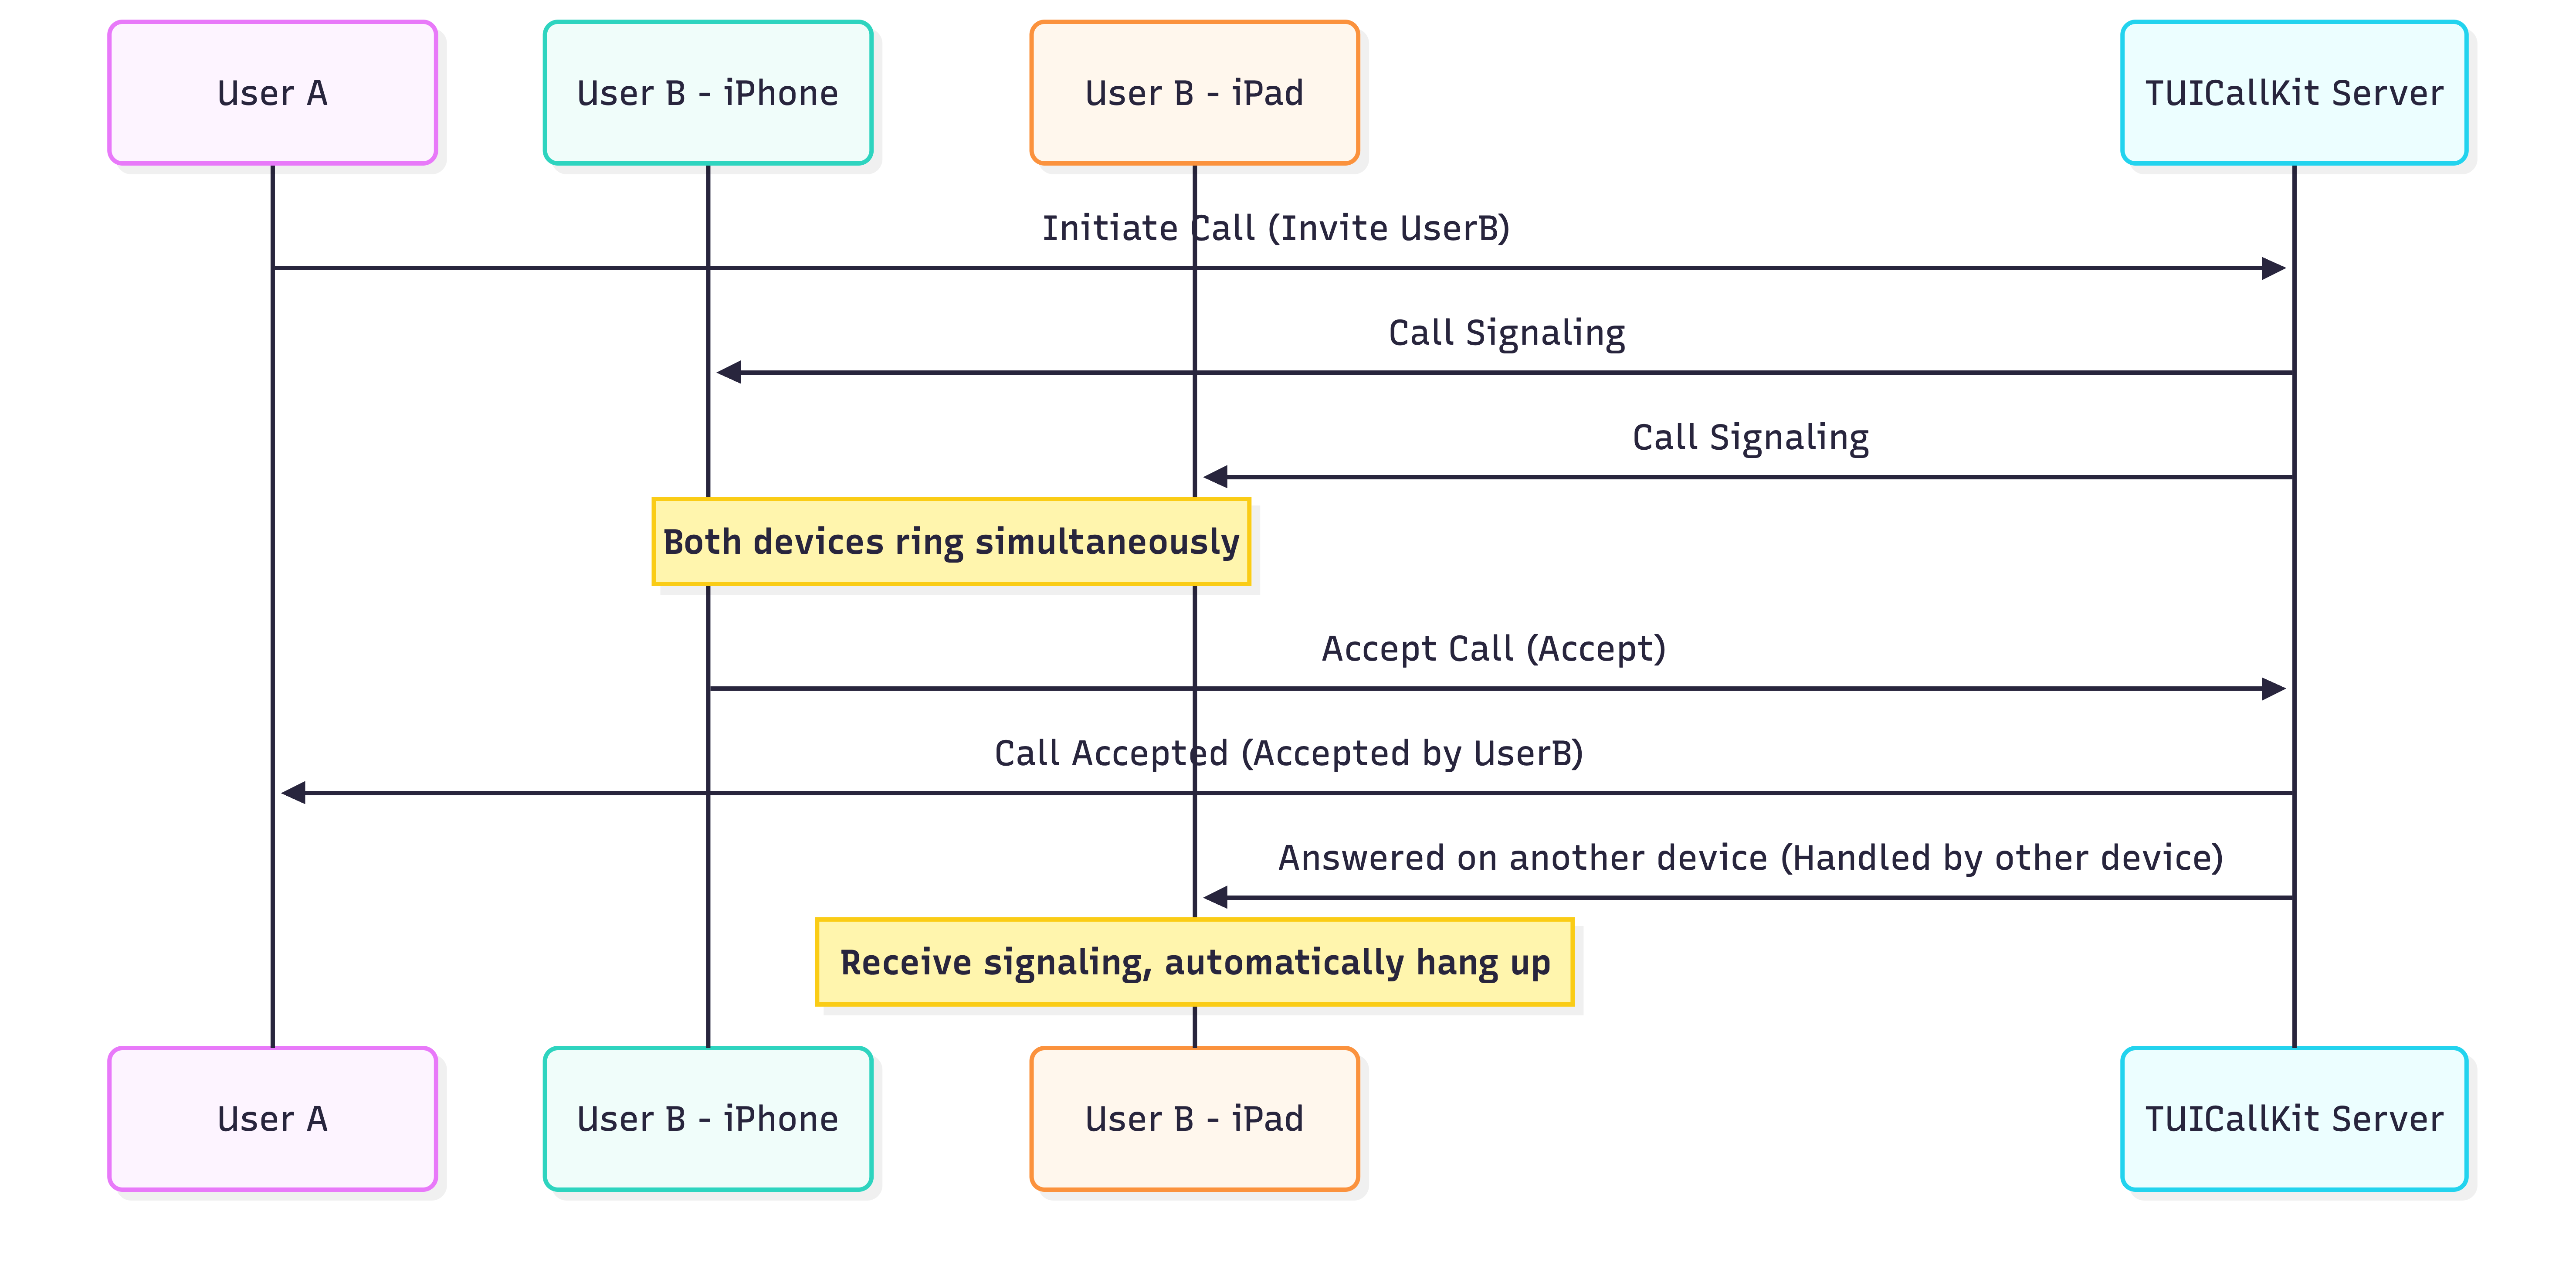
Key Logic
To help you better understand the feature and troubleshoot potential issues, here is a brief overview of the signaling interaction logic behind the scenes.
FAQs
Default Behavior Without Calling enableMultiDeviceAbility
Multi-device login is disabled by default in TUICallKit. In this mode, only the most recently logged-in device with the same UserID will receive incoming calls. For example, if a user logs in on a PC client first and then on a mobile client, only the mobile device will receive calls.
Handling Unstable Network Conditions
No. TUICallKit’s signaling backend uses atomic processing to accept only the first "answer" request received. Once a device answers, TUICallKit immediately sends a "cancel" instruction to all other devices, ensuring that only one device connects to the call.
フィードバック