For files already existing in the Bucket, you can create tasks to perform operations such as Media Processing. Task creation is based on the Template feature. You can directly use the system preset templates provided by Cloud Infinite or customize templates. For details on templates, see Template documentation.
Note:
Media Processing currently supports files in formats such as 3gp, asf, avi, dv, flv, f4v, m3u8, m4v, mkv, mov, mp4, mpg, mpeg, mts, ogg, rm, rmvb, swf, vob, wmv, webm, mp3, aac, flac, amr, awb, m4a, wma, wav. When initiating a Media Processing request, you must specify the complete file name and format; otherwise, the format cannot be recognized and processed.
Audio and video support outputting files encoded in AV1, H264, H265, VP8, and VP9 formats.
Currently, the task feature can only operate on existing files. If you need to process files during upload, use the Workflow feature.
When using Media Processing services, ensure resource availability by not enabling access restriction features such as Original-Protection and Hotlink Protection.
When using Media Processing, please first confirm the relevant limitations and Region. For details, see Usage Limitations.
Transcoding Processing
Audio/Video transcoding
Audio and Video Transcoding provides transcoding capabilities for audio and video files, which is the process of converting a file stream into another stream. Transcoding can modify parameters of the original stream, including encoding format, resolution, and bitrate, enabling playback adaptation to different devices and network environments.
2. In the left sidebar, click Bucket Management to go to the Bucket Management page.
3. Click the Bucket Name or Manage in the right operation bar to go to the corresponding Bucket page.
4. In the left sidebar, select Tasks and Workflows > Task Management, and select the Media Processing tab at the top of the page.
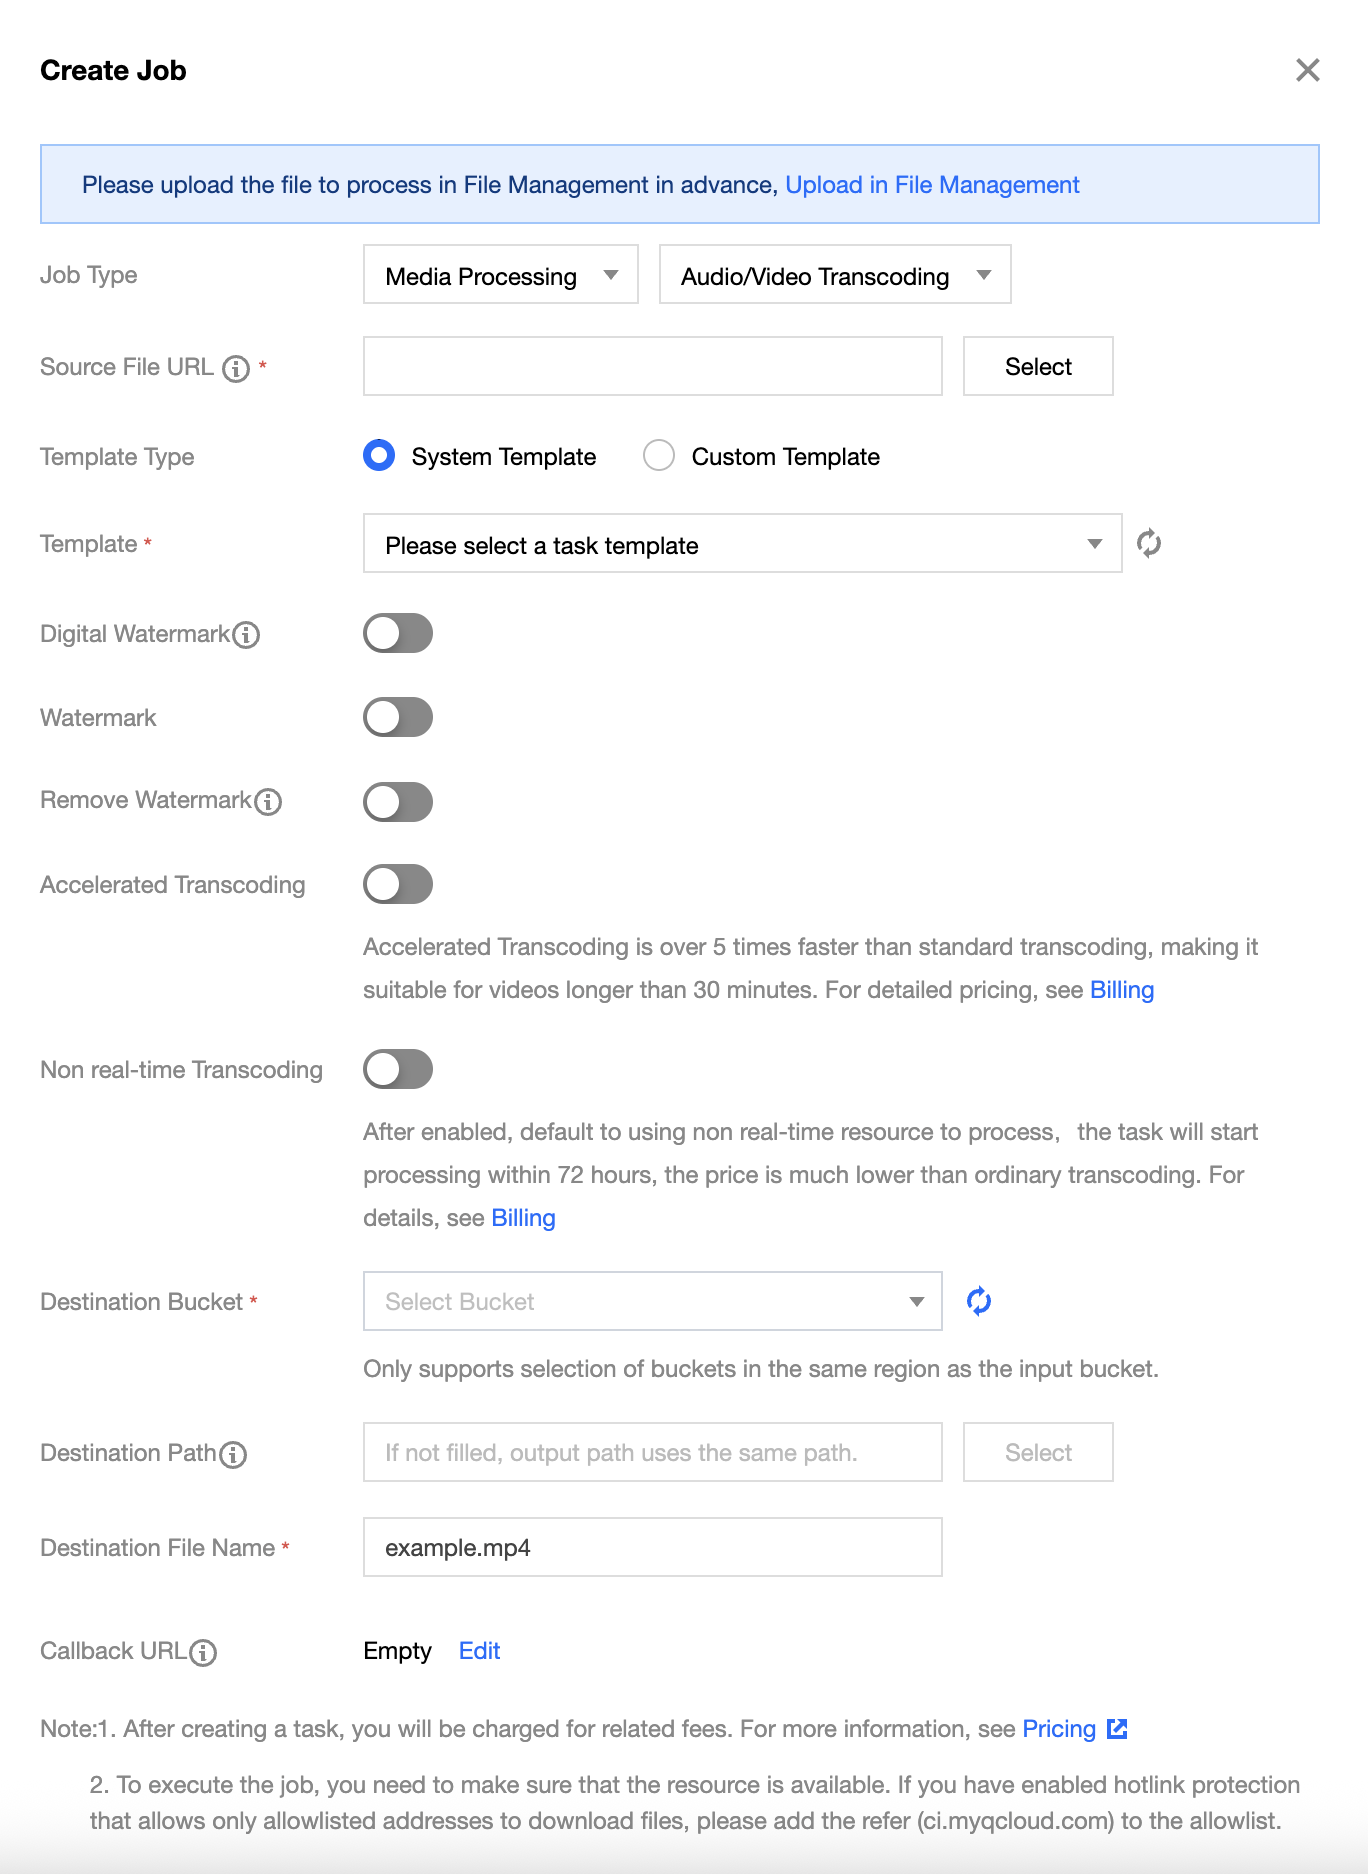
5. Select Transcoding for Feature Category, choose Audio Transcoding for Task Type, click Create Task, configure according to the following settings, and then click OK.
Task Type: Select Media Processing - Audio/Video Transcoding.
Source file path: Enter the path of the file to be processed. Note that the file path must not begin or end with /.
Template Type: You can choose a system preset Template or a custom Template. For related information, see Template Documentation.
Select Template: You can specify a Template.
Add Digital Watermark: You can add an invisible watermark to videos while transcoding to achieve copyright protection.
Add Visible Watermark: You can add an image or text logo to videos while transcoding.
Remove Watermark: Select watermarks and logos in the frame and erase them.
Speed-up Transcoding: After enabling, the task enters the speed-up queue, and the transcoding speed can reach more than 5 times that of standard transcoding.
Off-Peak Transcoding: When enabled, off-peak resources are used for processing, significantly reducing transcoding costs.
Target Bucket: Supports selecting Buckets in the same Region that have Media Processing enabled.
Target file name: You can specify the file name of the target file here.
Target Path: The storage path for transcoded files.
Callback URL: the callback address information bound to the Queue. For details, see Queue and Callback.
TSC
The TSC technology used can enhance the subjective visual quality of videos at the lowest bitrates. Compared with standard transcoding, it makes videos smaller and clearer while ensuring low network resource consumption, delivering a superior visual experience to users.
2. In the left sidebar, click Bucket Management to go to the Bucket Management page.
3. Click the Bucket Name or Manage in the right operation bar to go to the corresponding Bucket page.
4. In the left sidebar, select Tasks and Workflows > Task Management, and select the Media Processing tab at the top of the page.
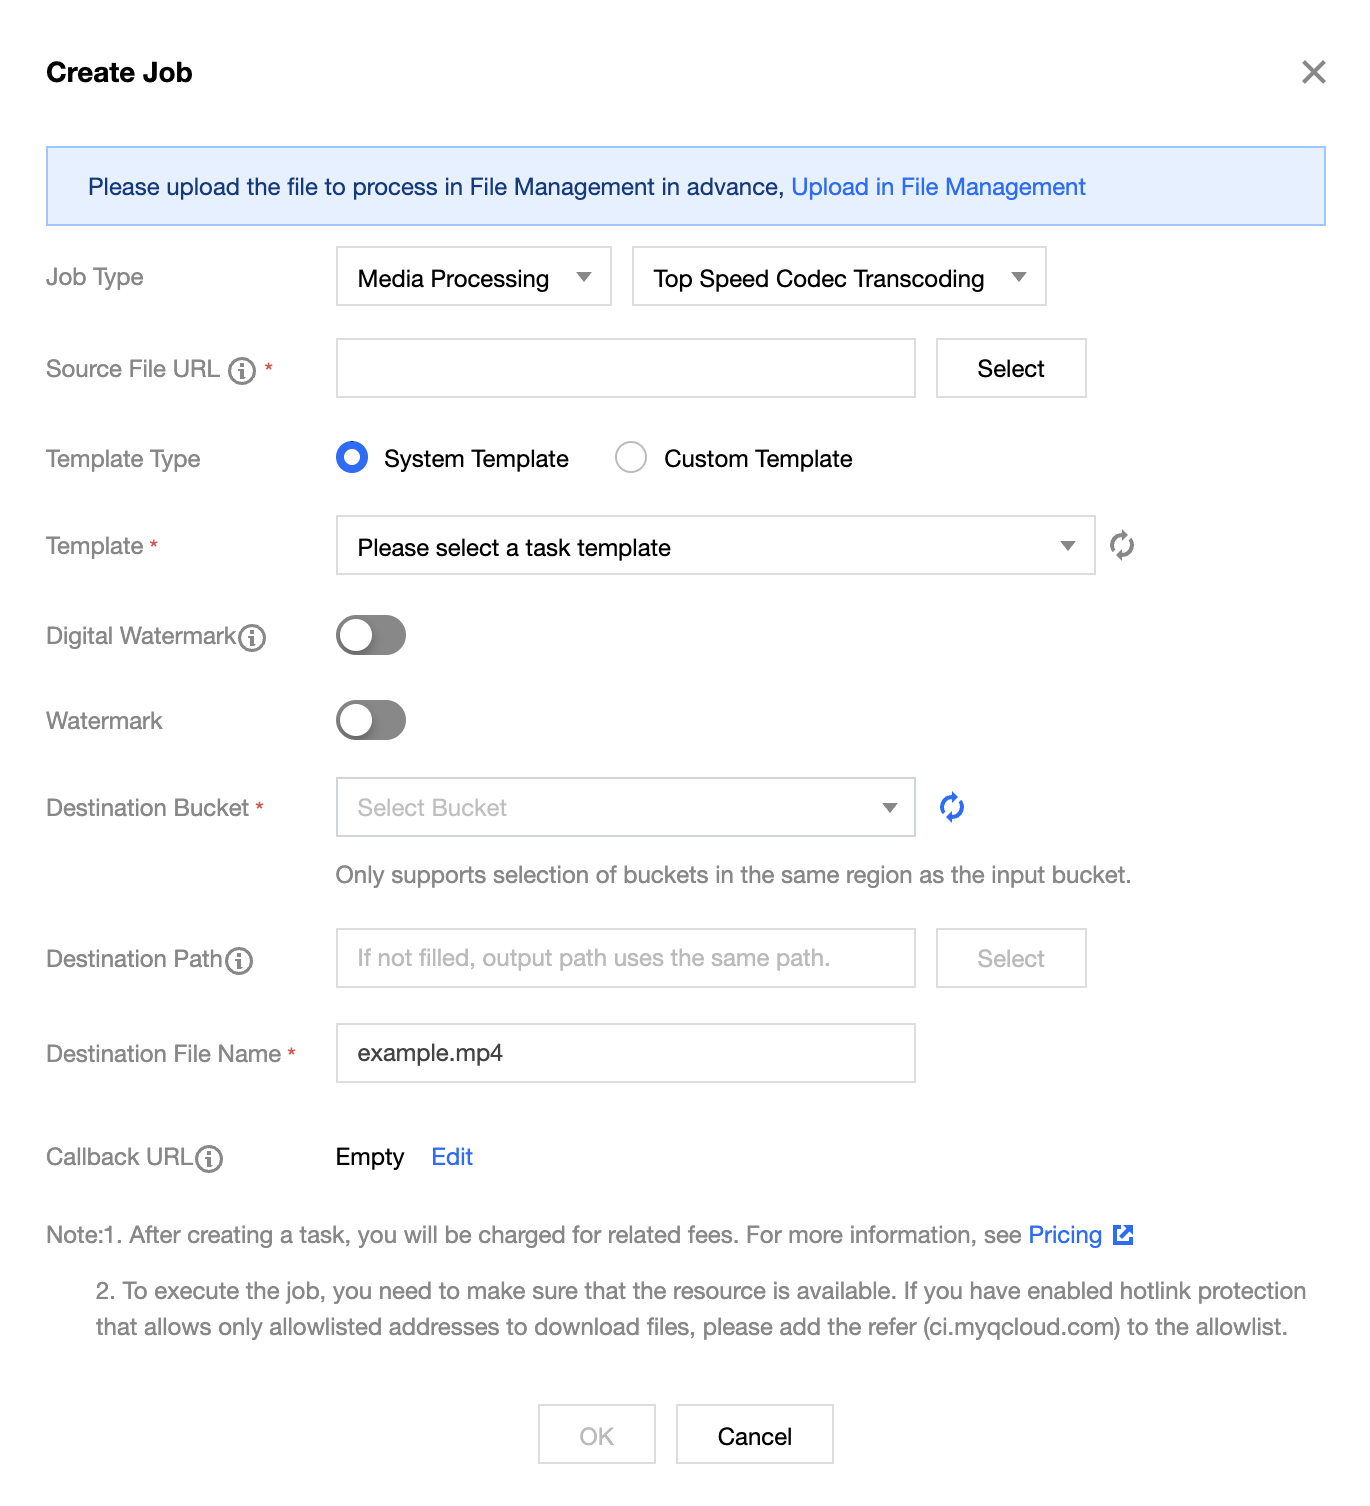
5. Select Transcoding for Feature Category, select TSC for Task Type, click Create Task, configure according to the following settings, and then click OK.
Task Type: Select Media Processing - TSC.
Source file path: Enter the path of the file to be processed. Note that the file path must not begin or end with /.
Template Type: Select system Template or custom Template. For details, see the Template document.
Select Template: You can choose a custom template. If none exists, go to create a template.
Add Digital Watermark: You can add an invisible watermark to videos while transcoding to achieve copyright protection.
Add Visible Watermark: You can add an image or text logo to videos while transcoding.
Target Bucket: Supports selecting Buckets in the same Region that have Media Processing enabled.
Target Path: The storage path for transcoded videos.
Target file name: You can specify the file name of the target file here.
Callback URL: the callback address information bound to the Queue. For details, see Queue and Callback.
Broadcast TV Professional Transcoding
Note:
Supports processing special formats such as XAVC and Apple ProRes.
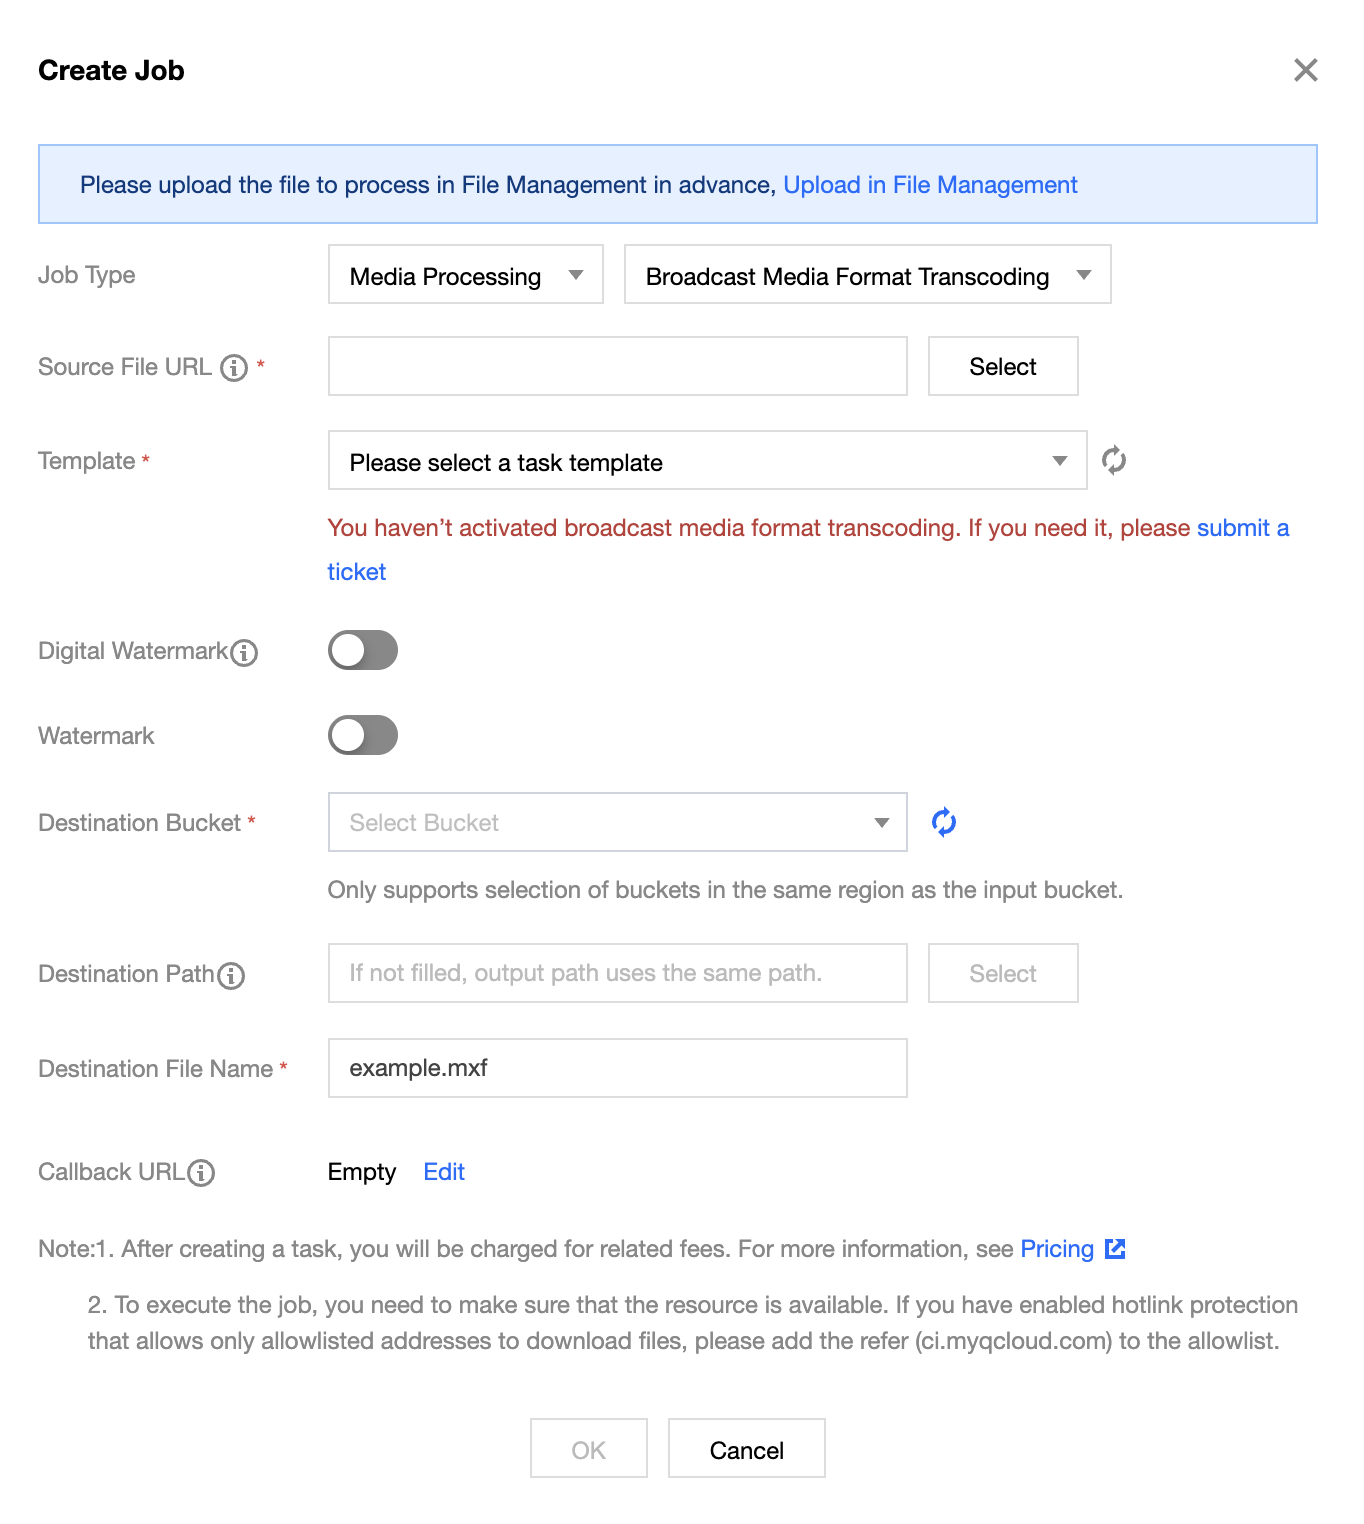
This feature is an allowlist feature. If you need to use the broadcast-grade professional format transcoding service, please submit a ticket.
2. In the left sidebar, click Bucket Management to go to the Bucket Management page.
3. Click the Bucket Name or Manage in the right operation bar to go to the corresponding Bucket page.
4. In the left sidebar, select Tasks and Workflows > Task Management, and select the Media Processing tab at the top of the page.
5. Select Transcoding for Feature Category, choose Broadcast-grade Professional Transcoding for Task Type, click Create Task, configure according to the following configuration items, and then click OK.
Task Type: Select Media Processing - Broadcast-grade Professional Transcoding.
Source file path: Enter the path of the file to be processed. Note that the file path must not begin or end with /.
Select Template: You can choose a custom template. If none exists, go to create a template.
Add Digital Watermark: You can add an invisible watermark to videos while transcoding to achieve copyright protection.
Add Visible Watermark: You can add an image or text logo to videos while transcoding.
Target Bucket: Supports selecting Buckets in the same Region that have Media Processing enabled.
Target Path: The storage path for transcoded videos.
Target file name: You can specify the file name of the target file here.
Callback URL: the callback address information bound to the Queue. For details, see Queue and Callback.
Convert Video to GIF
Note:
Video to animated GIF conversion tasks are based on the Template feature. You can customize settings such as the start transcoding time, transcoding duration, frame extraction method, target animated GIF frame rate, output animated GIF dimensions, and the target format.
2. In the left sidebar, click Bucket Management to go to the Bucket Management page.
3. Click the Bucket Name or Manage in the right operation bar to go to the corresponding Bucket page.
4. In the left sidebar, select Tasks and Workflows > Task Management, and select the Media Processing tab at the top of the page.
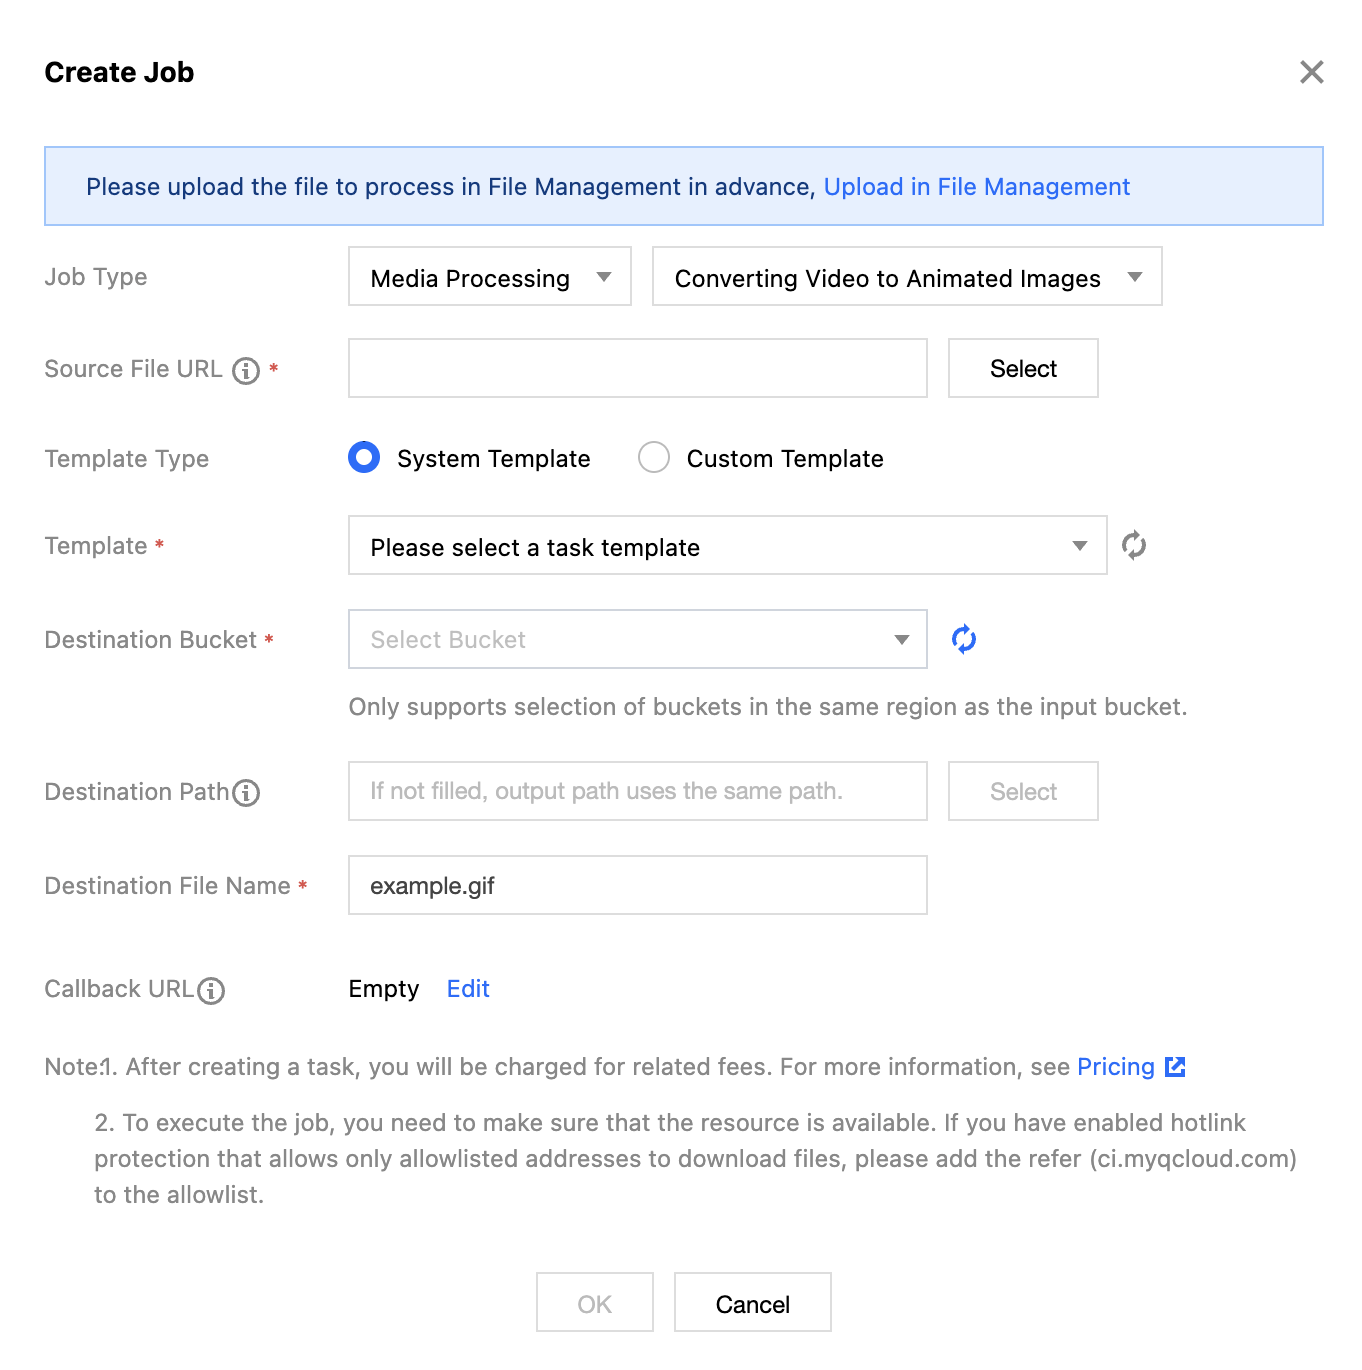
5. Select Transcoding for Feature Category, select Video to GIF for Task Type, click Create Task, configure according to the following settings, and then click OK.
Task Type: Select Media Processing - Video to GIF.
Source file path: Enter the path of the file to be processed. Note that the file path must not begin or end with /.
Template Type: You can select system templates or custom templates. For details about templates, see the Template documentation.
Select Template: You can specify a Template.
Target Bucket: Supports selecting Buckets in the same Region with Media Processing enabled.
Target path: The storage path for Video to GIF.
Target file name: You can specify the file name of the target file here.
Callback URL: the callback address information bound to the Queue. For details, see Queue and Callback.
Video Frame Capture
Video frame capture is a feature provided by Cloud Infinite to capture screenshots at specific time points in videos. Screenshots output by console tasks default to JPG format. When frame compression is enabled, HEIF and TPG formats can be output.
Note:
Video frame capture tasks are based on the Template feature. You can use custom video frame capture templates to configure settings such as the start time point for frame capture, frame capture interval, number of frames, target image size, and target format (frame compression must be enabled for this item).
2. In the left sidebar, click Bucket Management to go to the Bucket Management page.
3. Click the Bucket Name or Manage in the right operation bar to go to the corresponding Bucket page.
4. In the left sidebar, select Tasks and Workflows > Task Management, and select the Media Processing tab at the top of the page.
5. Select Transcoding for Feature Category, select Video frame capture for Task Type, click Create Task, configure according to the following settings, and then click OK.
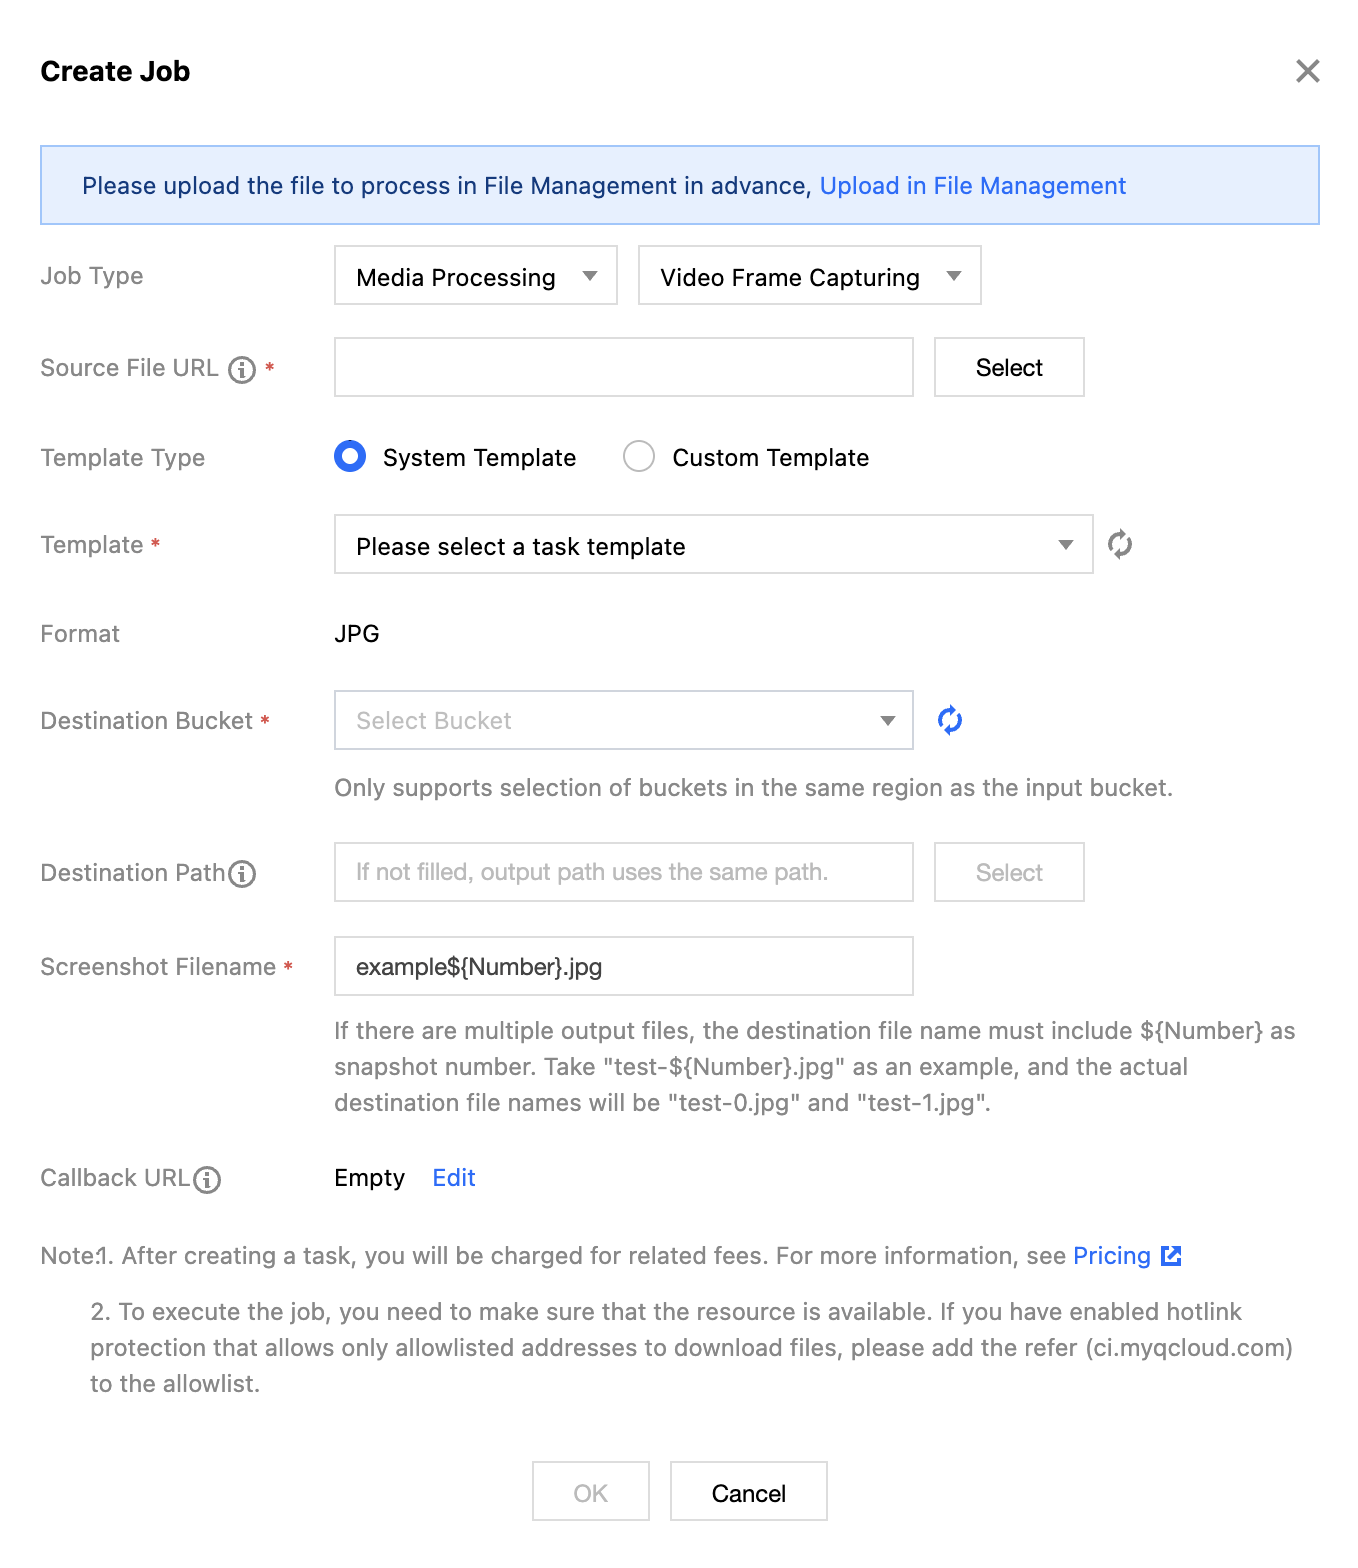
Task Type: Select Media Processing - Video Frame Capture.
Source file path: Enter the path of the file to be processed. Note that the file path must not begin or end with /.
Template Type: You can select system templates or custom templates. For details about templates, see the Template documentation.
Select Template: You can specify a Template.
Target Format: Currently, the console enables video frame capture tasks to default output screenshots in JPG format. If frame compression is used, it can output in HEIF or TPG formats. Using the video frame capture API, you can choose to output screenshots in JPG or PNG format. For details, see the video frame capture API documentation.
Target Bucket: Supports selecting Media Processing-enabled Buckets in the same Region.
Target path: The storage path for video screenshots.
Target filename: You can specify the output filename here. Note that the number of output files for smart frame capture is greater than 1, so the target filename must include the ${Number} parameter as the screenshot sequence number. For example, if the target file path is set to test-${Number}.jpg and the task captures two screenshots, the actual target filenames will be test-0.jpg and test-1.jpg.
Callback URL: the callback address information bound to the Queue. For details, see Queue and Callback.
Audio and Video Stitching
Audio and video stitching allows specified audio segments to be stitched at the beginning or end of an audio file to generate a new audio file, or specified video segments to be stitched at the beginning or end of a video file to generate a new video file.
2. In the left sidebar, click Bucket Management to go to the Bucket Management page.
3. Click the Bucket Name or Manage in the right operation bar to go to the corresponding Bucket page.
4. In the left sidebar, select Tasks and Workflows > Task Management, and select the Media Processing tab at the top of the page.
5. Select Transcoding for Feature Category, choose Audio and Video Stitching for Task Type, click Create Task, configure according to the following settings, and then click OK.
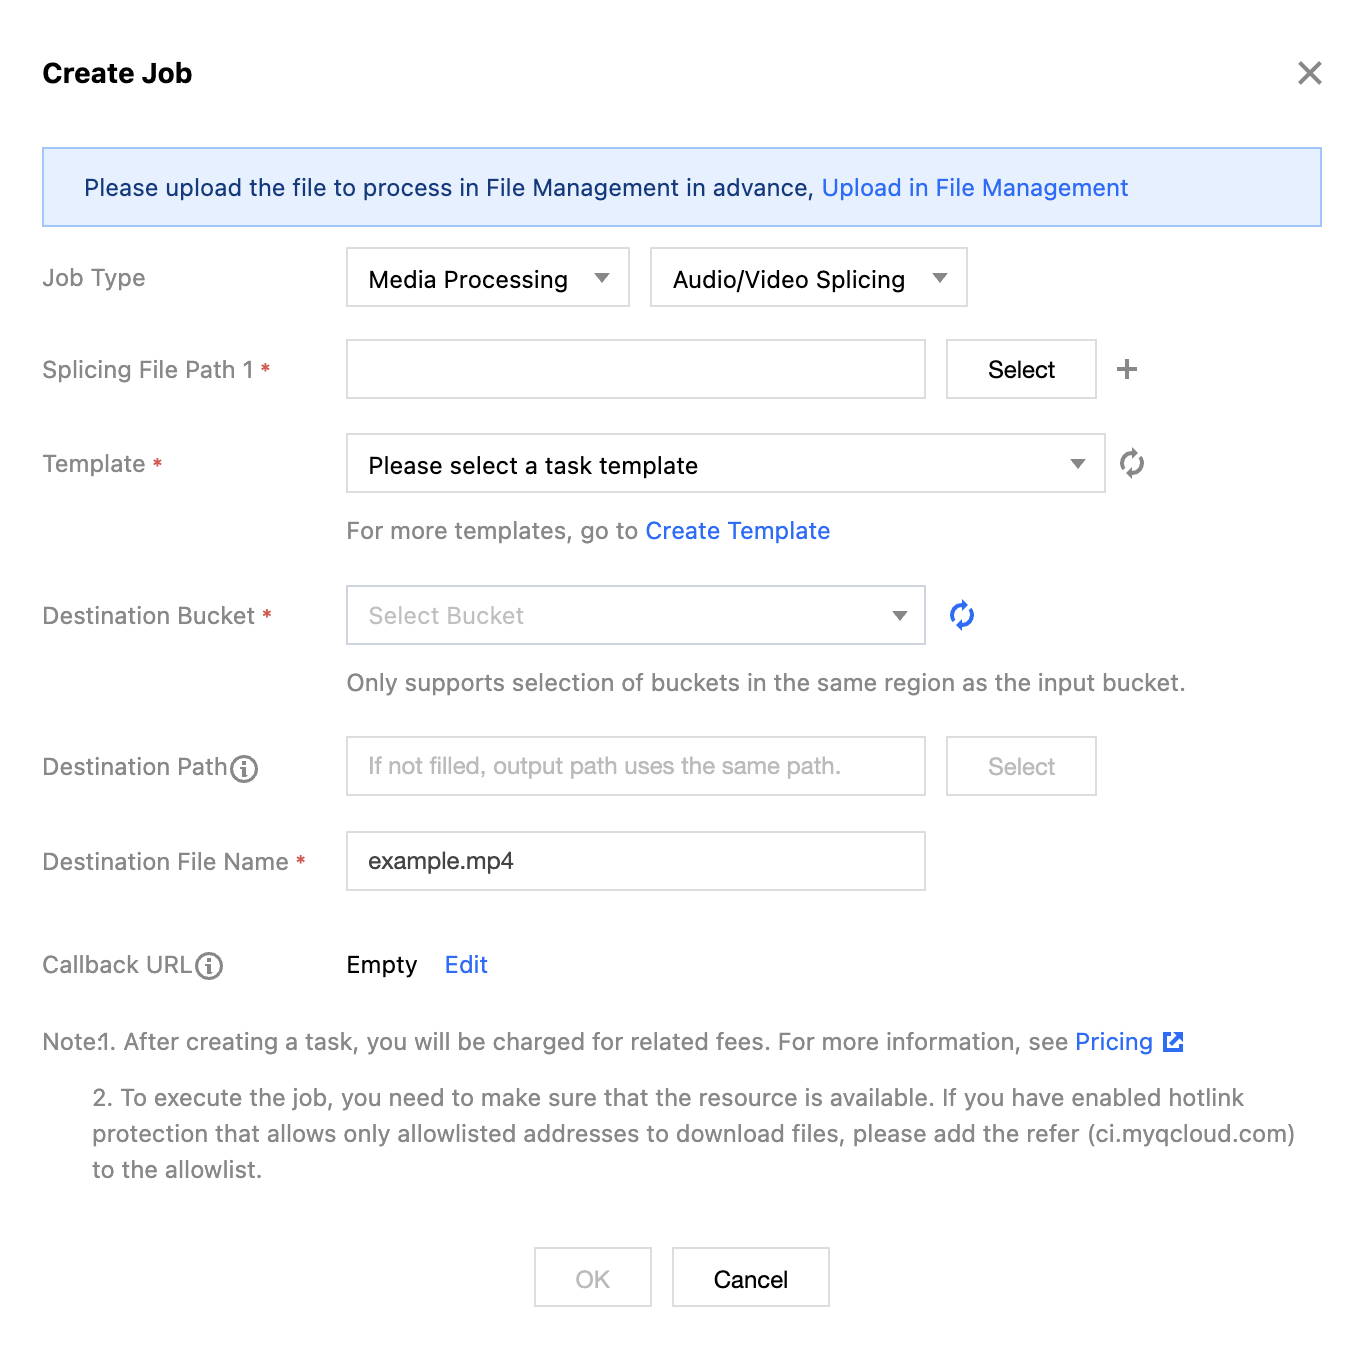
Task Type: Select Media Processing - Audio and Video Stitching.
Splicing file path: Enter the path of the file to be processed. Note that the file path must not begin or end with /. Adding splicing file paths is supported.
Select Template: You can choose a created audio and video stitching template.
Target Bucket: Supports selecting Buckets in the same Region that have Media Processing enabled.
Target Path: The storage path for files after splicing.
Target file name: You can specify the file name of the target file here.
Callback URL: the callback address information bound to the Queue. For details, see Queue and Callback.
Audio and Video Segmentation
Audio/Video segmentation can divide excessively long or large audio and video files into several segments, while also allowing the transmuxing of each segmented file.
2. In the left sidebar, click Bucket Management to go to the Bucket Management page.
3. Click the Bucket Name or Manage in the right operation bar to go to the corresponding Bucket page.
4. In the left sidebar, select Tasks and Workflows > Task Management, and select the Media Processing tab at the top of the page.
5. Select Transcoding for Feature Category, choose Audio/Video Segmentation for Task Type, click Create Task, configure according to the following settings, and then click OK.
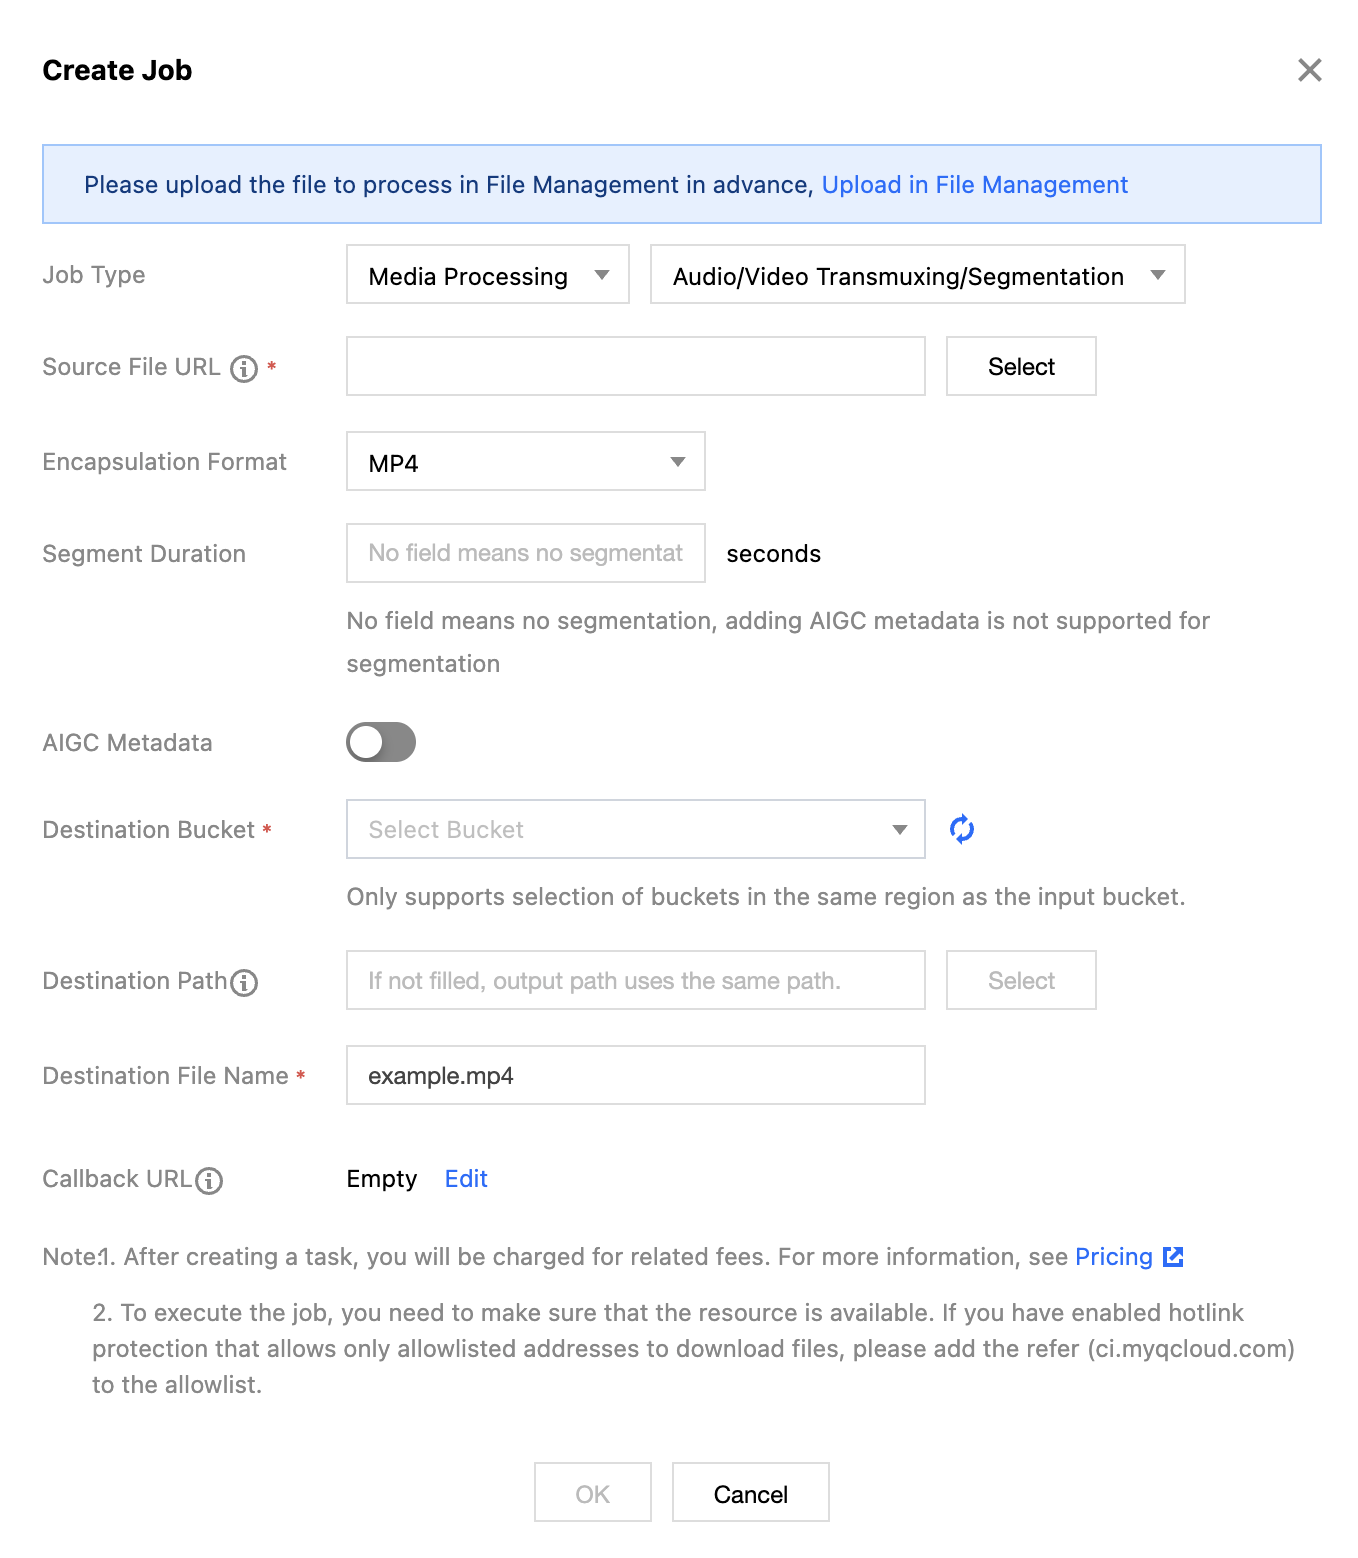
Task Type: Select Media Processing - Audio/Video Segmentation.
Source file path: Enter the path of the file to be processed. Note that the file path must not begin or end with /.
Container Format: You can select the target audio/video container format.
Segment Duration: You can specify the length of each segment.
Target Bucket: Supports selecting Buckets in the same Region that have Media Processing enabled.
Target path: the storage path of the files after segmentation is completed.
Target file name: You can specify the file name of the target file here.
Callback URL: the callback address information bound to the Queue. For details, see Queue and Callback.
Intelligent Editing
Smart Cover
The Smart Cover feature integrates Tencent Cloud's cutting-edge AI technology from the A-Lab. By analyzing video content, it intelligently evaluates the quality, highlights, and content relevance of video frames to extract optimal frames for cover images, enhancing content appeal.
Note:
Smart Cover is a paid service billed based on video duration. For specific fees, see Billing and Pricing.
Cloud Infinite will issue a free tier resource pack with 1000 minutes of usage and a validity period of 2 months to each account after its first usage of the service. Once the usage is exceeded or the resource pack expires, standard billing will apply.
Each video file will be intelligently analyzed to output 3 optimal key frames.
Cloud Infinite also provides an interface for creating tasks, which can be configured based on parameters. For details, see the CreateMediaJobs API documentation.
2. In the left sidebar, click Bucket Management to go to the Bucket Management page.
3. Click the Bucket Name or Manage in the right operation bar to go to the corresponding Bucket page.
4. In the left sidebar, select Tasks & Workflows > Task Management, and select the Media Processing tab at the top of the page.
5. Select Intelligent Editing for Feature Category, choose Smart Cover for Task Type, click Create Task, configure according to the following settings, then click OK.
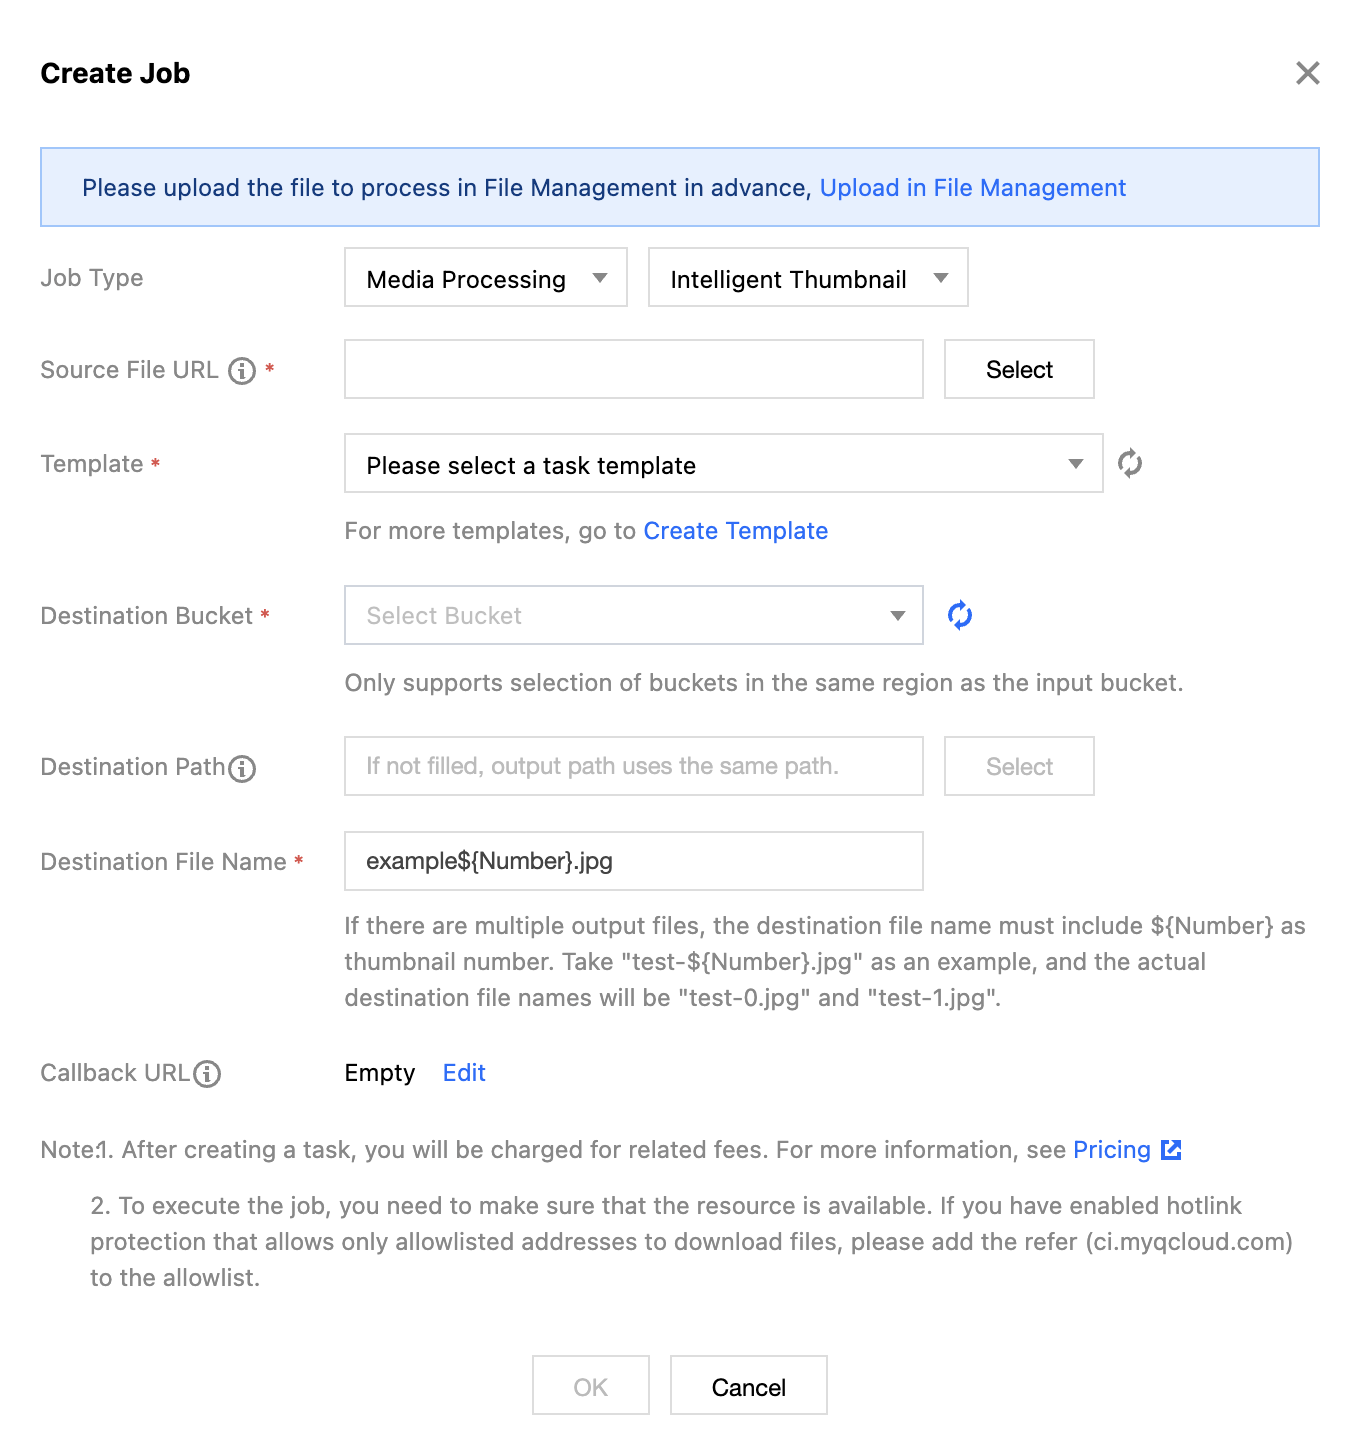
Task Type: Select Media Processing - Smart Cover.
Source file path: Enter the path of the file to be processed. Note that the file path must not begin or end with /.
Select Template: You can choose a custom template. If none exists, go to create a template.
Target Bucket: Supports selecting Buckets in the same Region with Media Processing enabled.
Target Path: The storage path for Smart Cover.
Target file name: You can specify the file name of the target file here.
Callback URL: the callback address information bound to the Queue. For details, see Queue and Callback.
Note:
The Smart Cover output generates multiple files, so the target file name must contain the ${Number} parameter as the cover sequence number. For example, if the target file path is set to test-${Number}.jpg, the actual target file names will be test-0.jpg, test-1.jpg.
Intelligent highlights
Highlight Reel can quickly and accurately extract highlight moments from videos, outputting these highlights as a new file. This facilitates later reuse of the video in scenarios such as replays and previews.
2. In the left sidebar, click Bucket Management to go to the Bucket Management page.
3. Click the Bucket Name or Manage in the right operation bar to go to the corresponding Bucket page.
4. In the left sidebar, select Tasks and Workflows > Task Management, and select the Media Processing tab at the top of the page.
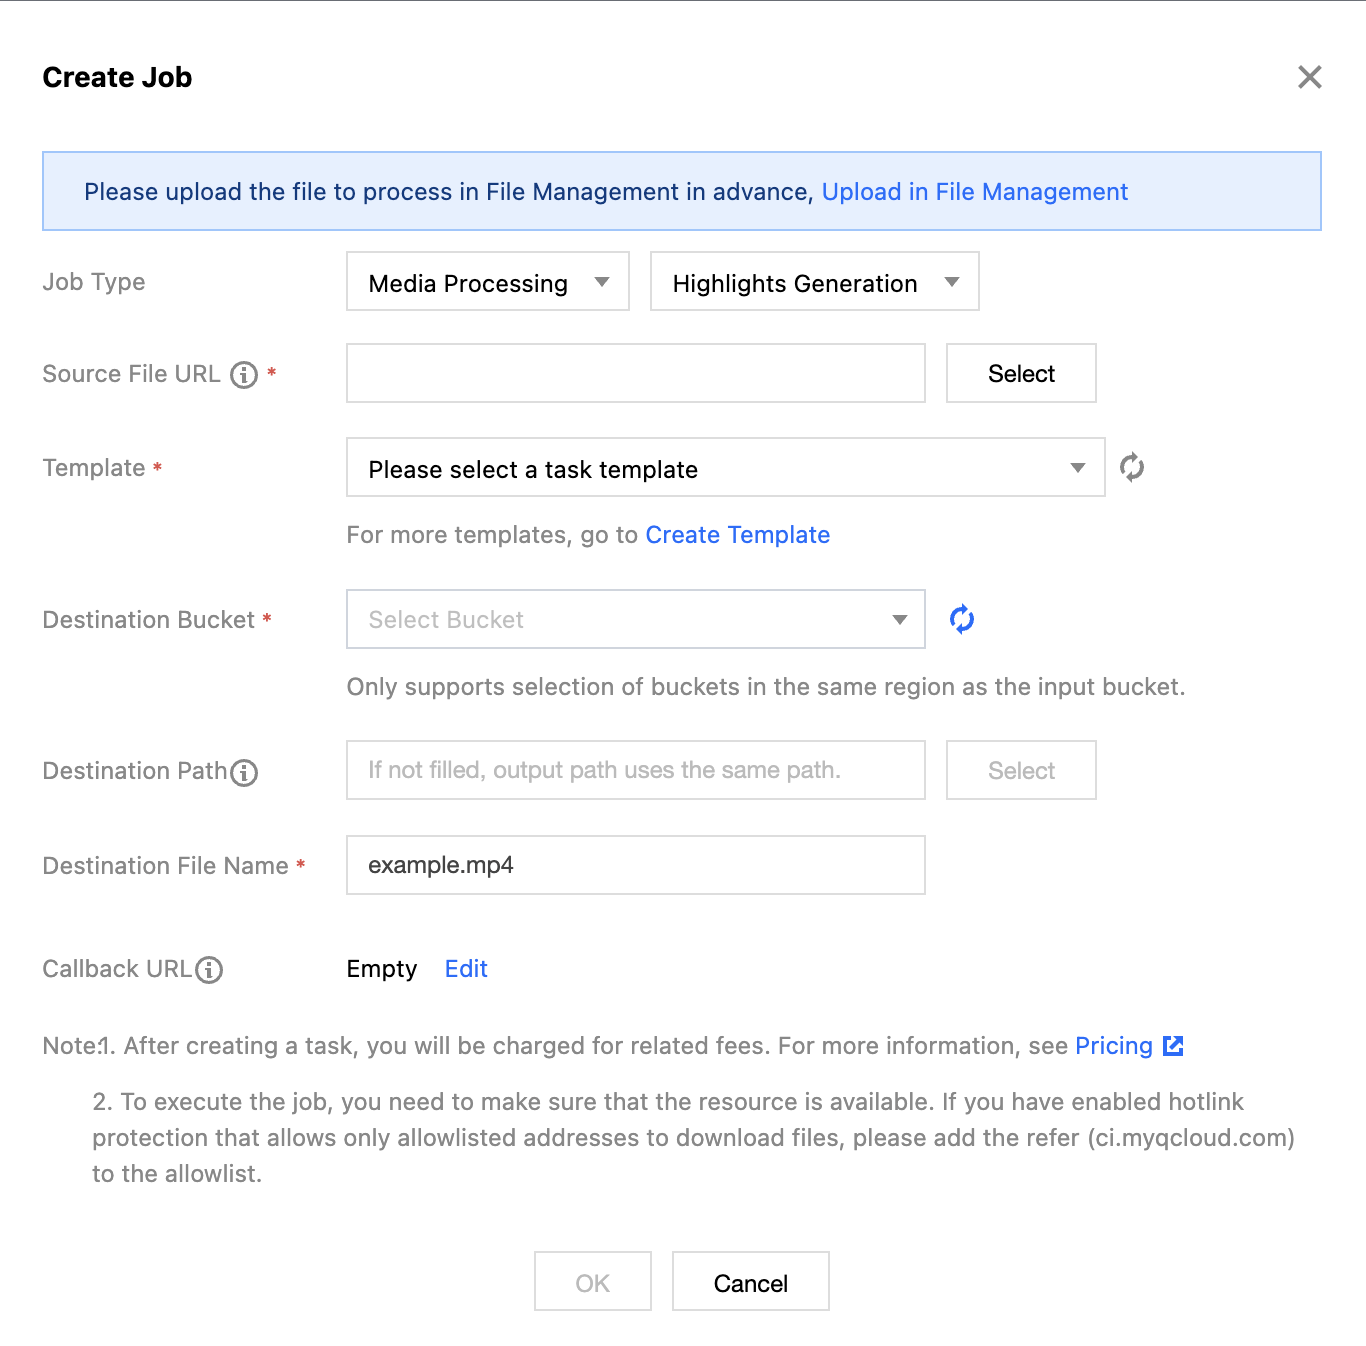
5. Select Intelligent Editing for Feature Category, choose Highlight Reel for Task Type, click Create Task, configure the following settings, and then click OK.
Task Type: Select Media Processing - Highlight Reel.
Source file path: Enter the path of the file to be processed. Note that the file path must not begin or end with /.
Select Template: You can choose a custom template. If none exists, go to create a template.
Target Bucket: Supports selecting Buckets in the same Region that have Media Processing enabled.
Target Path: The storage path for transcoded files.
Target file name: You can specify the file name of the target file here.
Callback URL: the callback address information bound to the Queue. For details, see Queue and Callback.
Video Quality Optimization
Video Quality Enhancement
Image Quality Enhancement is a video quality optimization feature provided by Cloud Infinite, including functions such as Super-Resolution and SDRTOHDR. You can enhance video colors and improve image detail quality through video enhancement.
2. In the left sidebar, click Bucket Management to go to the Bucket Management page.
3. Click the Bucket Name or Manage in the right operation bar to go to the corresponding Bucket page.
4. In the left sidebar, select Tasks and Workflows > Task Management, and select the Media Processing tab at the top of the page.
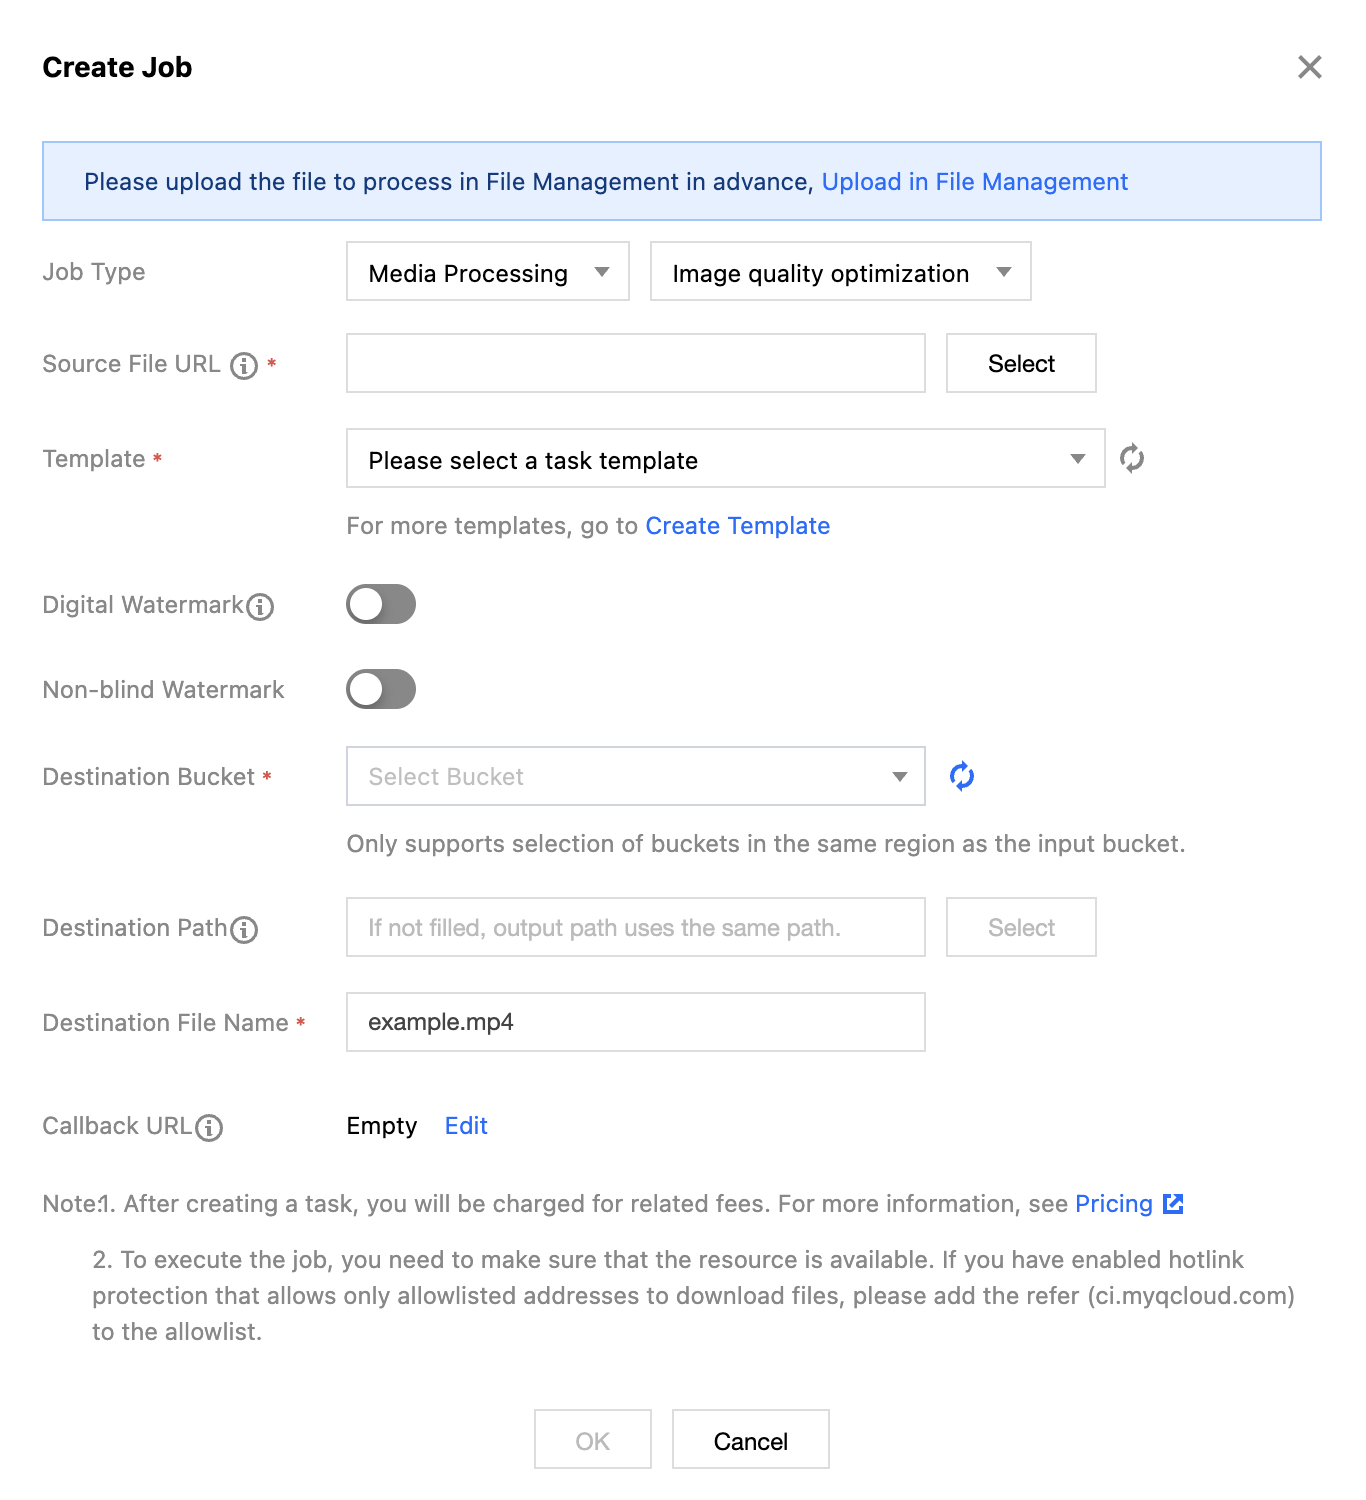
5. Select Image Quality Optimization for the feature category, select Image Quality Enhancement for the task type, click Create Task, configure according to the following configuration item descriptions, and then click OK.
Task Type: Select Media Processing - Image Quality Enhancement.
Source file path: Enter the path of the file to be processed. Note that the file path must not begin or end with /.
Select Template: Select the image quality enhancement template you need. The template supports frame interpolation, super-resolution, detail enhancement, and other image quality enhancement modes.
Add Digital Watermark: You can add an invisible watermark to videos while enhancing them to achieve copyright protection.
Add Visible Watermark: You can add an image or text logo to videos while enhancing them.
Target Bucket: Supports selecting Buckets in the same Region with Media Processing enabled.
Target path: The storage path for video enhancement's target files.
Target file name: You can specify the file name of the output file here.
Callback URL: the callback address information bound to the Queue. For details, see Queue and Callback.
Note:
The input video duration must be less than 30 minutes.
Copyright Protection
Adding a Digital Watermark
Supports embedding invisible watermarks in video carriers to achieve copyright protection.
2. In the left sidebar, click Bucket Management to go to the Bucket Management page.
3. Click the Bucket Name or Manage in the right operation bar to go to the corresponding Bucket page.
4. In the left sidebar, select Tasks and Workflows > Task Management, and select the Media Processing tab at the top of the page.
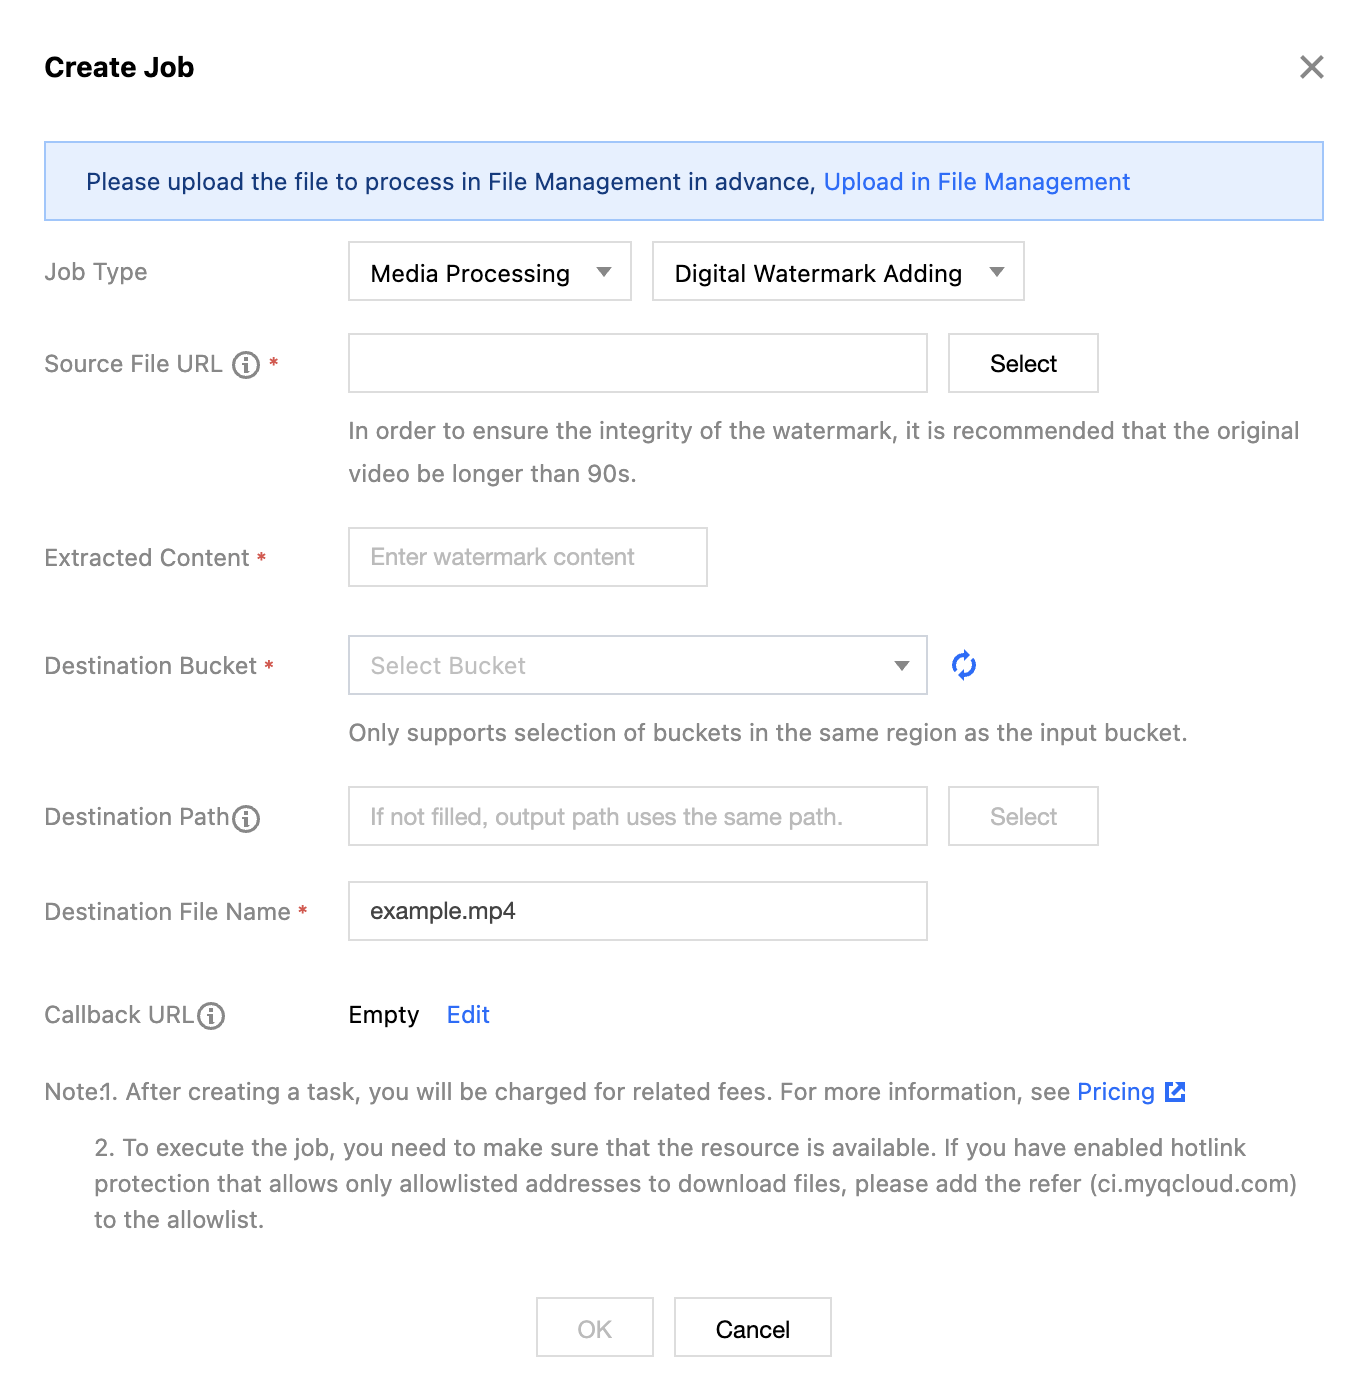
5. Select the feature category as Copyright Protection, select the task type as Digital Watermarking, click Create Task, configure the following settings, and then click OK.
Task Type: Select Media Processing - Digital Watermarking.
Source file path: Enter the path of the file to be processed. Note that the file path must not begin or end with /.
Target Bucket: Supports selecting Buckets in the same Region with Media Processing enabled.
Digital Watermark Content: Enter custom digital watermark content, used for copyright tracing.
Target Path: The storage path for Smart Cover.
Target file name: You can specify the file name of the target file here.
Callback URL: the callback address information bound to the Queue. For details, see Queue and Callback.
Digital Watermark Extraction
Cloud Infinite supports extracting digital watermark content from videos that have had watermarks added via its Media Processing service.
2. In the left sidebar, click Bucket Management to go to the Bucket Management page.
3. Click the Bucket Name or Manage in the right operation bar to go to the corresponding Bucket page.
4. In the left sidebar, select Tasks and Workflows > Task Management, and select the Media Processing tab at the top of the page.
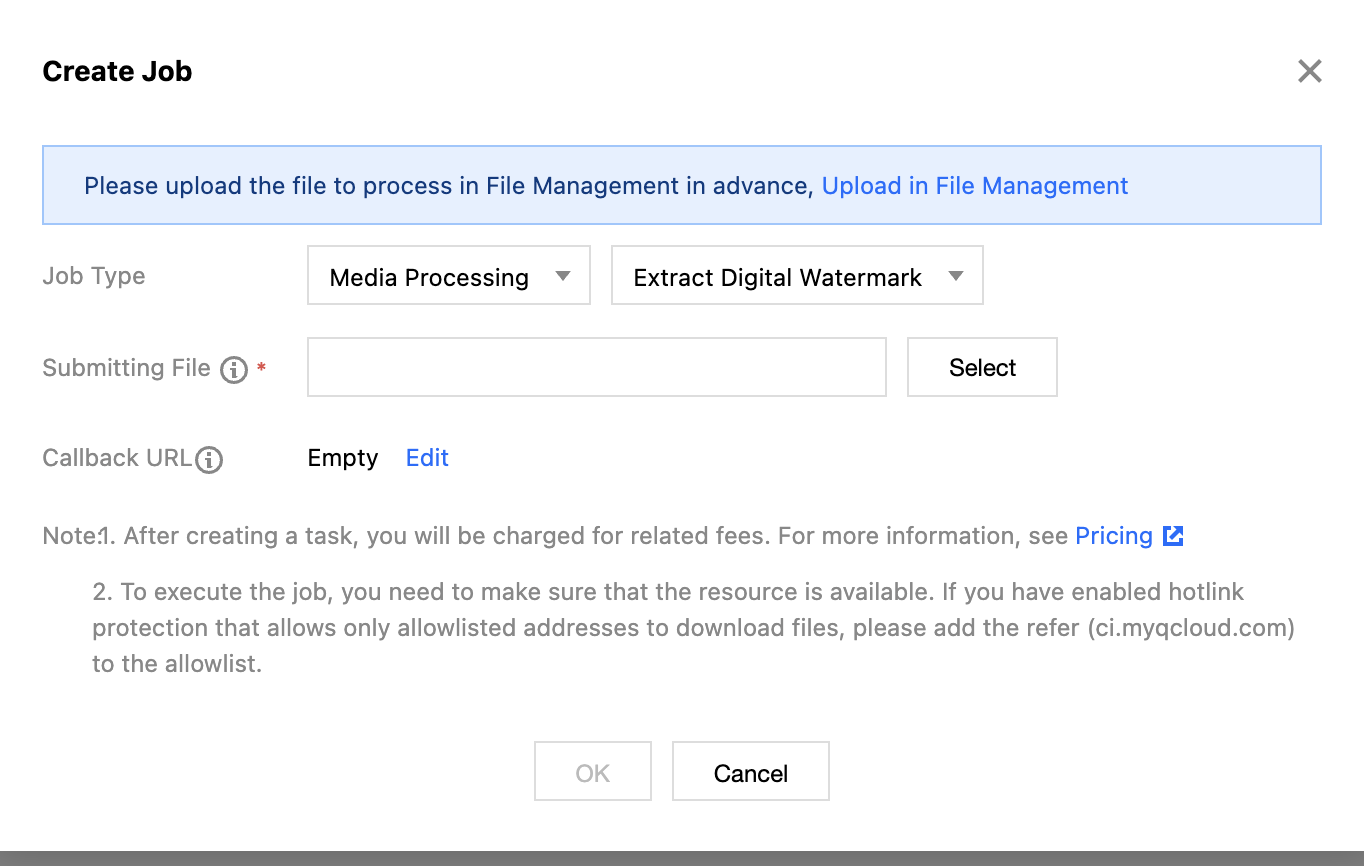
5. Select Feature Category as Copyright Protection, Task Type as Digital Watermark Extraction, click Create Task, configure according to the following settings, and then click OK.
Task Type: Select Media Processing - Digital Watermark Extraction.
File for Inspection: Enter the path of the file to be processed. Note that the path must not start or end with a /.
Callback URL: the callback address information bound to the Queue. For details, see Queue and Callback.