イベントアラーム設定
Download
フォーカスモード
フォントサイズ
TDSQL-C for MySQLはイベントアラーム機能をサポートします。イベントルール、イベントターゲット、および通知ユーザーを設定した場合、異常イベントが検出されると、イベントアラームが複数の選択可能な方法でユーザーにアラーム通知を送信します。本ドキュメントではイベントアラームの設定方法について説明します。
ステップ1:イベントバスを開通する
Tencent Cloud EventBridgeは、アクセス管理(Cloud Access Management、CAM)を通じて権限管理を実現します。CAMはTencent Cloudが提供する権限およびアクセス管理サービスであり、主に顧客がTencent Cloudアカウント下のリソースへのアクセス権限を安全に管理することを支援します。ユーザーはCAMを通じてユーザー(グループ)の作成、管理、破棄が可能であり、ID管理とポリシー管理を使用して他のユーザーのTencent Cloudリソース利用権限を制御できます。イベントバスEventBridgeをご利用になる前に、製品ページで本サービスをアクティベートする必要があります。メインアカウントのアクティベート方法およびサブアカウントへの本サービス利用権限付与については、イベントバスの開通をご参照ください。
ステップ2:TDSQL-C for MySQLのイベントアラームプッシュの設定
注意:
TDSQL-C for MySQLで発生したアラーム、監査などの運用保守イベントは、すべてクラウドサービスイベントセットに配信されます。この配信はデフォルト設定であり、変更や編集はサポートされていません。
Tencent Cloud EventBridgeサービスを有効にした後、自動的に広州リージョンにデフォルトのクラウドサービスイベントセットを作成します。TDSQL-C for MySQLで発生したアラームイベントは自動的にここに配信されます。
方法1:イベントバス設定
1. ログインイベントバスコンソール
2. 上部でリージョンとして広州を選択します。
3. クラウドサービスイベントセットの下にあるdefaultイベントセットをクリックします。

4. defaultイベントセットの詳細ページでイベントルールの管理をクリックし、遷移先のページで新規作成をクリックします(ここでは新規イベントルール作成を例示します。既存のイベントルールがある場合は、直接変更可能で再作成は不要です)。
5. 新規作成イベントルールページで以下の設定を完了した後、次へをクリックします。
パラメータ | 説明 |
ルール名称 | 英字、数字、アンダースコア、ハイフンのみを含み、英字で始まり、数字または英字で終わる2~60文字のルール名称を入力してください。 |
ルール説明 | ルール説明を入力してください。数字、中国語、英語および一般的な句読点のみ使用可能で、200文字以内にしてください。 |
Tag | タグの有効化をカスタマイズできます。有効化後、このイベントルールにタグを追加することが可能です。 |
データ変換 | イベントデータ変換は、イベント内容を簡単に処理するのに役立ちます。例えば、イベント内のフィールドを抽出・解析し、マッピングと再構成を行った後、イベントターゲットに配信することができます。 |
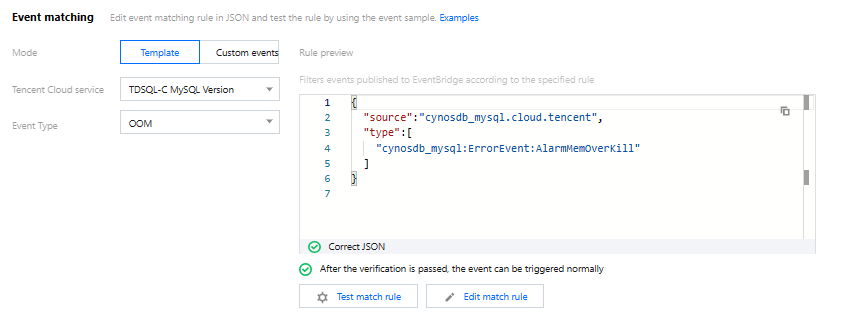
イベントサンプル | イベント構造のサンプルを提供しています。これはイベントマッチングルールの構成の参考となります。イベントサンプル選択でターゲットテンプレートを参照でき、クラウドサービスタイプにはTDSQL-C for MySQLを選択してください。 |
イベントパターン | フォームモードとカスタムイベントをサポートしています。ここではフォームモードの使用をお勧めします、より便利です。 |
クラウドサービス タイプ | TDSQL-C for MySQLを選択する。 |
イベントの種別 | アラームのイベントタイプを選択します。全選択が可能です。 |
マッチ対象 | イベントアラームのマッチ対象を選択します。すべてのインスタンスを選択するか、ターゲットインスタンスを入力することができます。 |
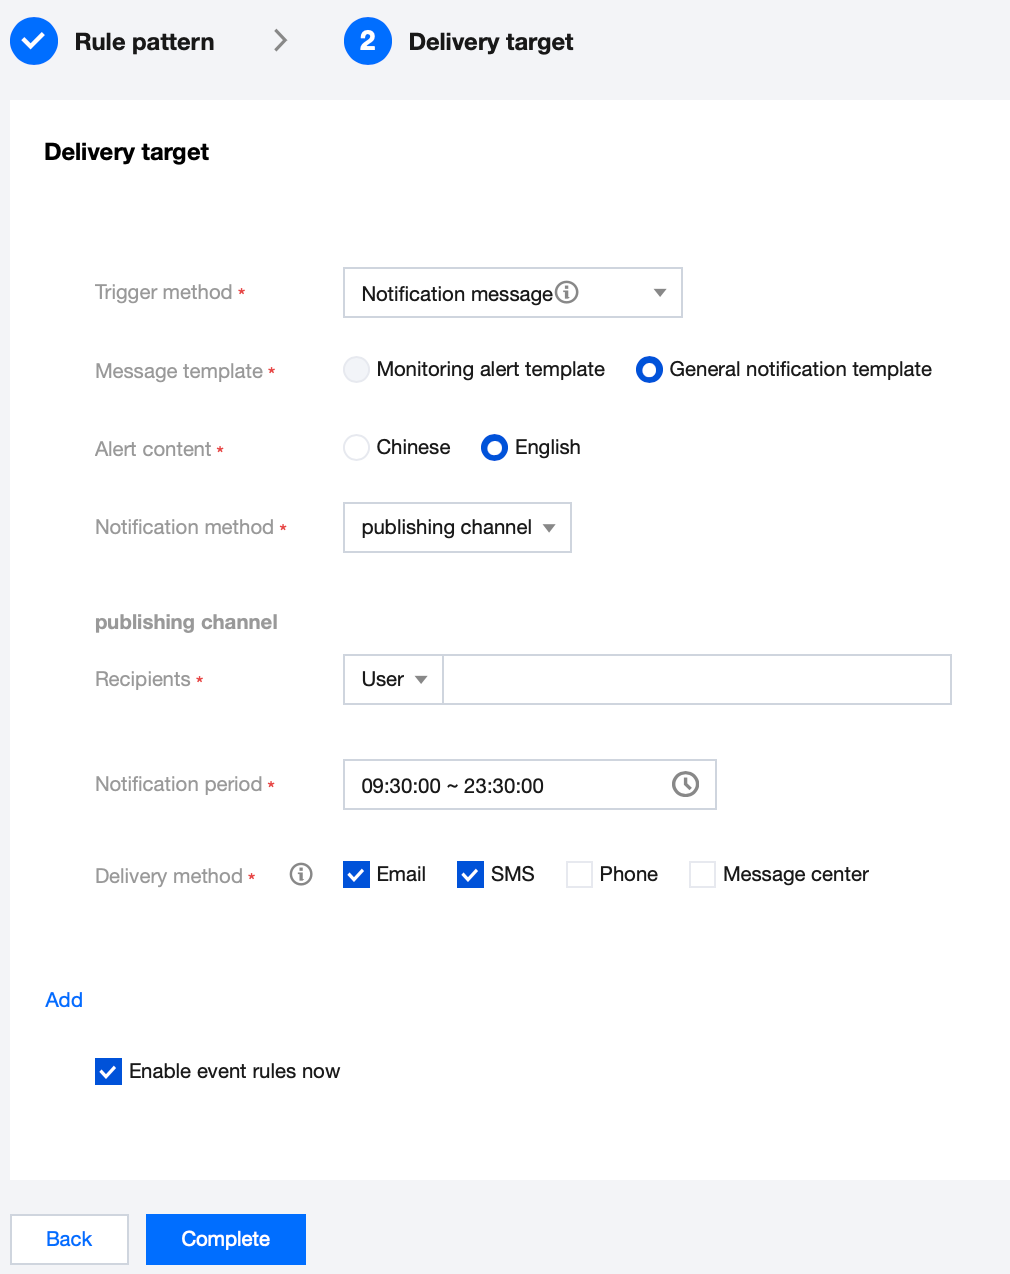
6. イベントターゲットページで関連設定を完了し、イベントルールを直ちに有効化するにチェックを入れ、完了をクリックします。(トリガー方式には複数のタイプがあり、必要に応じて選択可能です。下図ではトリガー方式として「メッセージプッシュ」を選択した例を示します。チャネルプッシュは設定された連絡先に通知され、受信オブジェクトで受信ユーザーを個別に設定する必要があります。通知時間帯は対応するアカウントユーザーと協議の上でご確認ください。受信チャネルはメール・サイト内メッセージ・SMS・電話から選択可能です)
説明:
複数のイベントターゲットを設定する必要がある場合は、追加をクリックして設定できます。
7. イベントメッセージのプッシュ設定が完了した後、設定されたイベントアラーム情報が発生した場合、システムは設定された受信対象の受信チャネルを通じて通知をお知らせします。
方法2:TCOPアラームポリシーの設定
アラームポリシー作成
1. TCOPコンソールにログインし、左側ナビゲーションでアラーム管理 > ポリシー管理ページを選択します。
2. アラームポリシーリストページで、新規作成をクリックします。
3. 新規ポリシーページで、基本情報、アラームルール、アラーム通知の設定を完了します。
ポリシータイプ:ホストモニタリングとスタンバイモニタリングに分かれており、異なるインスタンスタイプに適用されます。
アラームオブジェクト:オブジェクトが配置されているリージョンを選択するか、オブジェクトのインスタンスIDを検索することで、関連付けが必要なオブジェクトインスタンスを選択可能です。
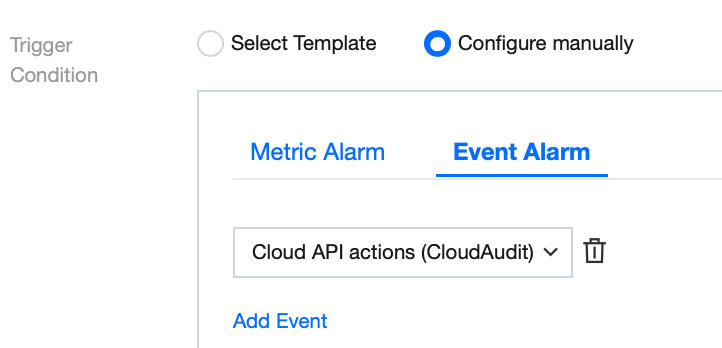
トリガー条件:イベントアラームを選択し、イベント追加をクリックして、業務ニーズに応じてアラームイベントを追加します。
アラーム通知の設定:システムプリセット通知テンプレートとユーザーカスタマイズ通知テンプレートの選択をサポートします。各アラームポリシーには最大3つの通知テンプレートまで関連付け可能です。カスタム通知テンプレートについては、新規通知テンプレートの作成をご参照ください。
システムプリセットテンプレートを選択する
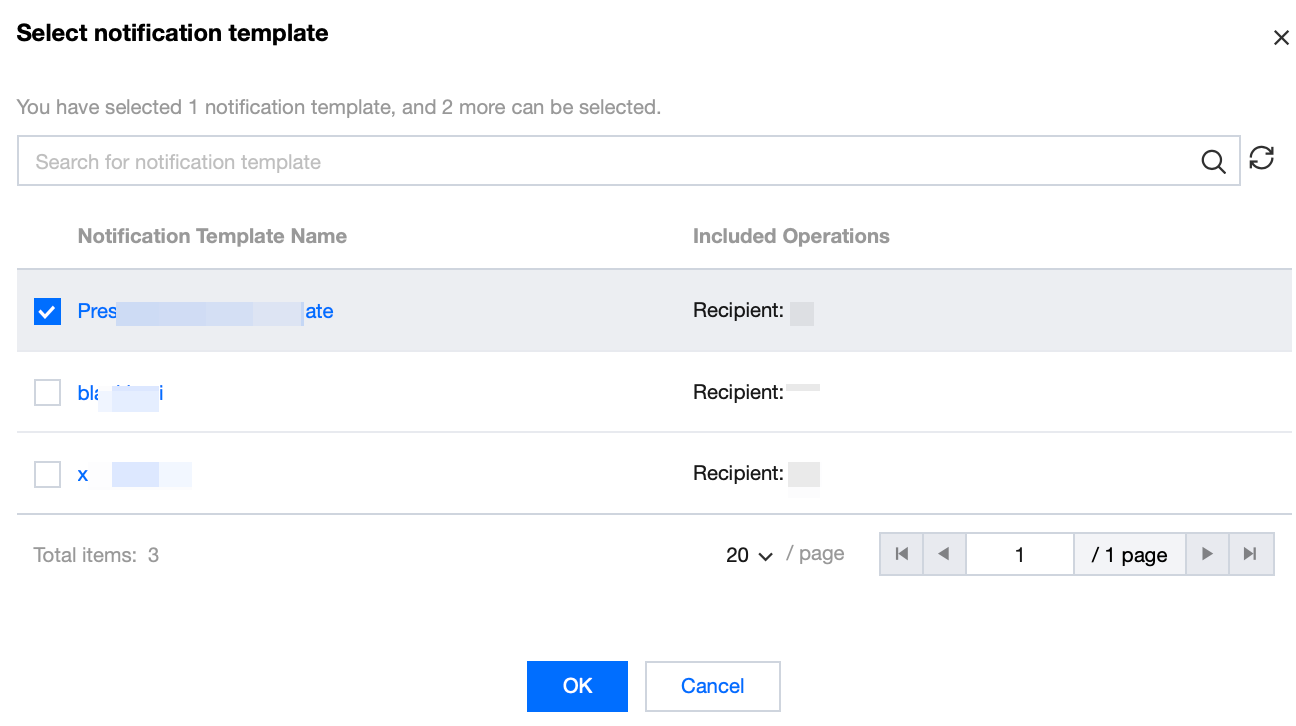
テンプレートを新規作成する

4. 問題がないことを確認した後、完了をクリックします。
アラームオブジェクトの関連付け
アラームポリシーの作成後、同じポリシーが適用される他のアラームオブジェクト(インスタンス)に関連付けることも可能です。オブジェクトがアラームのトリガー条件に達した場合、アラームが送信されます。
1. アラームポリシーリストページで、アラームポリシー名をクリックすると、アラームポリシー管理ページに移動します。
2. アラームポリシー管理ページのアラームオブジェクト欄で、オブジェクト追加をクリックします。
3. ポップアップダイアログで関連付けが必要なアラームオブジェクトを選択し、確定をクリックすると、アラームオブジェクトの関連付けが完了します。
フィードバック