Completing Data Migration Recovery From Self-Built ES to Tencent Cloud ES Via COS+snapshot
Download
Mode fokus
Ukuran font
Terakhir diperbarui: 2025-04-17 18:26:55
Overview
Tencent Cloud Elasticsearch Service (ES) is a highly available, scalable, cloud-managed Elasticsearch service built on the open-source search engine Elasticsearch, including Kibana and common plugins, and integrating advanced features such as security, SQL, machine learning, alerts, and monitoring (X-Pack). With Tencent Cloud ES, you can quickly deploy, easily manage, and scale your cluster on demand, simplify complex operations and maintenance, and quickly create various services such as log analytics, anomaly monitoring, website search, enterprise search, and BI analysis.
Tencent Cloud ES integrates the leading technological advantages of Tencent Cloud computing in areas such as computing, storage, and security. It also maintains the compatibility and openness of Elasticsearch itself. It has rich cluster management features as well as security, elasticity, and high availability features. At the same time, it also integrates official advanced commercial features (X-Pack). On the basis of being open-source, it adds features such as permission management, SQL, machine learning, and alarm. This helps you simplify basic Ops tasks such as cluster deployment and operational management, and focus more on the business itself.
Through Tencent Cloud ES, you can quickly build applications for massive data storage search and real-time log analysis, such as website search navigation, enterprise-level search, service log anomaly monitoring, clickstream analysis, etc.
The usage scenarios between ES and COS are mainly reflected in data migration and data backup recovery. The principle is actually a process where COS is used for intermediate storage of source ES data, and then the stored data is asynchronously restored to the target ES cluster.
Preparations
Create a public-read/private-write bucket. For details on how to create it, see Creating a Bucket document.
Notes:
The region of the COS bucket must be the same as that of ES.
Installing the COS Plug-In
Tencent Cloud ES has these plug-ins internally integrated by default. If it is a user-built ES cluster and COS is required, then the COS plug-in corresponding to the user's ES version needs to be installed.
Features of COS Plug-In
You can directly back up snapshot files from a user-built cluster to a COS bucket, and then perform recovery on the peer end.
Download Plug-in
Go to Github to download the COS plug-in launched by Tencent Cloud ES. This practice takes the 7.2.0 version of the plug-in as an example. For other version differences, please see releases.
Plug-In Installation Workflow
1. Retrieve the plug-in corresponding to the ES version. For example, version 7.2.0.
2. Grant all privileges of the plugin file to the ES startup account elastic.
3. Switch to a regular user account, install the plugin, and restart the ES service. Note: Perform the operation on each node of the cluster. Execute the command as follows.
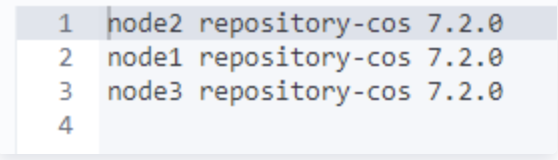
4. After execution, you can use get _cat/plugins on kibana to confirm whether the installation is completed. If you get the following results, it indicates successful installation.
Use COS to Achieve Data Migration From Self-Built ES to Tencent Cloud ES
1. Register a COS Repository on a local cluster.
PUT _snapshot/my_cos_backup
{
"type":"cos",
"settings":{
"access_key_id":"xxxxxx",
"access_key_secret":"xxxxxxx",
"bucket":"A bucket name without the appId suffix",
"region":"ap-guangzhou",
"compress": true,
"chunk_size":"500mb",
"base_path":"/yourbasepath",
"app_id":"xxxxxxx"
}
}
Execute this command will create a warehouse named my_cos_backup in the base_path directory of the corresponding bucket in COS.
The parameters are described as follows:
Parameter Name
Parameter Description
access_key_id,access_key_secret
Access key information can be created and obtained in Cloud API Key.
bucket
Bucket name. Note that do not include the appid.
app_id
APPID is one of the account identifiers assigned by the system after successfully applying for a Tencent Cloud account. It can be viewed in Tencent Cloud Console [Account Info].
region
The region where the bucket is located. For the abbreviation of COS region, please refer to regions and access endpoints.
base_path
Backup directory, such as /dir1/dir2/dir3. The initial / needs to be written. No / is needed at the end of the directory.
Notes:
If you use version 8.15.1 of the plug-in, note that the parameter name has added the prefix cos.client. For example, cos.client.access_key_id.
2. Create a snapshot file in the local repository. The snapshot file will be automatically uploaded to the specified repository in COS. You can execute the snapshot by using put _snapshot/repository name/snapshot name.
3. Similarly, register a repository on Tencent Cloud ES. The repository name may not be the same as that above.
PUT _snapshot/my_cos_backup
{
"type":"cos",
"settings":{
"access_key_id":"xxxxxx",
"access_key_secret":"xxxxxxx",
"bucket":"A bucket name without the appId suffix",
"region":"ap-guangzhou",
"compress": true,
"chunk_size":"500mb",
"base_path":"/yourbasepath",
"app_id":"xxxxxxx"
}
}
4. Perform recovery on Tencent Cloud ES. Run the following command to perform snapshot recovery.
POST _snapshot/repository name/snapshot name/_restore
Notes:
The name of the snapshot restored here is the name of the snapshot you created in the source cluster earlier.