Renewal
Download
フォーカスモード
フォントサイズ
If you do not renew a yearly/monthly subscription cluster in advance or have insufficient account balance to complete auto-renewal before the expiration date, the cluster will enter the isolated status. You need to complete renewal promptly to recover the cluster to normal status. If renewal is not completed during the isolation period, the system will automatically release all cluster resources after the isolation period ends. All data will be cleared and cannot be recovered.
Note:
Renewal is not required for pay-as-you-go clusters. You only need to ensure a sufficient available account balance. For specific steps to top up your account, see Online Top-up.
Renewal
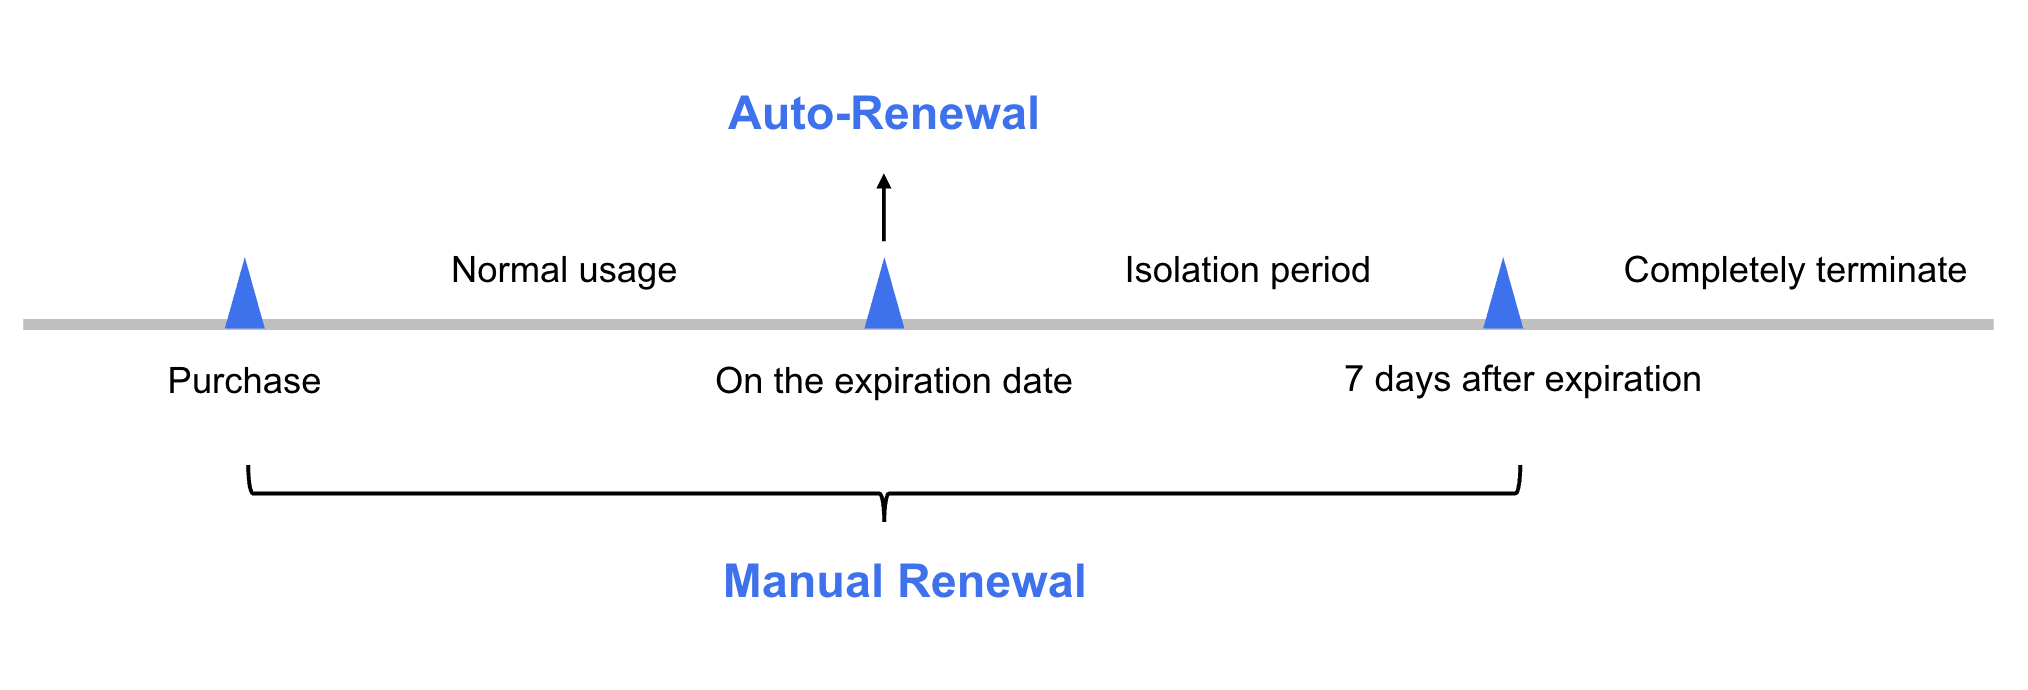
Two renewal methods are supported: manual renewal and auto-renewal. The details are as follows:
Manual renewal: For a yearly/monthly subscription cluster, you can manually renew it at any time from the time of purchase until it is completely deleted to extend its service period.
Auto-renewal: After you enable auto-renewal for a yearly/monthly subscription cluster, if your account balance is sufficient, the cluster will be automatically renewed on the expiration date.
Note:
Manual Renewal
Manual Renewal in the TDMQ for RocketMQ Console
1. Log in to the TDMQ for RocketMQ console.
2. In the left sidebar, select Cluster, select the target region, and then choose More > Renew in the operation column of the target cluster.
3. In the pop-up window, select the renewal duration. You can also enable Auto-renewal for the cluster.
4. Click OK. After you complete the payment on the Order Payment page, the renewal will be completed.
Manual Renewal in Billing Center
1. Log in to the TDMQ for RocketMQ console.
2. In the upper-right corner of the page, move the pointer over Billing Center and click Bills in the drop-down list to go to Billing Center.
3. On the Renewal Management page, select the expiration time range, search for and select Tencent Distributed Message Queue(TDMQ). On the Manual Renewal tab, select TDMQ for RocketMQ for the sub-product. You can manually renew your clusters.
Renew a single cluster: Click Renew in the operation column of the target cluster.
Renew multiple clusters in batches: Select the clusters that you want to renew and click Batch Renewal in the upper-left corner.
4. In the pop-up window, select the renewal duration and click Batch Renewal. After you complete the payment on the Order Payment page, the renewal will be completed.
Auto-Renewal
Auto-renewal reduces the management costs of manual renewal and prevents clusters from being automatically deleted due to missed manual renewals.
Enabling Auto-Renewal When Purchasing a Cluster
You can choose to enable auto-renewal on the page for purchasing TDMQ for RocketMQ clusters. For specific steps to purchase a cluster, see Creating a Cluster.
When you switch the billing mode of a cluster from pay-as-you-go to yearly/monthly subscription, you can also choose to enable auto-renewal. For specific steps to switch the billing mode, see Switching the Cluster Billing Modes (5.x).
Enabling Auto-Renewal in Billing Center
If you did not enable auto-renewal when purchasing the cluster, you can choose to enable auto-renewal for the cluster when it has not expired and is in the Running status. The operation steps are as follows:
1. Log in to the TDMQ for RocketMQ console.
2. In the upper-right corner of the page, move the pointer over Billing Center and click Renewal Management in the drop-down list to go to Billing Center.
3. On the Renewal Management page, select the expiration time range, search for and select Tencent Distributed Message Queue(TDMQ). On the Manual Renewal tab, select TDMQ for RocketMQ for the sub-product. You can enable auto-renewal for your clusters.
Enable auto-renewal for a single cluster: Click Set as Auto-renewal in the operation column of the target cluster.
Enable auto-renewal for multiple clusters in batches: Select the clusters for which you want to enable auto-renewal and click Set as Auto-renewal in the upper-left corner.
4. In the pop-up window, select I have read and agree to the Auto-renewal Rules and click OK to complete the process of enabling auto-renewal.
フィードバック